
Grow Chives Indoors? Absolutely! Imagine snipping fresh, flavorful chives right from your kitchen windowsill, adding a burst of oniony goodness to your meals year-round. Forget those sad, wilted bunches from the grocery store 鈥?with a few simple tricks, you can have a thriving chive garden right inside your home.
For centuries, chives have been a culinary staple, adding a delicate zest to dishes across various cultures. From ancient Roman gardens to modern-day kitchens, these versatile herbs have proven their worth. But let’s face it, not everyone has the space or the climate for an outdoor herb garden. That’s where the magic of indoor gardening comes in!
I’m going to show you how easy it is to grow chives indoors, even if you don’t have a green thumb. This DIY guide will walk you through everything you need to know, from choosing the right container and soil to providing the perfect amount of light and water. Say goodbye to bland meals and hello to fresh, flavorful chives at your fingertips! Plus, it’s a fantastic way to add a touch of green to your home and enjoy the therapeutic benefits of gardening, no matter the weather outside. So, let’s get started and unlock the secrets to a thriving indoor chive garden!
Growing Chives Indoors: A Beginner’s Guide
Hey there, fellow plant enthusiasts! Ever dreamt of snipping fresh chives right from your kitchen windowsill? Well, dream no more! Growing chives indoors is surprisingly easy, even if you don’t have a green thumb. I’m going to walk you through everything you need to know, from choosing the right pot to harvesting your flavorful bounty. Let’s get started!
What You’ll Need
Before we dive in, let’s gather our supplies. Here’s a checklist of everything you’ll need to successfully grow chives indoors:
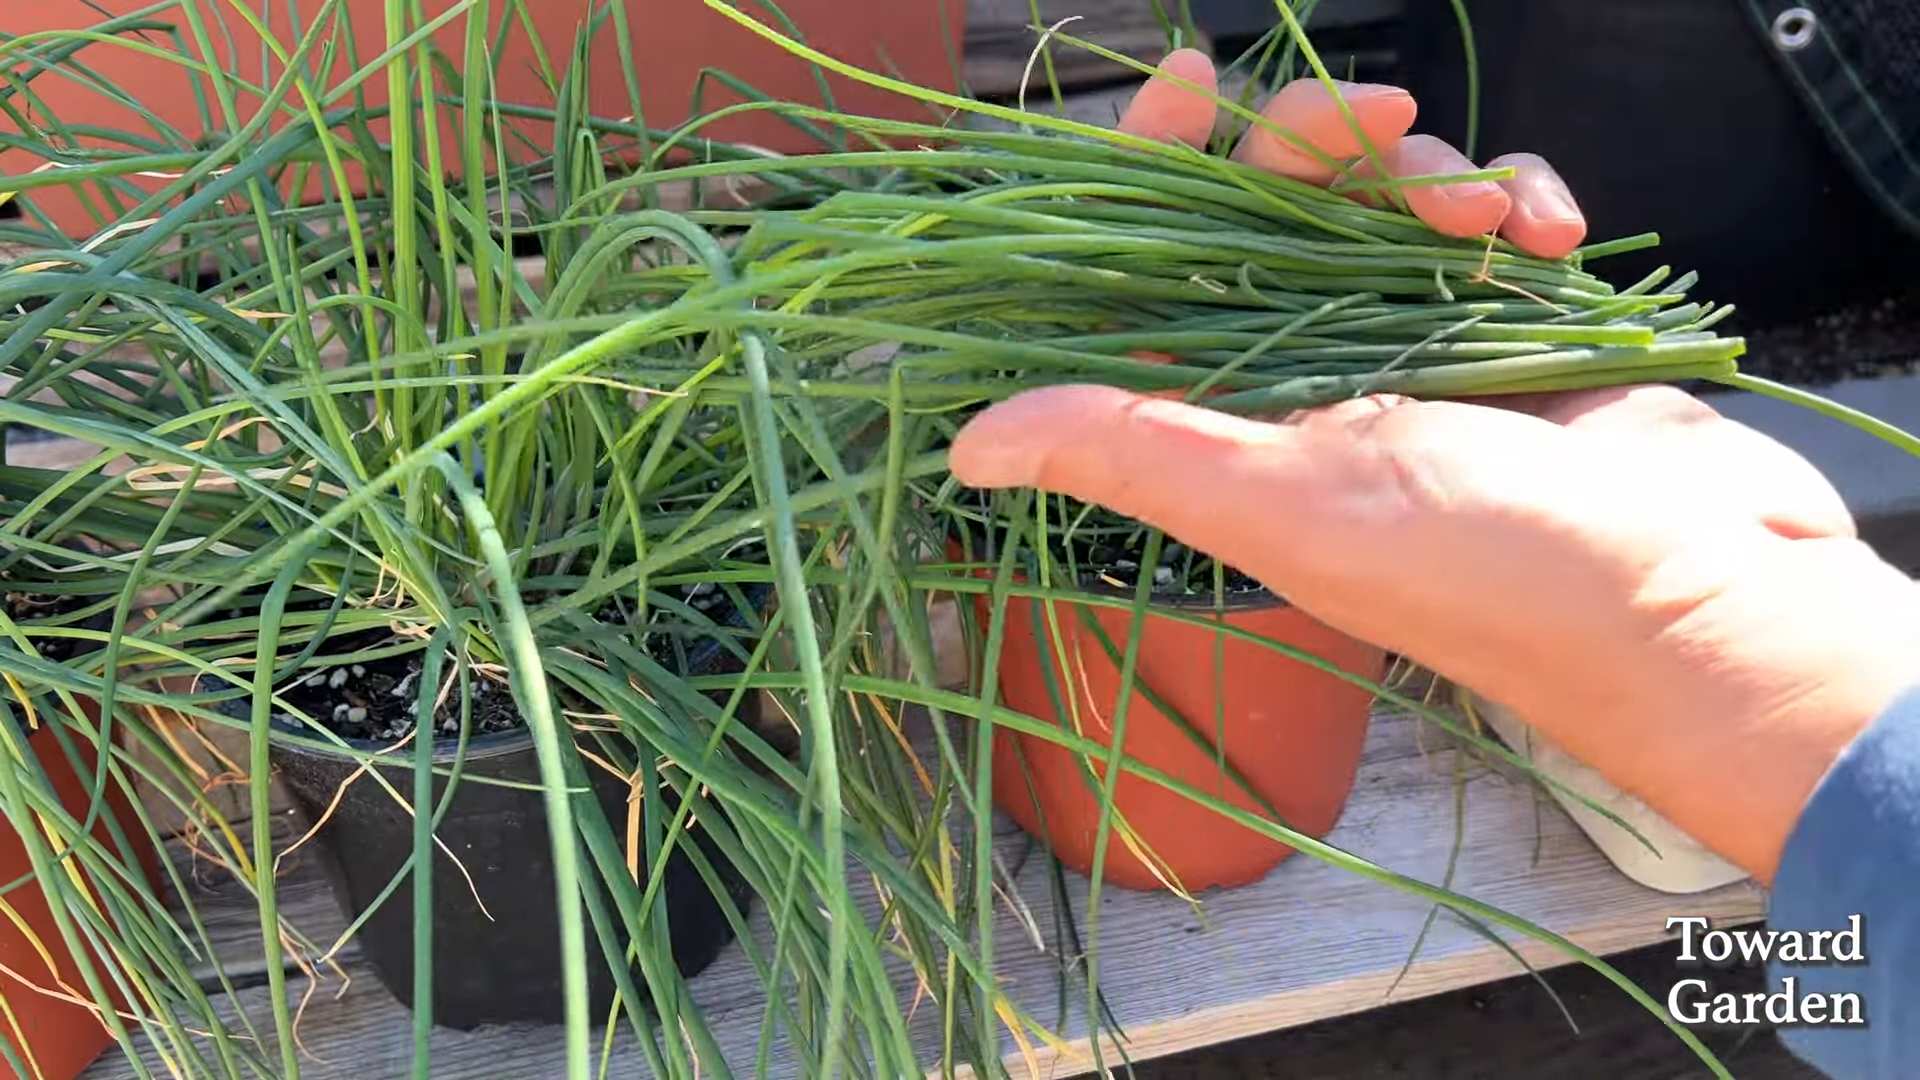
* Chive Seeds or a Chive Plant: You can start from seeds, which is more budget-friendly, or purchase a small chive plant from a nursery for quicker results. I personally prefer starting from seeds, it’s so rewarding to watch them sprout!
* Pot with Drainage Holes: A pot that’s at least 6 inches in diameter and 6 inches deep is ideal. Drainage is crucial to prevent root rot.
* Well-Draining Potting Mix: Avoid using garden soil, as it can compact and hinder drainage. A good quality potting mix specifically formulated for containers is best.
* Watering Can or Spray Bottle: For gentle watering.
* Sunny Location: Chives need at least 6 hours of sunlight per day. A south-facing windowsill is usually perfect. If you don’t have enough natural light, consider using a grow light.
* Optional: Seed starting tray, humidity dome (if starting from seeds), fertilizer (organic liquid fertilizer is a good choice).
Starting from Seeds: A Step-by-Step Guide
If you’re opting to start from seeds, here’s how to do it:
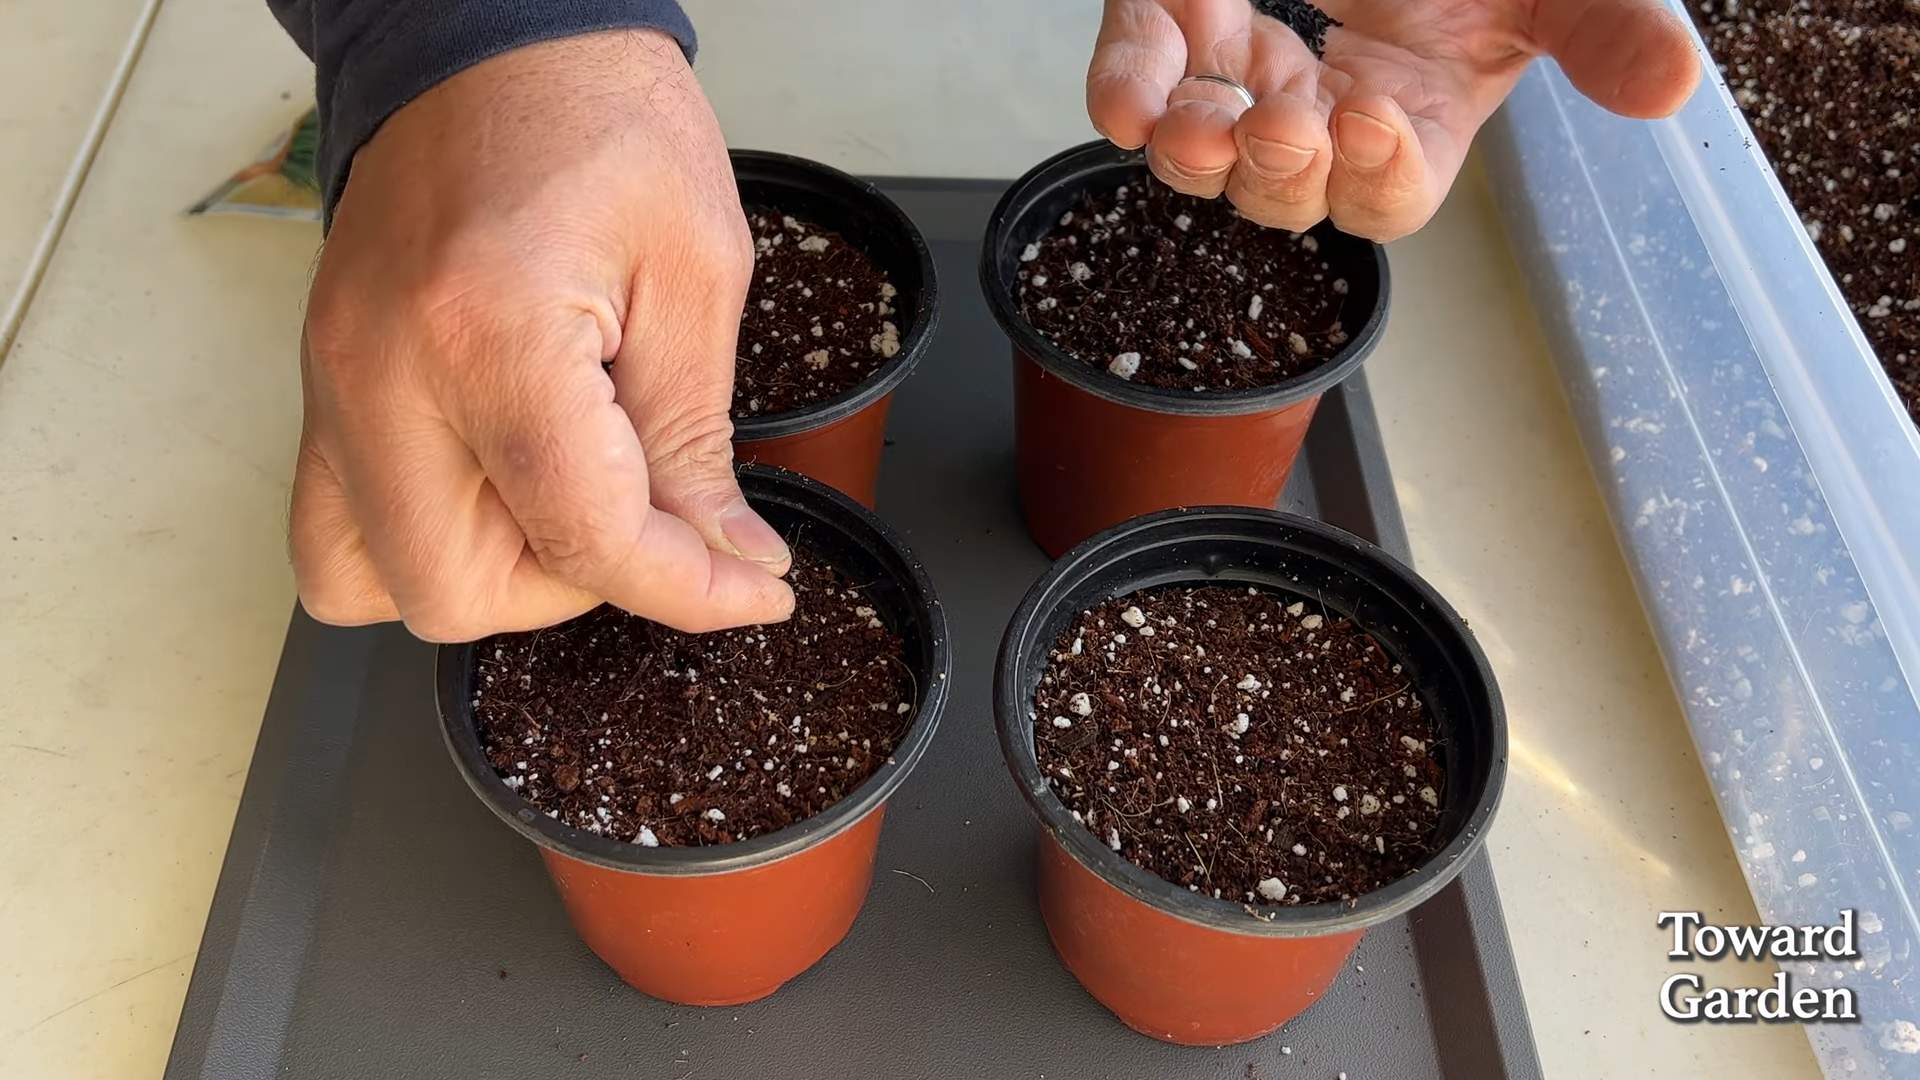
1. Prepare Your Seed Starting Tray (Optional): If you’re using a seed starting tray, fill each cell with moistened potting mix. If you’re planting directly into your pot, skip to step 3.
2. Sow the Seeds: Sprinkle a few chive seeds (about 3-5) on top of the soil in each cell of the seed starting tray or directly into your pot. Gently press them into the soil. Chive seeds are tiny, so don’t bury them too deep 鈥?about 录 inch is perfect.
3. Cover with Soil: Lightly cover the seeds with a thin layer of potting mix.
4. Water Gently: Use a spray bottle to mist the soil gently. You want to moisten the soil without disturbing the seeds.
5. Create a Humid Environment (Optional): If you’re using a humidity dome, place it over the seed starting tray or pot. This will help retain moisture and promote germination. If you don’t have a humidity dome, you can cover the pot with plastic wrap, making sure to poke a few holes for ventilation.
6. Place in a Warm Location: Chive seeds germinate best in warm temperatures (around 70-75掳F or 21-24掳C). Place the seed starting tray or pot in a warm spot, like on top of your refrigerator or near a radiator.
7. Keep the Soil Moist: Check the soil daily and mist it with water whenever it feels dry to the touch. Don’t let the soil dry out completely, but avoid overwatering.
8. Wait for Germination: Chive seeds typically germinate in 7-14 days. Be patient!
9. Remove the Humidity Dome or Plastic Wrap: Once the seedlings emerge, remove the humidity dome or plastic wrap to allow for better air circulation.
10. Thin the Seedlings (If Necessary): If you have multiple seedlings growing in the same cell or pot, thin them out by snipping off the weaker ones at the soil level. This will give the remaining seedlings more room to grow. Aim for about 2-3 seedlings per cell or pot.
11. Transplant (If Necessary): If you started your seeds in a seed starting tray, transplant the seedlings into individual pots once they have developed a few sets of true leaves (the leaves that look like miniature chives). Gently remove the seedlings from the tray, being careful not to damage the roots, and plant them in pots filled with well-draining potting mix.
Planting a Chive Plant: A Quick Start
If you’ve opted to purchase a chive plant from a nursery, the process is even simpler:
1. Choose Your Pot: Select a pot that’s at least 6 inches in diameter and 6 inches deep with drainage holes.
2. Prepare the Potting Mix: Fill the pot with well-draining potting mix, leaving about an inch of space at the top.
3. Remove the Plant from its Container: Gently remove the chive plant from its nursery container. If the roots are tightly packed, gently loosen them with your fingers.
4. Plant the Chives: Place the chive plant in the center of the pot and fill in around it with potting mix. Make sure the top of the root ball is level with the soil surface.
5. Water Thoroughly: Water the plant thoroughly until water drains out of the drainage holes.
Caring for Your Indoor Chives
Now that your chives are planted, it’s time to provide them with the care they need to thrive.
1. Sunlight: Chives need at least 6 hours of sunlight per day. Place your pot on a south-facing windowsill or under a grow light. If you notice the leaves are pale or leggy, it means they’re not getting enough light.
2. Watering: Water your chives when the top inch of soil feels dry to the touch. Avoid overwatering, as this can lead to root rot. Water thoroughly until water drains out of the drainage holes.
3. Fertilizing: Feed your chives every 2-4 weeks with a diluted organic liquid fertilizer. Follow the instructions on the fertilizer label. This will help them grow strong and healthy.
4. Temperature: Chives prefer temperatures between 60-70掳F (15-21掳C). Avoid placing them near drafts or extreme temperatures.
5. Humidity: Chives prefer moderate humidity. If your home is very dry, you can increase the humidity around your plants by placing a tray of water near them or using a humidifier.
6. Pruning: Regular pruning is essential for keeping your chives healthy and productive. Snip off the tips of the leaves regularly to encourage new growth. You can also remove any yellow or brown leaves.
7. Repotting: As your chives grow, they may outgrow their pot. If you notice the roots are circling the bottom of the pot, it’s time to repot them into a larger container. Choose a pot that’s 1-2 inches larger in diameter than the current pot.
Harvesting Your Chives
The best part of growing chives indoors is harvesting them! You can start harvesting your chives when they are about 6 inches tall.
1. Use Scissors: Use sharp scissors to snip off the leaves at the base of the plant, about 1-2 inches above the soil.
2. Harvest Regularly: Harvest your chives regularly to encourage new growth. The more you harvest, the more they will produce!
3. Don’t Over-Harvest: Avoid harvesting more than one-third of the plant at a time, as this can weaken it.
4. Use Fresh or Freeze: Use your freshly harvested chives in your favorite recipes. They’re delicious in salads, soups, omelets, and dips. You can also freeze chives for later use. To freeze them, chop them up and place them in a freezer bag or container.
Troubleshooting
Even with the best care, you may encounter some problems while growing chives indoors. Here are some common issues and how to fix them:
* Yellowing Leaves: Yellowing leaves can be caused by overwatering, underwatering, or lack of nutrients. Check the soil moisture and adjust your watering accordingly. If the soil is dry, water thoroughly. If the soil is soggy, allow it to dry out before watering again. You may also need to fertilize your chives.
* Leggy Growth: Leggy growth (long, thin stems) is usually caused by insufficient light. Move your chives to a sunnier location or use a grow light.
* Pests: Chives are generally pest-resistant, but they can occasionally be infested with aphids or spider mites. If you notice pests on your plants, spray them with insecticidal soap or neem oil.
* Root Rot: Root rot is caused by overwatering and poor drainage. Make sure your pot has drainage holes and avoid overwatering. If you suspect root rot, repot your chives in fresh potting mix.
Enjoy Your Homegrown Chives!
And there you have it! Growing chives indoors is a simple and rewarding way to add fresh flavor
Conclusion
So, there you have it! Growing chives indoors is not only achievable but also incredibly rewarding. Imagine having fresh, flavorful chives at your fingertips, ready to elevate your culinary creations any time of year. No more last-minute trips to the grocery store or settling for dried herbs that lack that vibrant, fresh taste. This simple DIY project brings the garden to your kitchen, offering a sustainable and cost-effective way to enjoy this versatile herb.
But why is this DIY trick a must-try? Beyond the convenience and freshness, growing your own chives connects you to the food you eat. It’s a small act of self-sufficiency that can bring a surprising amount of joy. Plus, it’s a fantastic way to add a touch of green to your indoor space, especially during those long winter months.
The possibilities are endless! Once you’ve mastered the basics, you can experiment with different varieties of chives, such as garlic chives for a bolder flavor. You can also try companion planting in your indoor herb garden, pairing your chives with other herbs like parsley, oregano, or thyme. Consider using decorative pots to add a touch of style to your kitchen windowsill. You can even propagate your chives to create more plants and share them with friends and family.
Don’t be intimidated if you’ve never grown herbs indoors before. Chives are incredibly forgiving and easy to care for, making them the perfect starting point for your indoor gardening journey. With just a little bit of attention and the right conditions, you’ll be harvesting fresh chives in no time.
We wholeheartedly encourage you to give this DIY trick a try. It’s a simple, satisfying, and delicious way to enhance your cooking and bring a little bit of nature into your home. And most importantly, we want to hear about your experience! Share your tips, tricks, and photos in the comments below. Let’s build a community of indoor chive growers and inspire others to discover the joys of fresh, homegrown herbs. So, grab your pots, soil, and chive seeds, and get ready to grow chives indoors like a pro! We are confident that you will find this a rewarding and delicious experience.
Frequently Asked Questions (FAQ)
What kind of soil is best for growing chives indoors?
The best soil for growing chives indoors is a well-draining potting mix. Avoid using garden soil, as it can be too heavy and may contain pests or diseases. Look for a potting mix that is specifically formulated for herbs or vegetables. A mix containing peat moss, perlite, and vermiculite will provide good drainage and aeration, which are essential for healthy chive growth. You can also amend your potting mix with compost to add nutrients and improve its water-holding capacity.
How much sunlight do chives need when grown indoors?
Chives need at least 6-8 hours of sunlight per day to thrive indoors. A south-facing window is ideal, but an east- or west-facing window can also work. If you don’t have enough natural light, you can supplement with a grow light. Place the grow light a few inches above the chives and keep it on for 12-14 hours per day. Insufficient light can lead to leggy growth and reduced flavor.
How often should I water my indoor chives?
Water your indoor chives when the top inch of soil feels dry to the touch. Avoid overwatering, as this can lead to root rot. Water thoroughly until the water drains out of the bottom of the pot. Allow the soil to dry out slightly between waterings. The frequency of watering will depend on the size of the pot, the type of soil, and the humidity levels in your home. Check the soil moisture regularly and adjust your watering schedule accordingly.
How do I harvest chives from my indoor plant?
Harvest chives by snipping them off at the base of the plant with scissors or kitchen shears. Avoid cutting off more than one-third of the plant at a time, as this can stunt its growth. Regular harvesting will encourage the plant to produce more leaves. You can harvest chives as needed, whenever you want to add them to your dishes.
Can I grow chives from seed indoors?
Yes, you can grow chives from seed indoors. Start by sowing the seeds in a seed-starting tray or small pots filled with seed-starting mix. Keep the soil moist and warm (around 70-75掳F). The seeds should germinate in about 7-14 days. Once the seedlings have developed a few sets of true leaves, you can transplant them into larger pots.
Do I need to fertilize my indoor chives?
Yes, you should fertilize your indoor chives regularly to provide them with the nutrients they need to grow. Use a balanced liquid fertilizer diluted to half strength. Fertilize every 2-4 weeks during the growing season (spring and summer). Avoid fertilizing during the dormant season (fall and winter).
How do I prevent pests and diseases from affecting my indoor chives?
To prevent pests and diseases from affecting your indoor chives, start with healthy plants and use a clean potting mix. Inspect your plants regularly for signs of pests or diseases. If you notice any problems, address them promptly. You can use insecticidal soap or neem oil to control pests. Avoid overwatering, as this can create conditions that are favorable for fungal diseases. Ensure good air circulation around your plants to prevent moisture buildup.
Can I move my indoor chives outdoors during the summer?
Yes, you can move your indoor chives outdoors during the summer, but you need to acclimate them gradually to the outdoor conditions. Start by placing them in a shady spot for a few hours each day, gradually increasing the amount of sunlight they receive. Bring them back indoors before the first frost.
How long will my indoor chive plant last?
With proper care, your indoor chive plant can last for several years. Chives are perennials, which means they can live for more than two years. To prolong the life of your plant, repot it every year or two into a larger pot with fresh potting mix. Divide the plant if it becomes overcrowded.
What are some creative ways to use my homegrown chives?
Freshly grown chives can be used in a multitude of ways! Sprinkle them on baked potatoes, scrambled eggs, or salads. Add them to soups, sauces, and dips. Use them to flavor cream cheese or butter. Garnish your favorite dishes with a sprinkle of chopped chives. The possibilities are endless! You can even freeze or dry your chives to preserve them for later use.

Leave a Comment