
Grow Cherry Tomatoes like a pro, even if you think you have a black thumb! Have you ever dreamed of popping sweet, juicy cherry tomatoes straight from your own backyard? I know I have! There’s something incredibly satisfying about nurturing a plant from a tiny seed to a bountiful harvest. For centuries, home gardening has been a source of sustenance and joy, connecting us to the earth and providing fresh, healthy food. From ancient Roman kitchen gardens to the victory gardens of World War II, growing your own food has always been a way to empower ourselves and connect with nature.
But let’s be honest, sometimes gardening can feel a little intimidating, right? That’s where these DIY tricks and hacks come in! I’m going to share some simple, effective methods to help you grow cherry tomatoes successfully, regardless of your experience level or garden size. Whether you’re dealing with limited space, pesky pests, or just want to maximize your yield, these tips will give you the confidence to cultivate a thriving cherry tomato patch. Get ready to enjoy the delicious rewards of your labor – fresh, flavorful cherry tomatoes perfect for salads, snacks, and sharing with friends and family!
Growing Cherry Tomatoes: A Beginner’s Guide to a Bountiful Harvest
Okay, so you want to grow cherry tomatoes? Awesome! They’re super rewarding, delicious, and relatively easy to grow, even if you don’t have a huge garden. I’ve grown them in everything from tiny balcony containers to raised beds, and I’m going to share everything I’ve learned with you. Let’s get started!
Choosing the Right Cherry Tomato Variety
First things first, let’s talk about varieties. There are tons of different cherry tomato types, each with its own unique flavor, size, and growth habit. Here are a few of my favorites:
* Sungold: These are incredibly sweet and have a beautiful golden-orange color. They’re a bit more prone to cracking, but the flavor is worth it!
* Sweet Million: As the name suggests, these produce a massive amount of small, sweet red tomatoes. They’re very prolific and disease-resistant.
* Black Cherry: These have a rich, complex flavor with a slightly smoky undertone. They’re a bit more unusual and add a nice variety to your harvest.
* Super Sweet 100: Another super producer, these are known for their exceptional sweetness and resistance to cracking.
* Grape Tomatoes: While technically not cherry tomatoes, they are very similar and easy to grow. They are oblong and have a slightly firmer texture.
Consider your space and taste preferences when choosing your variety. Some are bush types (determinate), meaning they grow to a certain size and then stop, while others are vining types (indeterminate), which will keep growing and producing all season long. Indeterminate varieties will need staking or caging.
Getting Started: Seeds vs. Seedlings
You have two main options for starting your cherry tomato plants: from seed or from seedlings (also called transplants).
* Starting from Seed: This gives you more control over the variety and can be more cost-effective. However, it requires more time and effort. You’ll need to start your seeds indoors about 6-8 weeks before the last expected frost in your area.
* Buying Seedlings: This is the easier option, especially for beginners. You can find healthy seedlings at your local garden center or nursery. Just make sure to choose plants that are sturdy, green, and free from any signs of disease or pests.
I personally prefer starting from seed because I love the whole process, but buying seedlings is perfectly fine, especially if you’re short on time or space.
Starting Cherry Tomatoes from Seed (Optional)
If you’re going the seed route, here’s what you’ll need:
* Seeds: Choose your desired variety.
* Seed Starting Mix: This is a sterile, lightweight mix that’s specifically designed for starting seeds. Don’t use regular potting soil.
* Seed Starting Trays or Pots: You can use plastic trays with individual cells or small peat pots.
* Humidity Dome (Optional): This helps to keep the soil moist and promote germination.
* Grow Lights (Recommended): These provide the seedlings with the light they need to grow strong and healthy. A sunny windowsill might work, but grow lights are much more reliable.
* Heat Mat (Optional): This helps to warm the soil and speed up germination.
Here’s the step-by-step process:
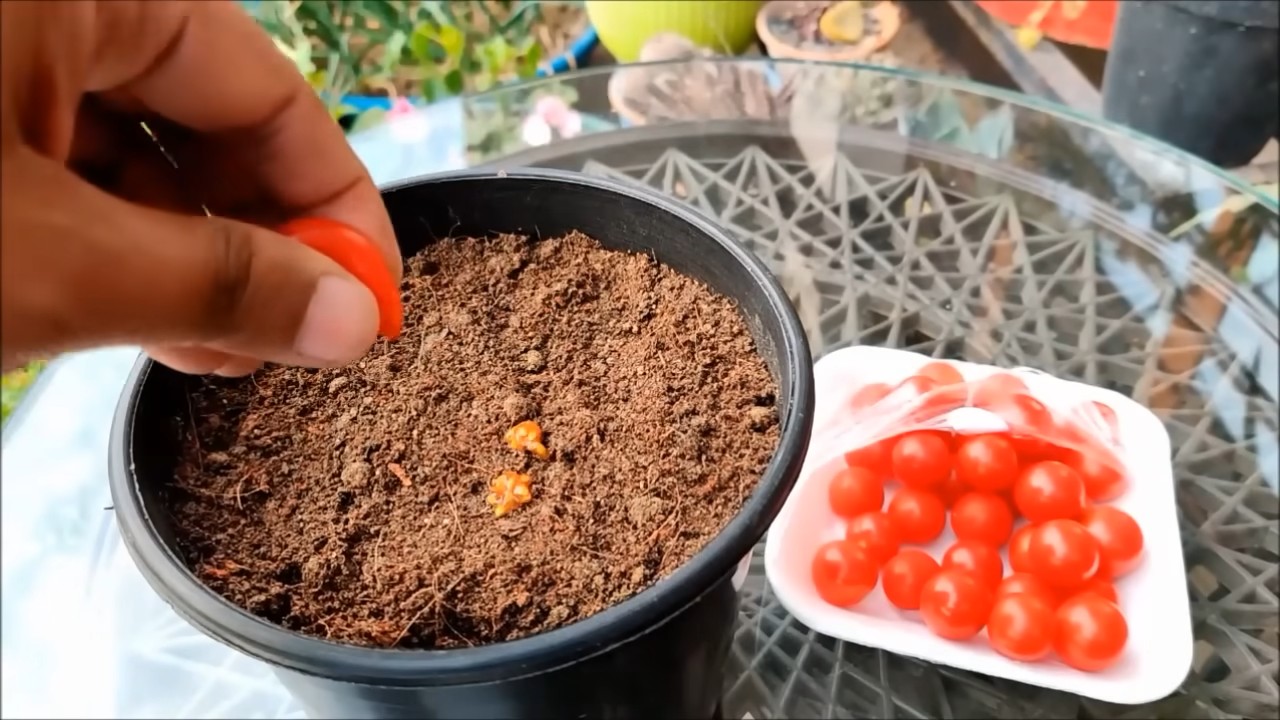
1. Sow the Seeds: Moisten the seed starting mix and fill your trays or pots. Sow 2-3 seeds per cell or pot, about 1/4 inch deep.
2. Water Gently: Water the soil gently using a spray bottle or watering can with a fine rose. You don’t want to dislodge the seeds.
3. Cover and Warm: Cover the trays with a humidity dome or plastic wrap to retain moisture. Place them on a heat mat if you’re using one.
4. Provide Light: Place the trays under grow lights or in a sunny windowsill. If using grow lights, keep them a few inches above the soil surface.
5. Germination: The seeds should germinate in about 5-10 days. Once they germinate, remove the humidity dome and keep the soil consistently moist.
6. Thin the Seedlings: Once the seedlings have their first true leaves (the second set of leaves), thin them to one seedling per cell or pot. Choose the strongest seedling and snip off the others at the soil line.
7. Harden Off: Before transplanting the seedlings outdoors, you need to “harden them off.” This means gradually exposing them to outdoor conditions over a period of 7-10 days. Start by placing them in a sheltered spot outdoors for an hour or two each day, gradually increasing the amount of time they spend outside.
Transplanting Cherry Tomatoes
Whether you started from seed or bought seedlings, the transplanting process is the same.
What you’ll need:
* Healthy Seedlings or Transplants: Choose plants that are sturdy, green, and free from any signs of disease or pests.
* Potting Soil or Garden Soil: Use a high-quality potting soil for containers or amend your garden soil with compost and other organic matter.
* Gardening Gloves: To protect your hands.
* Trowel or Shovel: For digging holes.
* Stakes or Cages: For supporting indeterminate varieties.
* Watering Can or Hose: For watering the plants.
* Fertilizer (Optional): A balanced fertilizer can help to promote healthy growth.
Here’s the step-by-step process:
1. Choose a Sunny Location: Cherry tomatoes need at least 6-8 hours of sunlight per day.
2. Prepare the Soil: If you’re planting in containers, fill them with potting soil. If you’re planting in the garden, amend the soil with compost and other organic matter.
3. Dig the Holes: Dig holes that are slightly larger than the root balls of the seedlings or transplants. Space the plants about 18-24 inches apart.
4. Plant the Seedlings: Gently remove the seedlings from their containers and loosen the root balls. Place the seedlings in the holes and backfill with soil. Bury the stem up to the first set of leaves. This encourages the plant to develop more roots, resulting in a stronger, healthier plant.
5. Water Thoroughly: Water the plants thoroughly after planting.
6. Add Support: Install stakes or cages to support the plants, especially if you’re growing indeterminate varieties.
7. Mulch (Optional): Add a layer of mulch around the plants to help retain moisture and suppress weeds.
Caring for Your Cherry Tomato Plants
Once your cherry tomato plants are in the ground, it’s important to provide them with proper care to ensure a bountiful harvest.
* Watering: Water your cherry tomato plants regularly, especially during hot, dry weather. Aim to water deeply and less frequently, rather than shallowly and often. Water at the base of the plant to avoid wetting the foliage, which can lead to disease.
* Fertilizing: Fertilize your cherry tomato plants every 2-3 weeks with a balanced fertilizer. You can also use a tomato-specific fertilizer, which is higher in phosphorus and potassium.
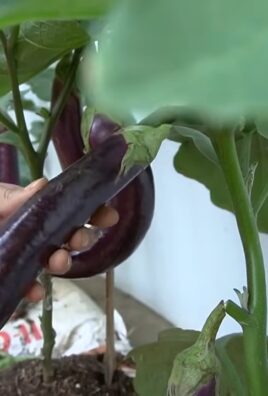
* Pruning: Pruning can help to improve air circulation and promote fruit production. Remove any suckers (the small shoots that grow between the main stem and the branches) to encourage the plant to focus its energy on producing fruit.
* Pest and Disease Control: Keep an eye out for pests and diseases, such as aphids, whiteflies, and tomato hornworms. Treat any infestations promptly with insecticidal soap or other appropriate treatments. Prevent diseases by providing good air circulation, avoiding overhead watering, and using disease-resistant varieties.
* Support: As your cherry tomato plants grow, they will need support to prevent them from falling over. Use stakes, cages, or trellises to support the plants.
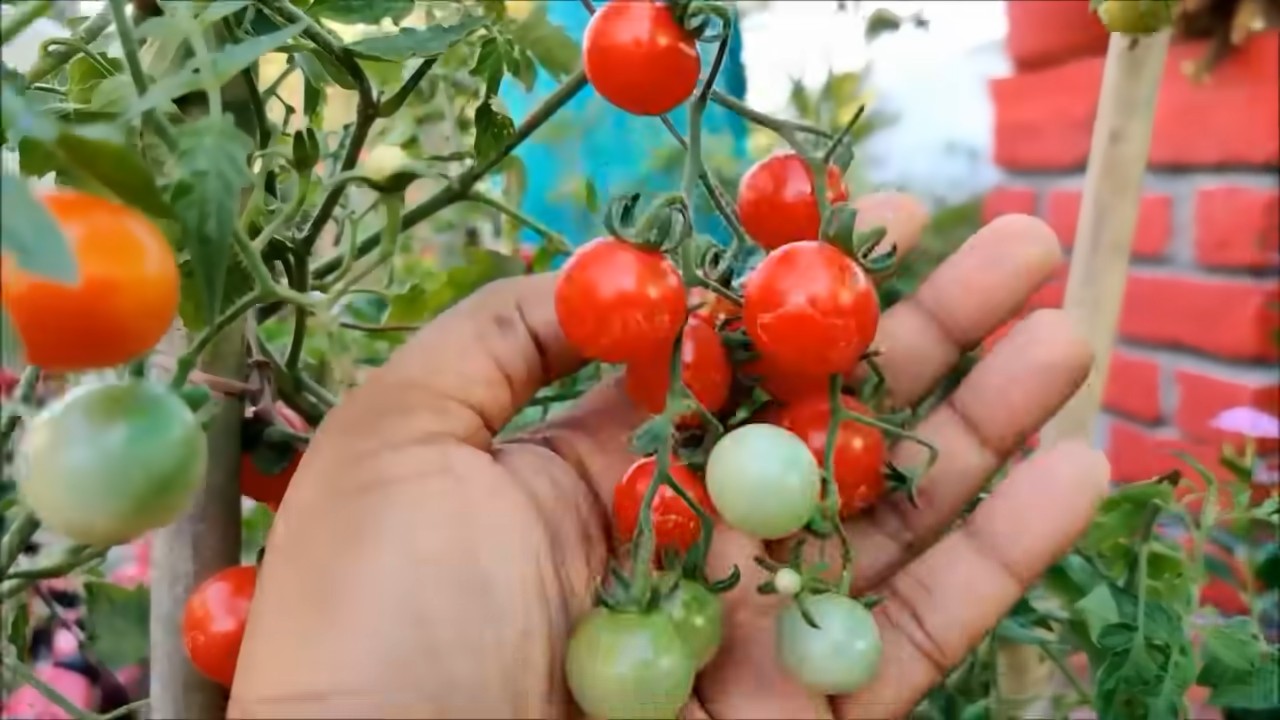
Harvesting Your Cherry Tomatoes
The best part! You’ll know your cherry tomatoes are ready to harvest when they are fully colored and slightly soft to the touch. Gently twist or snip the tomatoes from the vine. Harvest regularly to encourage the plant to produce more fruit.
Tips for a Bountiful Harvest:
* Pick Regularly: The more you pick, the more the plant will produce.
* Water Consistently: Consistent watering is key to preventing blossom end rot.
* Fertilize Regularly: Provide your plants with the nutrients they need to thrive.
* Protect from Pests and Diseases: Keep an eye out for problems and address them promptly.
Troubleshooting Common Problems
Even with the best care, you might encounter some problems along the way. Here are a few common issues and how to address them:
* Blossom End Rot: This is caused by a calcium deficiency and results in a dark, le
Conclusion
So, there you have it! Growing cherry tomatoes at home, especially using this simple DIY trick, is more than just a gardening project; it’s an investment in flavor, freshness, and a deeper connection to the food you eat. We’ve walked you through a method that’s not only cost-effective but also incredibly rewarding, allowing you to bypass the often bland and expensive store-bought varieties and cultivate your own burst of sunshine right in your backyard or even on your balcony.
Why is this DIY trick a must-try? Because it empowers you to control the entire process, from seed to table. You know exactly what goes into your tomatoes – no mystery chemicals or long-distance transportation. Plus, the taste difference is undeniable. Homegrown cherry tomatoes, bursting with sweetness and a vibrant tang, are a culinary revelation. They elevate salads, pasta dishes, snacks, and everything in between.
But the benefits extend beyond just taste. Gardening is therapeutic. It’s a chance to de-stress, connect with nature, and witness the miracle of growth firsthand. And when you involve children in the process, you’re teaching them valuable lessons about sustainability, healthy eating, and the origins of their food.
Don’t be afraid to experiment! This DIY method is a fantastic foundation, but feel free to adapt it to your specific needs and preferences. Consider these variations:
* **Container Gardening:** If you’re short on space, this trick works beautifully in containers. Choose pots that are at least 12 inches in diameter to give your cherry tomato plants ample room to grow.
* **Vertical Gardening:** Maximize your space by training your cherry tomato plants to grow vertically on trellises or stakes. This not only saves space but also improves air circulation, reducing the risk of disease.
* **Companion Planting:** Plant basil, marigolds, or other companion plants alongside your cherry tomatoes to deter pests and attract beneficial insects. Basil, in particular, is known to enhance the flavor of tomatoes.
* **Different Varieties:** While we’ve focused on cherry tomatoes, this DIY trick can also be adapted for other small tomato varieties, such as grape tomatoes or pear tomatoes. Explore different flavors and colors to create a vibrant and diverse harvest.
* Hydroponics Adaptation: With slight modifications, this method can even be adapted for hydroponic systems, allowing you to grow cherry tomatoes indoors year-round.
We are confident that you will find success in growing cherry tomatoes using this method. The key is to be patient, attentive, and willing to learn from your experiences. Observe your plants closely, adjust your watering and feeding schedules as needed, and don’t be afraid to ask for help if you encounter any challenges.
Now, it’s your turn! We wholeheartedly encourage you to try this DIY trick for growing cherry tomatoes. We are certain that you will be amazed by the results. Imagine the satisfaction of harvesting your own juicy, flavorful cherry tomatoes and sharing them with your family and friends.
But don’t just take our word for it. Give it a try and see for yourself! And most importantly, we want to hear about your experience. Share your photos, tips, and stories with us in the comments below. Let’s build a community of passionate gardeners who are dedicated to growing their own delicious and healthy food. Let us know what worked for you, what challenges you faced, and any creative adaptations you made along the way. Your feedback will help us refine this DIY trick and make it even more accessible to others. Happy gardening!
Frequently Asked Questions (FAQ)
What kind of soil is best for growing cherry tomatoes?
Cherry tomatoes thrive in well-draining, nutrient-rich soil with a slightly acidic pH (around 6.0 to 6.8). A good mix consists of equal parts garden soil, compost, and peat moss or coco coir. You can also purchase a pre-made potting mix specifically formulated for tomatoes. Avoid heavy clay soils, as they can retain too much water and lead to root rot. Amending your soil with organic matter like compost or aged manure will improve its drainage, fertility, and overall structure.
How often should I water my cherry tomato plants?
Watering frequency depends on several factors, including the weather, soil type, and size of your plants. Generally, you should water deeply whenever the top inch of soil feels dry to the touch. Avoid overwatering, as this can lead to root rot and other fungal diseases. During hot, dry weather, you may need to water daily. In cooler, wetter weather, you may only need to water every few days. The best time to water is early in the morning, which allows the foliage to dry before nightfall, reducing the risk of disease. Use a soaker hose or drip irrigation to deliver water directly to the roots, avoiding wetting the leaves.
How much sunlight do cherry tomato plants need?
Cherry tomato plants require at least 6-8 hours of direct sunlight per day to produce a bountiful harvest. Choose a location that receives full sun throughout the day. If you’re growing your plants indoors, supplement with grow lights to ensure they receive adequate light. Insufficient sunlight can result in leggy growth, poor fruit production, and increased susceptibility to pests and diseases.
When should I fertilize my cherry tomato plants?
Start fertilizing your cherry tomato plants about two weeks after transplanting them into the garden or containers. Use a balanced fertilizer (e.g., 10-10-10) diluted to half strength. As the plants begin to flower and set fruit, switch to a fertilizer that is higher in phosphorus and potassium (e.g., 5-10-10), which promotes fruit development. Avoid over-fertilizing, as this can lead to excessive foliage growth at the expense of fruit production. Organic fertilizers, such as compost tea or fish emulsion, are also excellent options.
How do I prevent pests and diseases from affecting my cherry tomato plants?
Prevention is key when it comes to pests and diseases. Start by choosing disease-resistant varieties of cherry tomatoes. Practice good sanitation by removing any fallen leaves or debris from around your plants. Water at the base of the plants to avoid wetting the foliage. Provide adequate air circulation by spacing your plants properly and pruning away any crowded or yellowing leaves. Regularly inspect your plants for signs of pests or diseases. If you spot any problems, address them promptly with appropriate treatments, such as insecticidal soap, neem oil, or copper fungicide. Companion planting with basil, marigolds, or other herbs can also help deter pests.
How do I prune my cherry tomato plants?
Pruning cherry tomato plants can improve air circulation, promote fruit production, and prevent diseases. The most common pruning technique is to remove the suckers that grow between the main stem and the branches. These suckers will eventually develop into new stems, but they can also divert energy away from fruit production. Prune suckers early in the morning on a dry day to allow the cuts to heal quickly. You can also remove any yellowing or diseased leaves to improve air circulation and prevent the spread of disease.
When is the best time to harvest cherry tomatoes?
Cherry tomatoes are typically ready to harvest about 60-70 days after transplanting. The fruits should be fully colored, slightly soft to the touch, and easily detach from the vine. Harvest your tomatoes regularly to encourage continued production. Overripe tomatoes can become mushy and attract pests. The best time to harvest is in the morning, after the dew has dried.
Can I grow cherry tomatoes indoors?
Yes, you can grow cherry tomatoes indoors, but you’ll need to provide them with adequate light, warmth, and humidity. Choose a sunny location near a south-facing window, or supplement with grow lights. Use a well-draining potting mix and water regularly. You may also need to hand-pollinate the flowers to ensure fruit set. Indoor cherry tomato plants may not produce as many fruits as outdoor plants, but they can still provide a delicious and rewarding harvest.
What are some common problems when growing cherry tomatoes and how can I fix them?
Some common problems include blossom end rot (caused by calcium deficiency), cracking (caused by inconsistent watering), and pests like aphids and tomato hornworms. Blossom end rot can be prevented by adding calcium to the soil and ensuring consistent watering. Cracking can be minimized by providing consistent moisture and avoiding overwatering. Pests can be controlled with insecticidal soap, neem oil, or hand-picking.
How can I save seeds from my cherry tomatoes for next year?
Saving seeds from your cherry tomatoes is a great way to preserve your favorite varieties and save money. Choose healthy, ripe tomatoes from disease-free plants. Squeeze the seeds and pulp into a jar and add a little water. Let the mixture ferment for 3-4 days, stirring occasionally. This process will kill any disease-causing organisms and make it easier to separate the seeds from the pulp. After fermentation, rinse the seeds thoroughly and spread them out on a paper towel to dry completely. Store the dried seeds in an airtight container in a cool, dark place.

Leave a Comment