
Grow Carrots in Containers? Absolutely! Imagine plucking fresh, vibrant carrots straight from your patio, balcony, or even your kitchen windowsill. No sprawling garden required! For centuries, carrots have been a staple in diets worldwide, dating back to ancient Persia where they were initially cultivated for their aromatic leaves and seeds, not their roots. Today, we cherish them for their sweet, earthy flavor and nutritional powerhouse.
But what if you lack the space for a traditional garden? That’s where the magic of container gardening comes in. I’m here to tell you that you don’t need acres of land to enjoy the satisfaction of harvesting your own carrots. This DIY guide will unlock the secrets to successfully grow carrots in containers, even if you’re a complete beginner.
In today’s fast-paced world, knowing where your food comes from is more important than ever. Growing your own food, even in a small way, connects you to nature, reduces your carbon footprint, and provides you with the freshest, most flavorful produce imaginable. Plus, let’s be honest, there’s something incredibly rewarding about nurturing a tiny seed into a delicious, crunchy carrot. So, grab your pots, soil, and seeds, and let’s get started on this exciting gardening adventure together!
Grow Your Own Delicious Carrots in Containers: A Beginner’s Guide
Hey there, fellow gardening enthusiasts! Ever dreamt of pulling fresh, vibrant carrots straight from your own garden? Well, guess what? You don’t need acres of land to make that dream a reality. Growing carrots in containers is totally doable, even if you’re a complete newbie like I was! It’s a rewarding experience, and the taste of homegrown carrots is simply unbeatable. So, grab your gardening gloves, and let’s dive into this fun and easy DIY project!
Choosing the Right Container and Carrot Variety
Before we get our hands dirty, let’s talk about the essentials: the container and the carrot seeds. These two factors are crucial for success.
* Container Size: Carrots need room to grow downwards. A deep container is key.
* Minimum Depth: Aim for at least 12 inches (30 cm) for shorter varieties like ‘Thumbelina’ or ‘Parisian’.
* Ideal Depth: For longer varieties like ‘Nantes’ or ‘Danvers’, go for 18-24 inches (45-60 cm).
* Width: The wider the container, the more carrots you can grow. A container that’s at least 12 inches wide is a good starting point.
* Drainage: Make sure your container has drainage holes! Carrots hate soggy soil.
* Container Material: Plastic, terracotta, or even fabric pots work well.
* Plastic: Lightweight and retains moisture well.
* Terracotta: Dries out faster, which can be good in humid climates.
* Fabric Pots: Allow for excellent drainage and air pruning of roots.
* Carrot Varieties: Choose varieties that are well-suited for container growing.
* Short and Round Varieties: ‘Thumbelina’, ‘Parisian’, ‘Round Romeo’. These are perfect for shallower containers.
* Medium-Length Varieties: ‘Nantes’, ‘Chantenay’. These are versatile and do well in a variety of containers.
* Avoid Long Varieties: ‘Imperator’ types are generally too long for most containers.
Preparing the Perfect Soil Mix
Carrots need loose, well-draining soil to thrive. Heavy, compacted soil will result in stunted, misshapen carrots. Here’s my go-to soil mix recipe:
* Base: Use a high-quality potting mix as your base. Avoid garden soil, as it’s often too heavy.
* Amendments:
* Sand: Add about 1/3 sand to improve drainage. Coarse sand is best.
* Compost: Mix in about 1/3 compost to provide nutrients and improve soil structure.
* Perlite or Vermiculite: Add a handful of perlite or vermiculite to further improve drainage and aeration.
* pH Level: Carrots prefer a slightly acidic to neutral pH (6.0-7.0). You can test your soil pH with a kit from your local garden center.
Planting Your Carrot Seeds
Now for the fun part! Let’s get those seeds in the ground (or rather, in the container!).
1. Fill the Container: Fill your container with the prepared soil mix, leaving about an inch of space at the top.
2. Water the Soil: Gently water the soil until it’s evenly moist but not soggy.
3. Sow the Seeds: Carrot seeds are tiny, so it’s easy to sow them too thickly.
* Spacing: Sprinkle the seeds thinly over the surface of the soil, spacing them about 1/2 inch apart.
* Depth: Cover the seeds with a very thin layer of soil (about 1/4 inch).
4. Gently Water Again: Use a spray bottle or a watering can with a gentle rose to avoid disturbing the seeds.
5. Label Your Container: Don’t forget to label your container with the carrot variety and the date you planted them.
6. Placement: Place the container in a sunny location. Carrots need at least 6 hours of sunlight per day.
Caring for Your Carrot Plants
Once your seeds are planted, it’s time to nurture them and watch them grow!
1. Watering: Keep the soil consistently moist, but not waterlogged. Water deeply whenever the top inch of soil feels dry.
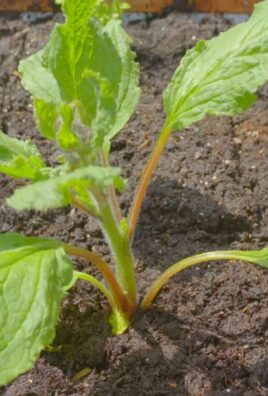
2. Thinning: This is crucial! If you don’t thin your carrots, they’ll be overcrowded and won’t develop properly.
* When to Thin: When the seedlings are about 2 inches tall, thin them to about 1-2 inches apart.
* How to Thin: Gently pull out the weaker seedlings, being careful not to disturb the roots of the remaining plants.
* Second Thinning: When the carrots are about 4 inches tall, thin them again to about 3-4 inches apart.
3. Fertilizing: Carrots are not heavy feeders, but they do benefit from occasional fertilization.
* Type of Fertilizer: Use a balanced fertilizer with a lower nitrogen content (e.g., 5-10-10).
* Frequency: Fertilize every 4-6 weeks.
* Application: Follow the instructions on the fertilizer package.
4. Weeding: Keep the container free of weeds, as they can compete with the carrots for nutrients and water.
5. Sunlight: Ensure your carrots are getting at least 6 hours of sunlight per day. If you live in a very hot climate, you may need to provide some afternoon shade.
6. Pest Control: Carrots are generally pest-resistant, but keep an eye out for common garden pests like aphids and carrot rust flies.
* Aphids: Spray with insecticidal soap.
* Carrot Rust Flies: Cover the container with a fine mesh netting to prevent the flies from laying eggs.
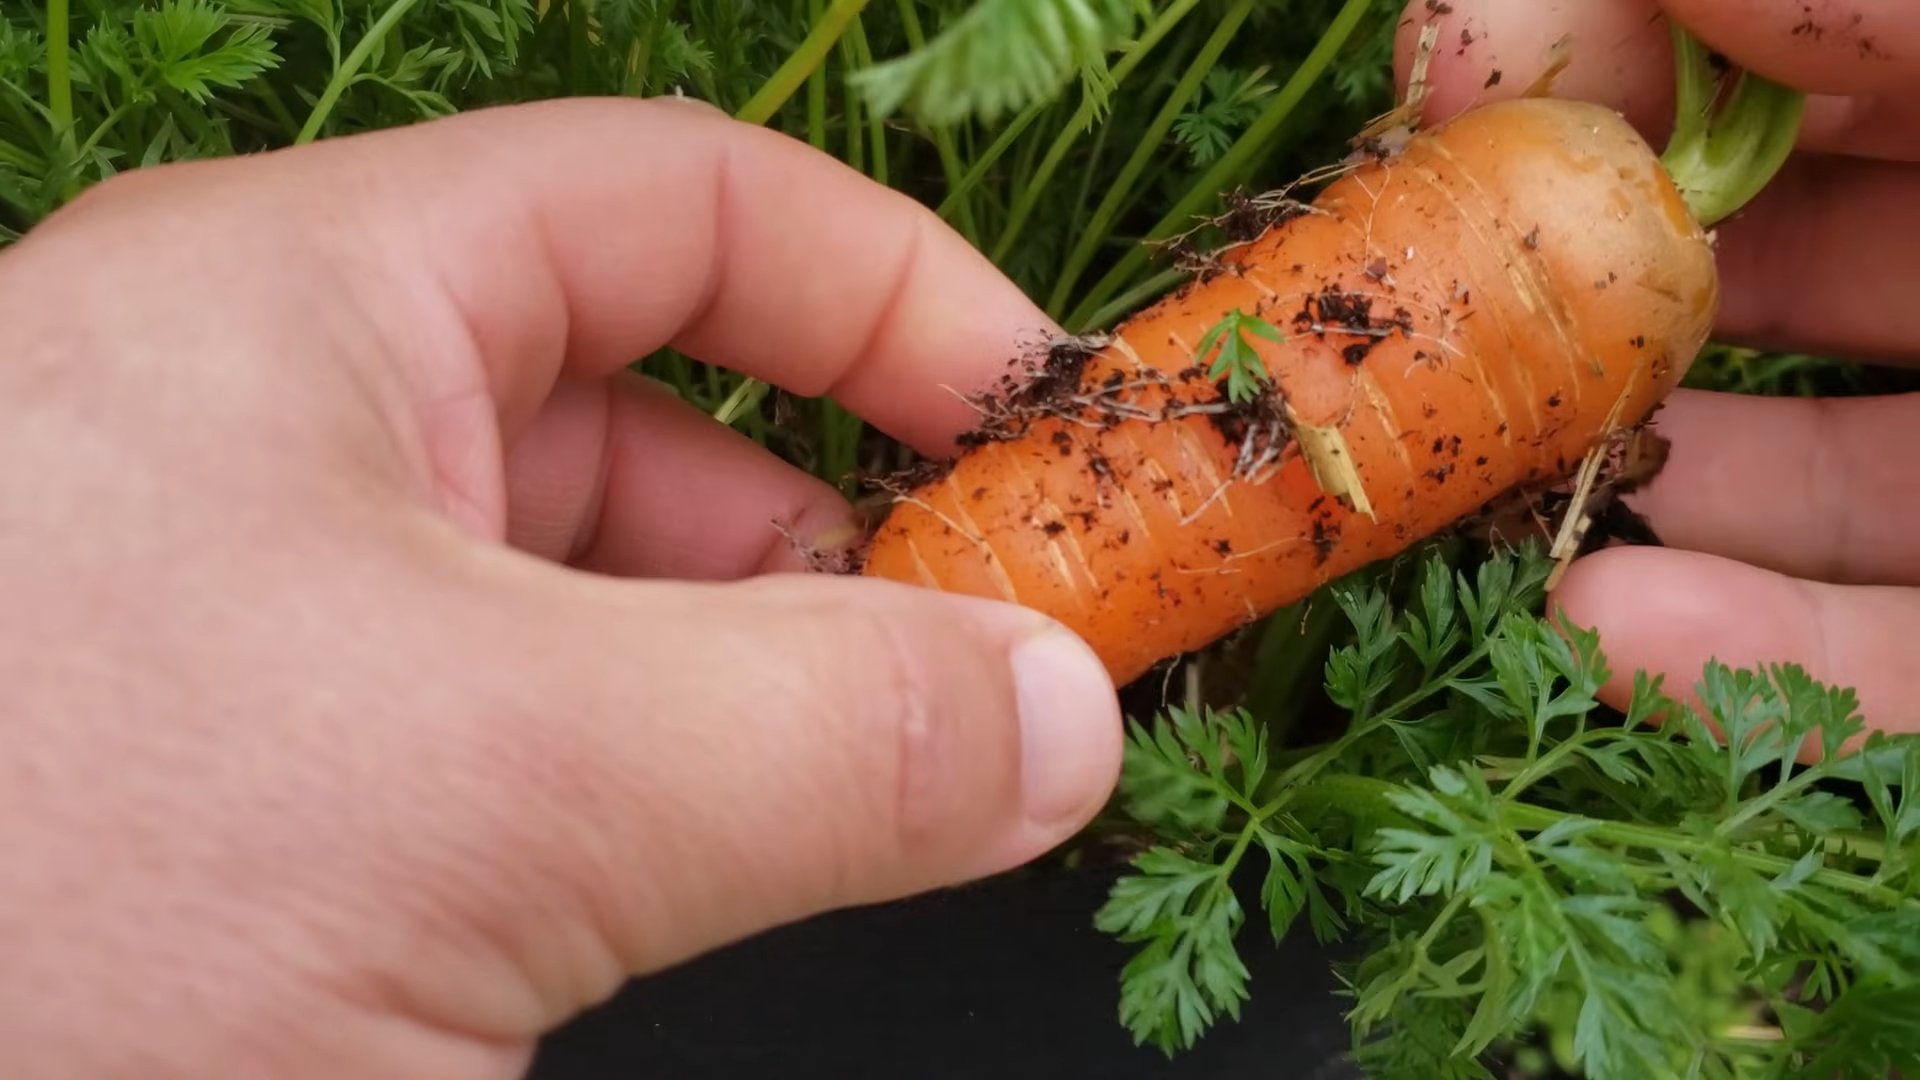
Harvesting Your Homegrown Carrots
The moment we’ve all been waiting for! Harvesting your own carrots is incredibly satisfying.
1. When to Harvest: Carrots are typically ready to harvest 60-80 days after planting, depending on the variety.
* Check the Size: Check the seed packet for the expected size of your carrots.
* Test Harvest: Gently pull up one carrot to check its size and maturity.
2. How to Harvest:
* Loosen the Soil: Gently loosen the soil around the carrots with a trowel or fork.
* Pull Gently: Grasp the carrot greens near the base and gently pull upwards, twisting slightly.
* If They’re Stuck: If the carrots are difficult to pull, use a trowel to carefully dig them out.
3. Storing Your Carrots:
* Remove the Greens: Cut off the carrot greens, leaving about an inch of stem.
* Wash and Dry: Wash the carrots thoroughly and dry them completely.
* Storage: Store the carrots in a plastic bag in the refrigerator. They should last for several weeks.
Troubleshooting Common Problems
Even with the best care, you might encounter a few challenges along the way. Here are some common problems and how to fix them:
* Stunted Growth:
* Cause: Poor soil, lack of nutrients, overcrowding.
* Solution: Amend the soil with compost, fertilize regularly, thin the carrots.
* Forked or Misshapen Carrots:
* Cause: Rocks or compacted soil in the container.
* Solution: Remove any rocks from the soil, use a loose, well-draining soil mix.
* Green Shoulders:
* Cause: The tops of the carrots are exposed to sunlight.
* Solution: Hill up the soil around the carrots to cover the shoulders.
* Pests:
* Cause: Various garden pests.
* Solution: Identify the pest and use appropriate pest control methods.
Extra Tips for Success
Here are a few extra tips to help you grow the best carrots possible:
* Succession Planting: Plant a new batch of carrot seeds every few weeks to ensure a continuous harvest.
* Companion Planting: Plant carrots alongside other vegetables like onions, garlic, and rosemary. These plants can help deter pests.
* Rotate Your Crops: Avoid planting carrots in the same container year after year. This can help prevent soilborne diseases.
* Enjoy the Process: Gardening should be fun! Don’t be afraid to experiment and learn from your

Conclusion
So, there you have it! Growing carrots in containers isn’t just a gardening trend; it’s a practical, rewarding, and surprisingly simple way to enjoy fresh, homegrown goodness, even if you’re short on space. We’ve walked you through the entire process, from selecting the right container and soil to nurturing your carrot crop until harvest. But why is this DIY trick a must-try?
Firstly, container gardening puts you in complete control. You dictate the soil composition, ensuring optimal drainage and nutrient levels, which is crucial for those perfectly formed, sweet carrots we all crave. No more battling rocky soil or unpredictable garden conditions! Secondly, it’s incredibly accessible. Whether you have a sprawling backyard or a tiny balcony, you can cultivate a thriving carrot patch. This makes fresh, organic produce available to everyone, regardless of their living situation.
Beyond the practical benefits, growing your own carrots is deeply satisfying. There’s something truly special about nurturing a tiny seed into a vibrant plant and then harvesting the fruits (or, in this case, the roots!) of your labor. It’s a connection to nature that can be incredibly grounding and rewarding.
Ready to take your container gardening to the next level? Consider these variations:
* Rainbow Carrots: Plant a mix of colorful carrot varieties like purple, yellow, and white for a visually stunning and nutrient-rich harvest. Imagine the vibrant salads and roasted vegetable dishes you can create!
* Succession Planting: Stagger your planting schedule by sowing seeds every few weeks. This ensures a continuous supply of fresh carrots throughout the growing season.
* Companion Planting: Plant herbs like rosemary or sage alongside your carrots. These herbs can help deter pests and enhance the flavor of your carrots. Marigolds are also great for pest control.
* Baby Carrots: If you prefer smaller, sweeter carrots, choose a baby carrot variety and harvest them earlier. These are perfect for snacking and dipping.
* Vertical Gardening: Get creative with vertical planters or hanging baskets to maximize your space and add a unique aesthetic to your garden.
Don’t be afraid to experiment and find what works best for you and your growing environment. The beauty of container gardening is its flexibility and adaptability.
We wholeheartedly encourage you to give this DIY trick a try. Growing carrots in containers is an achievable and enjoyable project for gardeners of all skill levels. It’s a fantastic way to connect with nature, enjoy fresh, healthy produce, and add a touch of green to your living space.
Once you’ve harvested your first batch of homegrown carrots, we’d love to hear about your experience! Share your tips, tricks, and photos in the comments below. Let’s create a community of container carrot growers and inspire others to embark on this rewarding journey. Happy gardening! Remember, the key to success is choosing the right container and soil, and providing consistent care. With a little effort, you’ll be enjoying delicious, homegrown carrots in no time.
Frequently Asked Questions (FAQ)
What is the best size container for growing carrots?
The ideal container size depends on the carrot variety you choose. For shorter, round varieties like ‘Thumbelina,’ a container that is at least 6-8 inches deep and wide is sufficient. However, for longer varieties like ‘Nantes’ or ‘Danvers,’ you’ll need a container that is at least 12 inches deep and wide. The wider the container, the more carrots you can grow. Ensure the container has drainage holes to prevent waterlogging, which can lead to root rot. A good rule of thumb is to allow at least 3-4 inches of space between each carrot seed or seedling.
What type of soil is best for growing carrots in containers?
Carrots thrive in loose, well-draining soil that is rich in organic matter. Avoid heavy clay soils, as they can hinder root development and result in misshapen carrots. A good potting mix specifically formulated for vegetables is an excellent choice. You can also create your own mix by combining equal parts of compost, peat moss (or coconut coir), and perlite or vermiculite. The compost provides nutrients, the peat moss or coconut coir retains moisture, and the perlite or vermiculite improves drainage. Ensure the soil pH is between 6.0 and 6.8 for optimal growth.
How often should I water my container carrots?
Consistent watering is crucial for growing healthy carrots. Keep the soil consistently moist, but not waterlogged. Water deeply whenever the top inch of soil feels dry to the touch. The frequency of watering will depend on the weather conditions, the size of your container, and the type of soil you’re using. During hot, dry weather, you may need to water daily. In cooler, wetter weather, you may only need to water every few days. Check the soil moisture regularly and adjust your watering schedule accordingly. Avoid overhead watering, as this can promote fungal diseases. Instead, water at the base of the plant.
How much sunlight do carrots need?
Carrots need at least 6 hours of direct sunlight per day to thrive. Choose a location for your container that receives plenty of sunlight. If you live in a hot climate, provide some afternoon shade to prevent the soil from drying out too quickly. If you don’t have a sunny spot, you can supplement with grow lights. Rotate the container regularly to ensure that all sides of the plant receive equal sunlight.
When should I fertilize my container carrots?
Carrots are not heavy feeders, but they do benefit from regular fertilization. Start fertilizing about 3-4 weeks after the seedlings emerge. Use a balanced, water-soluble fertilizer diluted to half strength. Fertilize every 2-3 weeks throughout the growing season. Avoid using fertilizers that are high in nitrogen, as this can promote leafy growth at the expense of root development. Look for a fertilizer that is higher in phosphorus and potassium, which are essential for root growth. You can also amend the soil with compost or worm castings to provide a slow-release source of nutrients.
How do I prevent pests and diseases from affecting my container carrots?
Several pests and diseases can affect carrots, including carrot rust flies, aphids, and fungal diseases. To prevent these problems, practice good garden hygiene. Remove any dead or decaying leaves from the container. Avoid overcrowding the plants, as this can create a humid environment that is conducive to fungal diseases. Use a well-draining soil mix to prevent root rot. Companion planting with herbs like rosemary or sage can help deter pests. You can also use insecticidal soap or neem oil to control aphids and other pests. If you notice any signs of fungal disease, remove the affected leaves and treat the plant with a fungicide.
How do I know when my carrots are ready to harvest?
The time it takes for carrots to mature depends on the variety you’re growing. Generally, carrots are ready to harvest 60-80 days after planting. Check the seed packet for specific maturity dates. You can also gauge ripeness by the size of the carrot tops. When the tops are about 1/2 to 1 inch in diameter, the carrots are usually ready to harvest. To harvest, gently loosen the soil around the carrot and pull it straight up. If the soil is dry, water it thoroughly before harvesting to make it easier to pull the carrots.
Can I grow carrots in containers indoors?
Yes, you can grow carrots in containers indoors, but you’ll need to provide them with adequate light. Place the container near a sunny window that receives at least 6 hours of direct sunlight per day. If you don’t have a sunny window, you can use grow lights. Use a full-spectrum grow light and position it a few inches above the plants. Keep the grow light on for 12-16 hours per day. Indoor carrots may take longer to mature than outdoor carrots.
What are some common problems when growing carrots in containers and how can I fix them?
Some common problems include:
* Forked or misshapen carrots: This is often caused by rocky or compacted soil. Use a loose, well-draining soil mix and remove any rocks or debris from the container.
* Small carrots: This can be caused by overcrowding, lack of sunlight, or insufficient fertilization. Thin the seedlings to provide adequate spacing, ensure the plants receive at least 6 hours of sunlight per day, and fertilize regularly.
* Bitter carrots: This can be caused by inconsistent watering or exposure to high temperatures. Water consistently and provide some afternoon shade during hot weather.
* Carrot rust fly damage: This pest lays its eggs near the base of the plant, and the larvae tunnel into the roots. Use row covers to prevent the flies from laying eggs, or apply nematodes to the soil to control the larvae.
Can I reuse the soil from my container carrots for other plants?
It’s generally not recommended to reuse soil from container carrots for other root vegetables, as it may contain pests or diseases that can affect the new crop. However, you can reuse the soil for other types of plants, such as leafy greens or herbs, after amending it with fresh compost and fertilizer. Be sure to remove any remaining carrot roots or debris from the soil before reusing it. You can also sterilize the soil by baking it in the oven at 180 degrees Fahrenheit for 30 minutes to kill any pests or diseases.
Leave a Comment