
Grow Carrots Backyard: Your Guide to a Bountiful Harvest
Growing carrots in your backyard might seem daunting, but I’m here to tell you it’s easier than you think! This article is packed with simple, effective Grow Carrots Backyard tricks and DIY solutions that will transform your gardening experience. Forget those limp, disappointing supermarket carrots; I’ll show you how to cultivate sweet, crunchy, homegrown perfection right in your own garden.
The history of carrots is fascinating! Originally purple or yellow, the orange carrot we know and love only became popular in the 17th century in the Netherlands. Today, growing your own carrots connects you to this rich history and provides a rewarding sense of accomplishment. But beyond the historical aspect, there’s a very practical reason why you should learn these Grow Carrots Backyard techniques.
Why Grow Your Own Carrots?
Store-bought carrots often travel long distances before reaching your plate, resulting in a loss of flavor and nutrients. By growing your own, you’ll enjoy the freshest, most flavorful carrots imaginable, harvested at their peak ripeness. Plus, you’ll have complete control over the growing process, ensuring your carrots are free from pesticides and other harmful chemicals. This is especially important if you have children or are concerned about the environmental impact of your food choices.
So, whether you’re a seasoned gardener or a complete beginner, get ready to embark on a rewarding journey with my Grow Carrots Backyard guide. Let’s get started and transform that patch of earth into a vibrant carrot patch!
Growing Carrots in Your Backyard: A Complete Guide
I love the sweet crunch of homegrown carrots, and I’m going to show you how easy it is to grow your own! This guide will walk you through every step, from preparing your soil to harvesting your delicious bounty.
Phase 1: Planning and Preparation
- Choose the right time: Carrots need cool weather to thrive. The best time to plant is in early spring or late summer/early fall, depending on your climate. Check your local frost dates to avoid planting too early or too late.
- Select a sunny spot: Carrots need at least six hours of sunlight per day. Find a location in your backyard that gets plenty of sun.
- Prepare the soil: This is crucial for growing straight, healthy carrots. Carrots hate rocks and clumps of soil, so you need to work the soil thoroughly. I recommend using a garden fork or tiller to loosen the soil to a depth of at least 12 inches. Remove any rocks or large debris.
- Amend the soil: Carrots prefer well-drained, sandy loam soil. If your soil is heavy clay, amend it with plenty of compost or other organic matter to improve drainage and aeration. This will help prevent your carrots from becoming stunted or forked.
- Consider soil testing: A soil test can tell you the pH level of your soil. Carrots prefer a slightly acidic to neutral pH (6.0-7.0). If your soil is too acidic or alkaline, you can adjust the pH by adding lime or sulfur, respectively.
Phase 2: Sowing the Seeds
- Choose your carrot seeds: There are many varieties of carrots available, so choose one that suits your taste and growing conditions. Consider factors like size, color, and maturity time.
- Direct sow the seeds: Carrots are best sown directly into the garden bed. Don’t start them indoors, as transplanting can damage their delicate roots.
- Prepare the seedbed: Create shallow furrows about 1/2 inch deep and 12-18 inches apart. Space the furrows far enough apart to allow for easy weeding and harvesting.
- Sow the seeds thinly: Carrot seeds are tiny! Sow them thinly and evenly along the furrows. Overcrowding will lead to small, stunted carrots.
- Cover the seeds: Gently cover the seeds with soil. Don’t bury them too deep, or they won’t germinate.
- Water gently: Water the seeds gently after sowing, using a gentle spray to avoid dislodging them.
- Keep the soil moist: Consistent moisture is key for germination. Keep the soil moist but not soggy until the seeds germinate.
Phase 3: Caring for Your Carrot Crop
- Thinning: Once the seedlings have a few true leaves (about 2 inches tall), thin them out to about 2-3 inches apart. This gives each carrot enough space to grow to its full potential. Don’t pull the seedlings; instead, gently snip them off at the soil line with scissors.
- Weeding: Regularly weed your carrot bed to prevent competition for water and nutrients. Hand weeding is best to avoid damaging the shallow carrot roots.
- Watering: Water regularly, especially during dry periods. Consistent moisture is essential for good growth. Aim for about 1 inch of water per week, either from rainfall or supplemental watering.
- Mulching: Applying a layer of mulch (such as straw or shredded leaves) can help retain moisture, suppress weeds, and regulate soil temperature.
- Pest and disease control: Keep an eye out for common carrot pests like carrot root flies and aphids. Use organic pest control methods if necessary, such as insecticidal soap or neem oil.
- Protecting from birds: Birds can be a problem, especially when the carrots are young. Consider using netting to protect your seedlings.
Phase 4: Harvesting Your Carrots
- Check for maturity: The time it takes for carrots to mature varies depending on the variety. Check the seed packet for the estimated harvest time.
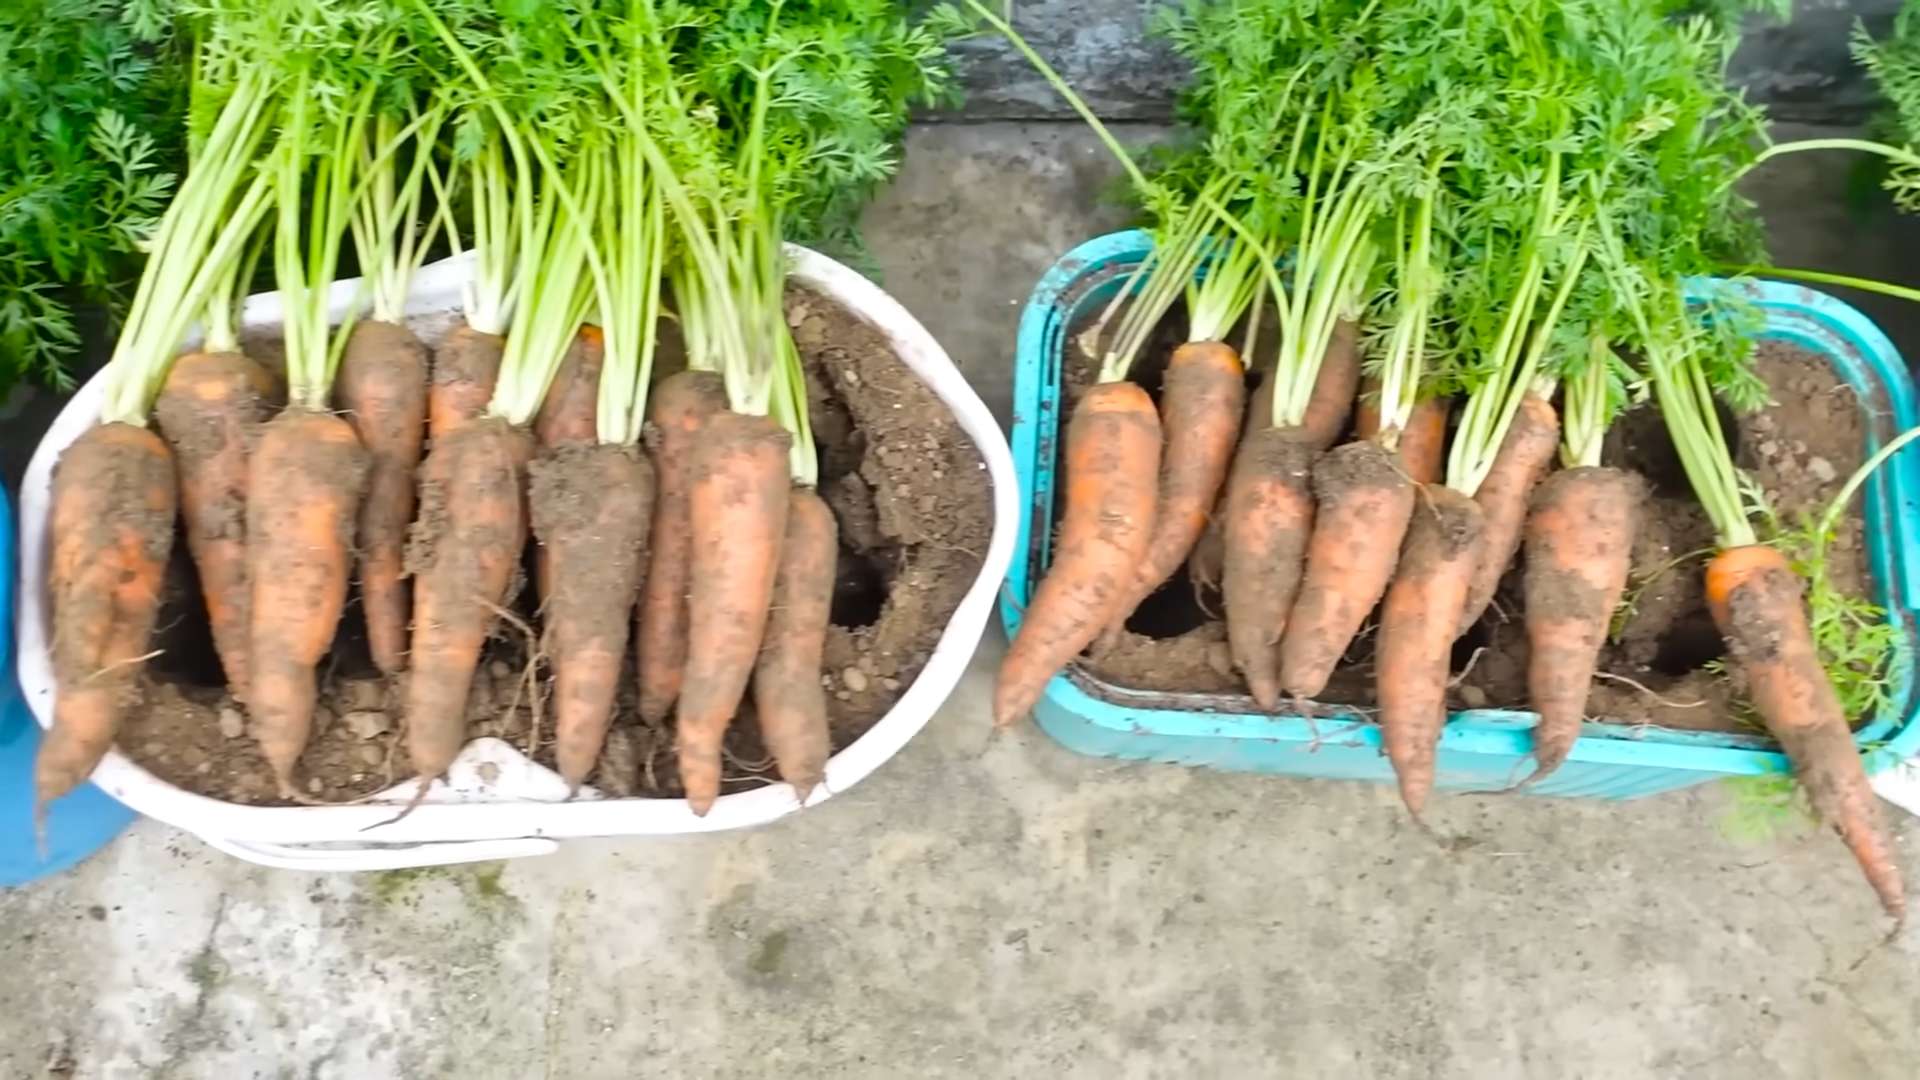
- Harvesting: Carrots are ready to harvest when they reach their desired size and are firm to the touch. Gently loosen the soil around the carrots with a garden fork or trowel, being careful not to damage the roots.
- Cleaning: Wash the carrots gently to remove any soil. You can store them in a cool, dark place for several weeks.
- Enjoying your harvest: Enjoy your homegrown carrots! They’re delicious eaten raw, cooked, or juiced.
Tips for Success:
- Use loose, well-drained soil: This is the single most important factor for growing straight carrots.
- Don’t over-fertilize: Too much nitrogen can lead to leafy tops and small, poorly developed roots.
- Water consistently: Avoid letting the soil dry out completely.
- Be patient: Growing carrots takes time, but the reward is well worth the effort!
Troubleshooting:
- Forked carrots: This is often caused by rocky or compacted soil. Make sure to prepare your soil thoroughly before planting.
- Small carrots: This can be caused by overcrowding, poor soil conditions, or lack of water.
- Pest damage: Monitor your plants regularly and take action to control pests as soon as you see them.
Conclusion
Growing your own carrots is a profoundly rewarding experience, transforming a simple vegetable into a testament to your gardening prowess. This DIY approach to growing carrots in your backyard offers a level of freshness and flavor simply unmatched by store-bought produce. You’ll savor the sweetness of a carrot pulled directly from the earth, knowing exactly how it was grown, without the use of harmful pesticides or long-distance transportation. Beyond the superior taste, the entire process is surprisingly simple and accessible, even for beginner gardeners. The satisfaction of nurturing a tiny seed into a vibrant, crunchy carrot is unparalleled. This method of growing carrots in your backyard provides a connection to nature and a deeper appreciation for the food we consume. It’s a truly enriching experience that we highly recommend.
Beyond the basic method outlined, there are numerous ways to personalize your carrot-growing adventure. Experiment with different carrot varieties – from the classic Nantes to the longer Imperator, each offering a unique flavor and texture. Consider companion planting, incorporating herbs like rosemary or thyme to deter pests and improve soil health. You can also explore different growing techniques, such as using raised beds for better drainage or employing vertical gardening methods to maximize space in smaller gardens. For those with limited sunlight, consider using grow lights to supplement natural light, especially during the early stages of growth. The possibilities are as diverse as the carrots themselves!
We encourage you to embark on this rewarding journey of growing your own carrots. Share your experiences with us – post pictures of your bountiful harvest on social media using #GrowCarrotsBackyard and tag us! We’d love to see your success stories and learn from your unique approaches. Remember, even small successes contribute to a larger sense of accomplishment and a deeper connection to the natural world. Don’t be afraid to experiment, learn from any setbacks, and most importantly, enjoy the process of nurturing your own delicious, homegrown carrots. The taste of success, quite literally, will be well worth the effort. This simple DIY trick will not only provide you with fresh, flavorful carrots but also a profound sense of satisfaction and a deeper appreciation for the wonders of nature. So, get your hands dirty, plant those seeds, and experience the joy of harvesting your own backyard bounty. Start your Grow Carrots Backyard journey today!
Frequently Asked Questions
Q: What type of soil is best for growing carrots?
Carrots thrive in loose, well-drained soil that is free of rocks and stones. Heavy clay soil can hinder root development, resulting in stunted or misshapen carrots. Sandy loam is ideal, but you can amend heavier soils by adding compost or other organic matter to improve drainage and aeration. Ensure the soil is relatively neutral to slightly acidic (pH 6.0-7.0).
Q: How much sunlight do carrots need?
Carrots require at least six hours of direct sunlight per day to grow properly. Choose a sunny location in your garden for optimal growth. Insufficient sunlight can lead to poor root development and a reduced harvest.
Q: When is the best time to plant carrots?
The best time to plant carrots depends on your climate. In most regions, spring and fall are ideal planting seasons. Spring planting allows for a summer harvest, while fall planting provides carrots for the winter months (depending on your climate’s frost dates). Always check your local frost dates to determine the optimal planting time.
Q: How often should I water my carrots?
Consistent moisture is crucial for carrot growth, but avoid overwatering, which can lead to root rot. Water deeply and regularly, especially during dry periods. Aim for consistently moist soil, but not soggy. Mulching can help retain soil moisture and suppress weeds.
Q: What are some common problems when growing carrots?
Some common problems include carrot root flies (which can be deterred with netting or companion planting), diseases like leaf blight (preventable with good air circulation and avoiding overhead watering), and poor soil conditions (addressed by soil amendment). Regularly inspect your plants for signs of pests or diseases and take appropriate action.
Q: How long does it take for carrots to mature?
The time it takes for carrots to mature varies depending on the variety and growing conditions. Generally, it takes 70-90 days for most carrot varieties to reach maturity. Check the seed packet for specific information on the expected harvest time for your chosen variety.
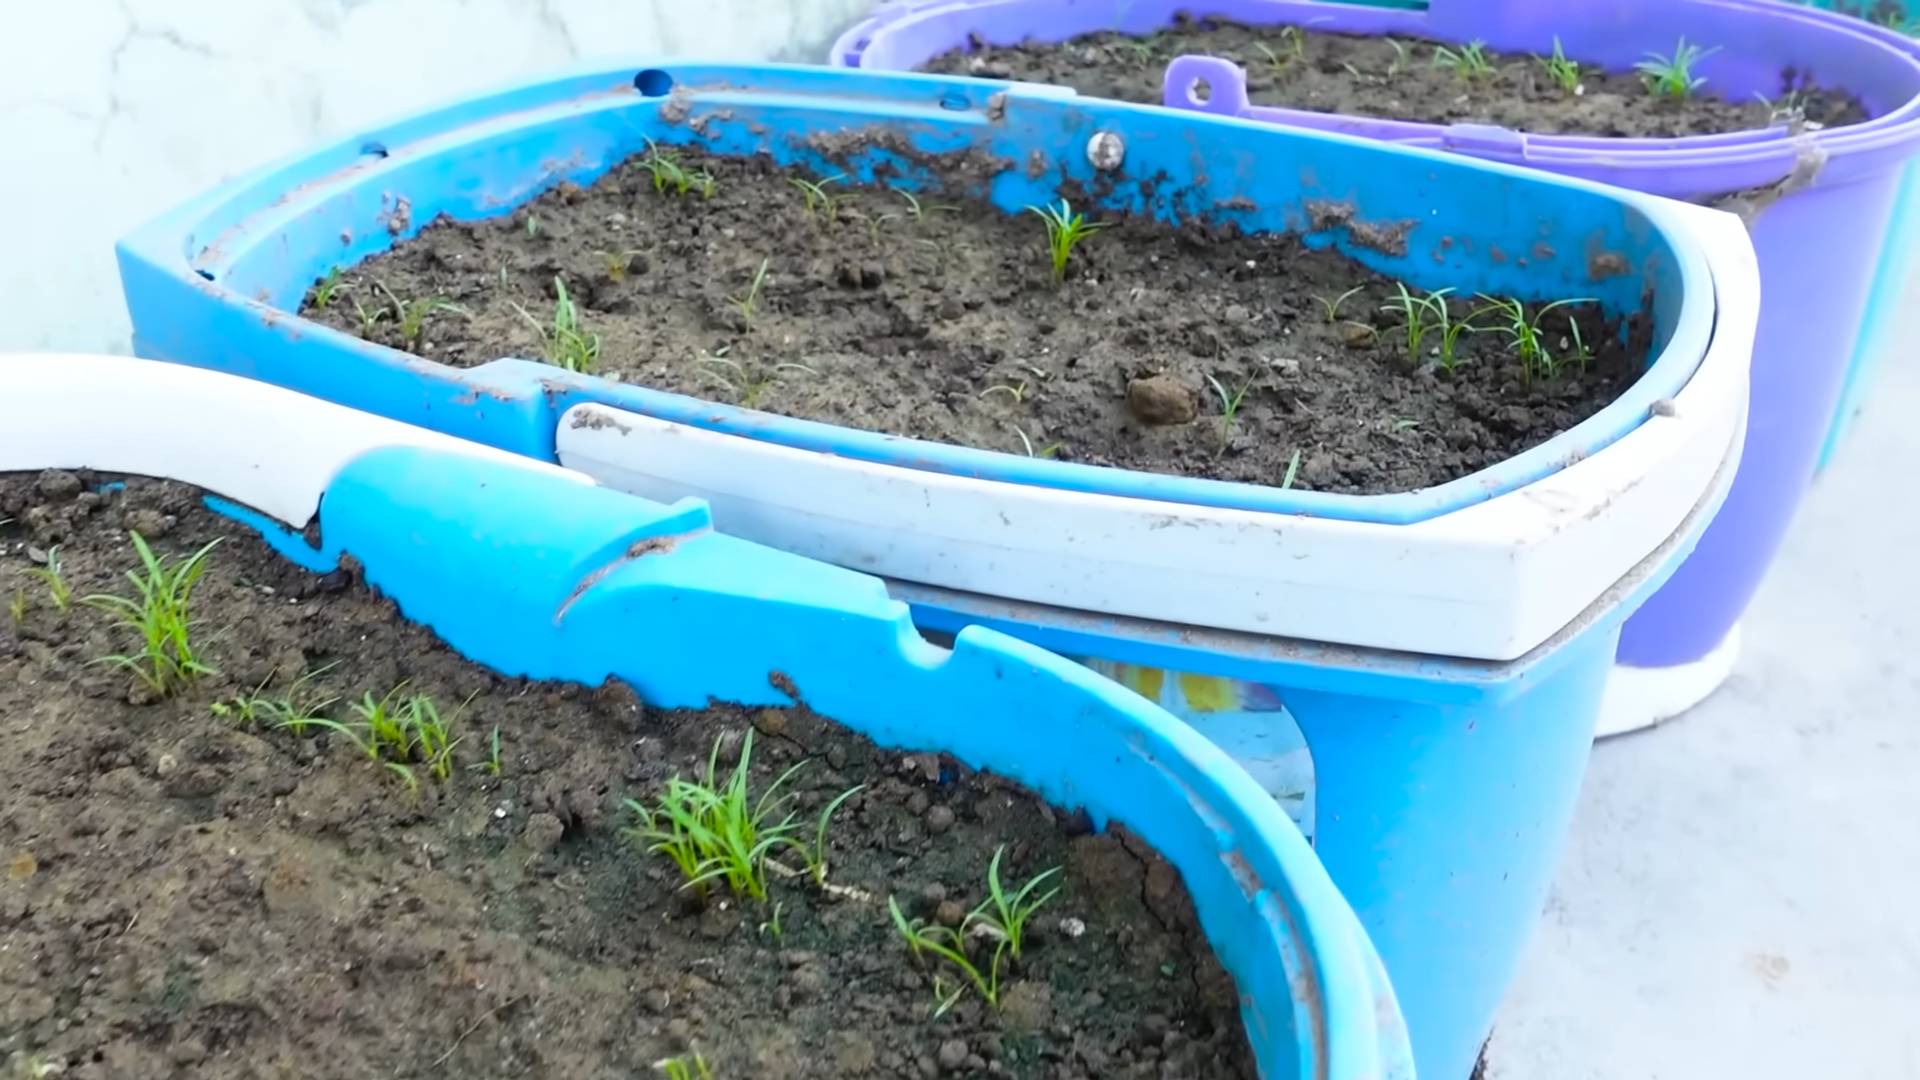
Q: Can I grow carrots in containers?
Yes, you can grow carrots in containers, but choose deep containers (at least 12 inches deep) to allow for proper root development. Use a well-draining potting mix and ensure adequate sunlight and watering.
Q: What should I do with my harvested carrots?
After harvesting, gently brush off excess soil and store your carrots in a cool, dark, and humid place. You can also store them in the refrigerator for extended freshness. Enjoy your homegrown carrots in salads, soups, stews, or as a delicious snack!
Q: What if my carrots are small or misshapen?
Small or misshapen carrots are often a result of poor soil conditions (rocky or compacted soil), inconsistent watering, or pest damage. Ensure your soil is loose and well-drained, water consistently, and protect your plants from pests to improve the quality of your harvest. Next time, try amending your soil with compost before planting.

Leave a Comment