
Grow Broccoli Indoors? Absolutely! Forget waiting for the perfect spring weather or battling garden pests. I’m here to tell you that you can cultivate your own delicious, nutrient-packed broccoli right in the comfort of your home. Imagine fresh, vibrant broccoli florets just steps away from your kitchen – ready to be steamed, roasted, or added to your favorite dishes.
The practice of indoor gardening, while seemingly modern, has roots stretching back centuries. From the hanging gardens of Babylon to the orangeries of Renaissance Europe, people have always sought ways to bring the bounty of nature indoors. Now, with advancements in lighting and growing techniques, it’s easier than ever to grow broccoli indoors, even if you have limited space.
But why bother with the effort? Well, for starters, you gain complete control over the growing environment, minimizing the risk of diseases and pests. Plus, you can enjoy a continuous harvest, regardless of the season. And let’s be honest, there’s something incredibly satisfying about nurturing a plant from seed to table. In this article, I’ll share my favorite DIY tricks and hacks to help you successfully grow broccoli indoors, ensuring a thriving and delicious harvest. Get ready to unleash your inner urban farmer!

Brokkoli im Haus anbauen: Dein umfassender DIY-Leitfaden
Hey Gartenfreunde! Habt ihr Lust, auch im Winter frischen Brokkoli zu ernten? Dann seid ihr hier genau richtig! Ich zeige euch, wie ihr Brokkoli erfolgreich im Haus anbauen könnt. Es ist einfacher als ihr denkt und bringt euch eine Extraportion Vitamine direkt auf den Tisch. Los geht’s!
Was du brauchst: Die Materialliste
Bevor wir loslegen, hier eine Liste mit allem, was du für dein Indoor-Brokkoli-Projekt benötigst:
* Brokkolisamen: Wähle am besten Sorten, die für den Anbau in Containern geeignet sind. Zwergbrokkoli-Sorten sind ideal.
* Anzuchterde: Diese ist feiner und nährstoffärmer als normale Blumenerde und fördert die Keimung.
* Töpfe oder Anzuchtschalen: Für die Anzucht benötigst du kleine Töpfe oder Anzuchtschalen.
* Größere Töpfe: Sobald die Sämlinge größer sind, brauchen sie größere Töpfe (mindestens 20 cm Durchmesser).
* Blumenerde: Eine gute, nährstoffreiche Blumenerde ist wichtig für das Wachstum.
* Pflanzenlampe (optional, aber empfohlen): Gerade im Winter ist zusätzliches Licht Gold wert.
* Sprühflasche: Zum Befeuchten der Erde.
* Gießkanne: Zum Bewässern der Pflanzen.
* Dünger: Ein organischer Flüssigdünger ist ideal.
* Thermometer: Um die Temperatur im Auge zu behalten.
* Feuchtigkeitsmesser (optional): Hilft, die Bodenfeuchtigkeit zu kontrollieren.
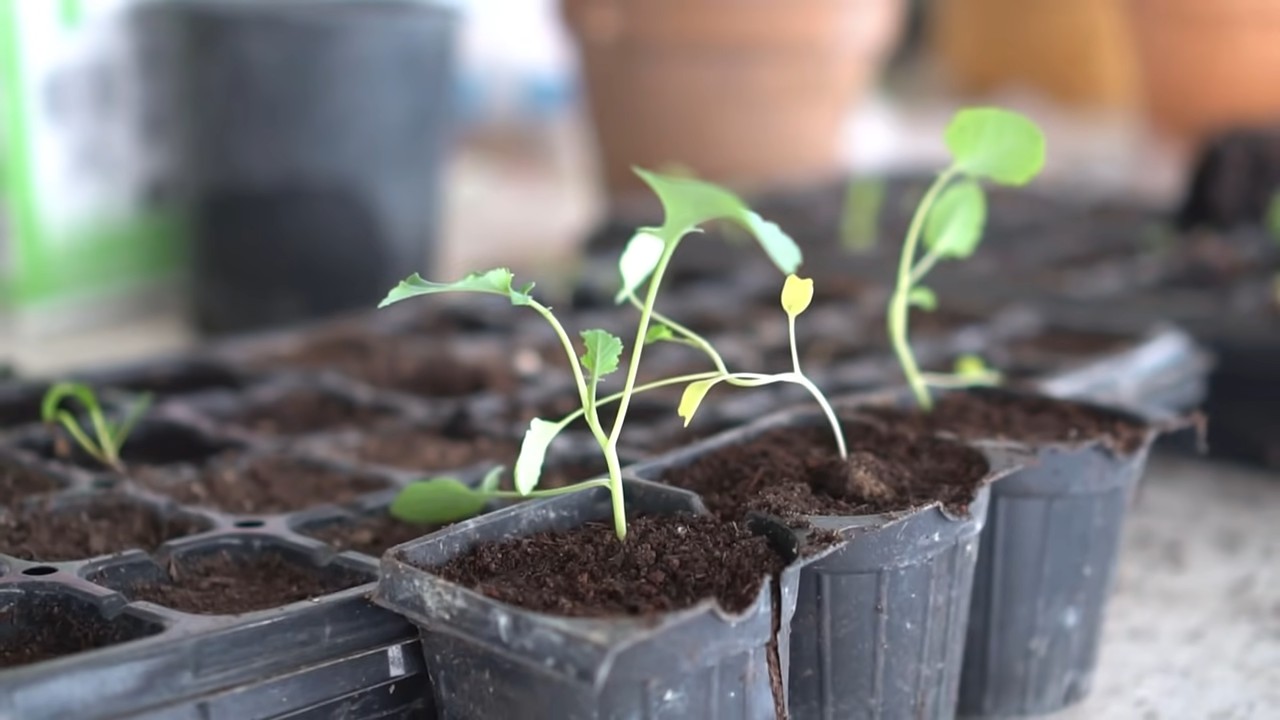
Phase 1: Die Anzucht der Brokkolisamen
Die Anzucht ist der erste und wichtigste Schritt. Hier legen wir den Grundstein für eine erfolgreiche Ernte.
1. Vorbereitung der Anzuchtschalen: Fülle die Anzuchtschalen oder kleinen Töpfe mit Anzuchterde. Drücke die Erde leicht an.
2. Aussaat der Samen: Lege in jede Schale oder jeden Topf 2-3 Samen. Bedecke die Samen mit einer dünnen Schicht Erde (ca. 0,5 cm).
3. Bewässerung: Befeuchte die Erde vorsichtig mit einer Sprühflasche. Die Erde sollte feucht, aber nicht nass sein.
4. Standort: Stelle die Anzuchtschalen an einen warmen und hellen Ort. Eine Temperatur von 18-24°C ist ideal.
5. Keimung: Die Samen keimen in der Regel innerhalb von 5-10 Tagen. Halte die Erde während dieser Zeit feucht.
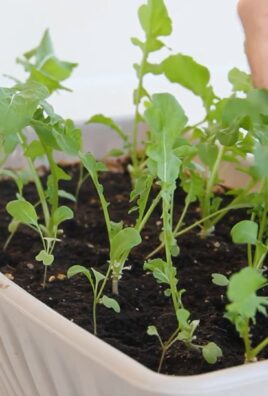
Phase 2: Pikieren und Umtopfen
Sobald die Sämlinge ein paar Blätter haben, ist es Zeit zum Pikieren und Umtopfen.
1. Pikieren: Wenn die Sämlinge 2-3 echte Blätter haben (nicht nur die Keimblätter), kannst du sie pikieren. Das bedeutet, du trennst die einzelnen Sämlinge vorsichtig und pflanzt sie in separate Töpfe.
2. Vorbereitung der neuen Töpfe: Fülle die größeren Töpfe (mindestens 20 cm Durchmesser) mit Blumenerde.
3. Umtopfen: Hebe die Sämlinge vorsichtig aus den Anzuchtschalen. Achte darauf, die Wurzeln nicht zu beschädigen. Setze jeden Sämling in einen separaten Topf und fülle den Topf mit Erde auf. Drücke die Erde leicht an.
4. Bewässerung: Gieße die Pflanzen nach dem Umtopfen gründlich.
5. Standort: Stelle die Töpfe an einen hellen Ort.
Phase 3: Die richtige Pflege für gesundes Wachstum
Jetzt kommt es auf die richtige Pflege an, damit deine Brokkolipflanzen prächtig gedeihen.
1. Bewässerung: Brokkoli braucht regelmäßig Wasser. Die Erde sollte immer leicht feucht sein, aber nicht nass. Vermeide Staunässe, da dies zu Wurzelfäule führen kann. Überprüfe die Bodenfeuchtigkeit regelmäßig mit deinem Finger oder einem Feuchtigkeitsmesser.
2. Beleuchtung: Brokkoli braucht viel Licht, mindestens 6-8 Stunden pro Tag. Wenn du nicht genügend natürliches Licht hast, verwende eine Pflanzenlampe. Stelle die Lampe in einem Abstand von ca. 30-50 cm über die Pflanzen.
3. Temperatur: Brokkoli bevorzugt kühle Temperaturen. Eine Temperatur von 15-20°C ist ideal. Vermeide extreme Temperaturschwankungen.
4. Düngung: Dünge deine Brokkolipflanzen regelmäßig mit einem organischen Flüssigdünger. Beginne mit der Düngung etwa 2 Wochen nach dem Umtopfen. Befolge die Anweisungen auf der Düngerpackung.
5. Belüftung: Sorge für eine gute Belüftung, um Pilzkrankheiten vorzubeugen. Stelle die Töpfe nicht zu eng nebeneinander und lüfte den Raum regelmäßig.
6. Schädlinge: Achte auf Schädlinge wie Blattläuse oder Kohlweißlingsraupen. Kontrolliere die Pflanzen regelmäßig und entferne Schädlinge gegebenenfalls von Hand oder mit einem biologischen Schädlingsbekämpfungsmittel.
7. Drehen der Töpfe: Drehe die Töpfe regelmäßig, damit die Pflanzen gleichmäßig Licht bekommen und nicht schief wachsen.
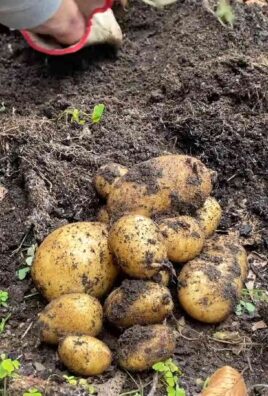
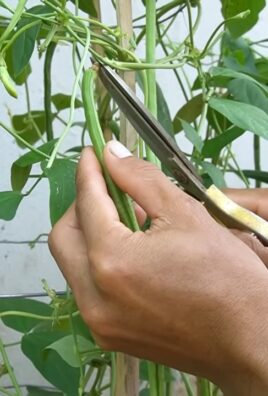
Phase 4: Die Ernte – Der Lohn deiner Mühe
Nach etwa 60-90 Tagen kannst du deinen selbstgezogenen Brokkoli ernten!
1. Erntezeitpunkt: Ernte den Brokkoli, wenn die Röschen fest und geschlossen sind. Wenn die Röschen gelb werden oder sich öffnen, ist es zu spät.
2. Erntemethode: Schneide den Brokkolikopf mit einem scharfen Messer ab. Lasse dabei einige Blätter an der Pflanze, da diese noch Seitentriebe bilden kann.
3. Nachernte: Nach der Haupternte können sich Seitentriebe bilden, die du ebenfalls ernten kannst. Diese sind zwar kleiner, aber genauso lecker.
Zusätzliche Tipps und Tricks für den Indoor-Brokkoli-Anbau
* Sortenwahl: Wähle Zwergbrokkoli-Sorten, die speziell für den Anbau in Containern gezüchtet wurden. Diese Sorten bleiben kleiner und sind besser für den Indoor-Anbau geeignet.
* Bodenqualität: Verwende eine hochwertige Blumenerde, die gut drainiert und reich an Nährstoffen ist. Du kannst die Erde auch mit Kompost oder Wurmhumus anreichern.
* Luftfeuchtigkeit: Brokkoli bevorzugt eine moderate Luftfeuchtigkeit. Wenn die Luft in deinem Haus sehr trocken ist, kannst du die Luftfeuchtigkeit erhöhen, indem du eine Schale mit Wasser in die Nähe der Pflanzen stellst oder einen Luftbefeuchter verwendest.
* Krankheiten: Achte auf Anzeichen von Krankheiten wie Mehltau oder Wurzelfäule. Entferne befallene Blätter oder Pflanzen sofort, um die Ausbreitung der Krankheit zu verhindern.
* Geduld: Der Anbau von Brokkoli braucht Zeit und Geduld. Sei nicht entmutigt, wenn es nicht sofort klappt. Mit etwas Übung und den richtigen Bedingungen wirst du bald deinen eigenen frischen Brokkoli ernten können.
* Upcycling: Verwende recycelte Behälter als Töpfe. Alte Joghurtbecher oder Plastikflaschen eignen sich hervorragend für die Anzucht.
* Beschneiden: Entferne regelmäßig gelbe oder beschädigte Blätter, um die Gesundheit der Pflanze zu fördern.
* Beobachtung: Beobachte deine Pflanzen täglich. Achte auf Veränderungen in Farbe, Wachstum und Aussehen. Je früher du Probleme erkennst, desto besser kannst du sie beheben.
Ich hoffe, dieser Leitfaden hilft dir dabei, deinen eigenen Brokkoli im Haus anzubauen. Viel Spaß beim Gärtnern und guten Appetit!
Conclusion
So, there you have it! Growing broccoli indoors might seem like a daunting task at first, but with a little patience, the right setup, and these simple steps, you can enjoy fresh, homegrown broccoli even when the weather outside isn’t cooperating. This DIY trick isn’t just about saving money; it’s about connecting with your food, understanding the growing process, and experiencing the satisfaction of nurturing something from seed to table.
Why is this a must-try? Because store-bought broccoli, while convenient, often lacks the vibrant flavor and nutritional punch of freshly harvested produce. Plus, you have complete control over the growing environment, ensuring your broccoli is free from unwanted pesticides and chemicals. Imagine the taste difference – a crisp, slightly sweet broccoli floret, bursting with flavor, picked straight from your indoor garden. It’s an experience that store-bought simply can’t replicate.
Beyond the basic method, there’s plenty of room for experimentation. Try different broccoli varieties to find your favorite flavor profile. Some varieties, like ‘Sprouts Early’ or ‘Waltham 29’, are particularly well-suited for indoor growing due to their smaller size and shorter maturity time. You can also experiment with different lighting setups. While fluorescent grow lights are a budget-friendly option, LED grow lights offer greater energy efficiency and can be tailored to the specific needs of your broccoli plants. Consider adding companion plants like basil or chamomile to your indoor garden. These herbs can help deter pests and even improve the flavor of your broccoli.
Don’t be afraid to get creative with your container choices, too. While standard pots work perfectly well, you could also repurpose old buckets or containers, just be sure they have adequate drainage. Hydroponic systems offer another exciting avenue for growing broccoli indoors, providing a nutrient-rich water solution directly to the roots. This can lead to faster growth and higher yields.
We understand that growing broccoli indoors can seem intimidating, but we encourage you to take the plunge. Start small, with just a few plants, and learn as you go. The rewards are well worth the effort. The taste of fresh, homegrown broccoli is unparalleled, and the satisfaction of nurturing your own food is incredibly rewarding.
We’re confident that you’ll find this DIY trick to be a game-changer. It’s a sustainable, healthy, and enjoyable way to bring the garden indoors. So, grab your seeds, set up your grow lights, and get ready to experience the joy of growing your own broccoli.
We’d love to hear about your experiences! Share your tips, tricks, and photos in the comments below. Let’s build a community of indoor broccoli growers and learn from each other. What variety did you try? What challenges did you face? What successes did you celebrate? Your insights can help others on their journey to growing delicious, homegrown broccoli indoors. Let’s cultivate a greener, healthier future, one broccoli plant at a time!
Frequently Asked Questions (FAQ)
1. What are the best broccoli varieties to grow indoors?
While many broccoli varieties can be grown indoors, some are better suited than others due to their size and maturity time. Compact varieties like ‘Sprouts Early’, ‘Waltham 29’, and ‘De Cicco’ are excellent choices. These varieties tend to be smaller and mature more quickly, making them ideal for indoor growing conditions. Consider also looking for “sprouting broccoli” varieties, as they often produce multiple smaller heads, which can be easier to manage indoors. Read seed descriptions carefully to understand the plant’s mature size and days to maturity before making your selection.
2. How much light does indoor broccoli need?
Broccoli requires a significant amount of light to thrive. Aim for at least 6-8 hours of direct light per day. If you don’t have a sunny window that provides this much light, you’ll need to supplement with grow lights. Fluorescent grow lights are a budget-friendly option, but LED grow lights are more energy-efficient and can be tailored to the specific needs of your broccoli plants. Look for grow lights that emit a full spectrum of light, including both blue and red wavelengths, to promote healthy growth. Position the lights close enough to the plants (usually a few inches) to provide adequate illumination, but be careful not to burn the leaves.
3. What is the ideal temperature for growing broccoli indoors?
Broccoli prefers cooler temperatures, ideally between 60-70°F (15-21°C). Avoid exposing your plants to temperatures above 80°F (27°C), as this can cause them to bolt (go to seed prematurely). If your home tends to be warm, consider using a fan to circulate air around the plants and keep them cool. You can also place ice packs near the plants during the hottest part of the day.
4. How often should I water my indoor broccoli plants?
Water your broccoli plants regularly, keeping the soil consistently moist but not waterlogged. Check the soil moisture level daily by sticking your finger about an inch into the soil. If the soil feels dry, it’s time to water. Water deeply, allowing the water to drain out of the bottom of the pot. Avoid overhead watering, as this can increase the risk of fungal diseases.
5. What kind of soil should I use for growing broccoli indoors?
Use a well-draining potting mix that is rich in organic matter. A mix of peat moss, perlite, and vermiculite is a good option. You can also add compost to the potting mix to provide additional nutrients. Avoid using garden soil, as it can be too heavy and may contain pests or diseases.
6. How do I fertilize my indoor broccoli plants?
Broccoli is a heavy feeder, so it’s important to fertilize regularly. Start fertilizing about two weeks after transplanting the seedlings into their final containers. Use a balanced fertilizer (e.g., 10-10-10) diluted to half strength. Fertilize every two weeks, following the instructions on the fertilizer label. You can also use organic fertilizers, such as compost tea or fish emulsion.
7. How do I prevent pests and diseases on my indoor broccoli plants?
Inspect your plants regularly for signs of pests or diseases. Common pests that can affect broccoli include aphids, cabbage worms, and spider mites. You can control these pests by handpicking them off the plants, spraying them with insecticidal soap, or using neem oil. To prevent fungal diseases, ensure good air circulation around the plants and avoid overhead watering. If you notice any signs of disease, remove the affected leaves immediately.
8. When is broccoli ready to harvest indoors?
Broccoli is ready to harvest when the central head is firm and the florets are tightly closed. The size of the head will vary depending on the variety. Use a sharp knife to cut the head from the plant, leaving a few inches of stem. After harvesting the central head, the plant may produce smaller side shoots, which can also be harvested.
9. Can I grow broccoli indoors year-round?
Yes, you can grow broccoli indoors year-round, provided you have adequate light and temperature control. You may need to adjust your growing schedule depending on the season. For example, you may need to provide more supplemental light during the winter months.
10. What are some common problems when growing broccoli indoors and how can I fix them?
Some common problems include leggy seedlings (caused by insufficient light), yellowing leaves (caused by nutrient deficiencies or overwatering), and bolting (caused by high temperatures). To fix leggy seedlings, provide more light. To fix yellowing leaves, adjust your watering schedule and fertilize regularly. To prevent bolting, keep the temperature cool.
Leave a Comment