
Grow Bok Choy Indoors? Absolutely! Imagine fresh, crisp bok choy, bursting with flavor, ready to harvest right from your kitchen windowsill. Forget those sad, wilted greens from the grocery store – with a few simple tricks, you can cultivate your own thriving bok choy patch, no matter the season or your outdoor space.
Bok choy, also known as pak choi, has a rich history deeply rooted in Chinese cuisine, dating back over 5,000 years! It’s a staple ingredient, prized for its versatility and nutritional benefits. But you don’t need to be a seasoned gardener to enjoy this leafy green. I’m here to show you how easy it is to bring a touch of the Orient to your home, one bok choy leaf at a time.
Why should you learn to grow bok choy indoors? Well, for starters, it gives you control over the growing environment, protecting your plants from pests, harsh weather, and even those pesky neighborhood critters. Plus, it’s incredibly rewarding to nurture something from seed to table. In today’s world, where access to fresh, healthy produce can sometimes be a challenge, having your own indoor garden is a game-changer. So, let’s dive into these easy DIY tricks and hacks that will have you harvesting delicious bok choy in no time!
Growing Bok Choy Indoors: A Beginner’s Guide
Hey there, fellow plant enthusiasts! Ever thought about growing your own fresh, crisp bok choy right in your kitchen? It’s easier than you might think, and trust me, the taste of homegrown bok choy is unbeatable. I’ve been doing it for a while now, and I’m excited to share my secrets with you. Let’s dive in!
Choosing the Right Bok Choy Variety
First things first, not all bok choy varieties are created equal when it comes to indoor growing. Some get HUGE, which isn’t ideal for a limited indoor space. Here are a few of my favorites that stay relatively compact and are perfect for containers:
* Dwarf Bok Choy: As the name suggests, this variety is small and compact, making it perfect for smaller pots. It matures quickly, too!
* Baby Bok Choy: Similar to dwarf bok choy, baby bok choy is smaller and has a milder flavor. It’s also quick to grow.
* Joi Choi: This variety is a bit larger than the others, but it’s still manageable indoors. It has a slightly sweeter flavor and is very productive.
Setting Up Your Indoor Bok Choy Garden
Okay, now that we’ve chosen our bok choy variety, let’s get our growing space ready. Here’s what you’ll need:
* Containers: Choose pots that are at least 6 inches deep and wide. Good drainage is crucial, so make sure your pots have drainage holes. I personally love using fabric pots because they allow for excellent drainage and aeration.
* Potting Mix: Don’t use garden soil! It’s too heavy and doesn’t drain well. Instead, opt for a high-quality potting mix specifically designed for containers. I like to use a mix of peat moss, perlite, and vermiculite.
* Grow Lights: Bok choy needs plenty of light, especially indoors. A sunny windowsill might not be enough, especially during the winter months. Invest in a good set of grow lights. LED grow lights are energy-efficient and work wonders.
* Watering Can or Spray Bottle: For gentle watering.
* Fertilizer: A balanced liquid fertilizer will help your bok choy thrive.
* Seeds: Of course! Choose organic seeds whenever possible.
Planting Your Bok Choy Seeds
Now for the fun part – planting!
1. Prepare Your Containers: Fill your containers with the potting mix, leaving about an inch of space at the top. Gently pat down the soil.
2. Sow the Seeds: Sprinkle the bok choy seeds evenly over the surface of the soil. You can sow them quite densely, as you’ll thin them out later.
3. Cover the Seeds: Lightly cover the seeds with a thin layer of potting mix (about ¼ inch).
4. Water Gently: Use a spray bottle or watering can with a gentle nozzle to water the soil thoroughly. Make sure the soil is moist but not soggy.
5. Provide Light: Place your containers under your grow lights. If you’re using a sunny windowsill, make sure it gets at least 6 hours of direct sunlight per day.
6. Maintain Moisture: Keep the soil consistently moist. Check the soil daily and water when the top inch feels dry.
Caring for Your Indoor Bok Choy
Once your bok choy seedlings emerge (usually within a week or so), it’s time to start caring for them.
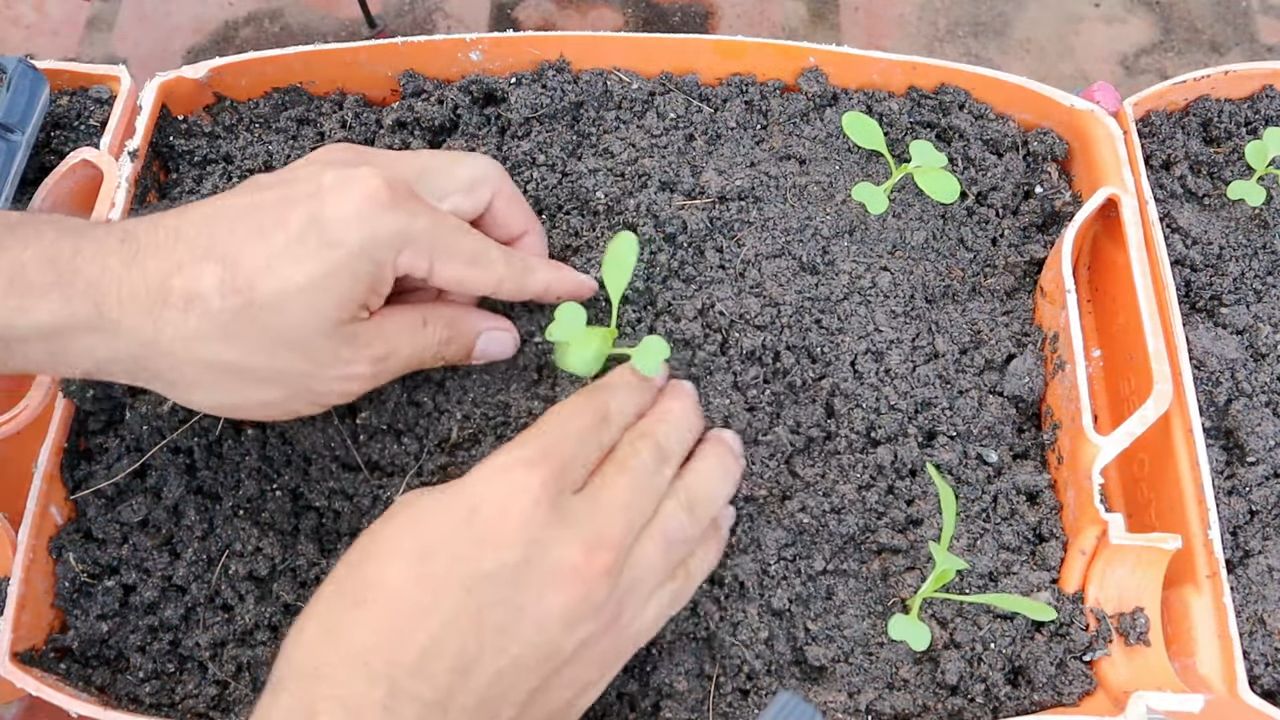
1. Thinning: Once the seedlings have a few true leaves (the second set of leaves that appear after the initial seed leaves), it’s time to thin them out. This means removing some of the seedlings to give the remaining ones enough space to grow. Aim for about 2-3 inches between plants. Don’t just pull them out! Gently snip them off at the soil line with scissors to avoid disturbing the roots of the remaining plants.
2. Watering: Water your bok choy regularly, keeping the soil consistently moist. Avoid overwatering, as this can lead to root rot. A good rule of thumb is to water when the top inch of soil feels dry.
3. Fertilizing: Feed your bok choy with a balanced liquid fertilizer every two weeks. Follow the instructions on the fertilizer package. I like to use a fertilizer that’s specifically formulated for leafy greens.
4. Light: Ensure your bok choy receives adequate light. If you’re using grow lights, keep them on for about 12-14 hours per day. Adjust the height of the lights as the plants grow to keep them close to the light source.
5. Temperature: Bok choy prefers cooler temperatures, ideally between 60-70°F (15-21°C). Avoid placing your plants near heat sources, such as radiators or vents.
6. Air Circulation: Good air circulation is important to prevent fungal diseases. If your growing area is stuffy, consider using a small fan to circulate the air.
7. Pest Control: Keep an eye out for pests, such as aphids and spider mites. If you spot any pests, you can try spraying them with insecticidal soap or neem oil. I prefer to use organic pest control methods whenever possible.
Harvesting Your Bok Choy
The best part! You can start harvesting your bok choy when the leaves are about 4-6 inches long. This usually takes about 30-45 days from planting.
1. Harvesting Individual Leaves: You can harvest individual leaves as needed, starting with the outer leaves. This will allow the inner leaves to continue growing. Simply snip off the leaves at the base with scissors or a knife.
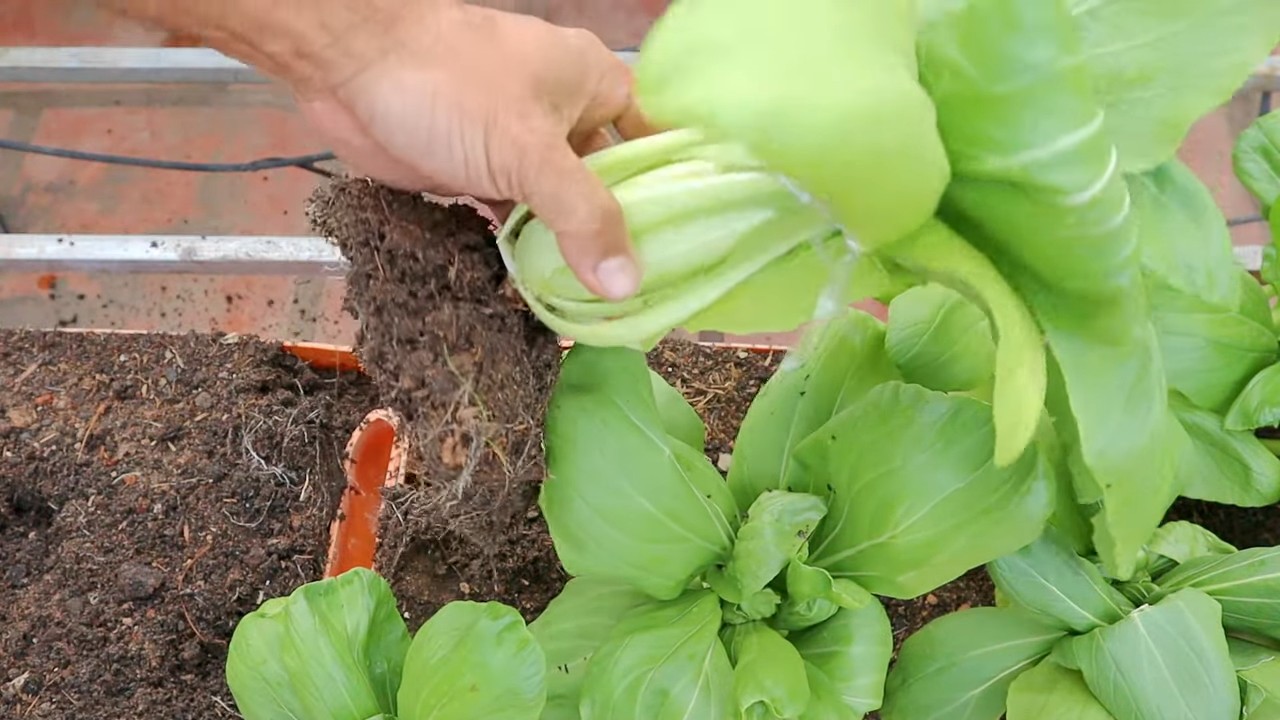
2. Harvesting the Whole Plant: If you prefer, you can harvest the entire plant at once. Simply cut the plant off at the base.
3. Washing and Storing: After harvesting, wash your bok choy thoroughly and store it in the refrigerator in a plastic bag or container. It will keep for about a week.
Troubleshooting Common Problems
Even with the best care, you might encounter some problems while growing bok choy indoors. Here are a few common issues and how to address them:
* Yellowing Leaves: This could be a sign of overwatering, underwatering, or nutrient deficiency. Check the soil moisture and adjust your watering accordingly. If the soil is consistently moist, you might be overwatering. If the soil is dry, you need to water more often. If the leaves are yellowing all over, it could be a sign of nutrient deficiency. Try fertilizing with a balanced liquid fertilizer.
* Leggy Growth: This means your plants are stretching towards the light and becoming tall and spindly. This is usually a sign that they’re not getting enough light. Move your plants closer to the grow lights or provide more natural sunlight.
* Pests: As mentioned earlier, aphids and spider mites are common pests that can attack bok choy. Inspect your plants regularly and treat any infestations promptly with insecticidal soap or neem oil.
* Root Rot: This is a fungal disease that can occur when the soil is consistently soggy. Make sure your pots have good drainage and avoid overwatering. If you suspect root rot, you can try transplanting your plants into fresh potting mix.
Tips for Success
Here are a few extra tips to help you succeed with growing bok choy indoors:
* Start with Quality Seeds: Using high-quality seeds will increase your chances of success.
* Provide Adequate Light: Light is crucial for bok choy growth. Make sure your plants are getting enough light, either from grow lights or natural sunlight.
* Don’t Overwater: Overwatering is a common mistake that can lead to root rot. Water your plants only when the top inch of soil feels dry.
* Fertilize Regularly: Bok choy needs nutrients to thrive. Fertilize your plants every two weeks with a balanced liquid fertilizer.
* Monitor for Pests: Inspect your plants regularly for pests and treat any infestations promptly.
* Enjoy the Process! Growing your own food is a rewarding experience. Don’t be afraid to experiment and have fun!
Enjoying Your Homegrown Bok Choy
Now that you’ve successfully grown your own bok choy, it’s time to enjoy the fruits (or rather, vegetables!) of your labor. Bok choy is a versatile vegetable that can be used in a variety of dishes. Here are a few of my favorite ways to use homegrown bok choy:
* Stir-fries: Bok choy is a classic ingredient in stir-fries. Simply chop it up and add it to your favorite stir-fry recipe.
* Soups: Bok choy adds a delicious flavor and texture to soups. Add it to your favorite soup recipe during the last few minutes of cooking.
* Salads: Baby bok choy is tender enough to be eaten raw in salads.
*
Conclusion
So, there you have it! Growing bok choy indoors is not only achievable, but it’s also a deeply rewarding experience that brings fresh, vibrant greens right to your kitchen. Forget relying solely on grocery store produce, often shipped from afar and lacking that just-picked freshness. With a little effort and the right setup, you can enjoy crisp, delicious bok choy whenever you crave it.
This DIY trick is a must-try for several reasons. First and foremost, it puts you in control of your food source. You know exactly what goes into your bok choy – no mystery pesticides or questionable growing practices. Secondly, it’s incredibly convenient. Imagine needing a handful of bok choy for a stir-fry and simply snipping it fresh from your indoor garden. No more last-minute trips to the store! Thirdly, it’s a fantastic way to connect with nature, even within the confines of your home. Watching your bok choy seedlings sprout and flourish is a truly satisfying experience.
But the benefits don’t stop there. Growing your own bok choy indoors can also be a cost-effective way to enjoy this nutritious vegetable. Over time, the savings on grocery store purchases can really add up. Plus, it’s a sustainable practice that reduces your carbon footprint by minimizing transportation and packaging.
Looking for variations? Consider experimenting with different varieties of bok choy. Baby bok choy is perfect for quick stir-fries, while larger varieties are great for soups and stews. You can also try growing other Asian greens alongside your bok choy, such as gai lan or tatsoi, to create a diverse and flavorful indoor garden. Another fun variation is to try succession planting. By planting new seeds every few weeks, you can ensure a continuous harvest of fresh bok choy throughout the year.
Don’t be intimidated if you’re new to indoor gardening. Bok choy is a relatively easy vegetable to grow, and with the tips and tricks outlined in this article, you’ll be well on your way to success. Remember to provide adequate light, water, and nutrients, and be patient. The rewards of fresh, homegrown bok choy are well worth the effort.
We wholeheartedly encourage you to give this DIY trick a try. Start small, experiment, and don’t be afraid to make mistakes. Gardening is a learning process, and every experience, whether successful or not, will teach you something new.
And most importantly, we want to hear about your experience! Share your photos, tips, and challenges in the comments section below. Let’s create a community of indoor bok choy growers and learn from each other. What growing medium did you find most successful? What lighting setup worked best for you? What delicious recipes have you created with your homegrown bok choy? We can’t wait to hear your stories and see your beautiful indoor gardens. So, grab your seeds, get your hands dirty, and start growing your own bok choy today! You’ll be amazed at how easy and rewarding it is to bring a little bit of nature into your home.
Frequently Asked Questions (FAQ)
What are the best lighting options for growing bok choy indoors?
Bok choy needs at least 6 hours of direct sunlight per day to thrive. If you don’t have a sunny windowsill, you’ll need to supplement with artificial lighting. Fluorescent grow lights are a good option, as they provide a broad spectrum of light that’s beneficial for plant growth. LED grow lights are another popular choice, as they’re energy-efficient and long-lasting. When using artificial lighting, position the lights a few inches above the plants and adjust as they grow. A timer can be used to automate the lighting schedule, ensuring consistent light exposure. Remember that the intensity of the light is just as important as the duration. If your bok choy is looking leggy or pale, it may not be getting enough light.
How often should I water my indoor bok choy?
The watering frequency will depend on several factors, including the size of the pot, the type of growing medium, and the temperature and humidity of your home. As a general rule, water your bok choy when the top inch of soil feels dry to the touch. Avoid overwatering, as this can lead to root rot. When watering, water deeply until the water drains out of the bottom of the pot. This ensures that the roots are thoroughly hydrated. Be sure to use a pot with drainage holes to prevent water from accumulating at the bottom. During warmer months, you may need to water more frequently. Check the soil moisture regularly and adjust your watering schedule accordingly.
What type of soil is best for growing bok choy indoors?
Bok choy prefers well-draining soil that’s rich in organic matter. A good potting mix for indoor bok choy should contain a blend of peat moss, perlite, and vermiculite. You can also add compost or other organic amendments to improve the soil’s fertility and drainage. Avoid using garden soil, as it can be too heavy and may contain pests or diseases. The ideal pH for bok choy is between 6.0 and 7.5. You can test the pH of your soil using a soil testing kit. If the pH is too low, you can add lime to raise it. If the pH is too high, you can add sulfur to lower it.
How do I fertilize my indoor bok choy?
Bok choy is a heavy feeder, so it’s important to fertilize it regularly. Start fertilizing your bok choy seedlings a few weeks after they emerge. Use a balanced liquid fertilizer, such as a 10-10-10 or 20-20-20, diluted to half strength. Fertilize every two weeks during the growing season. You can also use a slow-release fertilizer, which will provide nutrients to the plants over a longer period of time. Be careful not to over-fertilize, as this can burn the roots. Look for signs of nutrient deficiencies, such as yellowing leaves, and adjust your fertilization schedule accordingly. Organic fertilizers, such as compost tea or fish emulsion, are also good options for feeding your bok choy.
What are some common pests and diseases that affect indoor bok choy?
While growing bok choy indoors minimizes pest exposure, aphids, spider mites, and whiteflies can still be a problem. Regularly inspect your plants for signs of infestation, such as small insects on the leaves or webbing. If you find pests, you can try washing them off with a strong stream of water or using insecticidal soap. Avoid using harsh pesticides, as they can harm your plants and your health. Fungal diseases, such as powdery mildew, can also affect bok choy. To prevent fungal diseases, provide good air circulation and avoid overwatering. If you notice signs of disease, remove the affected leaves and treat the plants with a fungicide.
How long does it take to grow bok choy indoors?
Bok choy is a fast-growing vegetable, and you can typically harvest it within 45-60 days of planting. Baby bok choy can be harvested even sooner, after about 30 days. The exact time will depend on the variety of bok choy, the growing conditions, and your personal preferences. You can harvest the entire plant at once, or you can harvest individual leaves as needed. To harvest individual leaves, simply snip them off at the base of the plant. This will allow the plant to continue producing new leaves.
Can I grow bok choy from cuttings?
While growing bok choy from seed is the most common method, you can also try growing it from cuttings. To do this, cut off the bottom of a bok choy stalk, leaving about 2 inches of the base intact. Place the base in a shallow dish of water, and keep it in a bright, warm location. Change the water every day. After a few days, you should see roots starting to grow. Once the roots are about an inch long, you can transplant the cutting into a pot filled with potting mix. Keep the soil moist and provide plenty of light. While not always successful, this is a fun experiment to try.

Leave a Comment