
Grow Bok Choy at Home and unlock a world of fresh, crisp, and delicious greens right at your fingertips! Have you ever dreamt of strolling into your backyard and harvesting vibrant, healthy vegetables for dinner? Well, dream no more! This DIY guide will empower you to cultivate your own thriving Bok Choy patch, regardless of your gardening experience.
Bok Choy, also known as Chinese cabbage, boasts a rich history deeply rooted in Asian cuisine. For centuries, it has been a staple in stir-fries, soups, and salads, celebrated for its mild flavor and nutritional benefits. From ancient Chinese gardens to modern-day kitchens, Bok Choy has consistently proven its versatility and appeal.
But why should you bother growing your own? In today’s world, knowing where your food comes from is more important than ever. Growing your own Bok Choy ensures you have access to fresh, pesticide-free produce. Plus, it’s incredibly rewarding to nurture a plant from seed to harvest! This DIY guide will provide you with simple, effective tricks and hacks to grow Bok Choy at home successfully, even if you have limited space or a busy schedule. I’m excited to share my tips and tricks with you, so let’s get started!
Growing Bok Choy: Your DIY Guide for Crunchy Goodness from Your Own Garden
Hey gardening friends! Bok choy, also known as pak choi, is a super delicious and healthy vegetable that can be easily grown in your own garden or even on a balcony. I’ll show you how to bring in your own harvest with simple tools and a little patience. Let’s get started!
What You Need for Growing Bok Choy
Before we begin, here’s a list of everything you’ll need:
- Bok Choy Seeds: It’s best to choose organic seeds.
- Seedling pots or trays: For starting seeds indoors.
- Seed starting mix: Special soil for seedlings, low in nutrients and loose.
- Garden soil or potting soil: For transplanting later.
- Watering can or spray bottle: For watering.
- Planters (optional): If you want to grow bok choy on your balcony.
- Garden tools: Spade, trowel, maybe a small hoe.
- Slug pellets (optional): Unfortunately, bok choy is very popular with slugs and snails.
- Fertilizer (optional): Organic fertilizer is most suitable.
Preparation: How to Lay the Groundwork for a Bountiful Harvest
Preparation is everything! Here, I’ll show you how to get the seeds to germinate and optimally prepare the small plants for their life in the garden.
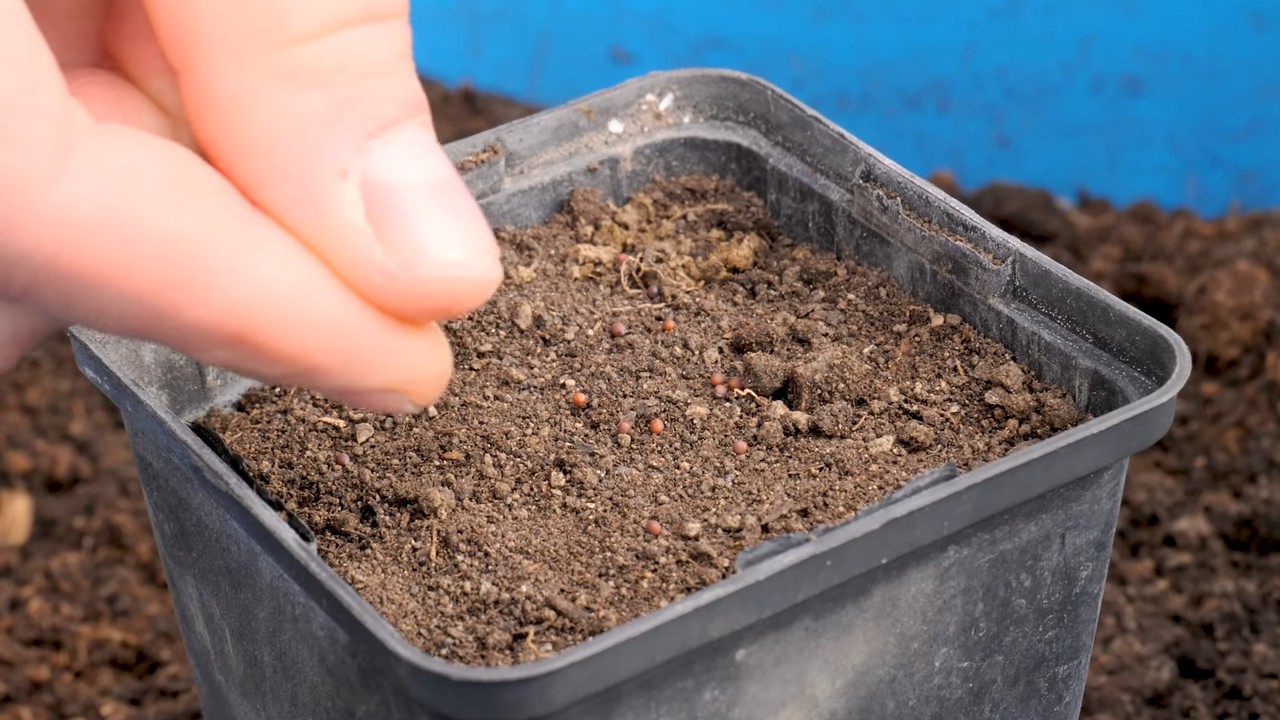
1. Sowing: The Kick-off for Your Bok Choy Project
- Timing: Bok choy can be sown in the spring (March/April) for a summer harvest or in late summer (August/September) for an autumn harvest. I prefer sowing in late summer, as the temperatures are no longer as high and the plants are less likely to bolt (flower prematurely).
- Sowing in seedling pots: Fill the seedling pots with seed starting mix. Lightly press the soil down. Place 2-3 seeds per pot on the soil and cover them with a thin layer of soil (about 0.5 cm or 1/4 inch). Gently moisten the soil with a spray bottle.
- Location: Place the seedling pots in a bright and warm place (approx. 18-20°C or 65-68°F). Avoid direct sunlight, as the soil will dry out too quickly.
- Moisture: Keep the soil evenly moist, but not wet. Be sure to avoid waterlogging!
2. Germination: Patience is Required
- Duration: Germination usually takes 5-10 days.
- Observation: Check the seedling pots daily. As soon as the first seedlings appear, it’s important that they get enough light.
- Thinning: When the seedlings are about 2-3 cm (1 inch) tall, you should thin them out. This means leaving only the strongest seedling in each pot. You can gently pull out the others or snip them at the soil line.
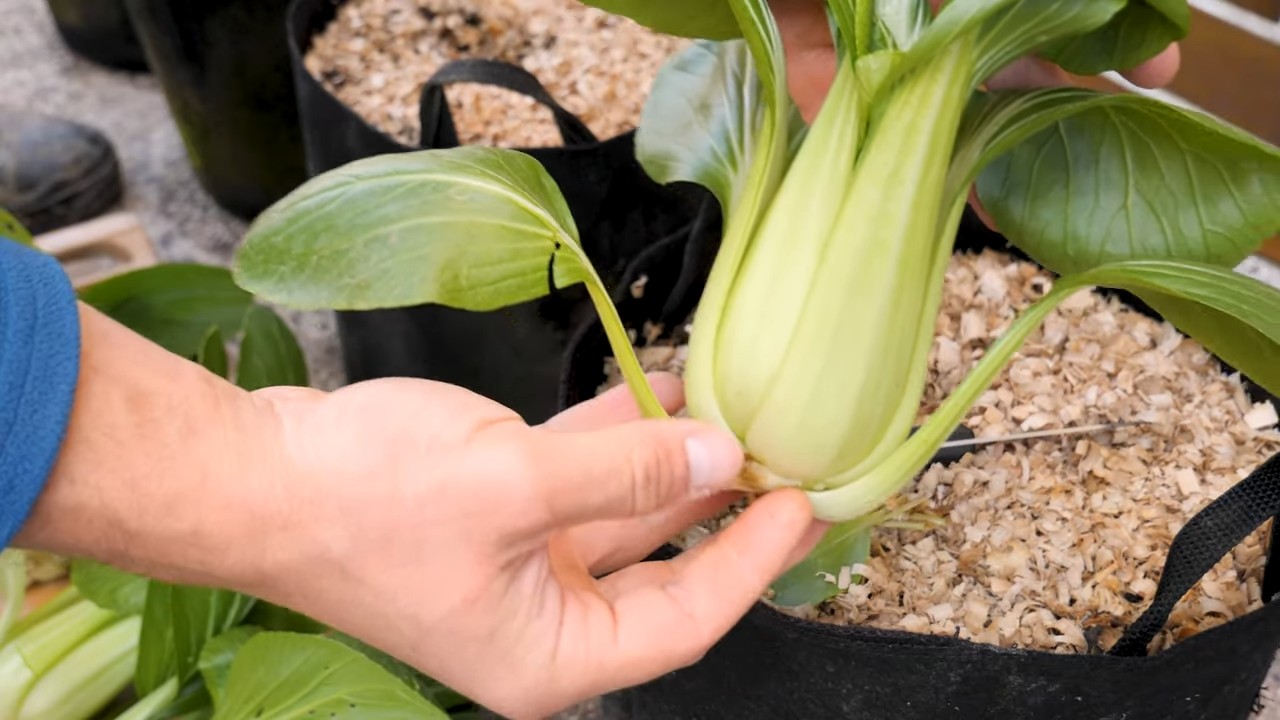
Transplanting: Off to the Garden Bed or Pot!
Once the small bok choy seedlings are strong enough, they can move into the garden bed or larger pots.
1. Preparing the Bed or Pots
- Garden Bed: Thoroughly loosen the soil in the bed and remove weeds. Work compost or organic fertilizer into the soil.
- Pots: Choose pots with a diameter of at least 20 cm (8 inches). Fill the pots with garden soil or potting soil.
2. Transplanting: Step by Step
- Spacing: Plant the bok choy seedlings in the garden bed with a spacing of about 20-30 cm (8-12 inches) between them. In pots, you can also plant several plants, but make sure they have enough space.
- Careful Removal: Carefully remove the seedlings from their starter pots. Be careful not to damage the roots.
- Planting: Place the seedlings in the prepared holes in the bed or pots. The top of the root ball should be level with the soil surface.
- Watering In: Water the seedlings thoroughly after transplanting.
Care: How Your Bok Choy Will Thrive
The right care is crucial for your bok choy to grow well and produce a rich harvest.
1. Watering: The Be-All and End-All
- Water regularly: Bok choy needs regular water, especially during dry periods. Make sure the soil is always slightly moist.
- Avoid waterlogging: Waterlogging can lead to root rot. It’s better to water more often with less water.
- Water in the morning: It’s best to water in the morning so the leaves can dry by evening. This reduces the risk of fungal diseases.
2. Fertilizing: For Strong Growth
- Organic fertilizer: Bok choy is a heavy feeder and needs sufficient nutrients. Fertilize the plants regularly with organic fertilizer, e.g., compost, horn shavings, or a vegetable fertilizer.
- Dosage: Follow the dosage instructions on the fertilizer packaging.
- Frequency: Fertilize the plants every 2-3 weeks.
3. Pest Protection: Slug Alert!
- Slug pellets: Unfortunately, bok choy is very popular with slugs. Protect your plants with slug pellets or other slug repellents.
- Inspection: Regularly check the plants for pests like aphids or cabbage white caterpillars.
- Organic pest control: If you have an aphid infestation, you can spray the plants with a jet of water or treat them with a solution of insecticidal soap and water.
4. Weed Control: Eliminating the Competition
- Regular weeding: Remove weeds regularly so your bok choy isn’t overgrown by them.
- Mulching: Mulching with straw or grass clippings can help reduce weed growth and retain moisture in the soil.
The Harvest: Finally, Harvest Time!
After about 6-8 weeks, you can harvest your homegrown bok choy.
1. Timing: When is the Right Time?
- Size: Harvest the bok choy when it has reached the desired size. The leaves should be crisp and juicy.
- Before flowering: Harvest the bok choy before it starts to flower. Otherwise, the leaves will become tough and bitter.
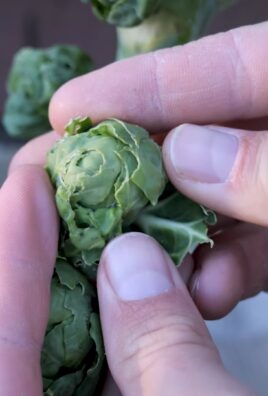
2. The Harvest: How to Do It Right
- Cutting: Cut the bok choy with a sharp knife or scissors just above the ground.
- Individual leaves: You can also harvest individual outer leaves if you don’t need the whole head.
- Storage: Bok choy doesn’t last long. Store it in a plastic bag in the refrigerator. It’s best to use it as quickly as possible.
Additional Tips for Growing Bok Choy
- Variety Selection: There are different varieties of bok choy. Choose a variety that is suitable for your climate and growing conditions.
- Crop Rotation: Don’t plant bok choy in the same spot every year. Rotate your crops to prevent diseases and pests.
- Bok Choy in a Pot: Bok choy can also be grown well in a pot on a balcony or terrace. Make sure the pot is large enough and has good drainage holes, as the soil in pots dries out more quickly.
Conclusion: Crunchy Goodness Made Easy!
You see, growing your own bok choy is no magic trick. With its fast growing time, it’s the perfect vegetable for beginners and anyone who wants to see quick harvest success. So, grab your seeds and look forward to delicious, homegrown bok choy in your stir-fries and salads. Happy gardening
Conclusion
So, there you have it! Growing your own bok choy at home is not only achievable but also incredibly rewarding. From the satisfaction of nurturing a plant from seed to the delicious, fresh flavors you’ll enjoy in your meals, this DIY project is a must-try for any home gardener or food enthusiast. Forget relying solely on grocery store produce; imagine stepping into your backyard or onto your balcony and harvesting crisp, vibrant bok choy whenever you need it.
This isn’t just about saving a few dollars; it’s about connecting with your food source, understanding the growing process, and enjoying the unparalleled taste of homegrown vegetables. Plus, it’s a fantastic way to introduce children to the wonders of gardening and healthy eating habits.
But the benefits don’t stop there. By growing your own bok choy, you have complete control over the growing environment. You can choose organic methods, avoiding harmful pesticides and herbicides, ensuring that your family is consuming the healthiest possible produce. You can also select varieties that might not be readily available in stores, expanding your culinary horizons.
Ready to take your bok choy cultivation to the next level? Consider experimenting with different varieties. From the petite and tender Shanghai bok choy to the larger, more robust Canton bok choy, each offers a unique flavor and texture profile. You can also try succession planting, sowing seeds every few weeks to ensure a continuous harvest throughout the growing season.
Another exciting variation is growing bok choy in containers. This is perfect for those with limited space or who want to keep their plants closer at hand. Choose a pot that’s at least 12 inches deep and wide, and use a well-draining potting mix. Container-grown bok choy can even be brought indoors during colder months, extending your harvest.
Don’t be afraid to get creative with your growing methods. Some gardeners have successfully grown bok choy hydroponically, while others have incorporated it into vertical gardening systems. The possibilities are endless!
We’re confident that once you experience the joy of growing your own bok choy, you’ll be hooked. It’s a simple, satisfying, and delicious way to enhance your life. So, grab some seeds, prepare your soil, and get ready to embark on this exciting gardening adventure.
We encourage you to try this DIY trick and share your experience with us! Let us know what varieties you’ve grown, what challenges you’ve faced, and what delicious dishes you’ve created with your homegrown bok choy. Your insights and experiences will inspire others to give it a try and contribute to a thriving community of home gardeners. Share your photos and stories on our social media channels using #HomegrownBokChoy. We can’t wait to see what you create!
Frequently Asked Questions (FAQ)
What is the best time of year to plant bok choy?
Bok choy is a cool-season crop, meaning it thrives in cooler temperatures. The best time to plant bok choy is in early spring or late summer/early fall. For a spring crop, start seeds indoors 4-6 weeks before the last expected frost or direct sow them outdoors as soon as the soil can be worked. For a fall crop, sow seeds directly into the garden in late summer or early fall, about 6-8 weeks before the first expected frost. Avoid planting during the hottest months of summer, as high temperatures can cause bok choy to bolt (go to seed prematurely).
How much sunlight does bok choy need?
Bok choy needs at least 4-6 hours of sunlight per day to grow well. While it can tolerate some shade, especially during the hottest part of the day, insufficient sunlight can result in leggy growth and reduced yields. If you’re growing bok choy indoors, supplement natural light with grow lights to ensure adequate illumination.
What kind of soil is best for growing bok choy?
Bok choy prefers well-draining soil that is rich in organic matter. Amend your garden soil with compost or well-rotted manure before planting to improve its fertility and drainage. The ideal soil pH for bok choy is between 6.0 and 7.5. If your soil is acidic, you can add lime to raise the pH.
How often should I water bok choy?
Bok choy needs consistent moisture to thrive. Water deeply and regularly, especially during dry periods. Aim to keep the soil consistently moist but not waterlogged. Mulching around the plants can help retain moisture and suppress weeds. Check the soil moisture regularly by sticking your finger about an inch deep into the soil. If it feels dry, it’s time to water.
What are some common pests and diseases that affect bok choy?
Bok choy can be susceptible to several pests and diseases, including aphids, cabbage worms, flea beetles, and downy mildew. Regularly inspect your plants for signs of infestation or disease. Control aphids with insecticidal soap or neem oil. Handpick cabbage worms and flea beetles or use row covers to protect your plants. Prevent downy mildew by providing good air circulation and avoiding overhead watering. If disease does occur, remove affected leaves promptly.
How do I harvest bok choy?
Bok choy can be harvested at any stage of growth, depending on your preference. For baby bok choy, harvest when the leaves are about 4-6 inches long. For mature bok choy, harvest when the heads are firm and compact, typically about 6-8 weeks after planting. To harvest, cut the entire head at the base of the plant with a sharp knife. You can also harvest individual leaves as needed, starting with the outer leaves.
Can I grow bok choy in containers?
Yes, bok choy grows well in containers. Choose a pot that is at least 12 inches deep and wide to provide enough room for the roots to grow. Use a well-draining potting mix and water regularly. Container-grown bok choy may need more frequent watering than plants grown in the ground.
How do I store bok choy after harvesting?
To store bok choy, wrap it loosely in a damp paper towel and place it in a plastic bag in the refrigerator. It will typically keep for about a week. Avoid washing the bok choy before storing it, as this can promote spoilage. Wash it just before using it.
Can I eat the entire bok choy plant?
Yes, the entire bok choy plant is edible, including the leaves, stems, and flowers. The stems are slightly more fibrous than the leaves, but they are still delicious and nutritious. The flowers are also edible and have a mild, slightly sweet flavor.
What are some ways to use bok choy in cooking?
Bok choy is a versatile vegetable that can be used in a variety of dishes. It can be stir-fried, steamed, boiled, or added to soups and stews. It’s also delicious raw in salads. Some popular bok choy recipes include stir-fried bok choy with garlic and ginger, bok choy soup, and bok choy salad with sesame dressing.
Leave a Comment