
Grow bigger collard greens and transform your garden into a vibrant, leafy paradise! Have you ever dreamed of harvesting collard greens so large they could practically double as umbrellas? Well, dream no more! This isn’t just another gardening article; it’s your personal guide to unlocking the secrets of colossal collards. For generations, collard greens have been a staple in Southern cuisine, symbolizing prosperity and good fortune. From family recipes passed down through generations to their role in celebrating cultural heritage, these leafy greens hold a special place in our hearts and on our tables.
But let’s be honest, sometimes our collard crops fall a little short of our expectations. They might be tasty, but not quite the size we envisioned. That’s where these DIY tricks and hacks come in! I’m going to share simple, effective techniques that anyone can use, regardless of their gardening experience, to grow bigger collard greens than ever before. Imagine the satisfaction of harvesting those massive leaves, knowing you nurtured them to their full potential. Get ready to roll up your sleeves, because we’re about to embark on a journey to collard green greatness!
Growing Giant Collard Greens: My Secrets Revealed!
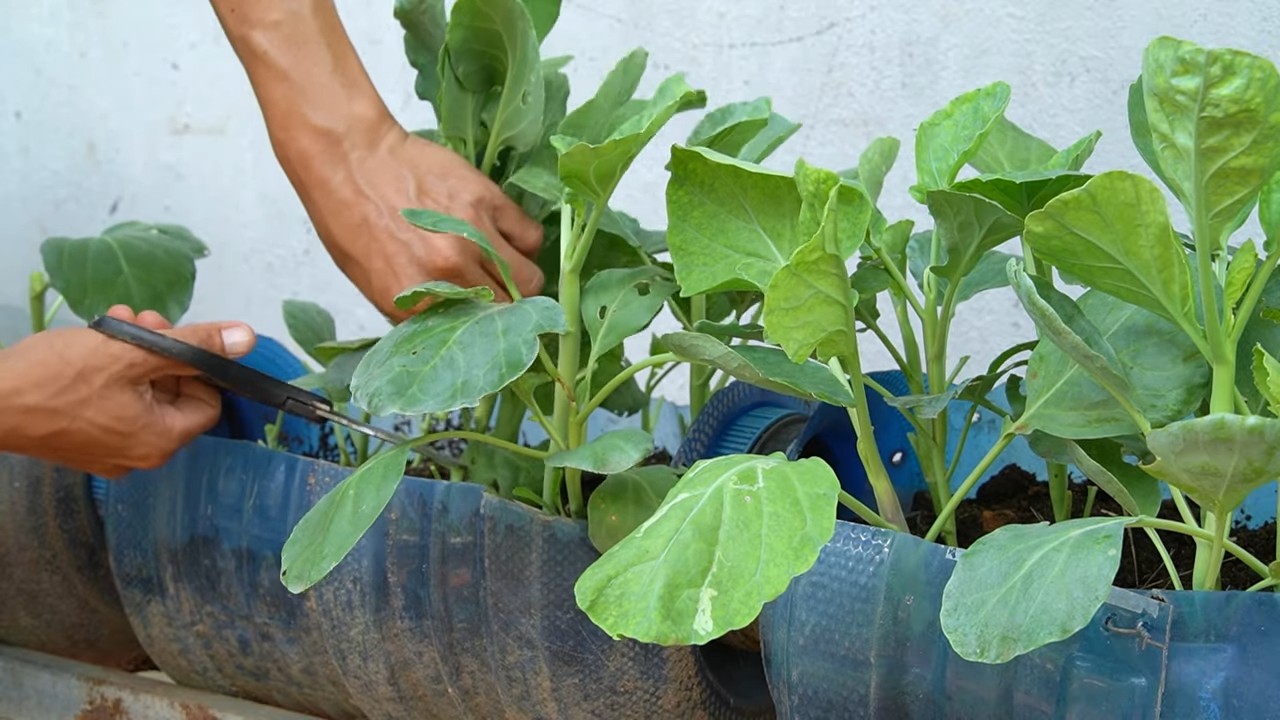
Hey there, fellow gardeners! I’m so excited to share my tried-and-true methods for growing collard greens that are not just big, but absolutely HUGE! We’re talking leaves that could practically double as umbrellas. Forget those puny, store-bought greens – we’re going for collard royalty here! This isn’t just about planting and hoping; it’s about understanding what these leafy giants need to thrive. So, grab your gardening gloves, and let’s get started!
Understanding Collard Greens: The Basics
Before we dive into the nitty-gritty, let’s quickly cover the basics. Collard greens (Brassica oleracea var. viridis) are cool-season crops, meaning they prefer cooler temperatures. They’re incredibly nutritious, packed with vitamins and minerals, and oh-so-delicious when cooked right. They are also relatively easy to grow, making them perfect for beginner and experienced gardeners alike.
* Sunlight: Collard greens need at least 6 hours of sunlight per day. More is always better!
* Soil: Well-draining soil that is rich in organic matter is key.
* Water: Consistent moisture is crucial, especially during hot weather.
* Nutrients: Collard greens are heavy feeders, so they need plenty of nutrients to grow big and strong.
* pH: Aim for a soil pH between 6.0 and 7.5.
Phase 1: Preparing the Soil – The Foundation for Success
The secret to truly massive collard greens starts with the soil. Think of it as building a strong foundation for a skyscraper. You wouldn’t skimp on the foundation, would you? Neither should you skimp on soil preparation!
1. Soil Testing: First things first, test your soil! You can get a soil testing kit from your local garden center or send a sample to your local agricultural extension office. This will tell you the pH of your soil and what nutrients are lacking. This is a crucial step because you can’t fix a problem if you don’t know it exists!
2. Amending the Soil: Based on your soil test results, amend your soil accordingly.
* For acidic soil (pH below 6.0): Add lime to raise the pH. Follow the instructions on the lime package for the correct amount to use.
* For alkaline soil (pH above 7.5): Add sulfur to lower the pH. Again, follow the package instructions.
* Adding Organic Matter: Regardless of your soil pH, adding organic matter is always a good idea. I like to use a combination of compost, well-rotted manure, and leaf mold. Spread a 2-3 inch layer of organic matter over the planting area and work it into the top 6-8 inches of soil. This will improve drainage, water retention, and nutrient availability.
3. Fertilizing: Collard greens are heavy feeders, so you’ll need to add fertilizer to the soil. I recommend using a slow-release fertilizer that is specifically formulated for leafy greens. Follow the instructions on the fertilizer package for the correct amount to use. Alternatively, you can use an organic fertilizer such as bone meal or blood meal.
4. Tilling or Digging: Once you’ve amended and fertilized the soil, it’s time to till or dig it. This will help to incorporate the amendments and fertilizer into the soil and create a loose, well-aerated planting bed. If you’re using a tiller, till the soil to a depth of 6-8 inches. If you’re digging by hand, use a garden fork or spade to turn over the soil to the same depth.
5. Creating Raised Beds (Optional): If your soil is poorly drained, consider creating raised beds. Raised beds will improve drainage and allow the soil to warm up faster in the spring. To create a raised bed, simply mound up the soil to a height of 6-12 inches and a width of 3-4 feet.
Phase 2: Planting Your Collard Greens – Timing is Everything!
Now that your soil is prepped and ready, it’s time to plant your collard greens! Timing is crucial for getting the biggest and best harvest.
1. Starting from Seed vs. Transplants: You can start collard greens from seed or purchase transplants from your local garden center. Starting from seed is more economical, but it takes longer. Transplants are more expensive, but they give you a head start. I personally prefer to start my collard greens from seed indoors about 6-8 weeks before the last expected frost.
2. Sowing Seeds Indoors (If Starting from Seed):
* Fill seed trays or small pots with a seed-starting mix.
* Sow the seeds about 1/4 inch deep.
* Water gently and keep the soil moist.
* Place the seed trays or pots in a warm, sunny location or under grow lights.
* Once the seedlings have developed a few sets of true leaves, thin them out so that only the strongest seedling remains in each pot.
3. Hardening Off Transplants: Before transplanting your collard greens outdoors, you’ll need to harden them off. This means gradually exposing them to outdoor conditions over a period of 7-10 days. Start by placing the transplants outdoors in a sheltered location for a few hours each day, gradually increasing the amount of time they spend outdoors.
4. Transplanting Outdoors:
* Choose a cloudy day to transplant your collard greens. This will help to reduce transplant shock.
* Dig holes that are slightly larger than the root balls of the transplants.
* Carefully remove the transplants from their pots and gently loosen the roots.
* Place the transplants in the holes and backfill with soil.
* Water thoroughly.
5. Direct Sowing (If Sowing Seeds Directly):
* Sow the seeds about 1/2 inch deep and 1-2 inches apart in rows.
* Thin the seedlings to 18-24 inches apart once they have developed a few sets of true leaves.
6. Spacing: Space your collard greens 18-24 inches apart in rows that are 2-3 feet apart. This will give them plenty of room to grow.
Phase 3: Caring for Your Collard Greens – The Secret Sauce
Once your collard greens are planted, it’s important to provide them with the care they need to thrive. This is where the “secret sauce” comes in!
1. Watering: Water your collard greens regularly, especially during hot weather. Aim to keep the soil consistently moist, but not waterlogged. I like to water deeply and less frequently, rather than shallowly and more often. This encourages the roots to grow deeper, making the plants more drought-tolerant.
2. Fertilizing (Continued): Collard greens are heavy feeders, so you’ll need to continue fertilizing them throughout the growing season. I recommend side-dressing them with a nitrogen-rich fertilizer every 4-6 weeks. Side-dressing means applying the fertilizer to the soil around the plants, rather than directly on the leaves.
3. Weeding: Keep the area around your collard greens free of weeds. Weeds compete with collard greens for water, nutrients, and sunlight. Hand-pulling weeds is the best option, but you can also use a hoe or cultivator.
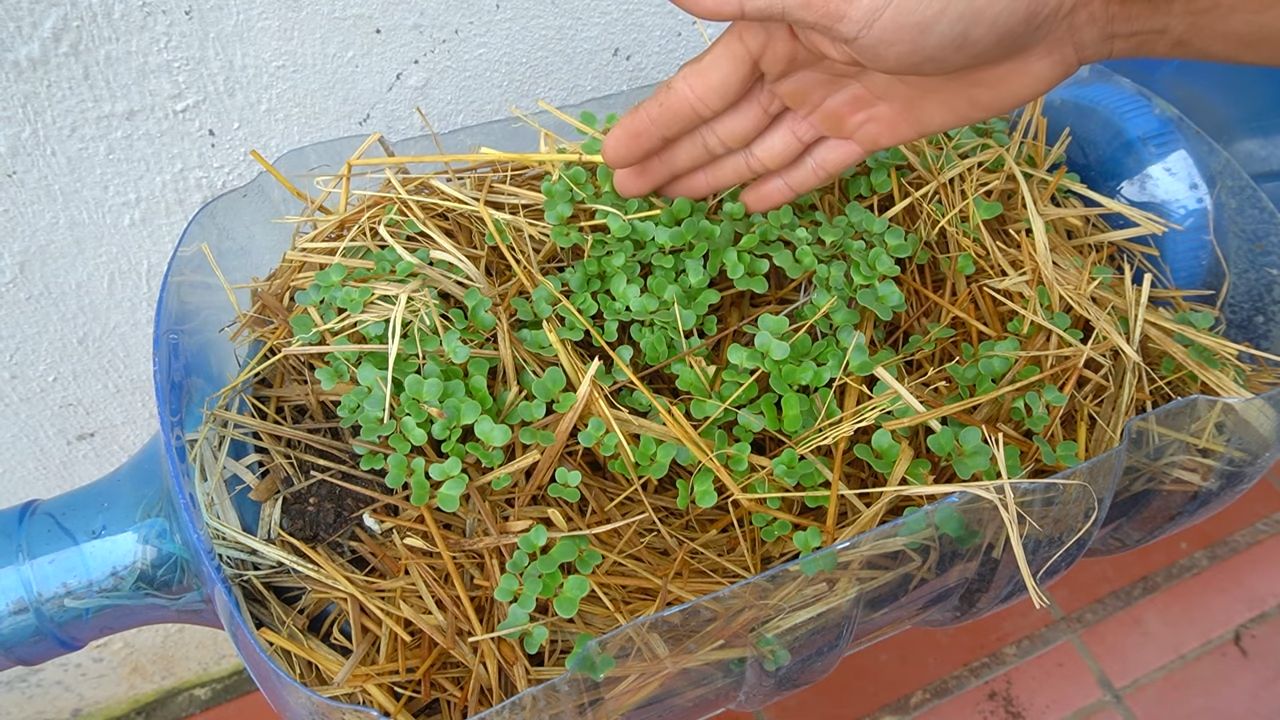
4. Mulching: Apply a layer of mulch around your collard greens. Mulch will help to retain moisture, suppress weeds, and regulate soil temperature. I like to use straw, hay, or shredded leaves as mulch.
5. Pest Control: Collard greens are susceptible to a variety of pests, including cabbage worms, aphids, and flea beetles.
* Cabbage Worms: These green caterpillars can quickly devour your collard greens. Hand-picking them off the plants is the most effective way to control them. You can also use Bacillus thuringiensis (Bt), a natural insecticide that is safe for humans and pets.
* Aphids: These small, sap-sucking insects can weaken your collard greens. Spraying the plants with a strong stream of water can help to dislodge them. You can also use insecticidal soap or neem oil.
* Flea Beetles: These tiny, jumping beetles can create small holes in the leaves of your collard greens. Covering the plants with row covers can help to prevent flea beetles from reaching them. You can also use insecticidal soap or neem oil.
6. Disease Control: Collard greens are also susceptible to a few diseases, including black rot and downy mildew.
* Black Rot: This bacterial disease causes yellowing and browning of the leaves. To prevent black rot, plant disease-resistant varieties of collard greens and avoid overhead watering.
* Downy Mildew: This fungal disease causes white or gray patches on
Conclusion
So, there you have it! This simple, yet incredibly effective DIY trick for encouraging larger, more robust collard greens is a game-changer for any gardener, whether you’re a seasoned pro or just starting out. We’ve walked you through the process, highlighting the key steps and explaining the science behind why it works. But why is this a must-try?
Firstly, the results speak for themselves. Imagine harvesting collard greens so large they practically overflow your basket! This isn’t just about bragging rights; it’s about maximizing your yield and getting the most out of your garden space. More greens mean more delicious and nutritious meals for you and your family.
Secondly, this method is incredibly cost-effective. You likely already have most of the materials you need lying around your house or garden shed. No need to spend a fortune on expensive fertilizers or specialized equipment. This is a budget-friendly way to significantly improve your collard green harvest.
Thirdly, it’s environmentally friendly. By using natural methods to boost your plant’s growth, you’re reducing your reliance on synthetic chemicals that can harm the environment. You’re contributing to a healthier ecosystem while enjoying the fruits (or rather, the greens!) of your labor.
But the benefits don’t stop there. This DIY trick also promotes healthier plants overall. Stronger roots, thicker stems, and more vibrant leaves are all signs of a thriving plant that is better equipped to resist pests and diseases. You’ll spend less time worrying about your collard greens and more time enjoying them.
Now, let’s talk about variations. While the method we’ve outlined is a great starting point, feel free to experiment and adapt it to your specific needs and preferences. For example, you could try using different types of organic matter to enrich the soil. Compost, aged manure, or even coffee grounds can all provide valuable nutrients to your collard greens. You can also adjust the frequency of watering and feeding based on your local climate and soil conditions.
Another variation to consider is companion planting. Certain plants, such as marigolds and nasturtiums, can help deter pests and attract beneficial insects to your collard greens. Experiment with different combinations to see what works best in your garden.
Remember, gardening is all about learning and experimenting. Don’t be afraid to try new things and see what works best for you. The most important thing is to have fun and enjoy the process.
We are confident that this DIY trick will help you grow bigger collard greens than you ever thought possible. But don’t just take our word for it. We encourage you to try it out for yourself and see the results firsthand.
Once you’ve given it a try, we’d love to hear about your experience. Share your photos, tips, and tricks in the comments section below. Let’s create a community of gardeners who are passionate about growing the best collard greens possible! We can all learn from each other and help each other succeed. So, get out there, get your hands dirty, and start growing!
Frequently Asked Questions (FAQ)
What kind of soil is best for growing collard greens?
Collard greens thrive in well-drained soil that is rich in organic matter. A slightly acidic to neutral pH (around 6.0 to 7.0) is ideal. Before planting, amend your soil with compost, aged manure, or other organic materials to improve its fertility and drainage. If your soil is heavy clay, consider adding sand or perlite to improve drainage. A soil test can help you determine the pH and nutrient levels of your soil, allowing you to make necessary adjustments.
How often should I water my collard greens?
Collard greens need consistent moisture, especially during hot and dry weather. Water deeply and regularly, aiming to keep the soil consistently moist but not waterlogged. A good rule of thumb is to water when the top inch of soil feels dry to the touch. Mulching around your plants can help retain moisture and reduce the need for frequent watering. The frequency of watering will depend on your local climate, soil type, and the age of your plants. Younger plants will require more frequent watering than established plants.
What are some common pests and diseases that affect collard greens, and how can I prevent them?
Common pests that attack collard greens include aphids, cabbage worms, flea beetles, and slugs. Diseases include black rot, downy mildew, and clubroot. To prevent these problems, practice good garden hygiene, such as removing plant debris and weeds regularly. Use row covers to protect your plants from pests. Encourage beneficial insects, such as ladybugs and lacewings, which prey on aphids and other pests. Choose disease-resistant varieties of collard greens. Rotate your crops each year to prevent the buildup of soilborne diseases. If you encounter pests or diseases, treat them promptly with organic pesticides or fungicides.
How much sunlight do collard greens need?
Collard greens need at least 6 hours of sunlight per day to thrive. However, they can tolerate partial shade, especially in hot climates. If you live in a region with intense summer heat, consider planting your collard greens in a location that receives morning sun and afternoon shade. This will help prevent the leaves from scorching.
When is the best time to harvest collard greens?
Collard greens can be harvested at any time, but they are typically ready to harvest when the leaves are about 10-12 inches long. Harvest the outer leaves first, leaving the inner leaves to continue growing. This will allow you to harvest your collard greens over a longer period. The flavor of collard greens improves after a frost, so consider harvesting them in the fall or winter.
Can I grow collard greens in containers?
Yes, collard greens can be successfully grown in containers. Choose a large container (at least 12 inches in diameter) with drainage holes. Use a high-quality potting mix that is rich in organic matter. Water regularly and fertilize every few weeks with a balanced fertilizer. Place the container in a location that receives at least 6 hours of sunlight per day.
What are some good companion plants for collard greens?
Good companion plants for collard greens include:
* **Aromatic herbs:** Rosemary, thyme, and sage can help deter pests.
* **Marigolds:** These flowers repel nematodes and other soil pests.
* **Nasturtiums:** These flowers attract aphids away from your collard greens.
* **Garlic and onions:** These plants repel many common pests.
* **Dill:** Attracts beneficial insects like ladybugs.
Avoid planting collard greens near other members of the brassica family (e.g., broccoli, cabbage, kale), as they can attract the same pests and diseases.
How can I improve the flavor of my collard greens?
The flavor of collard greens can be improved by adding a variety of ingredients during cooking. Common additions include:
* **Smoked meats:** Ham hocks, bacon, or smoked turkey add a rich, smoky flavor.
* **Vinegar:** A splash of apple cider vinegar or balsamic vinegar adds acidity and brightness.
* **Hot sauce:** Adds a spicy kick.
* **Onions and garlic:** Provide a savory base flavor.
* **Sugar or molasses:** A touch of sweetness can balance the bitterness of the greens.
Experiment with different combinations of ingredients to find your favorite flavor profile.
How do I store collard greens after harvesting?
To store collard greens after harvesting, wash them thoroughly and remove any damaged or yellowed leaves. Wrap the greens in a damp paper towel and place them in a plastic bag in the refrigerator. They will typically last for 3-5 days. For longer storage, you can blanch and freeze the greens.
What if my collard greens are bitter?
Bitterness in collard greens can be caused by several factors, including hot weather, lack of water, and over-maturity. To reduce bitterness, harvest the greens after a frost, water them regularly, and avoid harvesting them when they are too old. Soaking the greens in cold water for 30 minutes before cooking can also help to reduce bitterness. Adding a touch of sugar or vinegar during cooking can also help to balance the flavor.
Leave a Comment