
Grow Basil Indoors? Absolutely! Imagine having fresh, fragrant basil readily available, even when the snow is falling outside. No more sad, wilted supermarket basil – just vibrant, flavorful leaves ready to elevate your pasta dishes, salads, and pesto. For centuries, basil has been cherished not only for its culinary uses but also for its purported medicinal properties and symbolic significance in various cultures. From ancient Rome, where it was associated with love and fertility, to India, where it’s considered a sacred herb, basil’s rich history adds another layer of appreciation to this amazing plant.
But let’s be honest, sometimes life gets in the way, and maintaining an outdoor herb garden isn’t always feasible. That’s where the magic of indoor gardening comes in! I’m here to share some simple, effective DIY tricks and hacks that will empower you to grow basil indoors successfully, regardless of your experience level. Whether you’re a seasoned gardener or a complete newbie, these tips will help you overcome common challenges like insufficient sunlight, pests, and watering issues. Get ready to transform your windowsill into a thriving basil oasis and enjoy the taste of summer all year round!
Growing Basil Indoors: A Beginner’s Guide to Fresh Herbs Year-Round
Hey there, fellow herb enthusiasts! Ever dreamt of having fresh, fragrant basil readily available, even when the snow’s piling up outside? Well, dream no more! Growing basil indoors is totally achievable, and I’m here to walk you through every step. Trust me, there’s nothing quite like snipping off a few leaves for your pasta sauce or pesto, knowing you grew them yourself. Let’s get started!
Choosing the Right Basil Variety
Not all basil varieties are created equal when it comes to indoor growing. Some are more compact and better suited for containers. Here are a few of my favorites:
- Genovese Basil: This is your classic Italian basil, perfect for pesto and all sorts of culinary delights. It’s relatively easy to grow indoors and has a fantastic flavor.
- Dwarf Basil: As the name suggests, this variety stays small and bushy, making it ideal for smaller pots and windowsills. It has a slightly spicier flavor than Genovese.
- Lemon Basil: If you’re looking for something a little different, lemon basil adds a bright, citrusy note to your dishes. It’s also quite attractive with its lighter green leaves.
- Thai Basil: For those who love Asian cuisine, Thai basil is a must-have. It has a distinct anise-like flavor and is perfect for stir-fries and soups.
Gathering Your Supplies
Before we dive into the planting process, let’s make sure you have everything you need. Here’s a checklist:
- Basil Seeds or Seedlings: You can start from seeds or buy small basil plants from your local nursery. Seeds are more economical, but seedlings will give you a head start.
- Potting Mix: Use a high-quality, well-draining potting mix. Avoid using garden soil, as it can become compacted in containers.
- Pots: Choose pots that are at least 6 inches in diameter. Make sure they have drainage holes to prevent waterlogging. Terra cotta pots are a great option because they allow the soil to breathe.
- Grow Lights (Optional but Recommended): Basil needs plenty of light to thrive. If you don’t have a sunny windowsill, consider investing in a grow light.
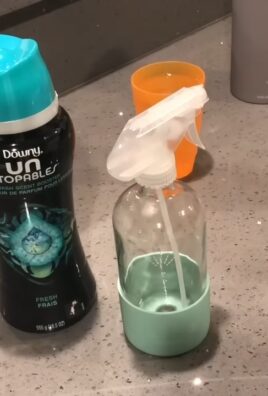
- Watering Can or Spray Bottle: For gentle watering.
- Fertilizer: A balanced liquid fertilizer will help your basil grow strong and healthy.
- Small Shovel or Trowel: For planting.
Planting Your Basil
Okay, now for the fun part! Let’s get those basil seeds or seedlings into their new home.
Starting from Seeds
1. Prepare the Pot: Fill your pot with potting mix, leaving about an inch of space at the top. Gently pat down the soil.
2. Sow the Seeds: Sprinkle the basil seeds evenly over the surface of the soil. You don’t need to bury them too deep; just lightly press them into the soil.
3. Water Gently: Use a spray bottle to mist the soil. You want to keep it moist but not soggy.
4. Cover the Pot (Optional): To create a humid environment, you can cover the pot with plastic wrap or a clear plastic bag. This will help the seeds germinate.
5. Place in a Warm Location: Basil seeds need warmth to germinate. Place the pot in a warm spot, ideally around 70-75°F (21-24°C).
6. Wait for Germination: Basil seeds typically germinate in 5-10 days. Once the seedlings emerge, remove the plastic wrap.
7. Thin the Seedlings: Once the seedlings have a few sets of leaves, thin them out so that they are spaced about 2-3 inches apart. This will give them enough room to grow.
Planting Seedlings
1. Prepare the Pot: Fill your pot with potting mix, leaving about an inch of space at the top.
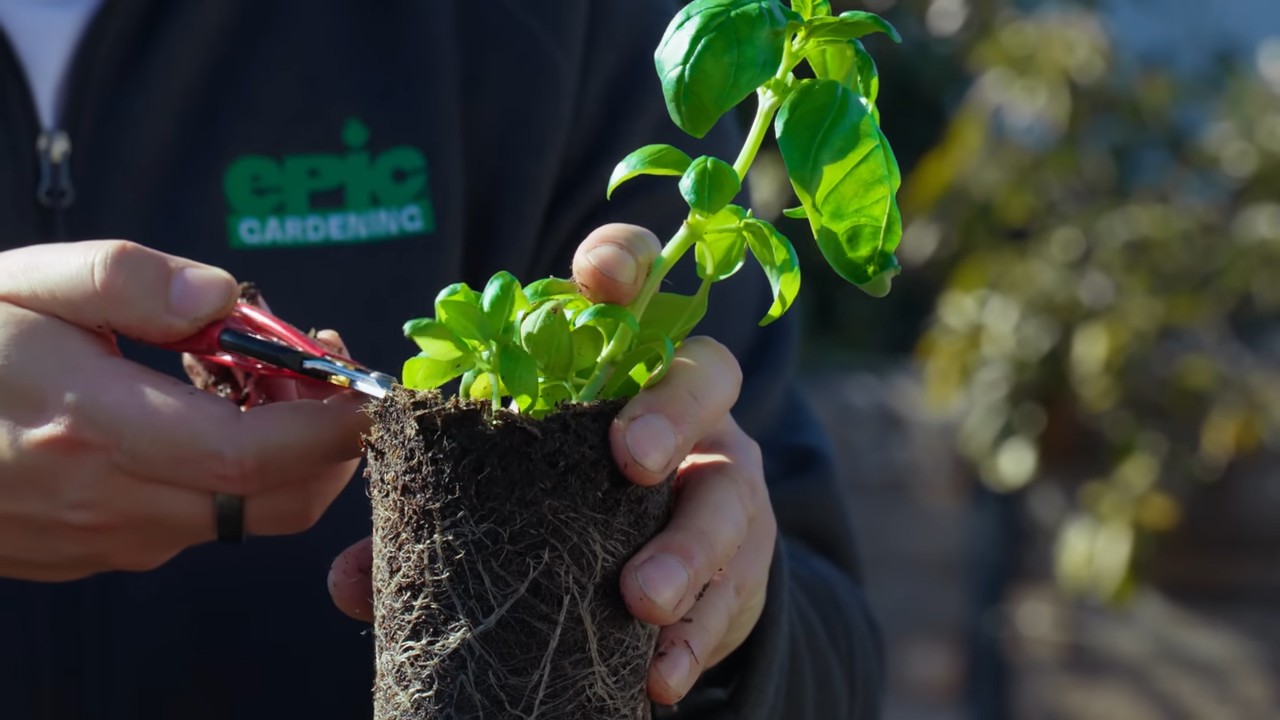
2. Remove the Seedling from its Container: Gently squeeze the sides of the container to loosen the seedling. Carefully remove it, being careful not to damage the roots.
3. Plant the Seedling: Dig a small hole in the potting mix and place the seedling in the hole. Make sure the top of the root ball is level with the surface of the soil.
4. Fill in the Hole: Gently fill in the hole with potting mix and pat it down lightly.
5. Water Thoroughly: Water the seedling thoroughly until the water drains out of the bottom of the pot.
Caring for Your Basil Plant
Now that your basil is planted, it’s time to provide it with the care it needs to thrive.
Light
Basil needs at least 6-8 hours of sunlight per day. If you don’t have a sunny windowsill, use a grow light. Place the grow light about 6-12 inches above the plant. I’ve found that LED grow lights work really well and don’t generate too much heat.
Watering
Water your basil plant when the top inch of soil feels dry to the touch. Avoid overwatering, as this can lead to root rot. Make sure the pot has good drainage. I usually water mine every 2-3 days, but it depends on the humidity and temperature in my home.
Fertilizing
Feed your basil plant with a balanced liquid fertilizer every 2-4 weeks. Follow the instructions on the fertilizer label. I like to use an organic fertilizer to keep things natural.
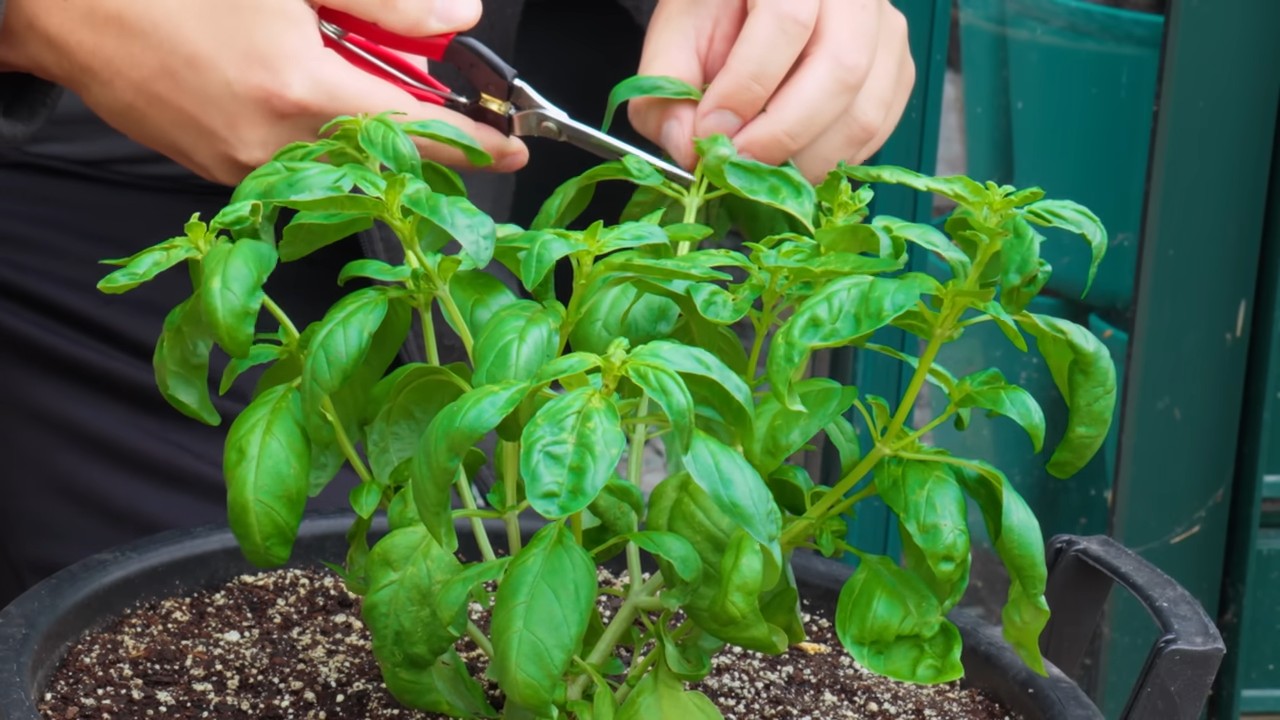
Pruning
Pruning is essential for keeping your basil plant bushy and productive. When the plant is about 6 inches tall, pinch off the top set of leaves. This will encourage the plant to branch out and produce more leaves. Continue to pinch off the top sets of leaves regularly.
Important Tip: Always pinch off the leaves above a set of new leaves. This will encourage the plant to grow in that direction.
Pest Control
Basil is relatively pest-resistant, but it can sometimes be affected by aphids, spider mites, or whiteflies. If you notice any pests, try spraying the plant with insecticidal soap. You can also try wiping the leaves with a damp cloth.
Harvesting Your Basil
The best part of growing basil is, of course, harvesting it! You can start harvesting basil leaves when the plant is about 6-8 inches tall.
1. Choose the Leaves: Select the largest, healthiest leaves to harvest.
2. Pinch or Cut the Leaves: Pinch or cut the leaves off the plant, leaving about an inch of stem.
3. Harvest Regularly: The more you harvest, the more the plant will produce. Don’t be afraid to cut back the plant quite a bit; it will bounce back quickly.
Pro Tip: To preserve your basil harvest, you can dry the leaves, freeze them, or make pesto.
Troubleshooting
Even with the best care, you might encounter some problems when growing basil indoors. Here are a few common issues and how to fix them:
- Yellowing Leaves: This can be caused by overwatering, underwatering, or nutrient deficiencies. Check the soil moisture and adjust your watering schedule accordingly. If the soil is dry, water thoroughly. If the soil is soggy, allow it to dry out before watering again. You may also need to fertilize the plant.
- Leggy Growth: This is usually caused by insufficient light. Move the plant to a sunnier location or use a grow light.
- Small Leaves: This can be caused by nutrient deficiencies or insufficient light. Fertilize the plant and make sure it’s getting enough light.
- Root Rot: This is caused by overwatering. Make sure the pot has good drainage and allow the soil to dry out between waterings.
Enjoying Your Homegrown Basil
Congratulations! You’ve successfully grown basil indoors. Now it’s time to enjoy the fruits (or rather, leaves) of your labor. Use your fresh basil in all your favorite recipes, from pasta sauces and pizzas to salads and soups. There’s nothing quite like the taste of homegrown basil!
I hope this guide has been helpful. Happy gardening!
Conclusion
So, there you have it! Mastering the art of growing basil indoors is not only achievable but also incredibly rewarding. We’ve walked through the essential steps, from selecting the right variety and providing optimal lighting to ensuring proper watering and addressing potential challenges. But why is this DIY trick a must-try?
Firstly, imagine the convenience of having fresh, fragrant basil readily available at your fingertips, regardless of the season. No more last-minute grocery store runs or settling for dried herbs that lack the vibrant flavor of fresh basil. With your own indoor basil garden, you’ll elevate your culinary creations to a whole new level. Think of the pesto, the Caprese salads, the flavorful sauces – all enhanced by the unmistakable taste of homegrown basil.
Secondly, growing basil indoors is a sustainable and cost-effective alternative to purchasing it from the store. You’ll reduce your carbon footprint by eliminating the need for transportation and packaging, and you’ll save money in the long run by avoiding frequent purchases. Plus, it’s a fantastic way to connect with nature and experience the satisfaction of nurturing a plant from seed to harvest.
But the benefits don’t stop there. Growing basil indoors can also be a therapeutic and stress-relieving activity. Tending to your plants, observing their growth, and enjoying their aroma can be incredibly calming and rewarding. It’s a simple way to bring a touch of nature into your home and create a more peaceful and inviting atmosphere.
Now, let’s talk about variations. While we’ve focused on the basic principles of growing basil indoors, there are plenty of ways to customize your approach. For example, you could experiment with different basil varieties, such as Thai basil, lemon basil, or purple basil, to add unique flavors and aromas to your dishes. You could also try growing basil from cuttings, which is a faster and easier way to propagate new plants.
Another variation is to use different types of containers. While we recommended using pots with drainage holes, you could also try using self-watering planters or hydroponic systems. These options can simplify the watering process and provide your basil plants with a consistent supply of moisture and nutrients.
Furthermore, consider companion planting. Basil is known to be a beneficial companion plant for tomatoes, peppers, and other vegetables. By growing basil alongside these plants, you can help to deter pests and improve their overall health and productivity.
Ultimately, the key to success with growing basil indoors is to experiment and find what works best for you and your environment. Don’t be afraid to try new things, make mistakes, and learn from your experiences. The more you experiment, the more you’ll learn about the needs of your basil plants and the more successful you’ll be at growing them.
So, what are you waiting for? Grab a pot, some soil, and some basil seeds or seedlings, and get started on your indoor basil garden today! We’re confident that you’ll be amazed by the results. And don’t forget to share your experiences with us! We’d love to hear about your successes, your challenges, and any tips or tricks that you’ve discovered along the way. Share your photos and stories on social media using #IndoorBasilGarden, and let’s inspire others to join the fun! Let’s all enjoy the rewards of fresh, homegrown basil, all year round.
Frequently Asked Questions (FAQ)
What is the best location for growing basil indoors?
The ideal location for growing basil indoors is a spot that receives at least 6-8 hours of direct sunlight per day. A south-facing window is often the best option. If you don’t have access to enough natural light, you can supplement with grow lights. Position the grow lights a few inches above the basil plants and keep them on for 12-16 hours per day.
How often should I water my indoor basil plant?
Water your basil plant when the top inch of soil feels dry to the touch. Avoid overwatering, as this can lead to root rot. When you water, water thoroughly until water drains out of the drainage holes. Make sure to empty the saucer underneath the pot to prevent the plant from sitting in water. The frequency of watering will depend on factors such as the size of the pot, the type of soil, and the humidity level in your home.
What type of soil is best for growing basil indoors?
Use a well-draining potting mix that is specifically formulated for herbs or vegetables. Avoid using garden soil, as it can be too heavy and may not drain properly. You can also amend your potting mix with perlite or vermiculite to improve drainage.
How do I fertilize my indoor basil plant?
Fertilize your basil plant every 2-4 weeks with a balanced liquid fertilizer. Follow the instructions on the fertilizer label for proper dilution rates. Avoid over-fertilizing, as this can burn the roots of the plant. You can also use a slow-release fertilizer at the time of planting.
How do I harvest basil leaves from my indoor plant?
Harvest basil leaves by pinching or cutting them off just above a leaf node (the point where leaves grow from the stem). This will encourage the plant to branch out and produce more leaves. Avoid removing more than one-third of the plant’s leaves at a time. Regular harvesting will also help to prevent the plant from flowering, which can reduce the flavor of the leaves.
Why are the leaves on my basil plant turning yellow?
Yellowing leaves can be a sign of several problems, including overwatering, underwatering, nutrient deficiencies, or pests. Check the soil moisture to determine if you are watering too much or too little. If the soil is consistently wet, reduce the frequency of watering. If the soil is dry, water more often. You may also need to fertilize your plant if it is lacking nutrients. Inspect the leaves for signs of pests, such as aphids or spider mites.
How do I prevent pests from attacking my indoor basil plant?
To prevent pests from attacking your indoor basil plant, inspect the plant regularly for signs of infestation. If you find pests, you can try washing them off with a strong stream of water or using insecticidal soap. You can also use neem oil to control pests. Avoid using harsh chemicals, as these can harm the plant.
Can I grow basil indoors from seed?
Yes, you can grow basil indoors from seed. Start the seeds in a seed-starting tray or small pots filled with seed-starting mix. Keep the soil moist and warm, and provide plenty of light. Once the seedlings have developed a few sets of true leaves, you can transplant them into larger pots.
How do I propagate basil from cuttings?
To propagate basil from cuttings, take a 4-6 inch cutting from a healthy basil plant. Remove the lower leaves from the cutting and place it in a glass of water. Change the water every few days. After a few weeks, the cutting should develop roots. Once the roots are about an inch long, you can transplant the cutting into a pot filled with potting mix.
My basil plant is flowering. What should I do?
When basil plants flower, they tend to produce fewer leaves and the leaves can become less flavorful. To prevent flowering, pinch off the flower buds as soon as you see them. If your plant has already flowered, you can still use the leaves, but they may not be as flavorful. You can also save the seeds from the flowers to grow new basil plants.
Leave a Comment