
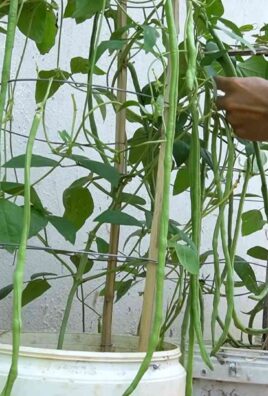
Grow Avocados at Home – imagine plucking a perfectly ripe avocado, grown with your own two hands, right from your backyard! Sounds like a dream, right? Well, it doesn’t have to be! For centuries, avocados have been prized for their creamy texture and incredible health benefits, dating back to ancient Mesoamerica where they were a staple food and even held symbolic significance. Now, you can bring a piece of that history to your own home.
But let’s be honest, the thought of growing your own avocado tree can seem a little daunting. Maybe you’ve tried before and ended up with nothing but a sad, sprouting pit that never quite took off. Or perhaps you’re just intimidated by the whole process. That’s where this DIY guide comes in! I’m here to share some simple, effective tricks and hacks that will dramatically increase your chances of successfully grow avocados at home, even if you don’t have a green thumb.
In today’s world, where we’re increasingly conscious of where our food comes from and eager to embrace sustainable living, learning to grow your own food is more relevant than ever. Plus, store-bought avocados can be expensive and sometimes disappointing. With a little patience and these easy-to-follow steps, you can enjoy a steady supply of delicious, homegrown avocados, save money, and impress your friends and family with your newfound gardening skills. Let’s get started!
Growing Avocados at Home: My DIY Guide for Beginners
Hey everyone! Have you ever wondered what it would be like to grow your own avocados? I tried it, and it’s surprisingly easy and satisfying! In this article, I’ll show you step-by-step how you can grow a small avocado plant from a simple avocado pit. Let’s get started!
What you need:
- An avocado pit (preferably from a ripe avocado)
- Toothpicks
- A glass or cup
- Water
- Potting soil
- A small pot
Preparing the Avocado Pit
Before we start the actual planting, we need to prepare the avocado pit. This is an important step to ensure that it germinates.
- Clean the pit: After you’ve eaten your avocado, wash the pit thoroughly under running water. Remove all leftover fruit pulp, as it can grow mold.
- Find the right side: Pay attention to which side of the pit is the “top” and which is the “bottom.” The top is the side from which the sprout will grow, and the bottom is the side from which the roots will grow. The top is usually a bit pointier, while the bottom is a bit flatter and rounder.
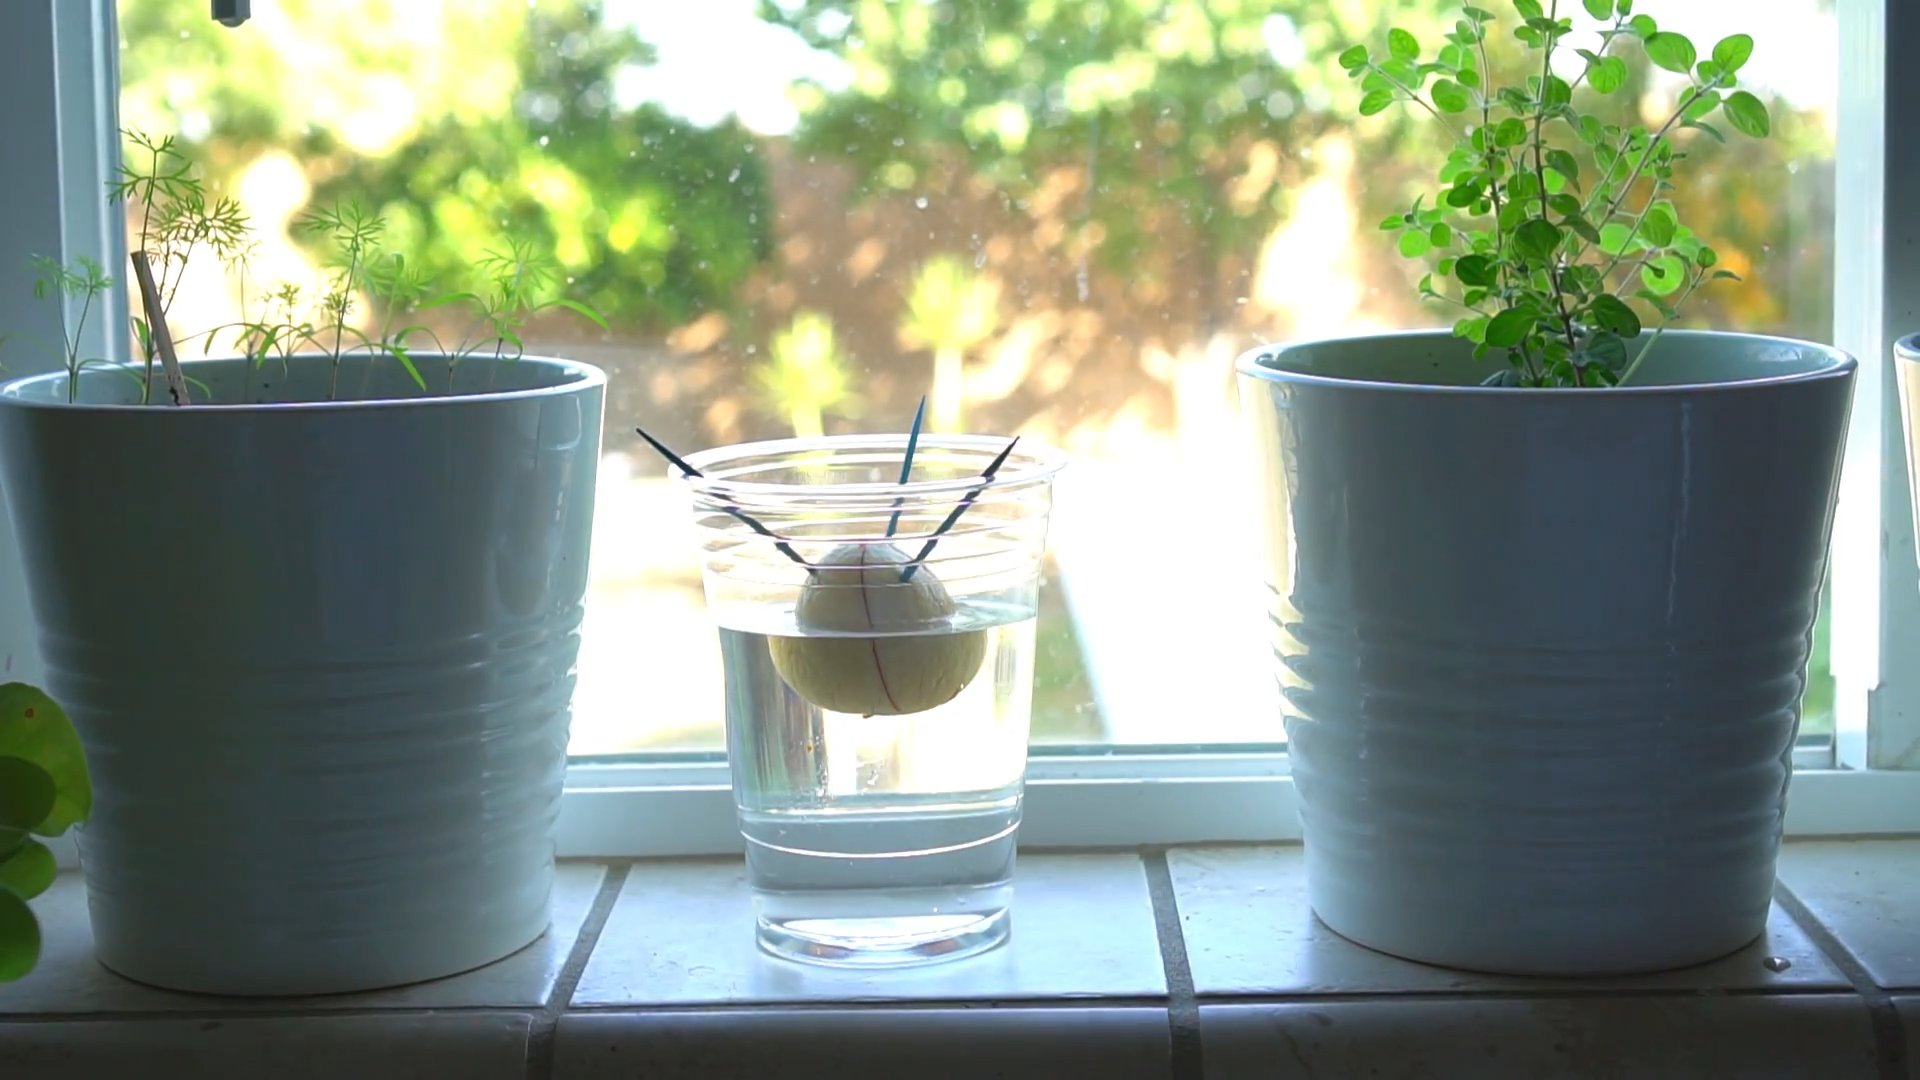
- Insert toothpicks: Take four toothpicks and stick them slightly angled into the middle section of the pit. They should be evenly distributed and serve as supports to hold the pit in the glass of water. Don’t insert the toothpicks too deeply, as you don’t want to damage the pit.
Placing the Avocado Pit in Water
Now for the exciting part: we’re going to let the pit sprout!
- Prepare the glass of water: Fill a glass or cup with water. Make sure the glass is wide enough so the pit doesn’t fall in.
- Position the pit: Place the pit with the toothpicks on the rim of the glass, so that the bottom half of the pit is in the water. The top should remain dry.
- Be patient: Place the glass in a warm, bright place, but not in direct sunlight. Change the water every few days to keep it clean and prevent mold growth.
- Wait and watch: Now it’s time to wait! It can take a few weeks or even months for the pit to crack and form roots. Be patient and don’t give up. You will first see a small crack in the middle of the pit, then a root will develop downwards, and finally, a sprout will grow upwards.
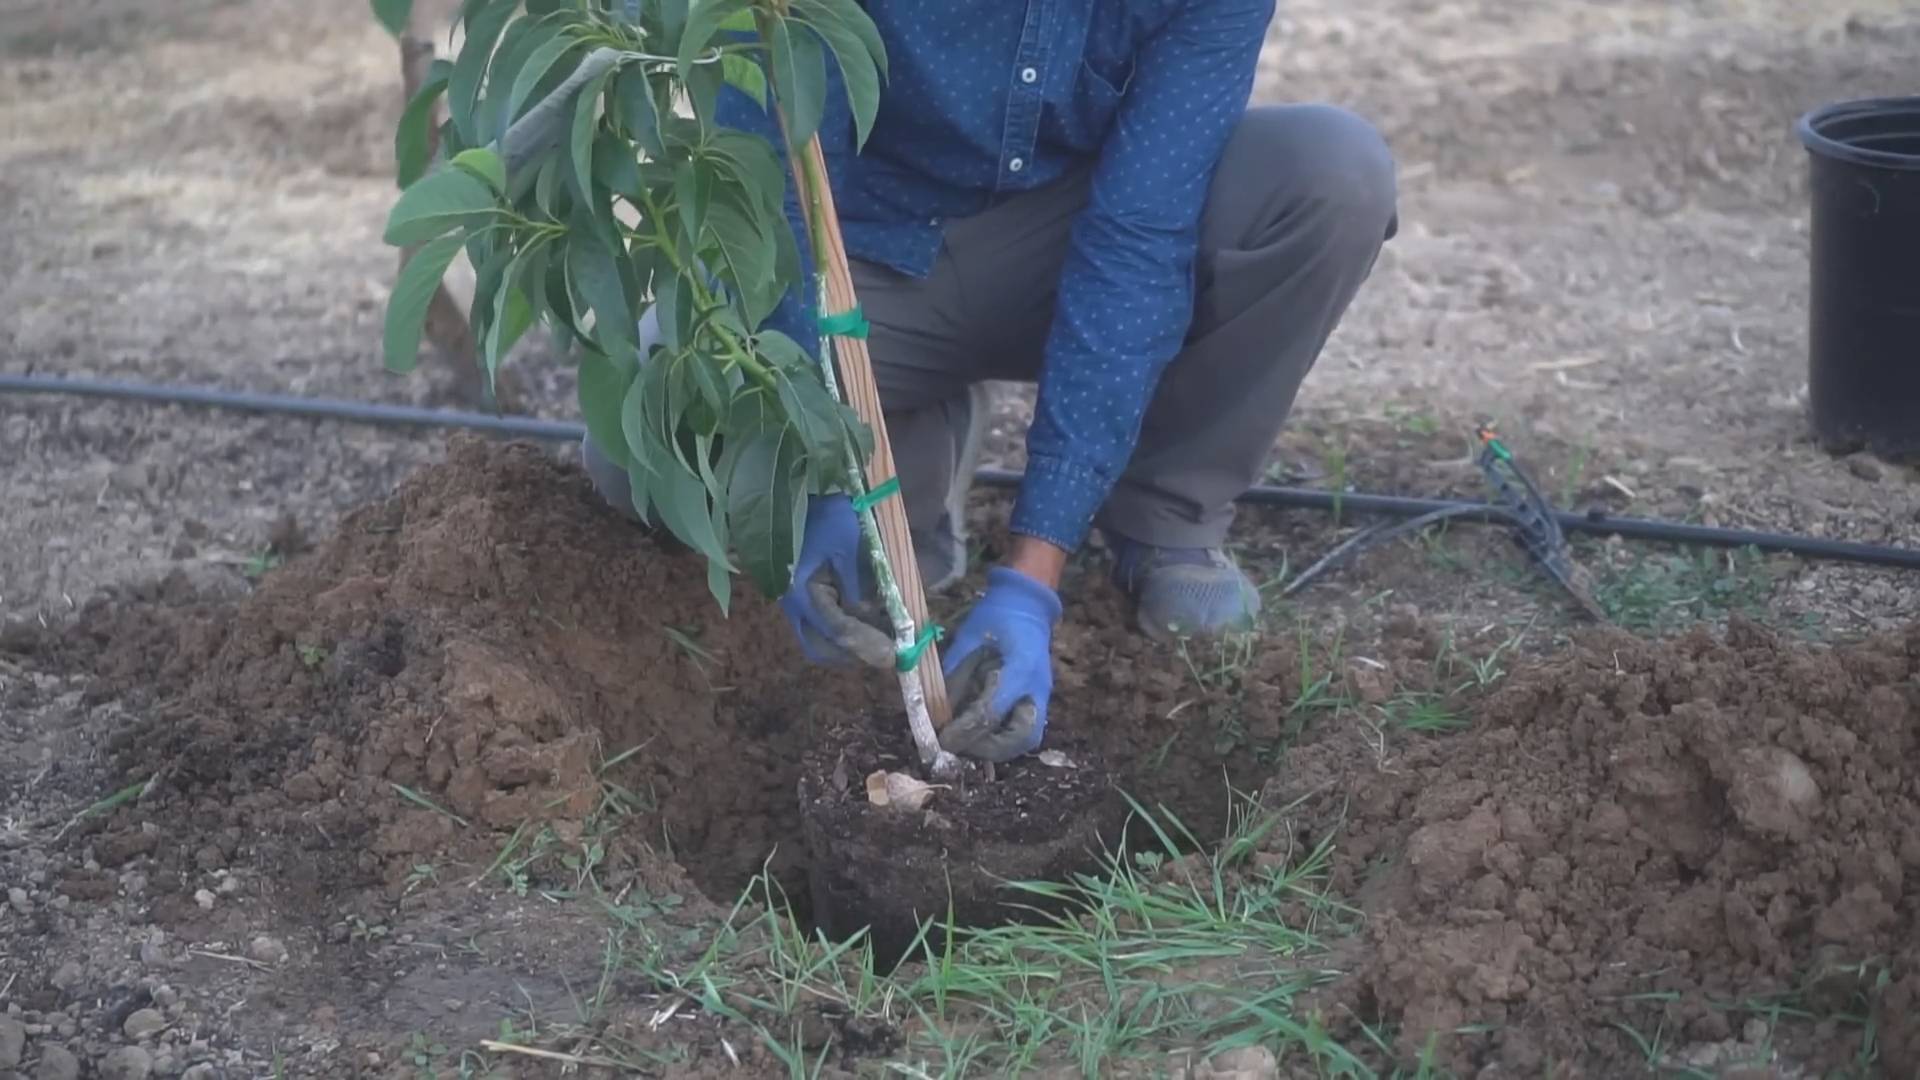
Transplanting into Soil
Once the roots are strong enough (about 5-8 cm or 2-3 inches long) and the sprout has a few leaves, it’s time to transplant the little avocado plant into soil.
- Prepare the pot: Choose a small pot with drainage holes. Fill it with potting soil.
- Carefully remove the plant: Carefully take the avocado plant out of the glass of water. Remove the toothpicks.
- Planting: Make a small hole in the soil and place the avocado plant inside. Make sure the top of the pit is still slightly showing above the soil.
- Watering: Gently water the plant so the soil is moist, but not wet.
Caring for Your Avocado Plant
Now that your avocado plant is in soil, it’s important to care for it properly so that it grows healthy.
- The right location: Place the plant in a bright spot, but avoid direct sunlight, especially during the hot midday hours.
- Proper watering: Water the plant regularly, but let the soil dry out slightly between waterings. Overwatering can lead to root rot.
- Fertilizing: During the growing season (spring and summer), fertilize the plant every few weeks with a liquid houseplant fertilizer.
- Pruning: If the plant gets too tall or has too few leaves, you can prune it. Simply cut off the tip of the main shoot to encourage the growth of new side shoots.
- Repotting: When the plant becomes too large for its pot, you will need to repot it into a larger one.
Common Problems and Solutions
Problems can also arise when growing avocados. Here are some common problems and how you can solve them:
- Yellow leaves: Yellow leaves can be a sign of overwatering, underwatering, or a nutrient deficiency. Check your watering habits and fertilize the plant if necessary.
- Brown leaf tips: Brown leaf tips can be caused by dry air. Increase the humidity by regularly spraying the plant with water or placing it near a humidifier.
- Pests: Avocado plants can be infested by pests like spider mites or aphids. Combat the pests with a suitable insecticide or with natural remedies like neem oil.
- No growth: If the plant isn’t growing, it could be due to too little light, not enough nutrients, or temperatures that are too low. Make sure the plant gets enough light, fertilize it regularly, and keep it warm.
Why My Avocado Probably Won’t Bear Fruit (and That’s Okay!)
It’s important to know that avocados grown from pits often take a very long time to bear fruit (if at all). It can take 5-10 years, and the fruits may not be of the same quality as the avocado the pit came from. This is because avocados do not grow “true to seed” when grown from a seed.
But hey, that’s not the point! Growing an avocado plant from a pit is a great experiment, a beautiful houseplant, and a super way to introduce children to nature. Enjoy the process and celebrate every new leaf!
Additional Tips and Tricks
- Try different pits: Try pits from different avocado varieties to see which ones germinate and grow best.
- Patience is key: Don’t give up if the pit doesn’t sprout immediately. It can take several weeks or months.
- Rotate the plant: Rotate the plant regularly so it gets even light.
- Involve friends and family: Share your experiences with friends and family and grow avocados together!
Overwintering Your Avocado Plant
Especially in our latitudes, overwintering is an important point you should consider to help your little avocado plant get through the winter well.
Pests: Pay special attention to pests in winter, as the dry air from heating can promote the spread of spider mites and other pests. Check the plant regularly and combat pests if necessary.
Temperature: Avocados don’t like it too cold. The ideal temperature for overwintering is between 10 and 15 degrees Celsius (50-59°F). Avoid placing the plant near cold windows or drafts.
Light: Even in winter, the avocado plant needs sufficient light. If the location is not bright enough, you can use a grow lamp to provide additional light.
Watering: In winter, the plant needs less water than in summer. Water it only when the soil is dry, and avoid waterlogging.
Fertilizing: You should not fertilize the plant in winter, as it grows less actively during this time.
Conclusion
So, there you have it! Growing avocados at home, while requiring patience and a little dedication, is an incredibly rewarding experience. It’s more than just a fun project; it’s a chance to connect with nature, learn about the life cycle of a plant, and eventually, enjoy the fruits (literally!) of your labor. We’ve walked you through the process, from sprouting the pit to nurturing your young tree, and hopefully, we’ve demystified the process of how to grow avocados at home.
Why is this DIY trick a must-try? Because it’s sustainable, educational, and ultimately, delicious. Imagine the satisfaction of harvesting your own avocados, knowing you nurtured them from a simple seed. Think of the conversations you’ll have, sharing your homegrown guacamole with friends and family. And consider the environmental benefits of reducing your reliance on commercially grown avocados, which often travel long distances.
But the journey doesn’t end here! Feel free to experiment with different avocado varieties. Some are better suited for indoor growing than others. Consider the ‘Wurtz’ avocado, also known as the ‘Little Cado,’ which is a dwarf variety perfect for containers. You can also try grafting a known fruiting variety onto your seedling to speed up the fruiting process and ensure you get the type of avocado you desire.
Don’t be afraid to get creative with your growing environment. Experiment with different soil mixes to find what works best for your climate and avocado variety. Consider using grow lights to supplement natural sunlight, especially during the winter months. And remember, consistent care is key. Regular watering, fertilization, and pruning will help your avocado tree thrive.
We understand that growing avocados from seed can be a test of patience. It can take several years for a tree grown from seed to produce fruit, and there’s no guarantee that it will produce fruit at all. However, the journey itself is worth it. The satisfaction of watching your avocado tree grow and develop is a reward in itself.
We encourage you to embark on this exciting adventure of growing avocados at home. It’s a project that will bring you joy, knowledge, and eventually, delicious avocados. Don’t be discouraged by setbacks. Every gardener faces challenges, and learning from those challenges is part of the fun.
We’d love to hear about your experiences! Share your photos, tips, and stories in the comments below. Let’s create a community of avocado enthusiasts, sharing our knowledge and supporting each other on this journey. What variety of avocado are you trying to grow? What challenges have you faced, and how have you overcome them? Your insights could be invaluable to other aspiring avocado growers.
Remember, growing avocados at home is not just about the destination; it’s about the journey. It’s about connecting with nature, learning about the life cycle of a plant, and experiencing the satisfaction of nurturing something from seed to fruit. So, grab an avocado pit, follow our guide, and get ready to embark on this exciting adventure. We can’t wait to see your homegrown avocados!
Frequently Asked Questions (FAQ)
How long does it take for an avocado tree grown from seed to produce fruit?
This is one of the most common questions, and the answer is, unfortunately, it varies. Generally, avocado trees grown from seed can take anywhere from 5 to 13 years to produce fruit. This is because the tree needs to mature and develop a strong root system before it can dedicate energy to fruit production. Grafting a branch from a mature, fruit-bearing tree onto your seedling can significantly reduce this time, potentially yielding fruit in as little as 2-3 years. However, if you are growing from seed, patience is key.
What kind of soil is best for growing avocados?
Avocados thrive in well-draining soil that is slightly acidic to neutral (pH 6.0-7.0). A good mix would include equal parts potting soil, sand, and peat moss or compost. The sand helps with drainage, while the peat moss or compost provides essential nutrients. Avoid heavy clay soils, as they can retain too much water and lead to root rot. You can also purchase specialized avocado potting mixes from garden centers.
How often should I water my avocado tree?
Watering frequency depends on several factors, including the size of the pot, the climate, and the time of year. Generally, you should water your avocado tree when the top inch of soil feels dry to the touch. Avoid overwatering, as this can lead to root rot. During the summer months, you may need to water more frequently than in the winter. Ensure the pot has adequate drainage holes to prevent water from accumulating at the bottom.
What are the signs of an unhealthy avocado tree?
Several signs can indicate that your avocado tree is unhealthy. Yellowing leaves can be a sign of overwatering, underwatering, or nutrient deficiency. Drooping leaves can also indicate overwatering or underwatering. Brown spots on the leaves can be a sign of fungal disease. If you notice any of these signs, it’s important to investigate the cause and take corrective action. Check the soil moisture, examine the leaves for pests or diseases, and consider fertilizing your tree.
How much sunlight does an avocado tree need?
Avocado trees need at least 6 hours of direct sunlight per day to thrive. If you are growing your avocado tree indoors, place it near a sunny window or supplement with grow lights. Rotate the tree regularly to ensure that all sides receive adequate sunlight. Insufficient sunlight can lead to leggy growth and reduced fruit production.
Do I need to fertilize my avocado tree?
Yes, avocado trees benefit from regular fertilization. Use a balanced fertilizer specifically formulated for avocado trees, following the instructions on the label. Fertilize your tree in the spring and summer months, when it is actively growing. Avoid fertilizing in the fall and winter, when the tree is dormant. Over-fertilizing can damage the roots, so it’s important to follow the instructions carefully.
How do I prune my avocado tree?
Pruning is important for maintaining the shape and health of your avocado tree. Prune your tree in the late winter or early spring, before new growth begins. Remove any dead, damaged, or crossing branches. You can also prune to shape the tree and encourage branching. Avoid pruning too heavily, as this can reduce fruit production.
What pests and diseases affect avocado trees?
Avocado trees can be susceptible to various pests and diseases, including aphids, spider mites, scale, and root rot. Regularly inspect your tree for signs of pests or diseases. If you find any, take corrective action immediately. You can use insecticidal soap or horticultural oil to control pests. To prevent root rot, ensure that your soil is well-draining and avoid overwatering.
Can I grow an avocado tree indoors year-round?
Yes, you can grow an avocado tree indoors year-round, especially if you choose a dwarf variety like ‘Wurtz.’ However, you will need to provide adequate sunlight, humidity, and temperature. Place your tree near a sunny window or supplement with grow lights. Maintain a humidity level of around 50-60% by misting the leaves regularly or using a humidifier. Keep the temperature between 60-85°F (15-29°C).
My avocado tree is flowering, but not producing fruit. Why?
Avocado trees have a unique flowering pattern called dichogamy, where the male and female flower parts mature at different times. This can make pollination challenging. To improve fruit set, you can try hand-pollinating the flowers using a small brush. You can also plant two different avocado varieties near each other to encourage cross-pollination. Additionally, ensure that your tree is receiving adequate sunlight, water, and nutrients.
Leave a Comment