
Grow angled luffa at home and transform your backyard into a personal spa supply center! Imagine stepping outside and harvesting your own natural sponges – no more plastic loofahs from the store! This isn’t just about gardening; it’s about embracing a sustainable and rewarding lifestyle. For centuries, luffa has been cultivated in Asia and Africa, not only for its cleansing properties but also as a food source when young. The ancient Egyptians even used luffa fibers for sandals!
But why should you learn to grow angled luffa at home? Well, beyond the satisfaction of growing your own, commercially produced loofahs often undergo harsh chemical treatments. Growing your own ensures a completely natural and chemical-free product. Plus, it’s a fantastic conversation starter! I’m excited to share some simple DIY tricks and hacks that will help you cultivate these amazing gourds, even if you’re a complete beginner. Get ready to ditch those synthetic sponges and embrace the natural goodness of homegrown luffa!
Growing Angled Luffa Vertically for Maximum Yield: A DIY Guide
Hey there, fellow gardening enthusiasts! I’m so excited to share my experience with growing angled luffa (also known as Chinese okra or silk gourd) vertically. It’s a fantastic way to maximize space, get a bigger harvest, and honestly, it just looks really cool in your garden. Angled luffa can be a bit of a challenge, but with the right approach, you’ll be enjoying your own homegrown sponges in no time!
Why Grow Angled Luffa Vertically?
Before we dive into the how-to, let’s talk about why vertical growing is the way to go with angled luffa. These guys are vigorous climbers, and they need a lot of space to sprawl. If you let them grow on the ground, they’ll take over your entire garden! Vertical growing offers several advantages:
* Space Saving: Angled luffa vines can grow incredibly long. Training them vertically allows you to grow them even in smaller gardens or balconies.
* Improved Air Circulation: Vertical growth promotes better air circulation around the leaves and fruits, reducing the risk of fungal diseases.
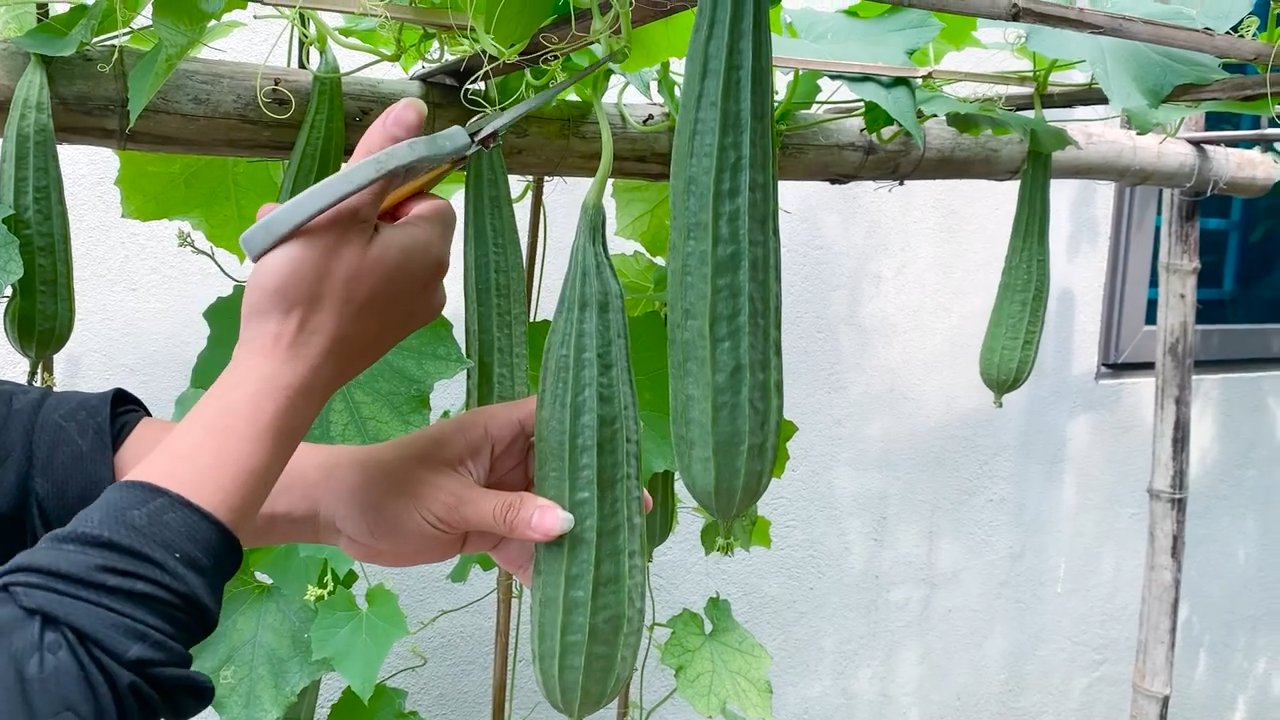
* Easier Harvesting: When the luffas are hanging down, it’s much easier to see them and harvest them when they’re ready. No more crawling around on the ground!
* Better Fruit Quality: Hanging luffas tend to develop straighter and more uniform shapes, which is ideal for sponge production.
* Aesthetic Appeal: Let’s be honest, a wall or trellis covered in lush green luffa vines and dangling gourds is a beautiful sight!
What You’ll Need
Okay, let’s gather our supplies. Here’s what you’ll need to get started:
* Angled Luffa Seeds: You can find these online or at your local garden center. Make sure to choose a variety that’s well-suited to your climate.
* Seed Starting Trays or Pots: For starting your seeds indoors.
* Seed Starting Mix: A light and well-draining mix is essential for successful germination.
* Potting Soil: For transplanting your seedlings into larger containers or directly into the ground.
* Large Pots or a Garden Bed: If you’re growing in containers, choose pots that are at least 15-20 gallons in size.
* Trellis, Fence, or Other Support Structure: This is crucial for vertical growing. A sturdy trellis, a chain-link fence, or even a DIY structure made from bamboo poles will work.
* Gardening Gloves: To protect your hands.
* Watering Can or Hose: For watering your plants.
* Fertilizer: A balanced fertilizer or one specifically formulated for vegetables.
* Twine or Plant Ties: For training the vines to the support structure.
* Pruning Shears: For pruning the vines as needed.
* Optional: Compost or other organic matter to enrich the soil.
Starting Your Angled Luffa Seeds
Angled luffa has a hard seed coat, so it benefits from scarification and soaking to improve germination rates. I’ve found this method works wonders:
1. Scarify the Seeds: Gently rub the seeds with sandpaper or nick them with a knife. Be careful not to damage the inner part of the seed. This helps water penetrate the seed coat.
2. Soak the Seeds: Place the scarified seeds in a bowl of warm water and let them soak for 24-48 hours. This will further soften the seed coat and encourage germination.
3. Prepare Your Seed Starting Trays or Pots: Fill your trays or pots with seed starting mix.
4. Sow the Seeds: Plant the seeds about 1 inch deep in the soil.
5. Water Gently: Water the soil gently to moisten it, but avoid overwatering.
6. Provide Warmth: Angled luffa seeds need warmth to germinate. Place the trays or pots in a warm location, such as on top of a refrigerator or in a greenhouse. You can also use a heat mat.
7. Wait for Germination: Germination typically takes 7-14 days. Keep the soil consistently moist but not soggy.
Transplanting Your Seedlings
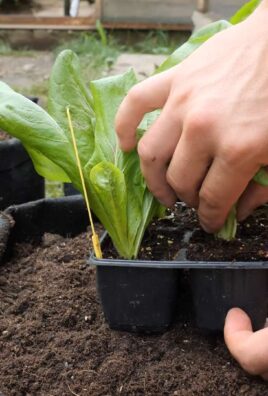
Once your seedlings have developed a few sets of true leaves (the leaves that look like miniature versions of the adult leaves), it’s time to transplant them.
1. Harden Off the Seedlings: Before transplanting, you’ll need to harden off the seedlings. This means gradually exposing them to outdoor conditions over a period of 7-10 days. Start by placing them in a sheltered location for a few hours each day, gradually increasing the amount of time they spend outdoors.
2. Prepare Your Planting Location: Choose a sunny location with well-drained soil. If you’re growing in containers, make sure the pots are large enough to accommodate the mature vines. Amend the soil with compost or other organic matter to improve its fertility.
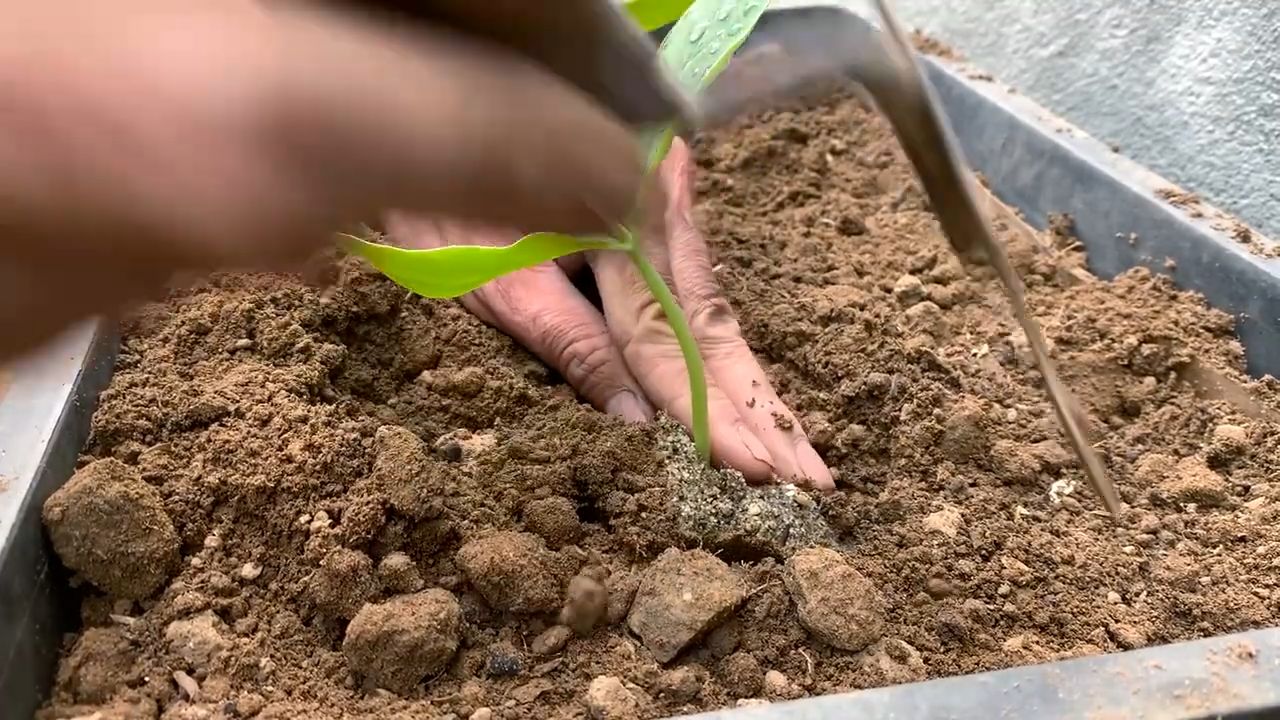
3. Transplant the Seedlings: Gently remove the seedlings from their trays or pots and plant them in the prepared soil. Space them about 18-24 inches apart.
4. Water Thoroughly: Water the seedlings thoroughly after transplanting.
5. Add Support Structure: Install your trellis, fence, or other support structure near the seedlings. Make sure it’s sturdy enough to support the weight of the mature vines and fruits.
Training and Pruning Your Angled Luffa Vines
Angled luffa vines are naturally climbers, but they may need a little help getting started.
1. Guide the Vines: As the vines grow, gently guide them towards the support structure and tie them loosely with twine or plant ties.
2. Prune Side Shoots: To encourage the main vine to grow upwards and produce more fruits, prune off any side shoots that develop along the lower part of the vine.
3. Pinch Off the Growing Tip: Once the vine reaches the top of the support structure, you can pinch off the growing tip to encourage branching.
4. Remove Yellowing Leaves: Remove any yellowing or diseased leaves to improve air circulation and prevent the spread of disease.
Caring for Your Angled Luffa Plants
Angled luffa plants need consistent care to thrive and produce a good harvest.
1. Water Regularly: Water your plants regularly, especially during hot, dry weather. Angled luffa plants need plenty of water to produce their large fruits. Aim for deep watering, allowing the water to soak into the soil.
2. Fertilize Regularly: Feed your plants with a balanced fertilizer or one specifically formulated for vegetables every 2-3 weeks. Follow the instructions on the fertilizer package.
3. Control Pests and Diseases: Keep an eye out for pests and diseases, such as aphids, squash bugs, and powdery mildew. Treat any problems promptly with organic pest control methods or fungicides.
4. Provide Support for Heavy Fruits: As the luffa fruits grow larger, they may need additional support to prevent them from breaking off the vine. You can use slings made from fabric or netting to support the fruits.
Harvesting Your Angled Luffa
The timing of your harvest depends on whether you want to eat the luffa as a vegetable or use it as a sponge.
* For Vegetable Use: Harvest the luffa when it’s young and tender, about 6-8 inches long. The skin should be smooth and green. You can cook it like zucchini or other summer squash.
* For Sponge Use: Allow the luffa to mature on the vine until the skin turns brown and dry. The fruit will become lighter in weight. This usually takes several months.
Processing Your Luffa Sponges
Once your luffa is fully mature and dry, it’s time to process it into a sponge.
1. Harvest the Luffa: Cut the luffa from the vine.
2. Remove the Skin: Crack the dry skin and peel it away from the fibrous interior. This can be a bit messy, so do it outdoors or in a well-ventilated area.
3. Remove the Seeds: Shake out the seeds. You can save them for planting next year.
4. Wash the Sponge: Rinse the sponge thoroughly with water to remove any remaining pulp or debris.
5. Bleach (Optional): If you want a whiter sponge, you can soak it in a diluted bleach solution for a few minutes. Rinse thoroughly afterwards.
6. Dry the Sponge: Allow the sponge to dry completely in the sun or in a well-ventilated area.
7. Cut to Size: Once the sponge is dry, you can cut it into smaller pieces to make individual sponges.
Troubleshooting
*
Conclusion
So, there you have it! Growing angled luffa at home, specifically training it to grow at an angle, might seem like a small adjustment, but it unlocks a world of benefits. From maximizing space in your garden and preventing ground contact issues to yielding straighter, more uniform luffas perfect for crafting and personal use, this simple DIY trick is a game-changer for any luffa enthusiast.
Think about it: no more awkwardly shaped luffas that are difficult to process. No more wasted space in your garden because your vines are sprawling uncontrollably. Just beautifully angled luffas, ready to be transformed into luxurious bath sponges, exfoliating scrubbers, or even unique artistic creations.
But the benefits don’t stop there. By training your luffas to grow at an angle, you’re also improving air circulation around the developing fruits, which helps to prevent fungal diseases and ensures a healthier, more productive harvest. Plus, it’s just plain fun to experiment with different training techniques and see the results of your efforts.
Ready to take your luffa growing to the next level? Don’t be afraid to get creative with your training methods. Try using different types of supports, such as trellises, fences, or even sturdy branches. Experiment with different angles to see what works best for your garden and your desired luffa shape.
Consider these variations to further enhance your angled luffa growing experience:
* Vertical Spacing: If you’re short on horizontal space, train your luffas to grow vertically along a tall trellis. This maximizes your yield in a small area.
* Curved Luffas: Instead of a straight angle, gently curve your luffas as they grow for a unique and artistic shape. This is perfect for creating decorative items.
* Grafted Luffas: For even faster growth and increased disease resistance, consider grafting your luffa plants onto a more vigorous rootstock.
* Companion Planting: Plant beneficial herbs and flowers around your luffas to attract pollinators and deter pests. Marigolds, basil, and nasturtiums are excellent choices.
Growing angled luffa at home is not just about producing sponges; it’s about connecting with nature, learning new skills, and enjoying the satisfaction of harvesting your own homegrown goods. It’s a rewarding experience that will leave you feeling proud and accomplished.
We’re confident that once you try this DIY trick, you’ll never go back to growing luffas the old way. So, grab your seeds, prepare your garden, and get ready to embark on a luffa-growing adventure.
We can’t wait to hear about your experiences! Share your photos, tips, and tricks in the comments below. Let’s build a community of angled luffa enthusiasts and learn from each other. Happy growing!
Frequently Asked Questions (FAQ)
What is the best time to start growing angled luffa?
The best time to start growing angled luffa depends on your climate. Luffas require a long growing season (around 150-200 days) and warm temperatures. In colder climates, it’s best to start seeds indoors 6-8 weeks before the last expected frost. In warmer climates, you can direct sow seeds outdoors after the soil has warmed up and the danger of frost has passed. Aim for soil temperatures consistently above 70°F (21°C) for optimal germination.
How do I germinate luffa seeds?
Luffa seeds have a hard outer shell, so scarification (lightly scratching the seed coat) and soaking them in warm water for 24-48 hours before planting can significantly improve germination rates. Sow the seeds about 1 inch deep in well-draining soil. Keep the soil consistently moist but not waterlogged. Germination typically takes 1-3 weeks.
What kind of support should I use to train my luffas at an angle?
The type of support you use depends on your garden setup and personal preference. Trellises, fences, and sturdy branches all work well. The key is to provide a strong and stable structure that can support the weight of the growing vines and developing luffas. Use soft ties or twine to gently guide the vines and secure them to the support at the desired angle. Regularly check and adjust the ties as the plants grow.
How often should I water and fertilize my luffa plants?
Luffa plants are heavy feeders and require consistent watering and fertilization. Water deeply and regularly, especially during hot and dry weather. Aim to keep the soil consistently moist but not soggy. Fertilize every 2-3 weeks with a balanced fertilizer or a fertilizer specifically formulated for fruiting vegetables. You can also amend the soil with compost or aged manure to provide a slow-release source of nutrients.
How do I know when my luffas are ready to harvest?
Luffas are ready to harvest when the skin turns brown and dry, and the luffa feels lightweight. The stem connecting the luffa to the vine will also start to dry out. If you shake the luffa, you should hear the seeds rattling inside. It’s important to harvest the luffas before they become completely dry and brittle, as this can make them more difficult to process.
What is the best way to process luffas after harvesting?
After harvesting, remove the outer skin of the luffa. This can be done by soaking the luffa in water for a few days to soften the skin, then peeling it off by hand. Rinse the luffa thoroughly to remove any remaining pulp and seeds. Shake out as many seeds as possible and save them for future planting. Soak the luffa in a solution of water and bleach (1 part bleach to 10 parts water) for about 30 minutes to disinfect it. Rinse thoroughly and allow the luffa to dry completely in the sun.
Can I eat young luffas?
Yes, young luffas can be eaten like zucchini or squash. They have a mild, slightly sweet flavor. Harvest them when they are small and tender, before the fibers develop. You can sauté them, stir-fry them, or add them to soups and stews.
How can I prevent pests and diseases from affecting my luffa plants?
To prevent pests and diseases, practice good garden hygiene. Remove any dead or diseased leaves and debris from around the plants. Provide good air circulation by spacing the plants properly and pruning the vines as needed. Monitor the plants regularly for signs of pests or diseases. If you spot any problems, take action promptly. Organic pest control methods, such as insecticidal soap or neem oil, can be effective for controlling many common pests.
What if my luffa plants are not producing fruit?
There are several reasons why your luffa plants might not be producing fruit. Common causes include lack of pollination, insufficient sunlight, inadequate watering or fertilization, and extreme temperatures. Ensure that your plants are getting at least 6-8 hours of sunlight per day. Water and fertilize regularly. If pollination is an issue, you can hand-pollinate the flowers by transferring pollen from the male flowers to the female flowers using a small brush.
Is growing angled luffa at home really worth the effort?
Absolutely! While it requires some effort and attention, growing angled luffa at home is a rewarding experience that offers numerous benefits. You’ll have a sustainable source of natural sponges, you’ll be able to control the quality and shape of your luffas, and you’ll enjoy the satisfaction of growing your own homegrown goods. Plus, it’s a fun and educational activity that can be enjoyed by the whole family. The unique shapes you can achieve by training them at an angle make it all worthwhile.
Leave a Comment