
Garlic peeling plastic bag hack: Sounds too good to be true, right? I thought so too, until I tried it! Let’s be honest, peeling garlic is one of those kitchen tasks that everyone dreads. It’s sticky, smelly, and often results in mangled cloves and frustrated sighs. But what if I told you there’s a super simple, almost magical way to peel garlic cloves in seconds, using nothing more than a humble plastic bag?
Garlic, a culinary staple for centuries, has a rich history that spans cultures and continents. From ancient Egypt, where it was revered for its medicinal properties, to modern-day kitchens worldwide, garlic has always been a prized ingredient. But despite its culinary importance, the tedious task of peeling it remains a universal annoyance.
That’s where this garlic peeling plastic bag hack comes in! In today’s busy world, who has time to spend ages peeling garlic? This DIY trick is a game-changer for anyone who loves to cook but hates the prep work. It’s quick, easy, and incredibly effective, saving you time and effort in the kitchen. Plus, it’s a fun little experiment that will impress your friends and family. So, ditch the sticky fingers and embrace this simple solution – you’ll wonder how you ever lived without it!
The Easiest Way to Peel Garlic: The Plastic Bag Shake-Down!
Okay, friends, let’s be honest. Peeling garlic is the bane of many a home cook’s existence. That sticky, papery skin clinging stubbornly to each clove… it’s a time-consuming and often frustrating task. But fear not! I’m here to share a ridiculously simple and effective hack that will have you peeling garlic like a pro in seconds. All you need is a plastic bag! Yes, you read that right. This method is so easy, you’ll wonder why you haven’t been doing it all along.
What You’ll Need
* A head of garlic
* A sturdy plastic bag (ziplock or grocery bag works great)
* A flat, hard surface (like a countertop or cutting board)
The Magic Shake: Step-by-Step Instructions
1. Separate the Cloves: First, you’ll need to break apart the head of garlic into individual cloves. Don’t worry about peeling them at this stage. Just gently pull them apart. Sometimes, giving the head of garlic a firm press with the palm of your hand helps loosen the cloves. Be careful not to crush them completely, though!
2. Bag ‘Em Up: Place all the separated garlic cloves into your plastic bag. If you’re using a ziplock bag, make sure it’s sealed tightly. If you’re using a grocery bag, hold the top closed firmly. The key here is to create a contained space for the cloves to bounce around.
3. The Shake-Down: Now comes the fun part! Hold the bag firmly and start shaking it vigorously against your hard surface. I usually do this on my kitchen countertop. You want to shake it with some force, but not so hard that you risk breaking the bag. Think of it as giving the garlic cloves a good, jostling massage. Shake for about 20-30 seconds. The friction between the cloves and the bag is what loosens the skins.
4. Check Your Progress: After the initial shake, open the bag and take a peek. You should already see a noticeable difference. Many of the cloves will have their skins partially or completely removed. If not, seal the bag back up and give it another 10-15 seconds of shaking.
5. The Final Peel (If Necessary): For any cloves that still have stubborn skins clinging on, you can easily peel them off by hand at this point. They should come off much easier than if you had tried to peel them before the shaking. Sometimes, a quick roll between your fingers is all it takes.
6. Enjoy Your Perfectly Peeled Garlic! That’s it! You now have a pile of perfectly peeled garlic cloves, ready to be minced, sliced, or roasted.
Troubleshooting and Tips for Garlic Peeling Success
* Bag Choice Matters: While any plastic bag will technically work, I’ve found that thicker, sturdier bags work best. Thin grocery bags can sometimes tear if you’re shaking them too vigorously. Ziplock bags are a great option because they’re durable and seal tightly.
* Garlic Freshness: This hack works best with relatively fresh garlic. Older garlic, where the skins are very dry and brittle, might not peel as easily.
* Shake It Like You Mean It: Don’t be afraid to put some muscle into the shaking! The more friction you create, the better the skins will loosen.
* Batch Size: I usually do this with a whole head of garlic at a time. If you’re only peeling a few cloves, you might not get as much friction, and the hack might not be as effective.
* Pre-Soaking (Optional): If you’re having trouble getting the skins to loosen, you can try soaking the garlic cloves in water for about 10-15 minutes before shaking them in the bag. The water helps to soften the skins and make them easier to remove.
* Smashing for Extra Help: For particularly stubborn cloves, you can gently smash them with the flat side of a knife before putting them in the bag. This helps to loosen the skins even further. Be careful not to completely crush the garlic, though.
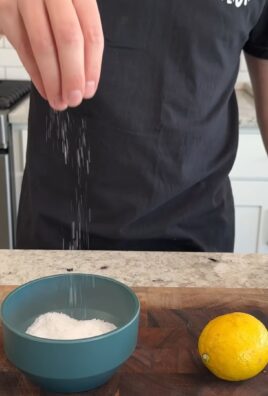
* Dealing with Sticky Garlic: Sometimes, garlic can be a bit sticky, especially if it’s very fresh. If you find that the cloves are sticking together in the bag, try adding a small amount of salt or cornstarch to the bag. This will help to absorb some of the moisture and prevent the cloves from sticking.
* Clean Up is a Breeze: One of the best things about this hack is that clean-up is super easy. Just toss the garlic skins in the trash or compost bin.
Why This Hack Works So Well
The magic behind this garlic peeling hack lies in the power of friction. When you shake the garlic cloves in the bag, they rub against each other and against the inside of the bag. This friction loosens the papery skins, making them much easier to remove. It’s a simple but incredibly effective way to peel garlic quickly and efficiently.
Beyond the Bag: Other Garlic Peeling Methods (For Comparison)
While the plastic bag method is my go-to, I’ve tried other garlic peeling techniques over the years. Here’s a quick comparison:
* The Knife Smash: This involves placing a clove of garlic on a cutting board and smashing it with the flat side of a knife. This loosens the skin, making it easier to peel. It’s a decent method, but it can be a bit messy, and you risk crushing the garlic.
* The Hot Water Soak: Soaking garlic cloves in hot water for a few minutes can help to loosen the skins. This method works okay, but it can also make the garlic a bit soggy.
* The Microwave Trick: Microwaving garlic cloves for a few seconds can also loosen the skins. However, this method can also cook the garlic slightly, which can affect its flavor.
* The Manual Peel: This is the traditional method, where you peel each clove of garlic by hand. It’s the most time-consuming and frustrating method of all.
In my opinion, the plastic bag method is the best of all worlds. It’s quick, easy, and doesn’t require any special equipment. Plus, it doesn’t affect the flavor or texture of the garlic.
Using Your Perfectly Peeled Garlic
Now that you have a pile of perfectly peeled garlic, the possibilities are endless! Here are just a few ideas:
* Garlic Bread: Spread minced garlic and butter on slices of bread and bake until golden brown.
* Garlic Pasta: Sauté minced garlic in olive oil and toss with your favorite pasta.
* Roasted Garlic: Roast whole garlic cloves in the oven until they’re soft and sweet.
* Garlic Soup: Make a creamy and flavorful garlic soup.
* Garlic Aioli: Blend garlic with mayonnaise, olive oil, and lemon juice to make a delicious aioli.
* Homemade Pesto: Add garlic to your homemade pesto for an extra kick of flavor.
Garlic is a staple ingredient in so many cuisines, so having a quick and easy way to peel it is a game-changer.
Final Thoughts
I hope this garlic peeling hack has been helpful! It’s one of those simple kitchen tricks that can make a big difference in your cooking routine. Give it a try, and let me know what you think. Happy peeling! And remember, don’t be afraid to experiment and find what works best for you. Cooking should be fun, and even the most mundane tasks, like peeling garlic, can be made easier with a little ingenuity. Now go forth and conquer that garlic!
Conclusion
So, there you have it! The garlic peeling plastic bag hack – a game-changer for anyone who cooks with garlic regularly. No more sticky fingers, no more frustratingly clinging skins, and no more wasted time. This simple trick transforms a tedious chore into a breeze, allowing you to focus on the more enjoyable aspects of cooking.
Why is this a must-try? Because it’s efficient, effective, and uses materials you likely already have in your kitchen. Think about all the time you spend peeling garlic each week. Now imagine reclaiming those precious minutes! This hack isn’t just about saving time; it’s about making your cooking experience more pleasant and less stressful. It’s about maximizing flavor with minimal effort.
But the beauty of this hack lies in its adaptability. While the plastic bag method is incredibly effective, feel free to experiment with variations. For instance, if you’re concerned about using plastic, try using a reusable silicone bag or even two stainless steel bowls nested together. The principle remains the same: agitation to loosen the skins. You could also try adding a pinch of salt to the bag, as some believe it helps to further abrade the garlic skins.
Another variation to consider is the level of force you apply. Some garlic cloves are more stubborn than others. Don’t be afraid to adjust the shaking intensity to find what works best for you. Just be mindful not to overdo it and crush the cloves entirely.
Ultimately, the best way to discover the full potential of this garlic peeling plastic bag hack is to try it yourself. We’re confident that once you experience the ease and speed of this method, you’ll never go back to peeling garlic the old way. It’s a small change that makes a big difference in the kitchen.
We encourage you to give it a try and share your experience with us! Did you find it as effective as we did? Did you discover any helpful variations or tips? Let us know in the comments below! Your feedback is invaluable and helps us refine and improve our recipes and techniques. Share your photos and videos of your garlic peeling success on social media using #GarlicPeelingHack – we can’t wait to see your results! Embrace the simplicity and efficiency of this method and unlock a world of flavorful possibilities in your cooking. Happy peeling!
Frequently Asked Questions (FAQ)
Q: What kind of plastic bag works best for this hack?
A: A standard zip-top plastic bag, like a sandwich bag or a quart-sized bag, works perfectly well. The key is to ensure the bag is clean and free of any holes. You don’t need anything fancy or heavy-duty. A thinner bag actually allows for better manipulation and agitation of the garlic cloves. If you’re concerned about plastic, you can use a reusable silicone bag as an alternative. Just make sure it’s durable enough to withstand the shaking.
Q: How many garlic cloves can I peel at once using this method?
A: It depends on the size of the bag and the size of the garlic cloves. As a general rule, start with about 6-8 cloves per bag. You want to ensure there’s enough room for the cloves to move freely and rub against each other. Overcrowding the bag will reduce the effectiveness of the hack. If you have a large batch of garlic to peel, it’s best to do it in smaller batches.
Q: How long should I shake the bag to peel the garlic?
A: The shaking time can vary depending on the freshness of the garlic and the force you apply. Start with about 20-30 seconds of vigorous shaking. Then, check the garlic cloves to see if the skins have loosened. If not, continue shaking for another 10-15 seconds. The goal is to loosen the skins without completely crushing the cloves. With practice, you’ll develop a feel for the optimal shaking time.
Q: What if the garlic cloves are still difficult to peel after shaking?
A: If the skins are still stubbornly clinging to the garlic, try a few things. First, make sure you’re shaking the bag vigorously enough. Second, try adding a pinch of coarse salt to the bag. The salt acts as an abrasive and can help to loosen the skins. Finally, if all else fails, you can gently roll the garlic cloves between your hands after shaking. This can help to further separate the skins.
Q: Can I use this method to peel garlic that’s already been separated into cloves?
A: Yes, absolutely! This method works best with garlic cloves that have already been separated from the bulb. In fact, it’s recommended to separate the cloves before using the plastic bag hack. This allows for better agitation and more efficient peeling.
Q: Is it safe to use this method with older garlic?
A: Yes, this method is safe to use with older garlic. However, older garlic may be more difficult to peel, regardless of the method you use. The skins tend to become drier and more brittle over time, making them more resistant to peeling. You may need to shake the bag for a longer period of time or apply more force to loosen the skins.
Q: Can I store the peeled garlic cloves after using this method?
A: Yes, you can store the peeled garlic cloves in an airtight container in the refrigerator for up to a week. You can also freeze them for longer storage. To freeze, spread the peeled cloves on a baking sheet and freeze them individually. Once frozen, transfer them to a freezer bag or container. This prevents them from clumping together.
Q: Does this method work for other types of bulbs, like shallots or onions?
A: While the principle of agitation to loosen skins might apply to other bulbs, the plastic bag hack is specifically designed for garlic. Shallots and onions have different skin structures and may not respond as well to this method. You’re better off using traditional peeling methods for those vegetables.
Q: I’m concerned about the environmental impact of using plastic bags. Are there any eco-friendly alternatives?
A: Absolutely! If you’re looking for eco-friendly alternatives, consider using a reusable silicone bag or two stainless steel bowls nested together. The silicone bag offers the same flexibility and durability as a plastic bag, but it can be washed and reused multiple times. The stainless steel bowl method involves placing the garlic cloves in one bowl, covering it with another bowl of the same size, and shaking vigorously. Both of these options are more sustainable and environmentally conscious.
Q: What if I accidentally crush some of the garlic cloves while shaking?
A: Don’t worry if you accidentally crush a few garlic cloves while shaking. Crushed garlic is still perfectly usable and flavorful. You can use it in sauces, soups, stews, or any dish where you want a strong garlic flavor. Just be aware that crushed garlic tends to burn more easily than whole cloves, so keep a close eye on it while cooking.
Leave a Comment