
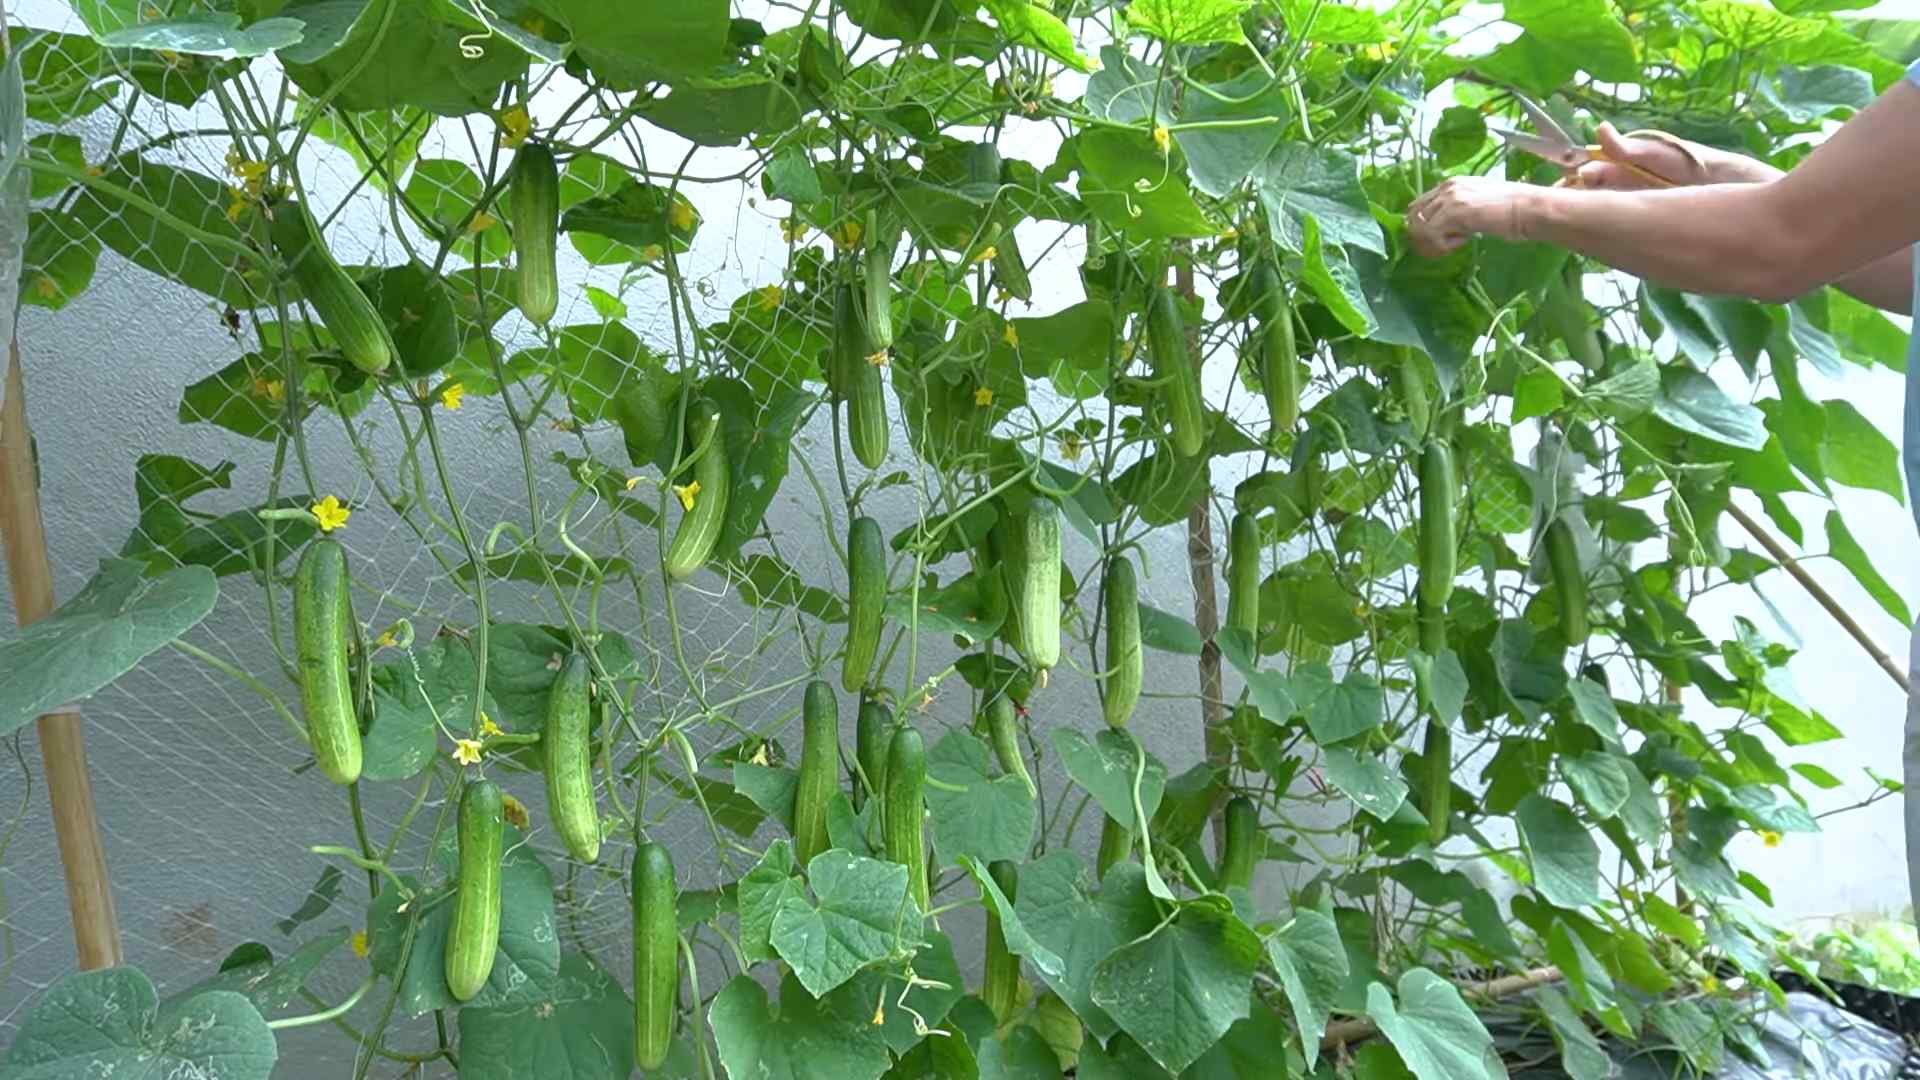
Garden Planting Hack: Unlock the secrets to a thriving garden with these simple, yet effective DIY tricks! Have you ever dreamt of a lush, bountiful garden overflowing with fresh vegetables, vibrant flowers, and fragrant herbs, but felt intimidated by the perceived complexity of gardening? I know I have! For centuries, people have cultivated gardens, not just for sustenance, but also for beauty, tranquility, and a connection to nature. From the hanging gardens of Babylon to the meticulously manicured landscapes of Versailles, gardening has always been an integral part of human culture.
But let’s face it, modern life can be hectic, and finding the time and energy for traditional gardening methods can be a challenge. That’s where these amazing garden planting hack come in! These aren’t your grandma’s gardening tips (although, grandma probably had some good ones too!). We’re talking about clever shortcuts, innovative techniques, and budget-friendly solutions that will transform your gardening experience. Whether you’re a seasoned green thumb or a complete beginner, these DIY hacks will help you maximize your yields, minimize your effort, and create the garden of your dreams. Get ready to dig in and discover the joy of effortless gardening!
DIY Seed Starting with Toilet Paper Rolls: A Gardener’s Best Friend
Hey fellow garden enthusiasts! Are you tired of flimsy seed starting trays and the hassle of transplanting delicate seedlings? I’ve got a fantastic, eco-friendly hack for you that will revolutionize your seed starting process: using toilet paper rolls! Yes, you read that right. Those humble cardboard tubes are a gardener’s secret weapon. They’re biodegradable, readily available, and perfect for giving your seedlings a healthy head start. Let’s dive in!
Why Toilet Paper Rolls?
Before we get started, let’s talk about why this method is so awesome:
* Eco-Friendly: We’re reusing something that would otherwise end up in the recycling bin (or worse, the trash!).
* Biodegradable: The cardboard decomposes naturally in the soil, minimizing root disturbance during transplanting.
* Cost-Effective: Free! Need I say more?
* Easy to Use: Simple to set up and manage.
* Root Protection: The tubes provide support and protection for delicate roots.
* Improved Drainage: Helps prevent overwatering, a common problem with seedlings.
Materials You’ll Need
* Toilet paper rolls (or paper towel rolls cut in half)
* Scissors
* Potting soil (seed starting mix is ideal)
* Seeds of your choice
* A tray or container to hold the rolls (a plastic takeout container works great!)
* Spray bottle with water
* Optional: Marker for labeling
Step-by-Step Instructions
Okay, let’s get our hands dirty (well, not yet, but soon!). Here’s how to transform those toilet paper rolls into mini seedling nurseries:
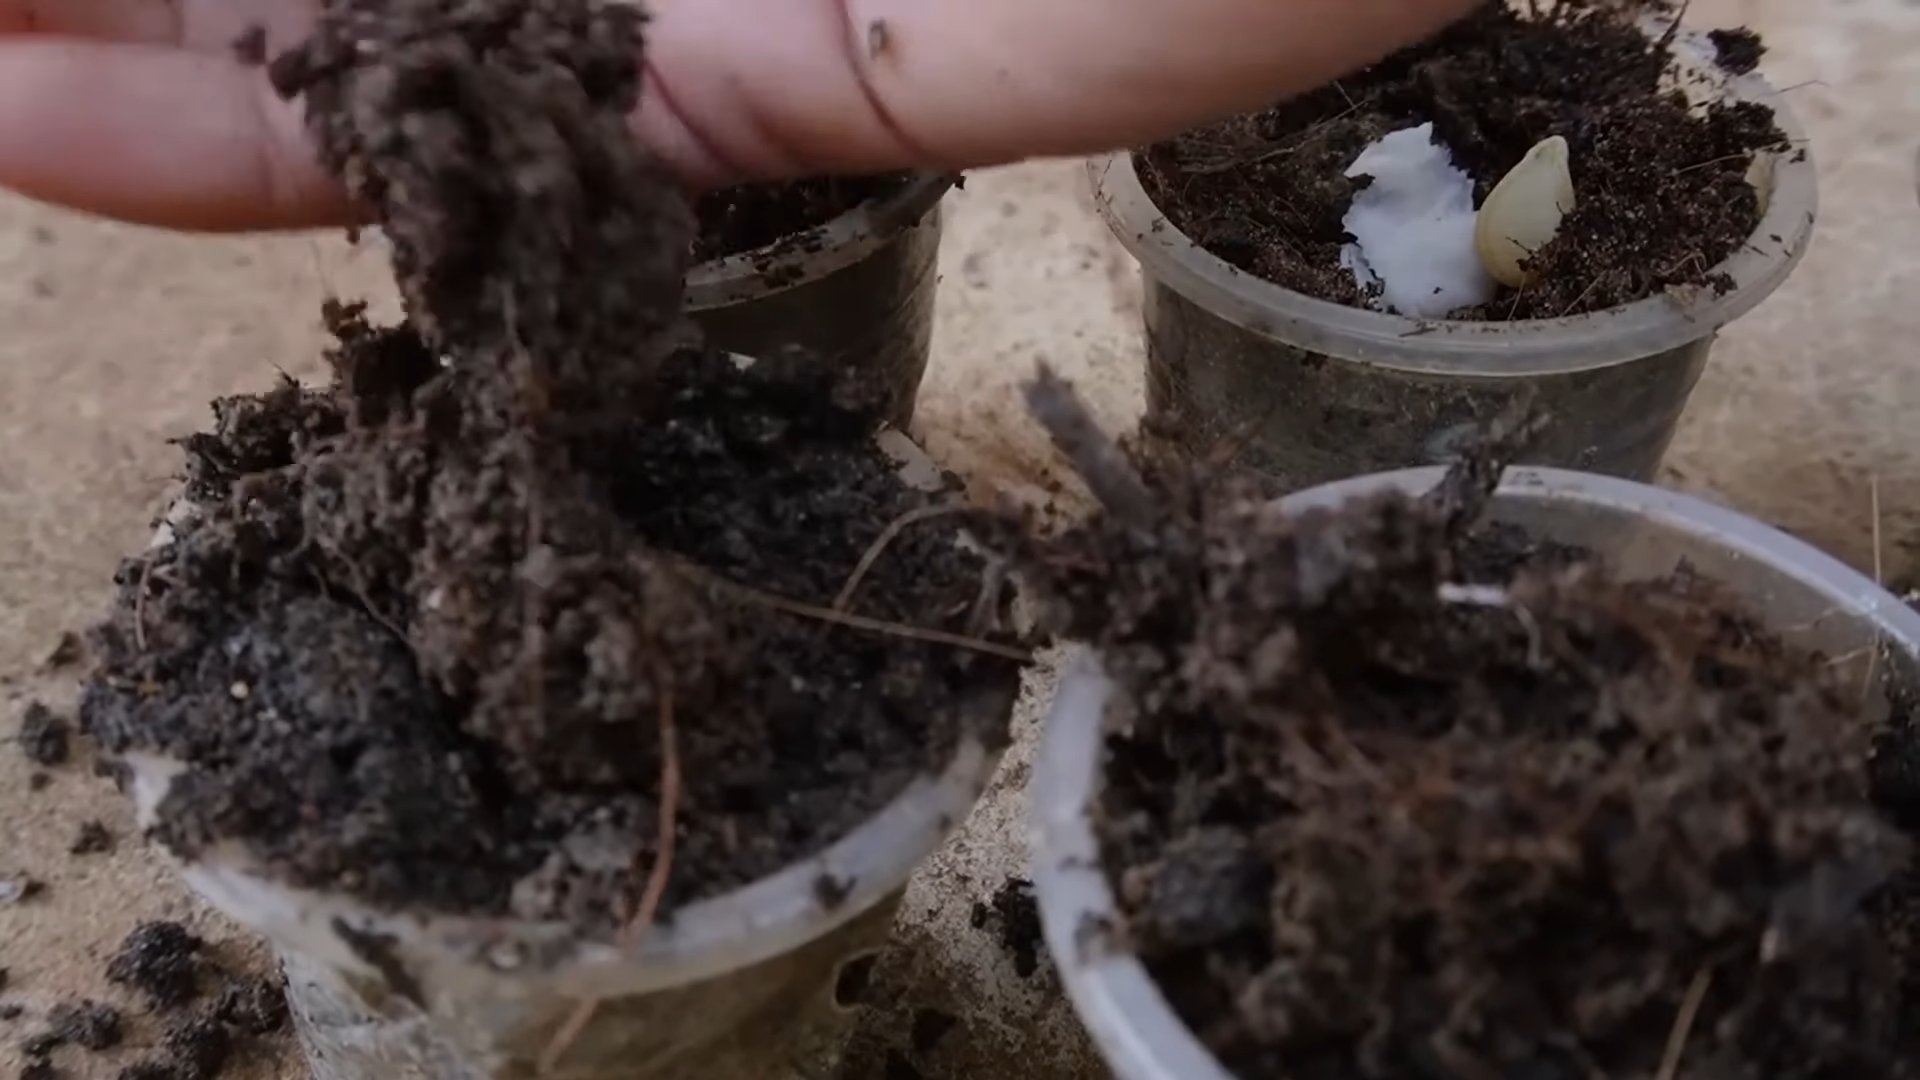
1. Prepare the Rolls:
* Take a toilet paper roll.
* Make four vertical cuts, about 1 inch deep, equally spaced around one end of the roll. Think of it like dividing a circle into quarters.
* Fold each of the four flaps inward, overlapping them to create a bottom for the roll. This will form a little cup to hold the soil. You can crease the folds to make them more secure. Don’t worry if it’s not perfectly sealed; the soil will help hold it together.
2. Arrange the Rolls in a Tray:
* Place the prepared rolls upright in your tray or container. Pack them snugly together to provide support and prevent them from tipping over. This also maximizes space.
3. Fill with Soil:
* Now, it’s time to add the soil. Gently fill each roll with your chosen potting soil or seed starting mix. Leave about half an inch of space at the top.
* Lightly tap the rolls to settle the soil and eliminate any air pockets.
4. Plant Your Seeds:
* Follow the instructions on your seed packet for planting depth and spacing. Generally, small seeds should be sprinkled on the surface and lightly covered with soil, while larger seeds need to be planted deeper.
* I usually plant 2-3 seeds per roll to increase the chances of germination. If more than one seed sprouts, I’ll thin them out later, keeping the strongest seedling.
5. Water Gently:
* Use your spray bottle to gently mist the soil in each roll. You want to moisten the soil without overwatering it. Overwatering can lead to damping-off, a fungal disease that can kill seedlings.
* Continue to mist the soil regularly to keep it consistently moist, but not soggy.
6. Label Your Rolls:
* This is an important step, especially if you’re planting multiple varieties of seeds. Use a marker to label each roll with the name of the plant. You can write directly on the roll or use small labels.
7. Provide Light and Warmth:
* Place your tray of seeded rolls in a warm, sunny location or under grow lights. Seedlings need plenty of light to grow strong and healthy.
* If you’re using a sunny windowsill, rotate the tray regularly to ensure that all the seedlings receive even light.
8. Monitor and Water:
* Check the soil moisture daily and water as needed. The soil should be consistently moist, but not waterlogged.
* Keep an eye out for any signs of pests or diseases.
Transplanting Your Seedlings
This is where the magic of the toilet paper roll method really shines! When your seedlings are ready to be transplanted into larger pots or directly into the garden (after the last frost, of course!), you can simply plant the entire roll.
1. Prepare the Planting Hole:
* Dig a hole in your garden or pot that is slightly larger than the toilet paper roll.
2. Plant the Roll:
* Gently place the entire roll into the hole. Make sure the top edge of the roll is buried slight
Hey fellow garden enthusiasts! Are you tired of flimsy seed starting trays and the hassle of transplanting delicate seedlings? I’ve got a fantastic, eco-friendly hack for you that will revolutionize your seed starting process: using toilet paper rolls! Yes, you read that right. Those humble cardboard tubes are a gardener’s secret weapon. They’re biodegradable, readily available, and perfect for giving your seedlings a healthy head start. Let’s dive in!
Why Toilet Paper Rolls?
Before we get started, let’s talk about why this method is so awesome:
* Eco-Friendly: We’re reusing something that would otherwise end up in the recycling bin (or worse, the trash!).
* Biodegradable: The cardboard decomposes naturally in the soil, minimizing root disturbance during transplanting.
* Cost-Effective: Free! Need I say more?
* Easy to Use: Simple to set up and manage.
* Root Protection: The tubes provide support and protection for delicate roots.
* Improved Drainage: Helps prevent overwatering, a common problem with seedlings.
Materials You’ll Need
* Toilet paper rolls (or paper towel rolls cut in half)
* Scissors
* Potting soil (seed starting mix is ideal)
* Seeds of your choice
* A tray or container to hold the rolls (a plastic takeout container works great!)
* Spray bottle with water
* Optional: Marker for labeling
Step-by-Step Instructions
Okay, let’s get our hands dirty (well, not yet, but soon!). Here’s how to transform those toilet paper rolls into mini seedling nurseries:
1. Prepare the Rolls:
* Take a toilet paper roll.
* Make four vertical cuts, about 1 inch deep, equally spaced around one end of the roll. Think of it like dividing a circle into quarters.
* Fold each of the four flaps inward, overlapping them to create a bottom for the roll. This will form a little cup to hold the soil. You can crease the folds to make them more secure. Don’t worry if it’s not perfectly sealed; the soil will help hold it together.
2. Arrange the Rolls in a Tray:
* Place the prepared rolls upright in your tray or container. Pack them snugly together to provide support and prevent them from tipping over. This also maximizes space.
3. Fill with Soil:
* Now, it’s time to add the soil. Gently fill each roll with your chosen potting soil or seed starting mix. Leave about half an inch of space at the top.
* Lightly tap the rolls to settle the soil and eliminate any air pockets.
4. Plant Your Seeds:
* Follow the instructions on your seed packet for planting depth and spacing. Generally, small seeds should be sprinkled on the surface and lightly covered with soil, while larger seeds need to be planted deeper.
* I usually plant 2-3 seeds per roll to increase the chances of germination. If more than one seed sprouts, I’ll thin them out later, keeping the strongest seedling.
5. Water Gently:
* Use your spray bottle to gently mist the soil in each roll. You want to moisten the soil without overwatering it. Overwatering can lead to damping-off, a fungal disease that can kill seedlings.
* Continue to mist the soil regularly to keep it consistently moist, but not soggy.
6. Label Your Rolls:
* This is an important step, especially if you’re planting multiple varieties of seeds. Use a marker to label each roll with the name of the plant. You can write directly on the roll or use small labels.
7. Provide Light and Warmth:
* Place your tray of seeded rolls in a warm, sunny location or under grow lights. Seedlings need plenty of light to grow strong and healthy.
* If you’re using a sunny windowsill, rotate the tray regularly to ensure that all the seedlings receive even light.
8. Monitor and Water:
* Check the soil moisture daily and water as needed. The soil should be consistently moist, but not waterlogged.
* Keep an eye out for any signs of pests or diseases.
Transplanting Your Seedlings
This is where the magic of the toilet paper roll method really shines! When your seedlings are ready to be transplanted into larger pots or directly into the garden (after the last frost, of course!), you can simply plant the entire roll.
1. Prepare the Planting Hole:
* Dig a hole in your garden or pot that is slightly larger than the toilet paper roll.
2. Plant the Roll:
* Gently place the entire roll into the hole. Make sure the top edge of the roll is buried slightly below the soil surface. This will help prevent the cardboard from wicking moisture away from the roots.
3. Water Thoroughly:
* Water the newly transplanted seedling thoroughly.
4. Optional: Pinch the Top of the Roll:
* Some gardeners recommend pinching or tearing the top edge of the toilet paper roll before planting. This allows the roots to easily grow out of the sides of the roll. I sometimes do this, but it’s not strictly necessary.
Troubleshooting Tips
* Mold: If you notice mold growing on the toilet paper rolls, it’s usually a sign of overwatering. Reduce watering and ensure good air circulation. You can also try spraying the rolls with a diluted solution of chamomile tea, which has antifungal properties.
* Rolls Falling Apart: If the rolls are becoming too soggy and falling apart, try using thicker cardboard or lining the tray with plastic to prevent the rolls from absorbing too much moisture.
* Seedlings Not Germinating: Make sure your seeds are fresh and viable. Check the soil moisture and temperature. Some seeds require specific conditions to germinate.
* Leggy Seedlings: Leggy seedlings are tall and spindly, usually due to insufficient light. Provide more light or move the seedlings closer to the light source.
Advanced Techniques
Want to take your toilet paper roll seed starting to the next level? Here are a few advanced techniques to try:
* Bottom Watering: Instead of misting the soil from the top, try bottom watering. Simply pour water into the tray and let the rolls absorb the moisture from the bottom. This encourages deeper root growth.
* Fertilizing: Once your seedlings have developed their first true leaves (the leaves that appear after the initial seed leaves), you can start fertilizing them with a diluted liquid fertilizer.
* Hardening Off: Before transplanting your seedlings into the garden, you’ll need to harden them off. This means gradually exposing them to outdoor conditions over a period of 1-2 weeks. Start by placing them in a sheltered location for a few hours each day, gradually increasing the amount of time they spend outdoors.
* Using Paper Towel Rolls: Don’t limit yourself to just toilet paper rolls! Paper towel rolls, cut in half, work just as well. They’re especially useful for plants with larger root systems.
* Creating a Mini Greenhouse: Cover your tray of seeded rolls with a clear plastic lid or plastic wrap to create a mini greenhouse. This will help retain moisture and warmth, promoting faster germination. Just be sure to remove the lid or wrap once the seedlings emerge to prevent damping-off.
Choosing the Right Seeds
The beauty of this method is that you can use it for almost any type of seed! However, some plants are particularly well-suited for starting in toilet paper rolls:
* Tomatoes: Tomatoes are a classic choice for seed starting. They benefit from a head start indoors, especially in regions with short growing seasons.
* Peppers: Like tomatoes, peppers need a long growing season and are best started indoors.
* Eggplant: Eggplant also requires a warm climate and a long growing season.
* Herbs: Many herbs, such as basil, parsley, and cilantro, can be easily started in toilet paper rolls.
* Flowers: Annual flowers like zinnias, marigolds, and cosmos are great candidates for seed starting.
Beyond Seed Starting: Other Uses for Toilet Paper Rolls in the Garden
Toilet paper rolls aren’t just for seed starting! Here are a few other creative ways to use them in your garden:
* Seedling Collars: Cut a toilet paper roll into shorter sections and place them around the base of your seedlings to protect them from cutworms and other pests.
* Composting: Add toilet paper rolls to your compost pile. They’ll break down and add valuable carbon to your compost.
* Plant Markers: Flatten a toilet paper roll and cut it into strips to create plant markers. Write the name of the plant on the marker with a permanent marker.
* Worm Food: If you have a worm
Conclusion
So, there you have it! This simple yet incredibly effective garden planting hack is more than just a trend; it’s a game-changer for anyone looking to maximize their yields, minimize their effort, and cultivate a thriving garden, regardless of space or experience. We’ve walked you through the process, highlighting the benefits of this method, and hopefully, inspired you to ditch the traditional planting methods and embrace a smarter, more sustainable approach.
Why is this a must-try? Because it addresses some of the most common challenges faced by gardeners: poor soil quality, inefficient watering, and the dreaded weed invasion. By creating a self-contained, nutrient-rich environment, this method allows your plants to flourish with minimal intervention. Think of it as giving your seedlings a head start in life, providing them with everything they need to thrive from day one.
But the beauty of this garden planting hack lies in its adaptability. Feel free to experiment with different materials for your container. While we’ve suggested using readily available items like plastic storage bins or repurposed containers, you could also explore using raised garden beds lined with landscape fabric for a more permanent and aesthetically pleasing solution.
Consider varying the soil composition based on the specific needs of your plants. For acid-loving plants like blueberries or azaleas, incorporate peat moss into your soil mix. For vegetables that require well-draining soil, add perlite or vermiculite. The possibilities are endless!
Another exciting variation is to incorporate companion planting techniques within your container. Planting basil alongside tomatoes, for example, can help deter pests and improve the flavor of your tomatoes. Marigolds are also excellent companion plants, known for their ability to repel nematodes and other harmful insects.
Don’t be afraid to get creative with your watering system. While manual watering works perfectly fine, you could also explore setting up a simple drip irrigation system to ensure consistent moisture levels, especially during hot summer months. This can be as simple as using a repurposed plastic bottle with small holes poked in the lid, buried near the base of your plants.
Ultimately, the success of this garden planting hack depends on your willingness to experiment and adapt it to your specific needs and environment. So, we wholeheartedly encourage you to give it a try! We are confident that you’ll be amazed by the results.
And most importantly, we want to hear about your experience! Share your photos, tips, and variations in the comments section below. Let’s create a community of gardeners who are passionate about sustainable and efficient gardening practices. Together, we can learn from each other and cultivate thriving gardens that bring joy and abundance to our lives. Let us know what you planted, what challenges you faced, and what successes you celebrated. Your feedback will not only help us improve this guide but also inspire other gardeners to embark on their own gardening adventures. Happy planting!
Frequently Asked Questions
What type of container is best for this garden planting hack?
The best type of container depends on your space, budget, and aesthetic preferences. Plastic storage bins are a cost-effective and readily available option. However, you can also use repurposed containers like old tires (be mindful of potential leaching), wooden crates, or even large buckets. Raised garden beds lined with landscape fabric offer a more permanent and visually appealing solution. The key is to ensure the container is large enough to accommodate the root systems of your chosen plants and has adequate drainage. If using a container without pre-existing drainage holes, be sure to drill some to prevent waterlogging.
What kind of soil should I use?
A well-draining, nutrient-rich soil mix is crucial for success. A good starting point is a combination of topsoil, compost, and peat moss or coco coir. The specific ratio will depend on the needs of your plants. For example, vegetables generally prefer a soil mix that is higher in organic matter, while succulents require a soil mix that is sandier and drains more quickly. You can also purchase pre-mixed potting soil specifically formulated for vegetables, flowers, or herbs. Amending your soil with compost regularly will help to improve its fertility and drainage over time.
How often should I water my plants?
Watering frequency depends on several factors, including the type of plant, the weather conditions, and the type of container you are using. Generally, you should water your plants when the top inch of soil feels dry to the touch. Avoid overwatering, as this can lead to root rot. During hot, dry weather, you may need to water your plants more frequently. Using a moisture meter can help you determine the moisture levels in your soil and avoid over or under watering.
How do I deal with pests and diseases?
Prevention is key when it comes to pests and diseases. Start by choosing disease-resistant varieties of plants. Ensure your plants have adequate sunlight and airflow. Regularly inspect your plants for signs of pests or diseases. If you spot any problems, address them promptly. Organic pest control methods, such as insecticidal soap or neem oil, are often effective. Companion planting can also help to deter pests. For example, planting basil alongside tomatoes can help to repel aphids and other pests.
Can I use this method for all types of plants?
While this garden planting hack is versatile, it’s not suitable for all types of plants. Plants with very deep root systems, such as trees or large shrubs, may not thrive in a container. However, it’s ideal for vegetables, herbs, flowers, and smaller shrubs. Consider the mature size and root system of your chosen plants when deciding whether or not this method is appropriate.
How do I fertilize my plants?
Regular fertilization is essential for healthy plant growth. You can use a variety of fertilizers, including organic options like compost tea or fish emulsion, or synthetic fertilizers. Follow the instructions on the fertilizer label carefully. Avoid over-fertilizing, as this can damage your plants. Side-dressing with compost or adding slow-release fertilizer granules to the soil at planting time can provide a steady supply of nutrients throughout the growing season.
What if I don’t have a lot of sunlight?
Most vegetables and flowers require at least six hours of sunlight per day. However, some plants, such as leafy greens and herbs, can tolerate partial shade. If you don’t have a lot of sunlight, choose plants that are well-suited to shady conditions. You can also supplement natural sunlight with grow lights.
How do I prevent weeds from growing in my container?
Using a weed-free soil mix is the first step in preventing weeds. You can also add a layer of mulch to the surface of the soil to suppress weed growth. Regularly inspect your container for weeds and remove them promptly. Hand-pulling weeds is often the most effective method. Avoid using herbicides, as they can harm your plants.
Can I move the container after planting?
Yes, you can move the container after planting, but it’s best to do so before the plants become too large and heavy. Choose a location that provides adequate sunlight and protection from wind. If you are using a very large container, you may need to use a dolly or other moving equipment.
What do I do at the end of the growing season?
At the end of the growing season, remove any dead or diseased plants from the container. You can compost the plant debris or dispose of it in your yard waste bin. Amend the soil with compost or other organic matter to replenish its nutrients. You can then either replant the container with new plants or store it for the winter. If you live in a cold climate, you may need to protect the container from freezing temperatures to prevent it from cracking.
Leave a Comment