
Fresh Herbs Daily DIY: Imagine stepping outside your door and snipping fragrant basil for your pasta, or plucking fresh mint for a refreshing mojito, all grown with your own two hands. Sounds idyllic, right? Well, it’s more achievable than you think! For centuries, cultivating herbs has been a cornerstone of cultures worldwide, from ancient Egyptians using them for medicinal purposes to medieval monks tending their monastery gardens. But you don’t need to be a pharaoh or a monk to enjoy the benefits of fresh herbs.
In today’s fast-paced world, we often rely on store-bought herbs that can be expensive and lack the vibrant flavor of homegrown varieties. That’s where the magic of fresh herbs daily DIY comes in! This article is packed with simple, effective tricks and hacks to help you cultivate a thriving herb garden, no matter your space or experience level. Whether you have a sprawling backyard or just a sunny windowsill, I’m going to show you how to enjoy the delightful taste and aroma of fresh herbs every single day. Get ready to unleash your inner gardener and transform your kitchen into a culinary paradise!
Frische Kräuter Jeden Tag: Dein DIY-Kräutergarten für die Küche
Hallo liebe Gartenfreunde und Hobbyköche! Habt ihr auch genug davon, ständig teure Kräuter im Supermarkt zu kaufen, die dann nach zwei Tagen schon wieder welk sind? Ich auch! Deshalb zeige ich euch heute, wie ihr euch ganz einfach einen kleinen, aber feinen Kräutergarten direkt in eurer Küche anlegen könnt. So habt ihr immer frische Kräuter zur Hand, um eure Gerichte zu verfeinern. Und das Beste daran: Es ist super einfach und macht richtig Spaß!
Was du brauchst: Die Materialliste
Bevor wir loslegen, hier eine Liste mit allen Materialien, die du für deinen Indoor-Kräutergarten benötigst:
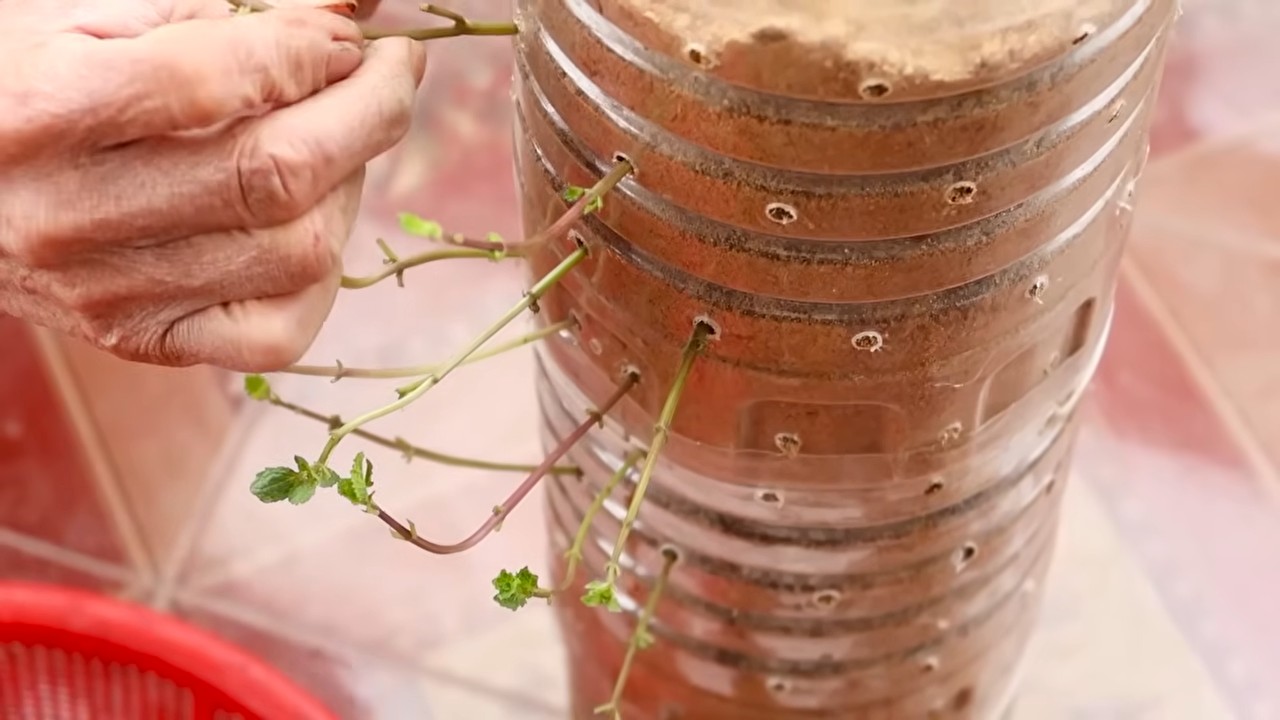
* Pflanzgefäße: Hier sind deiner Kreativität keine Grenzen gesetzt! Du kannst Töpfe, Kisten, alte Dosen oder sogar eine alte Schublade verwenden. Achte nur darauf, dass sie ausreichend groß sind und Abzugslöcher haben, damit das Wasser ablaufen kann. Ich persönlich mag Terrakotta-Töpfe, weil sie atmungsaktiv sind und die Erde nicht so schnell austrocknet.
* Pflanzerde: Verwende am besten spezielle Kräutererde. Diese ist nährstoffarm und verhindert, dass deine Kräuter zu schnell wachsen und an Aroma verlieren. Normale Blumenerde ist oft zu reichhaltig.
* Kieselsteine oder Blähton: Diese dienen als Drainage am Boden der Töpfe und verhindern Staunässe.
* Kräutersamen oder Jungpflanzen: Du kannst entweder Kräuter aus Samen ziehen oder direkt Jungpflanzen kaufen. Samen sind günstiger, aber es dauert länger, bis du ernten kannst. Jungpflanzen sind teurer, aber du hast sofort etwas zum Ernten. Ich empfehle eine Mischung aus beidem!
* Gießkanne oder Sprühflasche: Zum Bewässern deiner Kräuter.
* Schere oder Messer: Zum Ernten der Kräuter.
* Etiketten und Stift: Um deine Kräuter zu beschriften. So behältst du den Überblick!
* Optional: Ein kleiner Spaten oder eine Schaufel zum Umtopfen.
* Optional: Eine Pflanzenlampe, falls dein Standort nicht genügend Licht bietet.
Die Vorbereitung: Alles bereit machen
Bevor wir mit dem Pflanzen beginnen, sollten wir alles vorbereiten. Das spart Zeit und Nerven!
1. Reinige deine Pflanzgefäße: Egal ob neu oder gebraucht, spüle deine Töpfe gründlich mit heißem Wasser und etwas Spülmittel aus. So entfernst du eventuelle Schmutzreste und Keime.
2. Bereite die Drainage vor: Fülle eine Schicht Kieselsteine oder Blähton (ca. 2-3 cm hoch) auf den Boden jedes Topfes. Das sorgt für eine gute Drainage und verhindert Staunässe, die zu Wurzelfäule führen kann.
3. Fülle die Töpfe mit Erde: Fülle die Töpfe mit Kräutererde, aber lass oben noch ca. 2-3 cm Platz. Drücke die Erde leicht an.
Das Pflanzen: Samen oder Jungpflanzen?
Jetzt kommt der spannende Teil: Das Pflanzen deiner Kräuter! Hier zeige ich dir, wie du sowohl Samen als auch Jungpflanzen richtig einpflanzt.
Kräuter aus Samen ziehen
1. Samen aussäen: Verteile die Samen gleichmäßig auf der Erde. Achte darauf, dass du nicht zu viele Samen in einen Topf säst, da die Pflanzen sonst zu eng stehen und sich nicht richtig entwickeln können.
2. Samen bedecken: Bedecke die Samen mit einer dünnen Schicht Erde (ca. 0,5 cm). Die meisten Kräuter sind Lichtkeimer, das heißt, sie brauchen Licht zum Keimen. Informiere dich aber vorher, ob deine Kräuter zu den Dunkelkeimern gehören.
3. Angießen: Gieße die Erde vorsichtig mit einer Sprühflasche an. Vermeide es, die Samen wegzuschwemmen.
4. Feucht halten: Halte die Erde feucht, aber nicht nass. Am besten besprühst du die Erde regelmäßig mit Wasser.
5. Warm und hell stellen: Stelle die Töpfe an einen warmen und hellen Ort. Eine Fensterbank ist ideal.
6. Geduld haben: Es dauert einige Tage bis Wochen, bis die Samen keimen. Hab Geduld und gib nicht auf!
Jungpflanzen einpflanzen
1. Jungpflanzen vorbereiten: Nimm die Jungpflanzen vorsichtig aus ihren Töpfen. Lockere die Wurzeln etwas auf, damit sie sich besser im neuen Topf ausbreiten können.
2. Pflanzlöcher graben: Grabe in der Erde Löcher, die groß genug sind, um die Wurzelballen der Jungpflanzen aufzunehmen.
3. Jungpflanzen einsetzen: Setze die Jungpflanzen in die Löcher und fülle die Löcher mit Erde auf. Drücke die Erde leicht an.
4. Angießen: Gieße die Pflanzen vorsichtig an.
Die Pflege: Damit deine Kräuter prächtig gedeihen
Damit deine Kräuter lange leben und gut wachsen, brauchen sie die richtige Pflege. Hier sind ein paar Tipps:
* Gießen: Gieße deine Kräuter regelmäßig, aber nicht zu viel. Die Erde sollte immer leicht feucht sein, aber nicht nass. Vermeide Staunässe. Am besten testest du mit dem Finger, ob die Erde trocken ist.
* Düngen: Kräuter brauchen nicht viel Dünger. Wenn du aber merkst, dass deine Kräuter nicht richtig wachsen, kannst du sie ab und zu mit einem organischen Kräuterdünger düngen.
* Schneiden: Schneide deine Kräuter regelmäßig, damit sie buschiger werden und nicht verkahlen. Schneide die Triebe kurz über einem Blattknoten ab.
* Licht: Kräuter brauchen viel Licht. Stelle sie an einen hellen Ort, am besten auf eine Fensterbank. Wenn dein Standort nicht genügend Licht bietet, kannst du eine Pflanzenlampe verwenden.
* Umpflanzen: Wenn deine Kräuter zu groß für ihre Töpfe werden, solltest du sie umtopfen. Wähle einen Topf, der etwas größer ist als der alte.
* Schädlinge: Achte auf Schädlinge wie Blattläuse oder Spinnmilben. Wenn du Schädlinge entdeckst, kannst du sie mit einem natürlichen Schädlingsbekämpfungsmittel bekämpfen.
Die Ernte: Frische Kräuter für deine Küche
Endlich ist es soweit: Du kannst deine eigenen Kräuter ernten!
* Erntezeitpunkt: Ernte deine Kräuter am besten am Morgen, wenn die ätherischen Öle am konzentriertesten sind.
* Erntetechnik: Schneide die Triebe mit einer Schere oder einem Messer ab. Schneide die Triebe kurz über einem Blattknoten ab.
* Verwendung: Verwende die Kräuter sofort oder trockne sie, um sie länger haltbar zu machen.
Kräuterportraits: Meine Lieblingskräuter für den Indoor-Garten
Hier stelle ich dir meine persönlichen Lieblingskräuter für den Indoor-Garten vor und gebe dir ein paar Tipps zur Pflege und Verwendung:
Basilikum
* Standort: Sonnig und warm
* Gießen: Regelmäßig, aber nicht zu viel
* Verwendung: Passt hervorragend zu Tomaten, Mozzarella, Pasta und Pizza.
Petersilie
* Standort: Halbschattig
* Gießen: Regelmäßig
* Verwendung: Vielseitig einsetzbar, z.B. in Suppen, Salaten, Saucen und Dips.
Schnittlauch
* Standort: Sonnig bis halbschattig
* Gießen: Regelmäßig
* Verwendung: Passt gut zu Eiern, Quark, Suppen und Salaten.
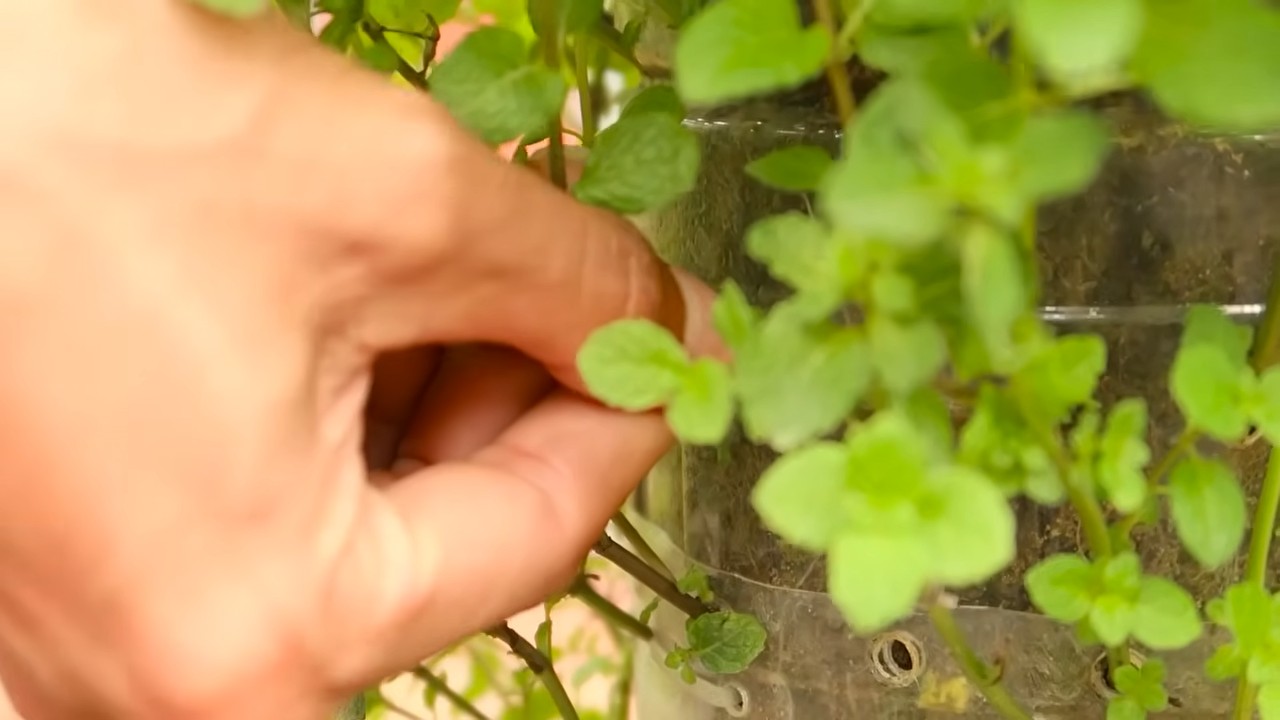
Minze
* Standort: Halbschattig
* Gießen: Regelmäßig
* Verwendung: Ideal für Tee, Cocktails, Desserts und Salate.
Rosmarin
* Standort: Sonnig und trocken
* Gießen: Wenig
* Verwendung: Passt gut zu Fleisch, Kartoffeln und Gemüse.
Häufige Fehler und wie du sie vermeidest
Auch beim Anlegen eines Kräutergartens können Fehler passieren. Hier sind die häufigsten Fehler und wie
Conclusion
So, there you have it! Transforming your kitchen into a miniature herb garden with this simple, effective, and incredibly rewarding DIY trick for preserving fresh herbs daily is not just a culinary game-changer; it’s a lifestyle upgrade. Forget those wilted, sad-looking bunches languishing in your crisper drawer. Say goodbye to expensive, pre-packaged herbs that lack the vibrant flavor and aroma of freshly picked greens. This method empowers you to enjoy the full potential of your herbs, adding a burst of freshness to every meal.
Why is this a must-try? Because it’s economical, reduces food waste, and most importantly, elevates your cooking. Imagine the possibilities: a sprinkle of fragrant basil on your homemade pizza, a generous handful of cilantro brightening your tacos, or a delicate chiffonade of mint infusing your iced tea with a refreshing zest. The difference between using dried herbs and freshly preserved ones is night and day, and this DIY method makes that difference accessible to everyone.
Beyond the basic method, there are countless ways to customize this technique to suit your specific needs and preferences. For delicate herbs like basil and mint, consider blanching them briefly in boiling water before freezing to help preserve their color and flavor even further. Experiment with different storage containers – reusable silicone bags are a great eco-friendly option. You can even create herb-infused oils or vinegars by adding your preserved herbs to a bottle of high-quality olive oil or vinegar. Let your creativity be your guide!
Don’t be intimidated by the idea of preserving your own herbs. This DIY trick is surprisingly simple, even for beginners. With just a few minutes of effort, you can unlock a world of culinary possibilities and enjoy the vibrant flavors of fresh herbs year-round. We wholeheartedly encourage you to give this a try. You’ll be amazed at how easy it is to maintain a constant supply of fresh herbs daily.
But the real magic happens when you share your experiences. We want to hear from you! Did you try this method? What herbs did you preserve? What variations did you experiment with? What delicious dishes did you create? Share your tips, tricks, and triumphs in the comments below. Let’s build a community of herb-loving cooks who are passionate about fresh, flavorful food. Your insights could inspire others to embark on their own herb-preserving journey. So, go ahead, give it a whirl, and let us know how it goes! Happy herb-ing!
Frequently Asked Questions (FAQ)
What types of herbs work best with this preservation method?
This DIY preservation method is versatile and works well with a wide variety of herbs. However, some herbs tend to retain their flavor and texture better than others. Generally, hardy herbs like rosemary, thyme, oregano, sage, and chives freeze exceptionally well. Softer herbs like parsley, cilantro, dill, and basil can also be preserved using this method, but they may lose some of their texture and color. Blanching these softer herbs before freezing can help to mitigate these effects. Mint also freezes well, and its flavor remains vibrant. Experiment with different herbs to discover your favorites!
How long will the preserved herbs last in the freezer?
When stored properly in an airtight container or freezer bag, your preserved herbs can last for up to 6-12 months in the freezer. For optimal flavor and quality, it’s best to use them within the first 6 months. Be sure to label your containers with the date of preservation so you can keep track of their freshness. While the herbs won’t necessarily “go bad” after 12 months, their flavor and aroma will gradually diminish over time.
Can I use this method to preserve herbs that I’ve purchased from the grocery store?
Absolutely! This method is perfect for preserving herbs that you’ve purchased from the grocery store, especially if you find yourself with more than you can use before they start to wilt. Simply wash and dry the herbs thoroughly, remove any damaged or discolored leaves, and follow the steps outlined in the DIY trick. This is a great way to prevent food waste and ensure that you always have fresh herbs on hand, even if you don’t have a garden.
What’s the best way to thaw the preserved herbs?
The beauty of this method is that you don’t necessarily need to thaw the herbs before using them. You can simply add them directly to your cooking pot or dish while they’re still frozen. The heat from the cooking process will quickly thaw them and release their flavor. If you prefer to thaw them beforehand, you can place them in the refrigerator for a few hours or run them under cold water for a few seconds. However, keep in mind that thawed herbs may be slightly softer than fresh herbs, so it’s best to add them towards the end of the cooking process to prevent them from becoming mushy.
Can I use this method to preserve herbs in oil or butter?
Yes, you can! Preserving herbs in oil or butter is a fantastic way to infuse these fats with flavor and create delicious culinary ingredients. To preserve herbs in oil, simply chop the herbs finely and combine them with a high-quality olive oil or other vegetable oil. Pour the mixture into ice cube trays and freeze until solid. Once frozen, transfer the herb-infused oil cubes to a freezer bag or airtight container. To preserve herbs in butter, follow the same process, but use softened butter instead of oil. These herb-infused oils and butters are perfect for sautéing vegetables, grilling meats, or adding a burst of flavor to sauces and dressings.
What if my herbs turn brown or black after freezing?
While this method generally preserves the color of herbs quite well, some discoloration can occur, especially with softer herbs like basil. This is usually due to oxidation. To minimize discoloration, ensure that the herbs are thoroughly dried before freezing and that they are stored in an airtight container or freezer bag. Blanching the herbs briefly in boiling water before freezing can also help to preserve their color. If your herbs do turn brown or black, they are still safe to eat, but their flavor may be slightly diminished.
Is it necessary to blanch the herbs before freezing?
Blanching is not strictly necessary, but it can help to preserve the color and flavor of certain herbs, particularly softer herbs like basil, parsley, and cilantro. Blanching involves briefly immersing the herbs in boiling water for a few seconds, followed by an immediate plunge into ice water to stop the cooking process. This helps to deactivate enzymes that can cause discoloration and flavor loss. If you’re preserving hardy herbs like rosemary, thyme, or oregano, blanching is usually not necessary.
Can I use this method to preserve edible flowers?
Yes, you can use this method to preserve edible flowers, although the results may vary depending on the type of flower. Delicate flowers like pansies and violets may not hold up as well as more robust flowers like nasturtiums and calendula. To preserve edible flowers, gently wash and dry them, then arrange them in a single layer on a baking sheet lined with parchment paper. Freeze until solid, then transfer them to a freezer bag or airtight container. Frozen edible flowers can be used to decorate cakes, salads, and other dishes.
How do I prevent freezer burn on my preserved herbs?
Freezer burn occurs when moisture evaporates from the surface of frozen food, causing it to become dry and discolored. To prevent freezer burn on your preserved herbs, ensure that they are stored in an airtight container or freezer bag. Press out as much air as possible before sealing the container. You can also wrap the herbs tightly in plastic wrap before placing them in the container. Using freezer-safe containers or bags specifically designed to prevent freezer burn can also be helpful.

Leave a Comment