
Easy melon growing tips are what every gardener dreams of, especially when visions of juicy, homegrown cantaloupe and watermelon dance in their heads! Let’s be honest, there’s nothing quite like the taste of a melon you’ve nurtured from seed to sweet, succulent perfection. But let’s face it, growing melons can sometimes feel like a gamble. You put in the effort, but the results can be… well, less than stellar.
Melons have a rich history, dating back to ancient civilizations in Africa and Asia. For centuries, they’ve been prized for their refreshing taste and nutritional benefits. Think of the elaborate melon displays in Renaissance paintings – a testament to their value and beauty! But you don’t need to be a master artist to cultivate your own melon patch.
That’s where these DIY tricks and hacks come in! I’m going to share some simple, yet effective, easy melon growing tips that will help you maximize your harvest and enjoy the sweetest, most flavorful melons you’ve ever tasted. Whether you’re a seasoned gardener or just starting out, these tips will empower you to overcome common challenges and unlock the secrets to melon-growing success. So, grab your gardening gloves, and let’s get ready to transform your garden into a melon paradise!
Melonenanbau leicht gemacht: Dein DIY-Guide für eine reiche Ernte
Hallo Gartenfreunde! Ich liebe es, frische, saftige Melonen direkt aus dem eigenen Garten zu ernten. Es gibt kaum etwas Besseres! Und wisst ihr was? Es ist gar nicht so schwer, wie man vielleicht denkt. Mit ein paar Tricks und Kniffen könnt auch ihr euch auf eine reiche Melonenernte freuen. In diesem Artikel zeige ich euch, wie ihr Melonen erfolgreich selbst anbauen könnt – von der Aussaat bis zur Ernte. Lasst uns loslegen!
Die Vorbereitung: Der Schlüssel zum Erfolg
Bevor wir mit dem eigentlichen Anbau beginnen, ist eine gute Vorbereitung das A und O. Melonen sind nämlich kleine Diven und brauchen die richtigen Bedingungen, um prächtig zu gedeihen.
* Der richtige Standort: Melonen lieben die Sonne! Sucht euch einen sonnigen Platz in eurem Garten aus, der mindestens 6-8 Stunden direkte Sonneneinstrahlung pro Tag bekommt. Je mehr Sonne, desto süßer werden die Melonen.
* Der Boden: Der Boden sollte locker, gut durchlässig und reich an Nährstoffen sein. Melonen mögen keine Staunässe, also achtet darauf, dass das Wasser gut ablaufen kann.
* Die richtige Sorte: Es gibt unzählige Melonensorten, von Wassermelonen über Honigmelonen bis hin zu Zuckermelonen. Informiert euch, welche Sorten in eurer Region gut gedeihen und welche euch am besten schmecken. Ich persönlich mag die “Sugar Baby” Wassermelone, weil sie relativ klein ist und schnell reift.
* Vorkultur oder Direktsaat: Ob ihr die Melonen vorzieht oder direkt ins Beet sät, hängt von eurem Klima ab. In kälteren Regionen empfiehlt sich die Vorkultur, um den Melonen einen Vorsprung zu verschaffen. In wärmeren Regionen könnt ihr sie direkt ins Beet säen.
Aussaat und Vorkultur: Den Grundstein legen
Ich bevorzuge es, meine Melonen vorzuziehen, da ich in einer Region mit etwas kühleren Sommern wohne. So haben die kleinen Pflänzchen einen guten Start.
1. Der richtige Zeitpunkt: Beginnt mit der Vorkultur etwa 4-6 Wochen vor dem letzten erwarteten Frost. Das ist meistens im April oder Mai.
2. Das richtige Gefäß: Verwendet kleine Töpfe oder Anzuchtschalen mit Anzuchterde. Die Erde sollte locker und nährstoffarm sein.
3. Die Aussaat: Legt 2-3 Samen pro Topf etwa 2-3 cm tief in die Erde. Bedeckt die Samen leicht mit Erde und gießt sie vorsichtig an.
4. Der richtige Standort: Stellt die Töpfe an einen warmen und hellen Ort. Eine Temperatur von 20-25°C ist ideal für die Keimung.
5. Die Pflege: Haltet die Erde feucht, aber nicht nass. Vermeidet Staunässe, da die Samen sonst faulen können. Nach etwa 1-2 Wochen sollten die ersten Keimlinge erscheinen.
6. Pikieren: Sobald die Keimlinge ihre ersten richtigen Blätter (nach den Keimblättern) gebildet haben, könnt ihr sie pikieren. Das bedeutet, dass ihr die stärksten Pflänzchen in größere Töpfe umsetzt. Achtet darauf, die Wurzeln nicht zu beschädigen.
Auspflanzen ins Beet: Die Melonen in die Freiheit entlassen
Sobald die Temperaturen steigen und keine Frostgefahr mehr besteht, können die Melonen ins Beet umziehen.
1. Der richtige Zeitpunkt: Wartet bis Mitte Mai oder Anfang Juni, bevor ihr die Melonen auspflanzt. Die Bodentemperatur sollte mindestens 15°C betragen.
2. Die Vorbereitung des Beetes: Lockert den Boden gründlich auf und entfernt Unkraut. Mischt Kompost oder gut verrotteten Mist unter die Erde, um sie mit Nährstoffen anzureichern.
3. Das Auspflanzen: Hebt Löcher aus, die etwas größer sind als die Töpfe, in denen die Melonen stehen. Setzt die Melonen vorsichtig in die Löcher und füllt sie mit Erde auf. Achtet darauf, dass der Wurzelballen vollständig bedeckt ist.
4. Der Abstand: Melonen brauchen viel Platz! Plant etwa 1-1,5 Meter Abstand zwischen den Pflanzen und 2-3 Meter zwischen den Reihen.
5. Angießen: Gießt die Melonen nach dem Auspflanzen gründlich an.
6. Mulchen: Mulcht das Beet mit Stroh oder Holzhackschnitzeln. Das hält den Boden feucht, unterdrückt Unkraut und schützt die Früchte vor direktem Bodenkontakt.
Die Pflege: Melonen glücklich machen
Nach dem Auspflanzen ist es wichtig, die Melonen gut zu pflegen, damit sie prächtig gedeihen und viele Früchte tragen.
* Gießen: Melonen brauchen viel Wasser, besonders während der Fruchtbildung. Gießt sie regelmäßig und gründlich, aber vermeidet Staunässe. Am besten gießt ihr morgens, damit die Blätter über den Tag abtrocknen können.
* Düngen: Düngt die Melonen regelmäßig mit einem organischen Dünger. Ich verwende gerne Komposttee oder Brennnesseljauche. Achtet darauf, dass der Dünger reich an Kalium ist, da Kalium die Fruchtbildung fördert.
* Unkraut jäten: Haltet das Beet unkrautfrei, damit die Melonen genügend Nährstoffe und Licht bekommen.
* Schutz vor Schädlingen: Melonen können von verschiedenen Schädlingen befallen werden, wie z.B. Schnecken, Blattläusen oder Gurkenmosaikvirus. Kontrolliert die Pflanzen regelmäßig und bekämpft Schädlinge bei Bedarf mit natürlichen Mitteln.
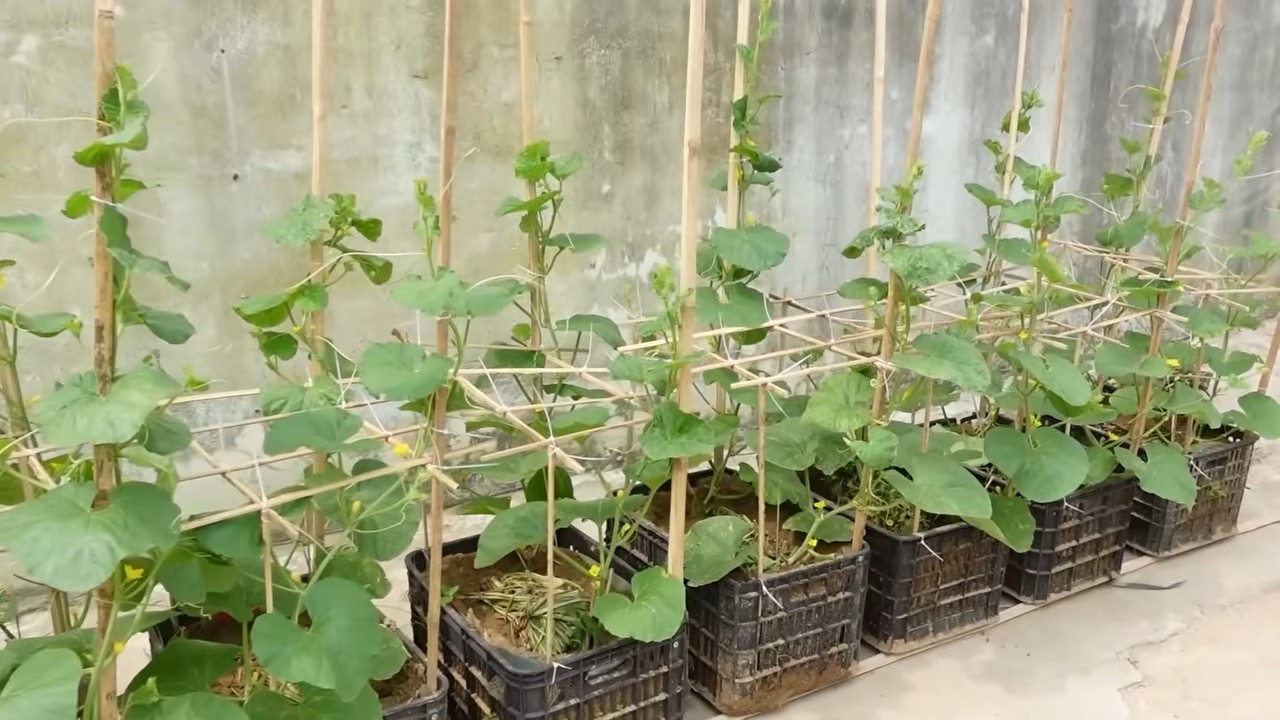
* Rankhilfe: Einige Melonensorten, insbesondere Wassermelonen, können sehr groß und schwer werden. Um zu verhindern, dass die Früchte auf dem Boden liegen und faulen, könnt ihr sie auf eine Rankhilfe legen oder mit Stroh unterlegen.
* Ausgeizen: Bei einigen Melonensorten, insbesondere bei Wassermelonen, kann es sinnvoll sein, die Seitentriebe auszugeizen. Das bedeutet, dass ihr die Seitentriebe entfernt, damit die Pflanze ihre Energie in die Hauptfrucht stecken kann.
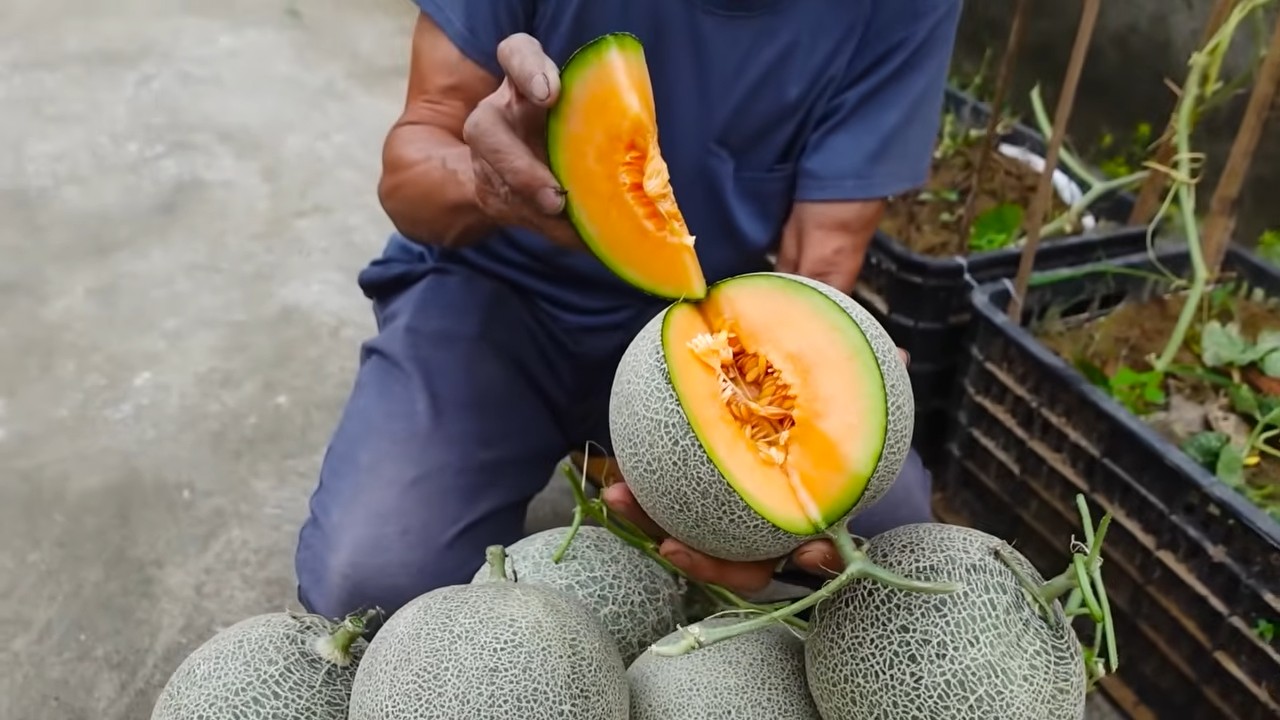
Die Ernte: Der Lohn der Mühe
Die Ernte ist der krönende Abschluss der Melonensaison. Aber wann sind die Melonen reif?
1. Der richtige Zeitpunkt: Der Reifezeitpunkt hängt von der Melonensorte ab. Informiert euch, wann eure Sorte reif sein sollte.
2. Die Klopfprobe: Klopft leicht gegen die Melone. Eine reife Melone klingt hohl.
3. Der Stielansatz: Bei vielen Melonensorten löst sich der Stielansatz leicht, wenn die Melone reif ist.
4. Die Farbe: Die Farbe der Melone kann sich verändern, wenn sie reif ist. Bei Wassermelonen wird die Unterseite, die auf dem Boden liegt, oft gelblich.
5. Der Duft: Einige Melonensorten duften intensiv, wenn sie reif sind.
Sobald ihr sicher seid, dass die Melone reif ist, könnt ihr sie mit einem scharfen Messer vom Stiel abschneiden. Lasst noch ein kleines Stück Stiel an der Melone, damit sie länger haltbar ist.
Spezifische Tipps für Wassermelonen
Wassermelonen sind besonders beliebt, aber auch etwas anspruchsvoller im Anbau. Hier sind ein paar zusätzliche Tipps:
* Viel Platz: Wassermelonen brauchen viel Platz, da sie sehr groß werden können. Plant mindestens 1,5 Meter Abstand zwischen den Pflanzen.
* Schwere Früchte: Wassermelonen können sehr schwer werden. Legt sie auf Stroh oder eine Rankhilfe, um zu verhindern, dass sie auf dem Boden liegen und faulen.
* Regelmäßiges Gießen: Wassermelonen brauchen viel Wasser, besonders während der Fruchtbildung. Gießt sie regelmäßig und gründlich.
* Ausgeizen: Bei Wassermelonen kann es sinnvoll sein, die Seitentriebe auszugeizen, damit die Pflanze ihre Energie in die Hauptfrucht stecken kann.
Spezifische Tipps für Honigmelonen und Zuckermelonen
Honigmelonen und Zuckermelonen sind etwas einfacher anzubauen als Wassermelonen. Hier sind ein paar Tipps:
* Weniger Platz: Honigmelonen und
Conclusion
So, there you have it! Transforming your melon growing game with these simple, yet incredibly effective, DIY tricks is not just about saving money; it’s about fostering a deeper connection with your garden and enjoying the unparalleled satisfaction of nurturing your own delicious, homegrown melons. We’ve covered everything from creating nutrient-rich soil amendments using kitchen scraps to constructing DIY supports for sprawling vines, and even explored clever ways to protect your precious fruits from pests and diseases.
But why is this a must-try? Because store-bought melons, while convenient, often lack the intense flavor and sweetness of those grown with love and care in your own backyard. By implementing these DIY techniques, you’re not only ensuring a healthier, more vibrant harvest, but you’re also actively participating in a sustainable and rewarding process. You’re controlling the inputs, minimizing waste, and maximizing the potential of your garden space.
Consider the possibilities! Imagine biting into a juicy, sun-ripened watermelon that you personally nurtured from seed to fruit. Or perhaps you’re slicing into a fragrant cantaloupe, its sweetness intensified by the homemade compost you meticulously prepared. The taste difference is undeniable, and the sense of accomplishment is immeasurable.
Variations and Further Exploration
Don’t be afraid to experiment and adapt these DIY tricks to suit your specific needs and resources. For example, if you don’t have access to coffee grounds, try using other nitrogen-rich materials like grass clippings or aged manure in your soil amendments. If you’re short on space, consider growing smaller melon varieties in containers and utilizing vertical gardening techniques. You can even try different materials for your DIY supports, such as bamboo poles or repurposed metal fencing.
The key is to be creative and resourceful. The beauty of DIY gardening lies in its flexibility and adaptability. There’s no one-size-fits-all approach, so feel free to tailor these techniques to your unique circumstances and preferences.
We strongly encourage you to give these easy melon growing tips a try this season. You’ll be amazed at the difference they can make in the quality and quantity of your harvest. And more importantly, you’ll discover a newfound appreciation for the magic of growing your own food.
But don’t just take our word for it! We want to hear about your experiences. Share your successes, your challenges, and your own DIY innovations in the comments section below. Let’s create a community of melon-loving gardeners who are passionate about sharing their knowledge and inspiring others to grow their own delicious fruits.
So, grab your gardening gloves, gather your supplies, and get ready to embark on a rewarding journey of DIY melon growing. We’re confident that you’ll be delighted with the results. Happy gardening!
Frequently Asked Questions (FAQ)
What are the most common mistakes people make when growing melons, and how can these DIY tips help avoid them?
One of the biggest mistakes is neglecting soil preparation. Melons are heavy feeders and require nutrient-rich soil to thrive. Our DIY soil amendment recipes, using readily available materials like coffee grounds and eggshells, provide a slow-release source of essential nutrients, preventing nutrient deficiencies that can lead to stunted growth and poor fruit production. Another common mistake is inadequate support for the vines. Melons, especially larger varieties like watermelons, can become quite heavy, causing the vines to break or the fruits to rot if they’re resting on the ground. Our DIY support structures, using materials like repurposed wood or bamboo, provide the necessary support to keep the vines and fruits off the ground, promoting air circulation and preventing disease. Finally, many gardeners struggle with pest and disease management. Our DIY pest control solutions, such as companion planting and homemade insecticidal sprays, offer a natural and effective way to protect your melons from common pests and diseases without resorting to harsh chemicals.
How do I know which melon variety is best suited for my climate and growing conditions?
Choosing the right melon variety is crucial for success. Consider your climate’s growing season length and average temperatures. Shorter-season varieties like ‘Sugar Baby’ watermelon or ‘Minnesota Midget’ cantaloupe are ideal for cooler climates with shorter summers. Longer-season varieties like ‘Charleston Gray’ watermelon or ‘Honeydew’ melon require warmer temperatures and a longer growing season. Also, consider your soil type. Some melon varieties are more tolerant of sandy soils, while others prefer heavier clay soils. Research the specific requirements of each variety before planting. Local nurseries and agricultural extension offices can provide valuable information on which varieties perform best in your area. Don’t be afraid to experiment with different varieties to find the ones that thrive in your garden.
Can I use these DIY tricks for other types of fruits and vegetables in my garden?
Absolutely! Many of these DIY techniques can be adapted for other fruits and vegetables. For example, the DIY soil amendment recipes can be used to improve the soil for tomatoes, peppers, and cucumbers. The DIY support structures can be used for climbing vegetables like beans, peas, and cucumbers. And the DIY pest control solutions can be used to protect a wide range of plants from common pests and diseases. The principles of DIY gardening are universal: utilize readily available materials, minimize waste, and create a sustainable and thriving garden ecosystem.
What are some signs that my melon plant is not getting enough nutrients, and how can I address this issue using DIY methods?
Signs of nutrient deficiency in melon plants include yellowing leaves (especially older leaves), stunted growth, poor fruit set, and small or misshapen fruits. If you notice these symptoms, it’s likely that your plants are lacking essential nutrients. To address this issue using DIY methods, start by testing your soil pH. Melons prefer a slightly acidic soil pH of 6.0 to 6.8. You can purchase a soil testing kit at your local garden center or send a soil sample to a laboratory for analysis. If your soil pH is too high or too low, amend it with lime or sulfur, respectively. Next, supplement your soil with our DIY soil amendment recipes. Coffee grounds are a great source of nitrogen, while eggshells provide calcium. You can also add compost or aged manure to your soil to provide a balanced source of nutrients. Finally, consider foliar feeding your plants with a diluted seaweed extract or compost tea. This will provide a quick boost of nutrients directly to the leaves.
How can I protect my melons from pests and diseases without using harmful chemicals?
There are several DIY methods you can use to protect your melons from pests and diseases without resorting to harmful chemicals. Companion planting is a great way to deter pests and attract beneficial insects. Plant marigolds near your melons to repel nematodes and aphids. Plant basil near your melons to repel whiteflies and other pests. You can also create a homemade insecticidal spray using ingredients like neem oil, garlic, or chili peppers. These sprays are effective against a wide range of pests, including aphids, spider mites, and caterpillars. To prevent fungal diseases, ensure good air circulation around your plants by spacing them properly and pruning away any crowded foliage. Water your plants in the morning so that the leaves have time to dry before nightfall. You can also apply a homemade fungicide made from baking soda and water to prevent fungal diseases like powdery mildew. Regularly inspect your plants for signs of pests or diseases and take action promptly to prevent them from spreading.
How long does it typically take for a melon to mature from planting to harvest, and what are some signs that it’s ready to be picked?
The time it takes for a melon to mature from planting to harvest varies depending on the variety and growing conditions. Generally, watermelons take 70-90 days to mature, cantaloupes take 70-80 days, and honeydew melons take 80-90 days. There are several signs that a melon is ready to be picked. For watermelons, look for a dull, thumping sound when you tap the melon. The tendril closest to the melon should be brown and dry. The underside of the melon, where it rests on the ground, should be yellow or cream-colored. For cantaloupes, the melon should slip easily from the vine with a gentle tug. The skin should be a golden color and have a fragrant aroma. For honeydew melons, the skin should be a creamy white color and have a slightly waxy feel. The blossom end of the melon should be slightly soft. Don’t be afraid to taste a small piece of the melon to ensure that it’s ripe and sweet.


Leave a Comment