
Easy Indoor Sprout Growing: Unlock the secrets to fresh, nutritious greens right on your windowsill! Have you ever dreamt of having a constant supply of vibrant, healthy sprouts without even stepping foot outside? Well, dream no more! This DIY guide will empower you to cultivate your own mini-garden of goodness, bringing a burst of flavor and vital nutrients to your meals, all year round.
Sprouting, in its essence, is an ancient practice. Cultures across the globe, from the Far East to the Mediterranean, have long recognized the incredible nutritional power packed within these tiny seedlings. Think of the ancient Egyptians, who sprouted grains for sustenance, or the traditional Chinese medicine practitioners who valued sprouts for their medicinal properties. This isn’t just a modern trend; it’s a time-tested method of accessing concentrated vitamins and minerals.
In today’s fast-paced world, it’s easy to fall into the trap of processed foods and nutrient-deficient diets. But what if I told you there’s a simple, cost-effective way to boost your health and add a delicious crunch to your salads, sandwiches, and stir-fries? That’s where easy indoor sprout growing comes in! This guide will show you how to bypass expensive grocery store prices and questionable freshness by creating your own thriving sprout haven. I’ll walk you through the entire process, from selecting the right seeds to harvesting your bounty, ensuring you have a continuous supply of these nutritional powerhouses. Get ready to transform your kitchen into a miniature farm and experience the joy of growing your own food, one sprout at a time!
DIY: Einfach Sprossen ziehen in der Wohnung – So geht’s!
Ich liebe frische Sprossen! Sie sind super gesund, knackig und peppen jedes Gericht auf. Und das Beste: Man kann sie ganz einfach selbst zu Hause ziehen, ohne viel Aufwand oder teure Ausrüstung. Ich zeige dir, wie es geht!
Was du brauchst:
* Sprossengläser: Du kannst spezielle Sprossengläser kaufen, aber ein normales Einmachglas mit einem feinmaschigen Netz oder einem Stück Mulltuch und einem Gummiring tut es auch. Ich persönlich finde Sprossengläser mit Ständer praktischer, weil das Wasser besser ablaufen kann.
* Sprossensamen: Achte darauf, dass du spezielle Sprossensamen kaufst, die für den Verzehr geeignet sind. Im Supermarkt oder Bioladen gibt es eine große Auswahl: Alfalfa, Radieschen, Brokkoli, Linsen, Mungbohnen, Kresse und viele mehr. Ich mag eine Mischung aus verschiedenen Sorten.
* Wasser: Am besten gefiltertes Wasser oder abgekochtes, abgekühltes Wasser.
* Ein dunkler Ort: Am Anfang brauchen die Sprossen Dunkelheit zum Keimen.
* Ein heller Ort: Nach dem Keimen brauchen sie Licht, um Chlorophyll zu bilden und grün zu werden.
Schritt-für-Schritt-Anleitung:
1. Samen einweichen: Gib die Sprossensamen in dein Sprossenglas. Die Menge hängt von der Größe des Glases und der Sorte ab. Als Faustregel gilt: Nicht zu viele Samen, da sie sich beim Keimen ausdehnen. Ich nehme meistens 1-2 Esslöffel für ein normales Einmachglas. Fülle das Glas mit Wasser, sodass die Samen gut bedeckt sind. Lass die Samen je nach Sorte 4-12 Stunden einweichen. Mungbohnen brauchen zum Beispiel länger als Alfalfa. Ich mache das meistens über Nacht.
2. Wasser abgießen und spülen: Gieße das Einweichwasser ab. Das geht am besten, wenn du das Netz oder Mulltuch über die Öffnung spannst und mit dem Gummiring fixierst. Spüle die Samen gründlich mit frischem Wasser durch. Das ist wichtig, um Keime zu entfernen.
3. Sprossenglas dunkel stellen: Stelle das Sprossenglas an einen dunklen Ort, zum Beispiel in einen Küchenschrank oder eine Schublade. Achte darauf, dass das Glas schräg steht, sodass überschüssiges Wasser ablaufen kann. Ich stelle es meistens auf ein Abtropfgitter.
4. Regelmäßig spülen: Spüle die Sprossen 2-3 Mal täglich mit frischem Wasser. Das ist das A und O für eine erfolgreiche Sprossenzucht. So verhinderst du Schimmelbildung und sorgst dafür, dass die Sprossen feucht bleiben.
5. Sprossen ans Licht stellen: Nach 2-3 Tagen, wenn die Sprossen gekeimt sind, kannst du sie an einen hellen Ort stellen, aber nicht in die pralle Sonne. Durch das Licht bilden sie Chlorophyll und werden grün.
6. Weiter spülen: Spüle die Sprossen weiterhin 2-3 Mal täglich.
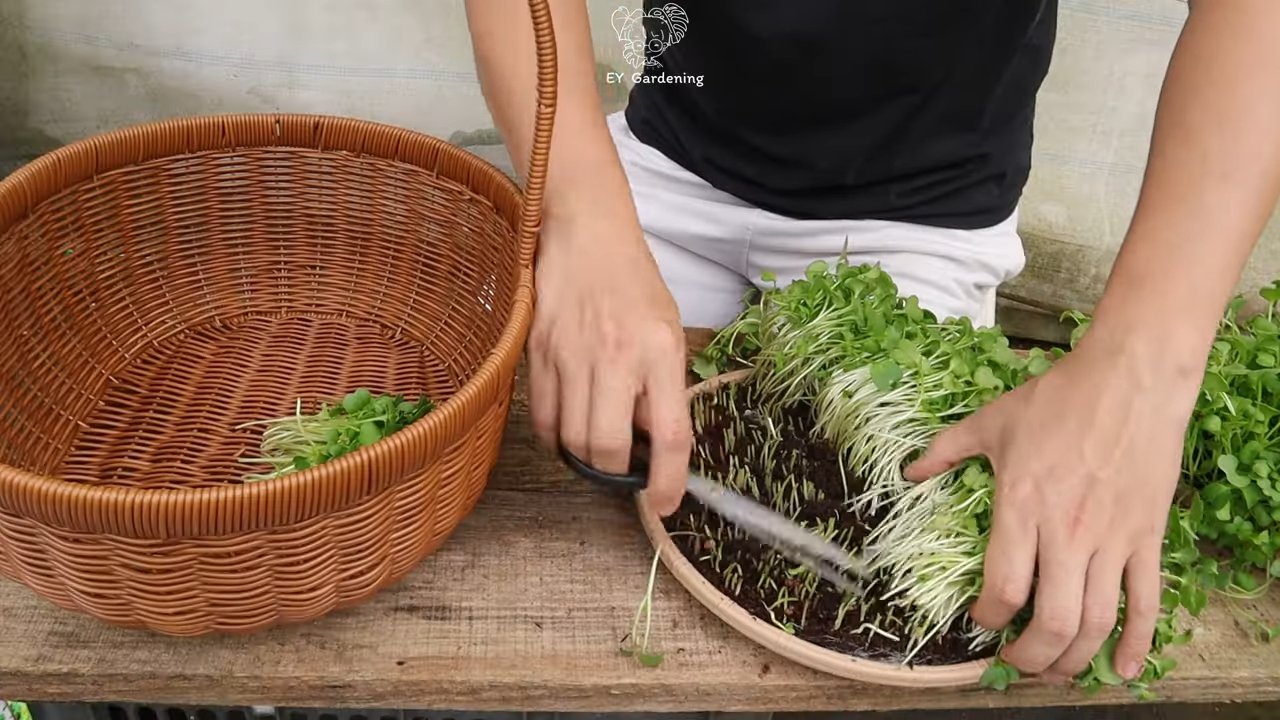
7. Ernten und genießen: Je nach Sorte sind die Sprossen nach 3-7 Tagen erntereif. Sie sollten knackig und frisch aussehen. Spüle sie vor dem Verzehr noch einmal gründlich ab.
8. Aufbewahrung: Bewahre die Sprossen im Kühlschrank auf. Am besten in einem luftdichten Behälter. Sie halten sich dort etwa 3-5 Tage.
Häufige Probleme und Lösungen:
* Schimmelbildung: Schimmelbildung ist das häufigste Problem beim Sprossen ziehen. Das liegt meistens an mangelnder Hygiene oder unzureichendem Spülen. Achte darauf, dass du saubere Gläser und frisches Wasser verwendest und die Sprossen regelmäßig spülst. Wenn du Schimmel entdeckst, solltest du die betroffenen Sprossen entsorgen.
* Faule Geruch: Ein fauler Geruch deutet ebenfalls auf Schimmelbildung oder Bakterienwachstum hin. Auch hier gilt: Entsorge die betroffenen Sprossen und achte beim nächsten Mal auf bessere Hygiene.
* Sprossen keimen nicht: Wenn die Sprossen nicht keimen, kann das verschiedene Ursachen haben. Vielleicht sind die Samen zu alt oder wurden falsch gelagert. Oder du hast sie nicht lange genug eingeweicht. Achte darauf, dass du frische Samen verwendest und die Einweichzeit beachtest.
* Sprossen sind schleimig: Schleimige Sprossen sind ein Zeichen für Bakterienwachstum. Das kann passieren, wenn die Sprossen zu warm stehen oder nicht ausreichend gespült werden. Stelle die Sprossen an einen kühleren Ort und spüle sie häufiger.
Spezielle Tipps für verschiedene Sprossensorten:
* Alfalfa: Alfalfa ist eine der beliebtesten Sprossensorten. Sie ist reich an Vitaminen und Mineralstoffen und schmeckt leicht nussig. Alfalfa braucht etwa 5-7 Tage, um zu keimen.
* Radieschen: Radieschensprossen haben einen würzigen, leicht scharfen Geschmack. Sie sind reich an Vitamin C und Senfölglykosiden. Radieschensprossen brauchen etwa 3-5 Tage, um zu keimen.
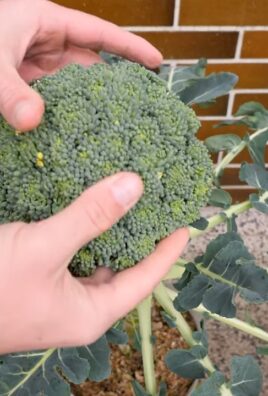
* Brokkoli: Brokkolisprossen sind besonders gesund, da sie reich an Sulforaphan sind, einem Stoff, der krebsvorbeugende Eigenschaften haben soll. Brokkolisprossen brauchen etwa 5-7 Tage, um zu keimen.
* Linsen: Linsensprossen sind reich an Proteinen und Ballaststoffen. Sie schmecken leicht erdig und nussig. Linsen brauchen etwa 2-3 Tage, um zu keimen.
* Mungbohnen: Mungbohnen sind die Grundlage für Sojasprossen. Sie sind reich an Proteinen und Vitaminen. Mungbohnen brauchen etwa 3-5 Tage, um zu keimen. Sie brauchen etwas mehr Platz, da sie stark wachsen.
* Kresse: Kresse ist eine schnell wachsende Sprosse mit einem pfeffrigen Geschmack. Sie ist reich an Vitamin C und Eisen. Kresse braucht nur 1-2 Tage, um zu keimen. Du kannst sie auch auf einem feuchten Tuch oder Watte ziehen.
Reinigung der Sprossengläser
Die Reinigung der Sprossengläser ist entscheidend, um Schimmelbildung und Bakterienwachstum zu verhindern. Ich reinige meine Gläser nach jeder Ernte gründlich.
1. Entleeren und Vorspülen: Zuerst entleere ich das Glas vollständig und entferne alle restlichen Sprossen. Dann spüle ich das Glas mit heißem Wasser vor, um grobe Verschmutzungen zu entfernen.
2. Reinigung mit Spülmittel: Ich verwende warmes Wasser und ein mildes Spülmittel, um das Glas gründlich zu reinigen. Mit einer Bürste komme ich auch in die Ecken und Winkel, um alle Rückstände zu entfernen.
3. Desinfektion (optional): Um sicherzustellen, dass alle Keime abgetötet werden, desinfiziere ich das Glas zusätzlich. Dafür gibt es verschiedene Möglichkeiten:
* Essig: Ich fülle das Glas mit einer Mischung aus Wasser und Essig (Verhältnis 1:1) und lasse es etwa 30 Minuten einwirken. Anschließend spüle ich das Glas gründlich mit klarem Wasser aus.
* Kochendes Wasser: Ich übergieße das Glas mit kochendem Wasser und lasse es einige Minuten stehen. Auch hier ist es wichtig, das Glas anschließend gründlich auszuspülen.
* Spezielle Desinfektionsmittel: Im Handel gibt es spezielle Desinfektionsmittel für Küchenutensilien. Diese sind besonders effektiv, aber achte darauf, dass sie für den Kontakt mit Lebensmitteln geeignet sind.
4. Trocknen: Nach der Reinigung lasse ich das Glas vollständig an der Luft trocknen. Ich stelle es dafür auf ein sauberes Tuch oder Abtropfgitter.
5. Netz oder Mulltuch reinigen: Auch das Netz oder Mulltuch, das ich zum Abdecken des Glases verwende, muss regelmäßig gereinigt werden. Ich wasche es entweder in der Waschmaschine oder spüle es gründlich mit heißem Wasser und Spülmittel aus.
Verwendung der Sprossen in der Küche
Sprossen sind unglaublich vielseitig und können in vielen verschiedenen Gerichten verwendet werden. Hier sind ein paar meiner Lieblingsideen:

Conclusion
So, there you have it! Mastering the art of easy indoor sprout growing is not only incredibly simple, but it’s also a game-changer for your health, your wallet, and your culinary adventures. Forget those expensive, pre-packaged sprouts from the grocery store that often come with a hefty price tag and a questionable freshness guarantee. With just a few basic supplies and a little bit of patience, you can cultivate a vibrant, nutrient-packed harvest right in your own kitchen.
Think about it: a constant supply of fresh, crunchy sprouts readily available to add a burst of flavor and nutrition to your salads, sandwiches, soups, and stir-fries. The possibilities are truly endless! And the best part? You have complete control over the entire process, ensuring that your sprouts are grown in a clean, safe, and sustainable environment.
But the benefits extend beyond just convenience and cost savings. Growing your own sprouts is a deeply rewarding experience. It’s a chance to connect with nature, even in the heart of the city. It’s a fascinating glimpse into the miracle of life, watching tiny seeds transform into vibrant, edible plants in just a matter of days. And it’s a powerful reminder of the abundance and resilience of the natural world.
Don’t be afraid to experiment with different types of seeds to discover your favorite sprout varieties. Try radish sprouts for a peppery kick, alfalfa sprouts for a mild and nutty flavor, or broccoli sprouts for a concentrated dose of antioxidants. You can even create your own custom sprout mixes to tailor the flavor profile to your specific tastes.
For a fun variation, consider using a sprouting jar with a mesh lid for easy rinsing and drainage. Or, if you’re feeling adventurous, try growing your sprouts in a terra cotta tray lined with damp paper towels. The key is to find a method that works best for you and your lifestyle.
We truly believe that everyone can benefit from incorporating easy indoor sprout growing into their daily routine. It’s a simple, sustainable, and incredibly rewarding way to boost your health, enhance your meals, and connect with nature.
So, what are you waiting for? Grab some seeds, gather your supplies, and get sprouting! We’re confident that you’ll be amazed at how easy and enjoyable it is to grow your own fresh, delicious sprouts.
And once you’ve experienced the joy of homegrown sprouts, we encourage you to share your experiences with us! Let us know what varieties you’ve tried, what methods you’ve found most successful, and what delicious dishes you’ve created with your homegrown bounty. Share your photos and stories on social media using [Your Hashtag Here] and inspire others to join the sprouting revolution! We can’t wait to see what you create!
Frequently Asked Questions (FAQ)
What types of seeds are best for sprouting indoors?
The best seeds for easy indoor sprout growing are those specifically labeled for sprouting. These seeds have been tested for germination rates and are free from harmful bacteria. Popular choices include alfalfa, broccoli, radish, clover, mung beans, lentils, and adzuki beans. Avoid using seeds intended for planting in the garden, as they may be treated with chemicals that are not safe for consumption. Always purchase your sprouting seeds from a reputable source to ensure their quality and safety.
How often should I rinse my sprouts?
Rinsing your sprouts is crucial for preventing mold and bacteria growth. Aim to rinse them at least twice a day, preferably in the morning and evening. Use cool, clean water and ensure that all the sprouts are thoroughly rinsed. After rinsing, drain the sprouts well to prevent them from becoming waterlogged. Proper rinsing and drainage are essential for successful easy indoor sprout growing.
How long does it take for sprouts to be ready to eat?
The sprouting time varies depending on the type of seed and the growing conditions. Generally, most sprouts are ready to eat within 3 to 7 days. Alfalfa sprouts, for example, typically take about 5 to 6 days, while radish sprouts may be ready in as little as 3 to 4 days. The best way to determine if your sprouts are ready is to taste them. They should be crisp and flavorful, with a slightly nutty or peppery taste.
What is the best way to store sprouts?
Once your sprouts are ready to eat, store them in the refrigerator in a clean, airtight container. Line the container with a paper towel to absorb any excess moisture. Properly stored sprouts can last for up to a week in the refrigerator. Be sure to rinse them again before using them.
Can I grow sprouts in direct sunlight?
While sprouts need light to grow, direct sunlight can be too intense and can cause them to dry out or overheat. The ideal location for easy indoor sprout growing is a well-lit area with indirect sunlight. A kitchen counter near a window is often a good choice. If you don’t have access to natural light, you can use a grow light to provide the necessary illumination.
What if my sprouts start to smell bad?
A foul odor is a sign that your sprouts have been contaminated with bacteria or mold. If you notice a bad smell, discard the sprouts immediately. To prevent this from happening, be sure to rinse your sprouts regularly and thoroughly, and ensure that they are properly drained. Using clean equipment and high-quality seeds is also essential.
Are there any health benefits to eating sprouts?
Yes! Sprouts are packed with nutrients and offer a wide range of health benefits. They are a good source of vitamins, minerals, enzymes, and antioxidants. Sprouts are also low in calories and high in fiber, making them a healthy and nutritious addition to any diet. Incorporating easy indoor sprout growing into your life is a great way to boost your overall health and well-being.
Can I grow sprouts without a special sprouting kit?
Absolutely! You don’t need a fancy sprouting kit to grow your own sprouts. You can easily use a mason jar with a cheesecloth or mesh lid, or even a simple bowl lined with damp paper towels. The key is to provide a clean, moist environment with good drainage. Get creative and experiment with different methods to find what works best for you.
What can I do with my sprouts once they are grown?
The possibilities are endless! Sprouts can be added to salads, sandwiches, wraps, soups, stir-fries, and smoothies. They can also be used as a garnish for tacos, omelets, and other dishes. Get creative and experiment with different ways to incorporate sprouts into your meals. They add a delicious crunch and a boost of nutrition to any dish.
Is it safe to eat sprouts if I am pregnant or have a compromised immune system?
While sprouts are generally safe to eat, individuals who are pregnant or have a compromised immune system should exercise caution. Sprouts can sometimes harbor bacteria, which can pose a risk to these vulnerable populations. To minimize the risk, it is recommended to cook sprouts thoroughly before eating them. Alternatively, you can purchase commercially grown sprouts that have been treated to reduce the risk of contamination. Always consult with your doctor or healthcare provider if you have any concerns.
Leave a Comment