
Easy Bitter Gourd Setup: Ever dreamt of harvesting a bounty of fresh, healthy bitter gourds right from your own backyard? I know I have! But the thought of complicated trellises and finicky vines can be daunting. Fear not, fellow gardening enthusiasts! This article is your ultimate guide to creating a simple, effective, and, yes, easy bitter gourd setup that will have you enjoying homegrown goodness in no time.
Bitter gourd, also known as karela, has a rich history, deeply rooted in traditional medicine and culinary practices across Asia. For centuries, it’s been celebrated not only for its unique, slightly bitter flavor but also for its impressive health benefits. From aiding digestion to boosting immunity, this humble vegetable packs a powerful punch. But let’s be honest, growing it can sometimes feel like a challenge.
That’s where this DIY guide comes in. Many gardeners struggle with supporting the vigorous growth of bitter gourd vines, leading to overcrowding, disease, and ultimately, a disappointing harvest. An easy bitter gourd setup doesn’t just make your garden look neater; it provides the optimal environment for your plants to thrive. By following these simple steps, you’ll learn how to build a sturdy and space-efficient structure that encourages healthy growth, maximizes sunlight exposure, and makes harvesting a breeze. So, grab your tools, and let’s get started on creating the perfect home for your bitter gourd!
DIY: Growing Bitter Gourd Like a Pro (Even if You’re a Beginner!)
Okay, let’s be honest, bitter gourd (or karela) isn’t exactly everyone’s favorite vegetable. But, homegrown bitter gourd? That’s a whole different story! Freshly picked, it’s less bitter and so much more flavorful. Plus, the satisfaction of growing your own food is unbeatable. I’m going to walk you through a super easy setup that even a complete gardening newbie can handle.
What You’ll Need: The Essential Supplies
Before we dive in, let’s gather our supplies. This is crucial for a smooth and enjoyable gardening experience. Trust me, running to the store mid-planting is never fun!
* Bitter Gourd Seeds: Choose a variety that suits your climate. Local nurseries are your best bet for this. I personally love the long, green varieties.
* Seed Starting Tray or Small Pots: These are perfect for getting your seedlings going.
* Seed Starting Mix: This is a light, airy soil mix specifically designed for seedlings. Regular garden soil is too heavy.
* Large Pots or a Garden Bed: Bitter gourd vines need space to spread out. If you’re using pots, aim for at least 12-15 inches in diameter.
* Well-Draining Soil: A mix of garden soil, compost, and aged manure works wonders.
* Trellis or Support Structure: Bitter gourd is a vine, so it needs something to climb on. A trellis, fence, or even sturdy bamboo poles will do the trick.
* Organic Fertilizer: A balanced fertilizer will help your plants thrive.
* Watering Can or Hose: For, well, watering!
* Gardening Gloves: To keep your hands clean and protected.
* Hand Trowel: For digging and transplanting.
* Optional: Neem Oil: For pest control (more on this later).
Phase 1: Starting Your Seeds Indoors (Recommended!)
Starting your seeds indoors gives them a head start, especially if you live in a cooler climate. This isn’t strictly necessary, but I highly recommend it.
1. Soak the Seeds: Before planting, soak your bitter gourd seeds in lukewarm water for 24 hours. This helps soften the seed coat and encourages germination. I usually put them in a small bowl on my kitchen counter.
2. Prepare Your Seed Starting Tray: Fill your seed starting tray or small pots with seed starting mix. Gently press down the soil to remove any air pockets.
3. Plant the Seeds: Make a small hole (about half an inch deep) in the center of each pot or cell. Place one seed in each hole and cover it with soil.
4. Water Gently: Water the soil gently using a watering can or spray bottle. Avoid overwatering, as this can lead to rot. The soil should be moist, not soggy.
5. Provide Warmth and Light: Place the tray in a warm, sunny location. A south-facing window is ideal. If you don’t have enough natural light, you can use a grow light.
6. Keep the Soil Moist: Check the soil daily and water as needed to keep it moist.
7. Wait for Germination: Bitter gourd seeds typically germinate in 7-14 days. Be patient!
Phase 2: Preparing Your Garden Bed or Pots
While your seeds are germinating, let’s get your garden bed or pots ready. This is a crucial step for ensuring healthy and productive plants.
1. Choose a Sunny Location: Bitter gourd needs at least 6-8 hours of sunlight per day. Choose a location that gets plenty of sun.
2. Prepare the Soil: If you’re using a garden bed, loosen the soil to a depth of at least 12 inches. Amend the soil with compost and aged manure to improve drainage and fertility. If you’re using pots, fill them with a well-draining soil mix. I like to use a mix of garden soil, compost, and perlite.
3. Install Your Trellis: Before planting, install your trellis or support structure. This will give your bitter gourd vines something to climb on. Make sure the trellis is sturdy enough to support the weight of the mature vines and fruits. I’ve used everything from simple bamboo poles to elaborate wooden trellises.
Phase 3: Transplanting Your Seedlings
Once your seedlings have developed a few sets of true leaves (the leaves that look like miniature versions of the adult leaves), it’s time to transplant them to your garden bed or pots.
1. Harden Off Your Seedlings: Before transplanting, you need to harden off your seedlings. This means gradually exposing them to outdoor conditions. Start by placing them outside for a few hours each day, gradually increasing the amount of time they spend outdoors. This will help them adjust to the sun, wind, and temperature changes.
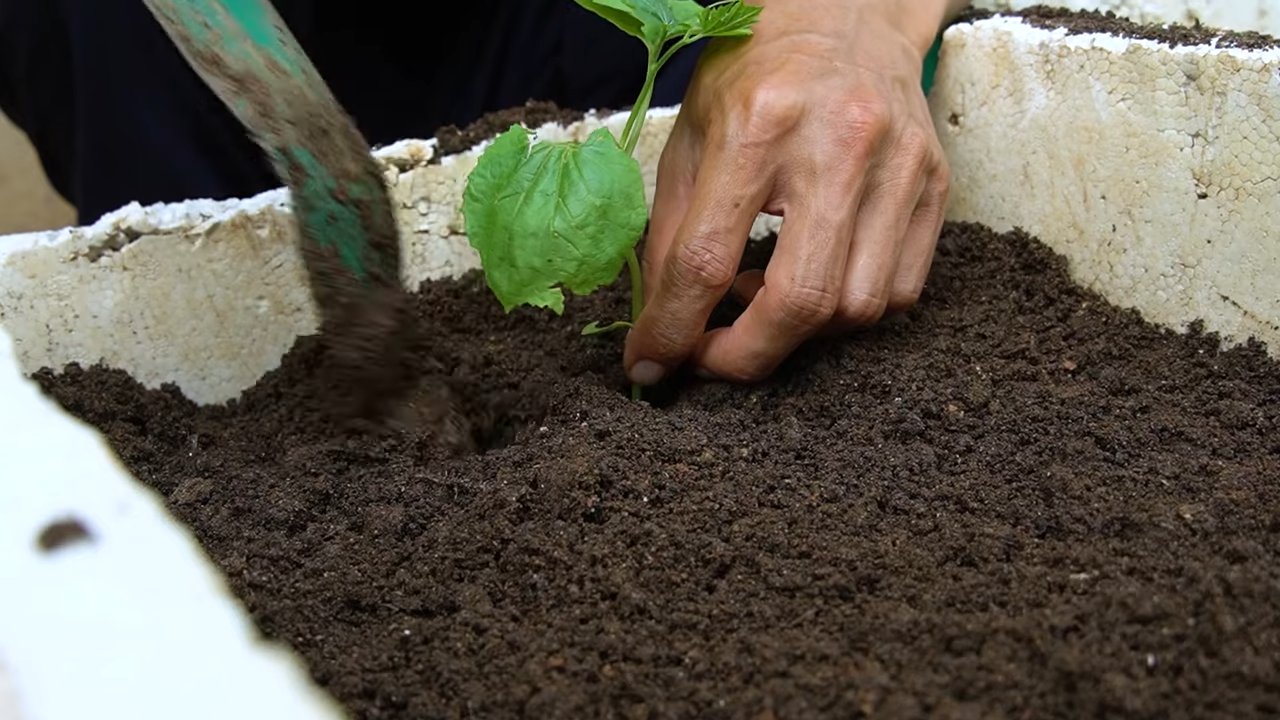
2. Dig Holes: Dig holes in your garden bed or pots that are slightly larger than the root balls of your seedlings.
3. Carefully Remove Seedlings: Gently remove the seedlings from their pots or cells. Be careful not to damage the roots.
4. Plant the Seedlings: Place the seedlings in the holes and cover the roots with soil. Gently press down the soil to remove any air pockets.
5. Water Thoroughly: Water the seedlings thoroughly after transplanting.
6. Mulch Around the Plants: Apply a layer of mulch around the plants to help retain moisture and suppress weeds. I like to use straw or wood chips.
Phase 4: Caring for Your Bitter Gourd Plants
Now that your bitter gourd plants are in the ground, it’s time to provide them with the care they need to thrive.
1. Water Regularly: Water your plants regularly, especially during hot, dry weather. Bitter gourd needs consistent moisture to produce healthy fruits. Aim for deep watering, allowing the water to soak into the soil.
2. Fertilize Regularly: Fertilize your plants every 2-3 weeks with a balanced organic fertilizer. This will provide them with the nutrients they need to grow and produce fruits. I prefer using liquid seaweed fertilizer.
3. Train the Vines: As your bitter gourd vines grow, train them to climb up the trellis. Gently guide the vines and tie them to the trellis with soft twine or plant ties.
4. Prune the Plants: Prune the plants to encourage branching and fruit production. Remove any dead or yellowing leaves. You can also pinch off the tips of the vines to encourage them to produce more side shoots.
5. Control Pests and Diseases: Keep an eye out for pests and diseases. Common pests of bitter gourd include aphids, spider mites, and squash bugs. You can control these pests with organic insecticides like neem oil or insecticidal soap. Common diseases include powdery mildew and downy mildew. You can prevent these diseases by providing good air circulation and avoiding overhead watering. If you notice any signs of disease, treat the plants with an organic fungicide.
6. Pollination: Bitter gourd plants have separate male and female flowers. The female flowers have a small fruit behind them. Sometimes, pollination can be an issue, especially if you don’t have many bees or other pollinators in your garden. If you notice that your female flowers are not setting fruit, you can hand-pollinate them. To do this, use a small paintbrush to transfer pollen from the male flowers to the female flowers.
Phase 5: Harvesting Your Bitter Gourd
The moment we’ve all been waiting for! Harvesting your own homegrown bitter gourd is incredibly rewarding.
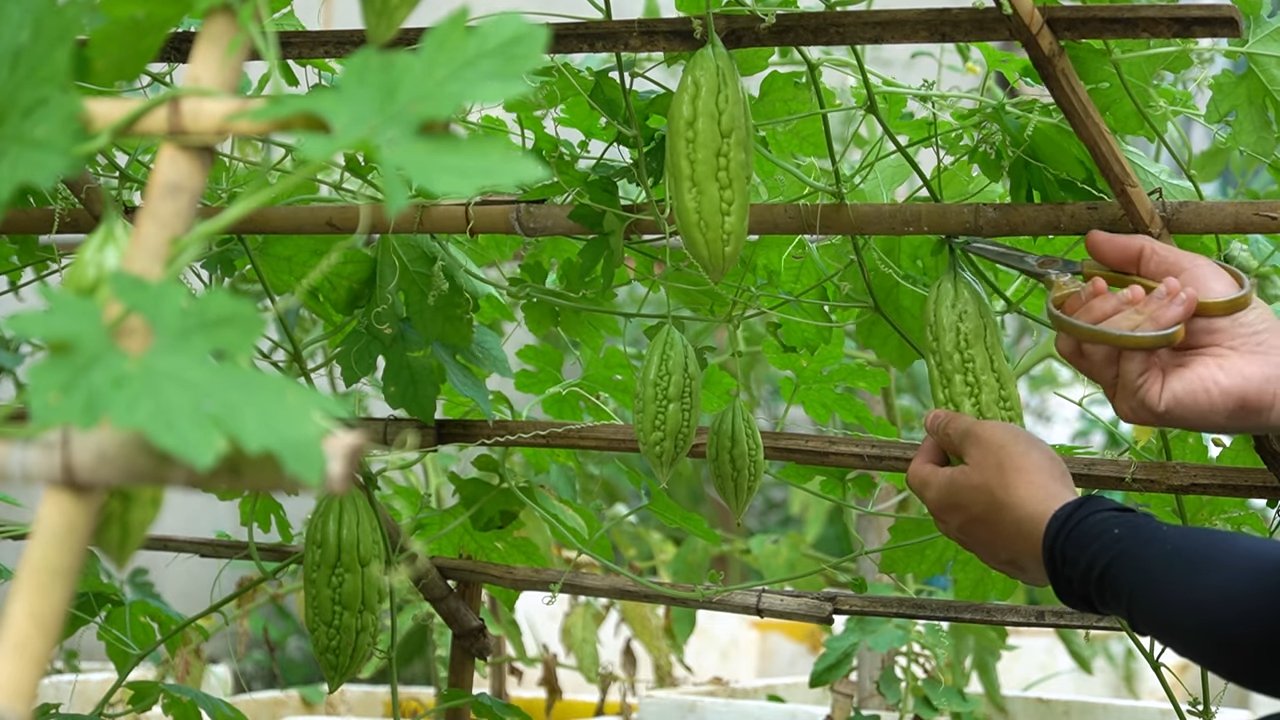
1. Harvest When Young: Harvest your bitter gourd when it’s still young and green. The younger the fruit, the less bitter it will be.
2. Use a Sharp Knife: Use a sharp knife or pruning shears to cut the fruit from the vine.
3. Harvest Regularly: Harvest your bitter gourd regularly to encourage the plant to produce more fruits.
4. Enjoy Your Harvest: Enjoy your fresh, homegrown bitter gourd in your favorite recipes. I love it stir-fried with onions and spices!
Troubleshooting: Common Issues and Solutions
Even with the best planning, you might encounter a few hiccups along the way. Here are some common issues and how to address them:
* Yellowing Leaves: This could be a sign of overwatering, underwatering, or nutrient deficiency. Check the soil moisture and adjust your watering schedule accordingly. Fertilize your plants with a balanced fertilizer.
* Lack of Fruit: This could be due to poor pollination, lack of sunlight, or nutrient deficiency. Hand-pollinate your plants if necessary. Make sure your plants are getting enough sunlight. Fertilize your plants with a fertilizer that is high in phosphorus.
* Pest Infestation: Treat your plants with organic insecticides like neem oil or insecticidal soap.
* Disease: Prevent diseases by providing good air circulation and avoiding overhead watering. Treat your plants with an
Conclusion
If you’ve ever battled the intense bitterness of bitter gourd, you know the struggle is real. But with this simple, effective DIY trick, you can finally enjoy this nutritious vegetable without the face-puckering experience. This isn’t just about making bitter gourd palatable; it’s about unlocking its full potential as a healthy and delicious addition to your diet.
This method, focusing on drawing out the bitter compounds before cooking, is a game-changer. It’s quick, easy, and uses ingredients you likely already have in your kitchen. Think of it as a pre-emptive strike against bitterness, ensuring that your final dish is balanced and enjoyable.
But don’t just take our word for it! The beauty of this DIY trick lies in its adaptability. Feel free to experiment with different soaking times to find what works best for your taste buds and the specific variety of bitter gourd you’re using. Some prefer a shorter soak for a hint of bitterness, while others prefer a longer soak for a completely mellow flavor.
Consider adding a pinch of turmeric to the soaking water. Turmeric is known for its anti-inflammatory properties and can also subtly enhance the flavor profile of the bitter gourd. Another variation involves scoring the bitter gourd more deeply before soaking, allowing the salt to penetrate further and draw out even more bitterness. You can also try using a combination of salt and lemon juice in the soaking water for an extra boost of flavor.
Beyond the soaking process, remember that the cooking method also plays a crucial role. Stir-frying, steaming, and baking are all excellent options, each offering a unique texture and flavor. Experiment with different spices and seasonings to create your own signature bitter gourd dish. From savory curries to crispy fries, the possibilities are endless.
We understand that trying new techniques can sometimes feel daunting, but we urge you to give this DIY trick a try. It’s a small investment of time that yields a significant return in terms of flavor and enjoyment. Imagine serving a bitter gourd dish that even the most skeptical eaters will rave about!
So, ditch the bitterness and embrace the deliciousness. We’re confident that this simple trick will transform your relationship with bitter gourd. Don’t hesitate to share your experiences, variations, and culinary creations with us. We’d love to hear how this DIY trick has worked for you and see the innovative ways you’re incorporating bitter gourd into your meals. Let’s unlock the full potential of this amazing vegetable together!
Now, go forth and conquer the bitterness! Your taste buds (and your health) will thank you.
Frequently Asked Questions (FAQ)
What exactly makes bitter gourd so bitter?
Bitter gourd, also known as bitter melon, contains compounds called cucurbitacins, which are responsible for its characteristic bitter taste. The concentration of these compounds varies depending on the variety of bitter gourd and its maturity. Younger bitter gourds tend to be less bitter than older ones. The DIY trick we’ve outlined helps to draw out these cucurbitacins, reducing the overall bitterness of the vegetable.
How long should I soak the bitter gourd?
The ideal soaking time depends on your personal preference and the level of bitterness you want to remove. As a general guideline, we recommend soaking the sliced bitter gourd in salted water for at least 30 minutes. For a milder flavor, you can soak it for up to an hour. If you prefer a stronger bitter taste, you can reduce the soaking time to 15-20 minutes. It’s best to experiment to find the soaking time that suits your taste.
Can I use any type of salt for soaking?
Yes, you can use any type of salt for soaking the bitter gourd. Common table salt, sea salt, or kosher salt will all work effectively. The key is to use enough salt to create a hypertonic solution, which helps to draw out the bitter compounds from the vegetable. We recommend using about 1-2 tablespoons of salt per quart of water.
Does the size of the bitter gourd slices matter?
Yes, the size of the bitter gourd slices does matter. Thinner slices will allow the salt water to penetrate more easily, resulting in a more effective reduction of bitterness. We recommend slicing the bitter gourd into thin, even slices, about 1/8 to 1/4 inch thick. This will also help the bitter gourd cook more evenly.
What if I don’t have time to soak the bitter gourd?
While soaking is the most effective way to reduce bitterness, there are a few alternative methods you can try if you’re short on time. One option is to blanch the bitter gourd in boiling water for a few minutes before cooking. This will help to remove some of the bitter compounds. Another option is to rub the bitter gourd with salt and then rinse it thoroughly before cooking. However, these methods may not be as effective as soaking.
Can I use this DIY trick for other bitter vegetables?
While this DIY trick is specifically designed for bitter gourd, it may also be helpful for reducing the bitterness of other vegetables, such as eggplant or kale. However, the soaking time and salt concentration may need to be adjusted depending on the vegetable. It’s always best to experiment and taste as you go.
How should I store leftover bitter gourd?
Cooked bitter gourd can be stored in an airtight container in the refrigerator for up to 3-4 days. It’s best to consume it as soon as possible to maintain its flavor and texture. Raw bitter gourd can also be stored in the refrigerator, wrapped in plastic wrap or in a sealed container, for up to a week.
What are the health benefits of bitter gourd?
Bitter gourd is a highly nutritious vegetable that offers a wide range of health benefits. It’s a good source of vitamins, minerals, and antioxidants. Bitter gourd is known for its ability to help regulate blood sugar levels, making it a beneficial food for people with diabetes. It also has anti-inflammatory and immune-boosting properties.
Can I freeze bitter gourd?
Yes, you can freeze bitter gourd, but it’s best to blanch it first to preserve its texture and flavor. To blanch bitter gourd, boil it for 2-3 minutes, then immediately transfer it to an ice bath to stop the cooking process. Drain the bitter gourd thoroughly and then freeze it in a single layer on a baking sheet. Once frozen, transfer the bitter gourd to a freezer bag or container. Frozen bitter gourd can be stored for up to 6 months.
What are some popular dishes that use bitter gourd?
Bitter gourd is used in a variety of dishes around the world. Some popular dishes include bitter gourd stir-fries, curries, soups, and salads. It can also be stuffed with meat or vegetables and baked or steamed. In some cultures, bitter gourd is even used to make juice or tea. The possibilities are endless!


Leave a Comment