
DIY stainless steel cleaner – sounds intimidating, right? Trust me, it’s not! I used to spend a fortune on fancy stainless steel cleaners, convinced they were the only way to keep my appliances gleaming. But then I stumbled upon a simple, homemade solution, and let me tell you, it’s a game-changer. Not only does it save money, but it’s also incredibly effective and uses ingredients you probably already have in your pantry.
The quest for a spotless kitchen isn’t new. Throughout history, people have sought ways to maintain clean and hygienic homes, often relying on natural ingredients. While our ancestors might not have had stainless steel, their resourcefulness in using readily available materials to clean and polish surfaces is a tradition we can certainly appreciate and adapt.
Why do you need this DIY stainless steel cleaner trick? Because those store-bought cleaners are often packed with harsh chemicals that can be harmful to your health and the environment. Plus, they can be surprisingly expensive! This DIY method is a natural, budget-friendly alternative that delivers amazing results. I’m going to show you how to whip up a cleaner that will leave your stainless steel sparkling, streak-free, and looking brand new. Get ready to say goodbye to fingerprints, smudges, and water spots – and hello to a beautifully clean kitchen!
DIY Stainless Steel Cleaner: Shine Like New!
Okay, friends, let’s talk stainless steel. We all love the sleek look, but those fingerprints, water spots, and greasy smudges? Not so much. Store-bought stainless steel cleaners can be expensive and often filled with chemicals I’d rather avoid. So, I’m going to share my go-to, super-effective, and budget-friendly DIY stainless steel cleaner recipe and method. Trust me, your appliances will thank you!
What You’ll Need: The Arsenal of Clean
Before we dive in, let’s gather our supplies. This is a pretty simple list, and you probably already have most of these items in your pantry:
* White Vinegar: The star of the show! Vinegar’s acidity helps cut through grease and grime.
* Water: Dilutes the vinegar and makes it easier to apply.
* Olive Oil (or Baby Oil): This is our secret weapon for that gorgeous, streak-free shine.
* Spray Bottle: For easy application of the vinegar solution.
* Two Microfiber Cloths: These are essential for cleaning and polishing without leaving streaks. Avoid paper towels, as they can leave lint.
* Optional: Essential Oil (Lemon, Orange, or Lavender): A few drops can help mask the vinegar smell, but it’s totally optional.
The Cleaning Process: From Dull to Dazzling
Now for the fun part! We’re going to break this down into easy-to-follow steps.
1. Prepare the Vinegar Solution: In your spray bottle, mix equal parts white vinegar and water. I usually start with about 1 cup of each, but you can adjust the amount depending on how much stainless steel you need to clean. If you’re using essential oil, add 5-10 drops to the mixture. Give it a good shake to combine everything.
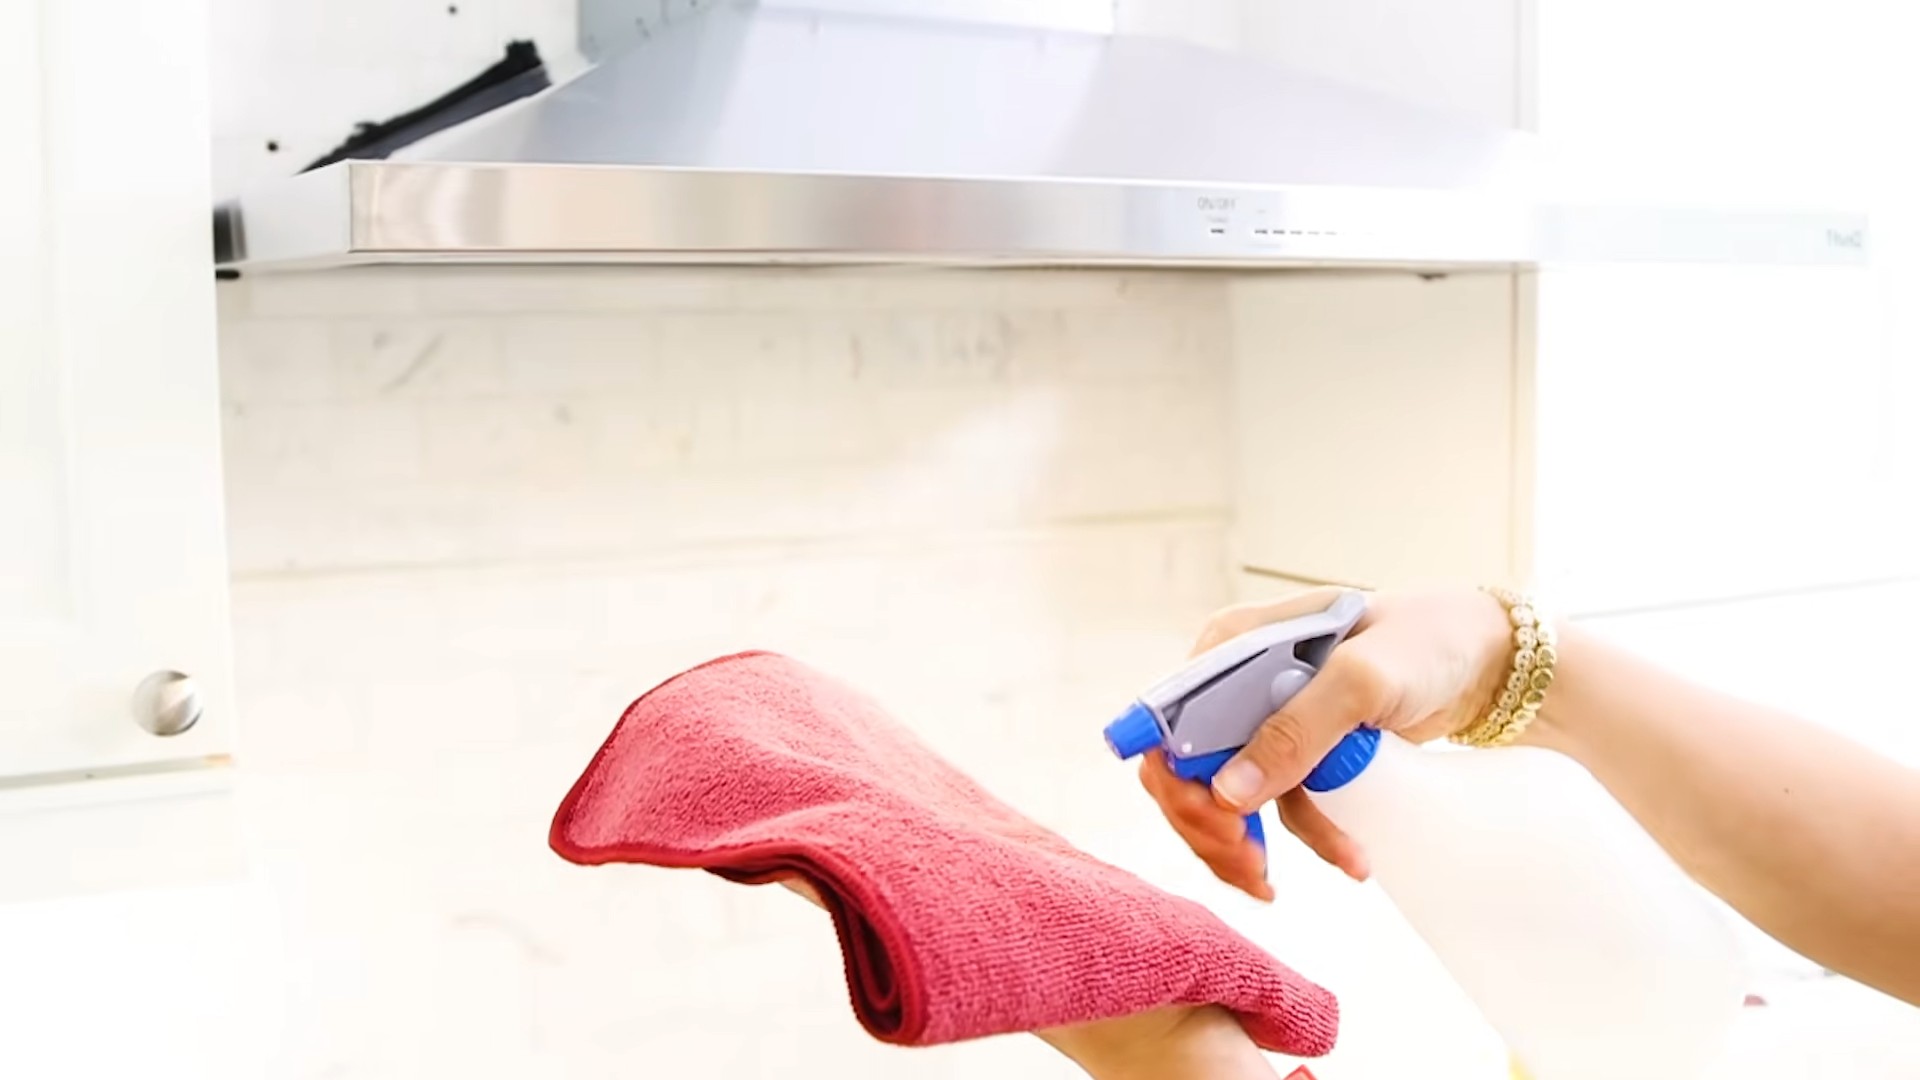
2. Spray and Wipe: Lightly spray the vinegar solution onto the stainless steel surface. Don’t over-saturate it; a light mist is all you need. Let it sit for a minute or two to allow the vinegar to work its magic on the grime.
3. Wipe with the First Microfiber Cloth: Using one of your microfiber cloths, wipe the surface in the direction of the grain. Stainless steel has a grain, which is the direction the metal was brushed during manufacturing. Wiping with the grain helps prevent streaks. Apply a bit of pressure to remove any stubborn spots.
4. Inspect and Repeat (If Necessary): Take a step back and examine the surface. If you see any remaining grime or spots, repeat steps 2 and 3. Sometimes, particularly greasy areas might need a second application.
The Polishing Phase: The Secret to the Shine
This is where the magic happens! We’re going to use olive oil (or baby oil) to create that beautiful, streak-free shine.
1. Apply a Tiny Amount of Oil: Pour a very small amount of olive oil (or baby oil) onto your second, clean microfiber cloth. I’m talking a *tiny* amount – about a teaspoon or less. You can always add more if needed, but it’s better to start with too little than too much.
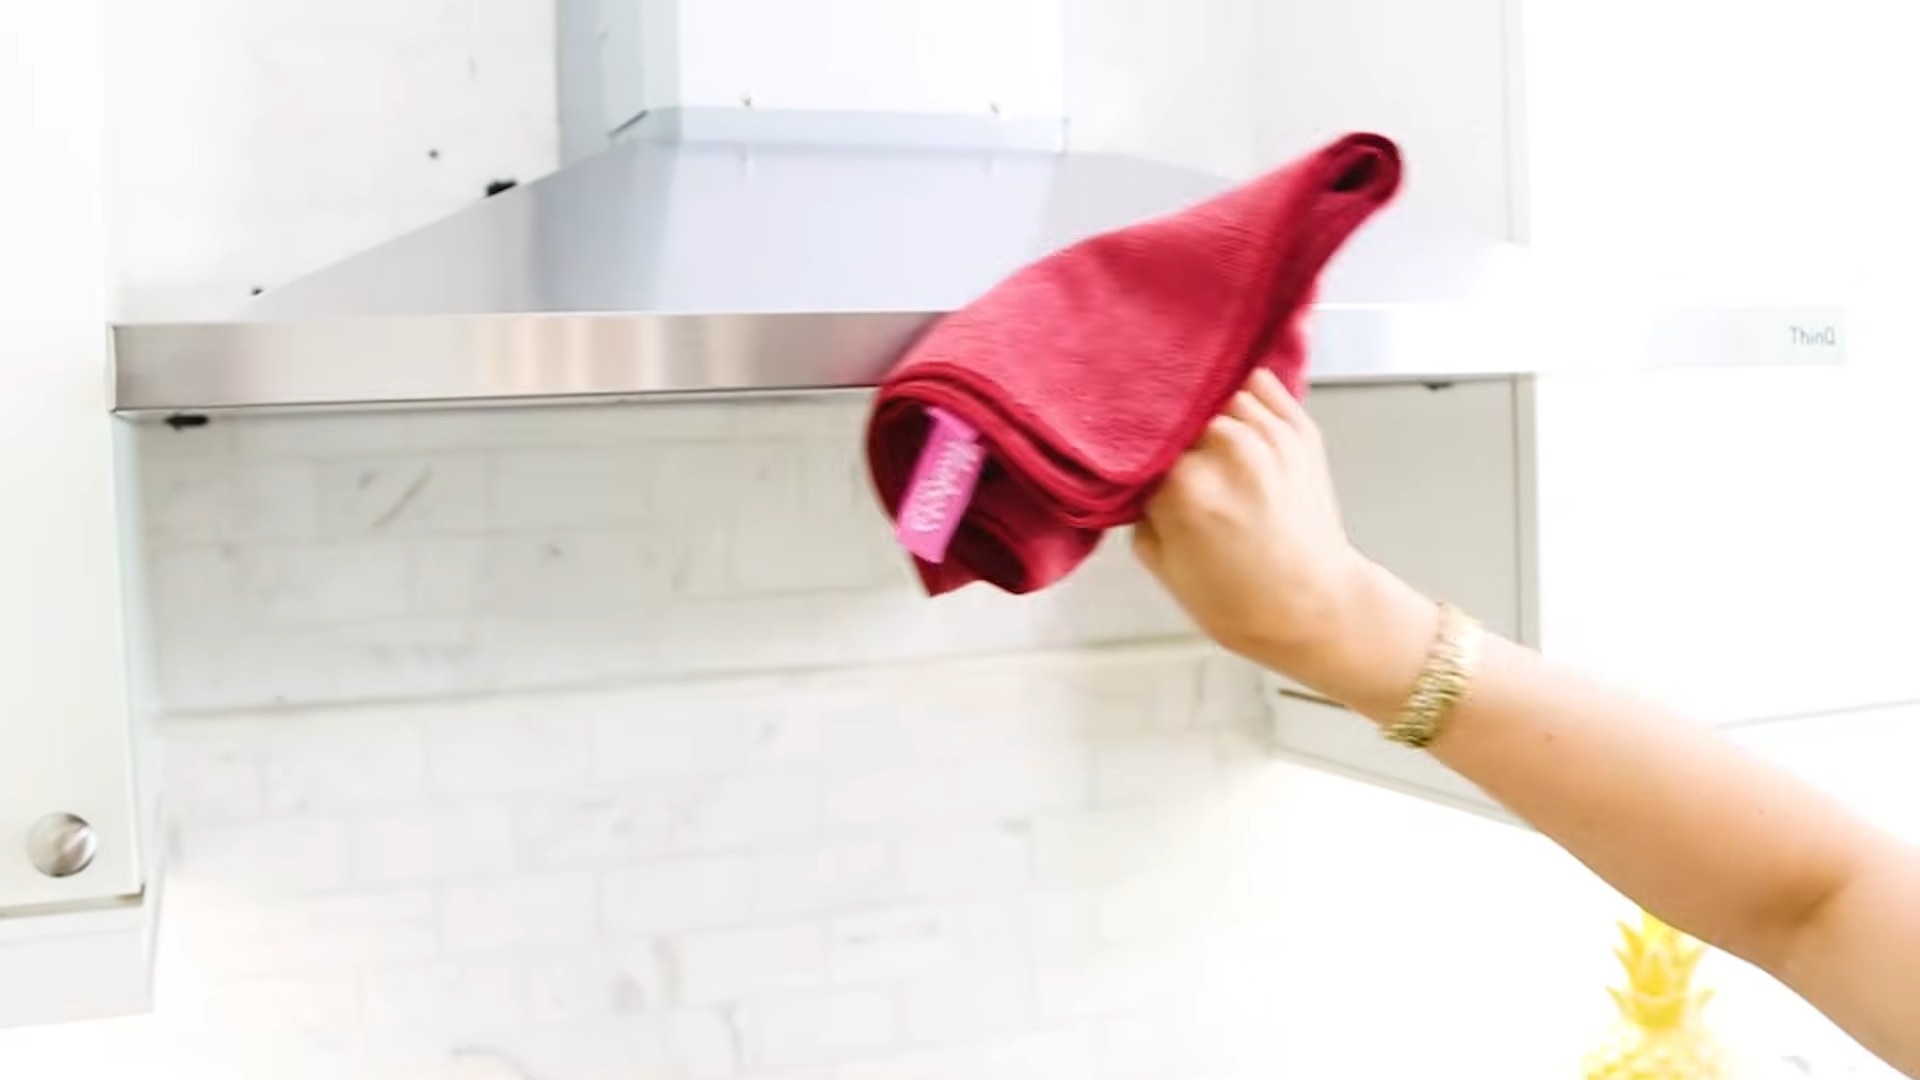
2. Buff the Surface: Using the second microfiber cloth, buff the stainless steel surface in the direction of the grain. Use gentle, circular motions to spread the oil evenly. You’ll notice the surface starting to shine almost immediately.
3. Remove Excess Oil: If you’ve used too much oil, you might see a slightly greasy residue. Don’t worry! Simply use a clean section of the microfiber cloth to buff away the excess. The goal is to leave a thin, even layer of oil that protects and shines the stainless steel.
4. Admire Your Work!: Step back and admire your sparkling clean stainless steel! The difference is truly amazing.
Tackling Stubborn Stains: When Vinegar Isn’t Enough
Sometimes, you’ll encounter stains that are a bit tougher to remove with just vinegar. Here are a few extra tips for dealing with those stubborn spots:
* Baking Soda Paste: For baked-on food or stubborn water spots, make a paste of baking soda and water. Apply the paste to the stain, let it sit for a few minutes, and then gently scrub with a soft cloth or sponge. Rinse thoroughly with water and dry with a microfiber cloth. Remember to test this in an inconspicuous area first, as baking soda can be mildly abrasive.
* Lemon Juice: Lemon juice is another natural cleaner that can help remove stains and brighten stainless steel. Simply apply lemon juice to the stain, let it sit for a few minutes, and then wipe clean with a damp cloth.
* Club Soda: For water spots, try spraying the surface with club soda and wiping it clean with a microfiber cloth. The carbonation can help lift the spots.
Maintaining the Shine: Keeping Your Stainless Steel Looking Its Best
Once you’ve achieved that beautiful shine, you’ll want to keep it that way! Here are a few tips for maintaining your stainless steel:
* Wipe Up Spills Immediately: The sooner you wipe up spills, the less likely they are to stain.
* Regular Cleaning: Clean your stainless steel appliances regularly, even if they don’t look dirty. A quick wipe-down with the vinegar solution every few days can prevent grime from building up.
* Avoid Abrasive Cleaners: Abrasive cleaners and scouring pads can scratch stainless steel. Stick to gentle cleaners and soft cloths.
* Dry Thoroughly: After cleaning, always dry the surface thoroughly with a microfiber cloth to prevent water spots.
Important Considerations: A Few Words of Caution
While this DIY cleaner is generally safe and effective, here are a few things to keep in mind:
* Test in an Inconspicuous Area: Before cleaning your entire appliance, test the vinegar solution in a small, inconspicuous area to make sure it doesn’t damage the finish.
* Avoid Using on Certain Surfaces: While this cleaner is great for most stainless steel appliances, avoid using it on surfaces that are coated with a special finish, such as fingerprint-resistant stainless steel. Check the manufacturer’s instructions for specific cleaning recommendations.
* Be Careful Around Electrical Components: When cleaning appliances, be careful not to get any liquid inside electrical components. Always unplug the appliance before cleaning and make sure it’s completely dry before plugging it back in.
* Ventilation: When using vinegar, make sure the area is well-ventilated.
Why This Works: The Science Behind the Shine
So, why does this simple DIY cleaner work so well? It’s all about the chemistry!
* Vinegar’s Acidity: The acetic acid in vinegar is a mild acid that helps dissolve grease, grime, and hard water deposits.
* Olive Oil’s Protective Layer: Olive oil (or baby oil) creates a thin, protective layer on the surface of the stainless steel, which helps repel fingerprints and water spots. It also enhances the shine by reflecting light more evenly.
* Microfiber Cloths: Microfiber cloths are made of tiny, absorbent fibers that effectively lift dirt and grime without scratching the surface. They also help distribute the oil evenly and buff the surface to a shine.
Beyond Appliances: Where Else Can You Use This?
This DIY stainless steel cleaner isn’t just for appliances! You can also use it to clean:
* Stainless Steel Sinks: Keep your kitchen sink sparkling clean with this simple solution.
* Stainless Steel Cookware: Remove food residue and water spots from your pots and pans.
* Stainless Steel Utensils: Keep your silverware looking its best.
* Stainless Steel Backsplashes: Clean grease and splatters from your kitchen backsplash.
* Stainless Steel Railings: Shine up those railings!
So there you have it! My tried-and-true DIY stainless steel cleaner recipe and method. It’s easy, affordable, and effective. Give it a try, and let me know what you think! I’m confident you’ll be amazed at the results. Happy cleaning!
Conclusion
So, there you have it! Ditching the expensive, chemical-laden store-bought cleaners and embracing this simple, effective, and budget-friendly DIY stainless steel cleaner is a game-changer for your kitchen and beyond. We’ve shown you how easy it is to create a powerful cleaning solution using ingredients you likely already have in your pantry. Why spend a fortune on products filled with mystery chemicals when you can achieve sparkling results with a natural, homemade alternative?
This isn’t just about saving money; it’s about creating a healthier home environment. By opting for a DIY stainless steel cleaner, you’re reducing your exposure to harsh chemicals that can irritate your skin, lungs, and even contribute to indoor air pollution. You’re also making a more sustainable choice by reducing plastic waste from disposable cleaning bottles.
But the benefits don’t stop there. This DIY cleaner is incredibly versatile. While we’ve focused on stainless steel appliances, it works wonders on stainless steel sinks, cookware, and even some bathroom fixtures. The gentle abrasive action of baking soda helps to lift away stubborn grime and grease without scratching the surface, while the vinegar cuts through hard water stains and leaves a brilliant shine.
Ready to take your cleaning routine to the next level?
Don’t be afraid to experiment with variations to find what works best for you. For example, if you prefer a scented cleaner, add a few drops of your favorite essential oil, such as lemon, lavender, or tea tree oil. Lemon oil, in particular, is known for its degreasing and disinfecting properties, making it a perfect addition to your DIY stainless steel cleaner. You could also try using a different type of vinegar, such as apple cider vinegar, although white vinegar is generally the most effective for cleaning.
For tougher stains, create a paste of baking soda and water and let it sit on the affected area for a few minutes before scrubbing gently. Remember to always test the cleaner in an inconspicuous area first to ensure it doesn’t damage the surface.
We’re confident that once you try this DIY stainless steel cleaner, you’ll be amazed by the results. It’s a simple, effective, and eco-friendly way to keep your stainless steel surfaces looking their best.
Now it’s your turn! We encourage you to give this DIY trick a try and share your experience with us. Did you find it easy to make? Were you happy with the results? Do you have any tips or variations to share? Let us know in the comments below! We love hearing from our readers and learning from your experiences. Together, we can create a community of DIY enthusiasts who are passionate about creating a cleaner, healthier, and more sustainable home. So, grab your ingredients, get cleaning, and let us know what you think! We can’t wait to hear from you.
Frequently Asked Questions (FAQ)
What kind of vinegar should I use for this DIY stainless steel cleaner?
White vinegar is generally the best choice for cleaning stainless steel. It’s readily available, inexpensive, and has a high acidity level, which makes it effective at cutting through grease, grime, and hard water stains. While you can use other types of vinegar, such as apple cider vinegar, white vinegar will typically provide the best results. The clear color of white vinegar also minimizes the risk of staining lighter-colored surfaces.
Can I use this DIY cleaner on all types of stainless steel?
While this DIY cleaner is generally safe for most stainless steel surfaces, it’s always a good idea to test it in an inconspicuous area first. Some stainless steel appliances have special coatings or finishes that could be damaged by abrasive cleaners. If you’re unsure, consult the manufacturer’s instructions for your appliance. Avoid using this cleaner on brushed stainless steel if you are concerned about potentially altering the finish.
How often should I clean my stainless steel appliances with this DIY cleaner?
The frequency of cleaning depends on how often you use your appliances and how dirty they get. For appliances that are used frequently, such as stovetops and refrigerators, you may want to clean them once or twice a week. For appliances that are used less often, such as dishwashers and ovens, you can clean them as needed. Regular cleaning will help prevent the buildup of grease and grime, making it easier to keep your stainless steel surfaces looking their best.
Can I store the leftover DIY stainless steel cleaner?
Yes, you can store the leftover DIY stainless steel cleaner in a spray bottle for future use. However, it’s best to use it within a few weeks, as the baking soda may settle to the bottom of the bottle over time. Be sure to shake the bottle well before each use to ensure that the ingredients are properly mixed. Store the spray bottle in a cool, dark place away from direct sunlight.
Is baking soda safe to use on stainless steel? Will it scratch the surface?
Baking soda is a mild abrasive, but it’s generally safe to use on stainless steel as long as you use it gently. Avoid scrubbing too hard, as this could potentially scratch the surface. Always use a soft cloth or sponge when cleaning with baking soda. If you’re concerned about scratching, you can mix the baking soda with water to create a paste before applying it to the surface.
What if I don’t have vinegar? Can I use something else?
Vinegar is a key ingredient in this DIY stainless steel cleaner because of its acidity, which helps to cut through grease and grime. If you don’t have vinegar, you can try using lemon juice as a substitute. Lemon juice also has acidic properties and can help to clean and disinfect stainless steel surfaces. However, vinegar is generally more effective and less expensive than lemon juice.
My stainless steel appliances have water spots. Will this DIY cleaner remove them?
Yes, this DIY stainless steel cleaner is effective at removing water spots from stainless steel appliances. The vinegar in the cleaner helps to dissolve the mineral deposits that cause water spots. For stubborn water spots, you may need to let the cleaner sit on the surface for a few minutes before scrubbing gently. After cleaning, be sure to dry the surface thoroughly with a clean, dry cloth to prevent new water spots from forming.
Can I add essential oils to this DIY cleaner?
Yes, you can add a few drops of your favorite essential oil to this DIY cleaner for a pleasant scent and added cleaning benefits. Lemon, lavender, and tea tree oil are all good choices. Lemon oil is known for its degreasing and disinfecting properties, while lavender and tea tree oil have antibacterial and antifungal properties. Be sure to use pure essential oils and add only a few drops, as too much essential oil can leave a residue on the surface.
The baking soda is leaving a white residue on my stainless steel. What am I doing wrong?
The white residue is likely caused by the baking soda not being fully dissolved or rinsed away. Make sure you are using a small amount of baking soda and mixing it well with the vinegar and water. After cleaning, thoroughly rinse the surface with clean water and dry it with a clean, dry cloth. This will help to remove any remaining baking soda residue.
Is this DIY cleaner safe for my family and pets?
Yes, this DIY cleaner is generally safe for families and pets because it’s made with natural ingredients that are non-toxic. However, it’s always a good idea to keep cleaning products out of reach of children and pets. If you’re using essential oils, be sure to choose oils that are safe for pets, as some essential oils can be toxic to animals. As with any cleaning product, avoid direct contact with eyes and skin.

Leave a Comment