
Container celery growing might sound intimidating, but trust me, it’s easier than you think! Have you ever bought a bunch of celery, used a few stalks, and watched the rest wilt away in your fridge? I know I have, countless times! That’s where the magic of growing your own comes in. Imagine having fresh, crisp celery right outside your door, ready to be added to soups, salads, or enjoyed as a healthy snack.
Celery, with its origins tracing back to the Mediterranean, has been enjoyed for centuries, not just for its culinary uses but also for its medicinal properties. Ancient Greeks and Romans used it for everything from flavoring food to treating ailments. Now, you can bring that historical connection right to your own home, even without a sprawling garden.
This DIY guide is your ticket to unlocking the secrets of successful container celery growing. We’ll walk you through every step, from choosing the right container and soil to providing the perfect amount of sunlight and water. Say goodbye to wasted celery and hello to a sustainable, delicious addition to your home. With these simple tricks and hacks, you’ll be amazed at how easy it is to cultivate your own thriving celery patch, no matter how small your space!
Growing Celery in Containers: A Beginner’s Guide
Hey there, fellow gardening enthusiasts! Ever dreamt of snipping fresh celery stalks right from your own backyard (or balcony!) for your soups, salads, and snacks? Well, dream no more! Growing celery in containers is totally achievable, even if you’re a beginner like I once was. It takes a little patience and attention, but the reward of homegrown celery is absolutely worth it. Let’s dive into how you can make this happen!
What You’ll Need
Before we get our hands dirty, let’s gather our supplies. Here’s a checklist to make sure you’re prepared:
* Celery Seeds or Seedlings: You can start from seeds (which takes longer) or buy seedlings from a local nursery (the faster route). I personally prefer seedlings for a quicker harvest.
* Large Container: Celery needs room to grow! Choose a container that’s at least 12 inches deep and 12 inches wide. A larger container is even better, allowing for more robust growth.
* High-Quality Potting Mix: Don’t skimp on the soil! Use a well-draining potting mix rich in organic matter. Avoid using garden soil, as it can compact in containers.
* Slow-Release Fertilizer: Celery is a heavy feeder, so a slow-release fertilizer will provide a steady supply of nutrients.
* Watering Can or Hose: Celery needs consistent moisture, so a reliable watering method is essential.
* Mulch (Optional): Mulch helps retain moisture and suppress weeds. Straw or shredded bark work well.
* Spray Bottle (Optional): For misting seedlings or newly transplanted plants.
* Gardening Gloves: To keep your hands clean and protected.
Choosing Your Celery Variety
There are several celery varieties to choose from, each with its own characteristics. Here are a few popular options:
* ‘Utah’ Celery: A classic variety with long, crisp stalks.
* ‘Conquistador’ Celery: A disease-resistant variety that’s easy to grow.
* ‘Golden Self-Blanching’ Celery: A unique variety that turns golden yellow as it matures, requiring less blanching.
* ‘Redventure’ Celery: A colorful variety with reddish-purple stalks.
Consider your climate and personal preferences when selecting a variety. I’ve had good luck with ‘Utah’ and ‘Conquistador’ in my garden.
Starting from Seeds (The Patient Gardener’s Route)
If you’re starting from seeds, be prepared for a longer growing period. Celery seeds can be a bit finicky to germinate, so patience is key.
1. Sow the Seeds Indoors: Start your seeds indoors 10-12 weeks before the last expected frost. Fill a seed tray or small pots with seed-starting mix. Moisten the mix thoroughly.
2. Sprinkle the Seeds: Sprinkle the celery seeds thinly over the surface of the soil. Celery seeds need light to germinate, so don’t bury them too deeply. Gently press them into the soil.
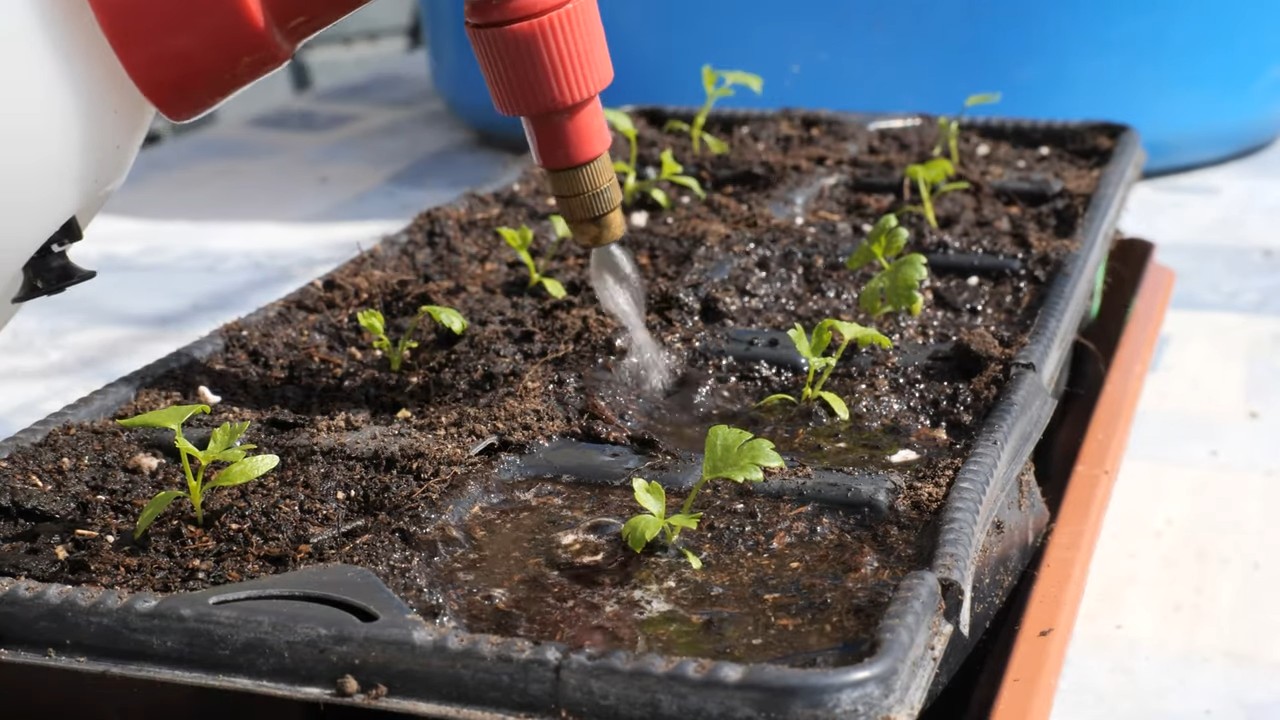
3. Provide Light and Moisture: Cover the seed tray with a clear plastic dome or plastic wrap to create a humid environment. Place the tray under grow lights or in a bright, sunny window. Keep the soil consistently moist, but not soggy. Use a spray bottle to mist the soil regularly.
4. Germination: Celery seeds can take 2-3 weeks to germinate. Once the seedlings emerge, remove the plastic cover and continue to provide light and moisture.
5. Thin the Seedlings: Once the seedlings have a few true leaves, thin them out, leaving only the strongest seedlings in each pot.
6. Harden Off the Seedlings: Before transplanting the seedlings outdoors, you’ll need to harden them off. This process gradually acclimates the seedlings to outdoor conditions. Start by placing the seedlings outdoors in a sheltered location for a few hours each day, gradually increasing the amount of time they spend outdoors over the course of a week.
Transplanting Seedlings (The Faster Route)
If you’re using seedlings, you can skip the seed-starting process and jump right to transplanting. This is the method I usually prefer because it’s quicker and easier.
1. Prepare the Container: Fill your large container with high-quality potting mix. Leave a few inches of space at the top of the container.
2. Water the Seedlings: Water the seedlings thoroughly before transplanting them. This will help them settle into their new home.
3. Carefully Remove the Seedlings: Gently remove the seedlings from their pots, being careful not to damage the roots. If the roots are tightly bound, gently loosen them with your fingers.
4. Plant the Seedlings: Dig small holes in the potting mix, spacing the seedlings about 6-8 inches apart. Place the seedlings in the holes and gently backfill with potting mix.
5. Water Thoroughly: Water the transplanted seedlings thoroughly.
Hey there, fellow gardening enthusiasts! Ever dreamt of snipping fresh celery stalks right from your own backyard (or balcony!) for your soups, salads, and snacks? Well, dream no more! Growing celery in containers is totally achievable, even if you’re a beginner like I once was. It takes a little patience and attention, but the reward of homegrown celery is absolutely worth it. Let’s dive into how you can make this happen!
What You’ll Need
Before we get our hands dirty, let’s gather our supplies. Here’s a checklist to make sure you’re prepared:
* Celery Seeds or Seedlings: You can start from seeds (which takes longer) or buy seedlings from a local nursery (the faster route). I personally prefer seedlings for a quicker harvest.
* Large Container: Celery needs room to grow! Choose a container that’s at least 12 inches deep and 12 inches wide. A larger container is even better, allowing for more robust growth.
* High-Quality Potting Mix: Don’t skimp on the soil! Use a well-draining potting mix rich in organic matter. Avoid using garden soil, as it can compact in containers.
* Slow-Release Fertilizer: Celery is a heavy feeder, so a slow-release fertilizer will provide a steady supply of nutrients.
* Watering Can or Hose: Celery needs consistent moisture, so a reliable watering method is essential.
* Mulch (Optional): Mulch helps retain moisture and suppress weeds. Straw or shredded bark work well.
* Spray Bottle (Optional): For misting seedlings or newly transplanted plants.
* Gardening Gloves: To keep your hands clean and protected.
Choosing Your Celery Variety
There are several celery varieties to choose from, each with its own characteristics. Here are a few popular options:
* ‘Utah’ Celery: A classic variety with long, crisp stalks.
* ‘Conquistador’ Celery: A disease-resistant variety that’s easy to grow.
* ‘Golden Self-Blanching’ Celery: A unique variety that turns golden yellow as it matures, requiring less blanching.
* ‘Redventure’ Celery: A colorful variety with reddish-purple stalks.
Consider your climate and personal preferences when selecting a variety. I’ve had good luck with ‘Utah’ and ‘Conquistador’ in my garden.
Starting from Seeds (The Patient Gardener’s Route)
If you’re starting from seeds, be prepared for a longer growing period. Celery seeds can be a bit finicky to germinate, so patience is key.
1. Sow the Seeds Indoors: Start your seeds indoors 10-12 weeks before the last expected frost. Fill a seed tray or small pots with seed-starting mix. Moisten the mix thoroughly.
2. Sprinkle the Seeds: Sprinkle the celery seeds thinly over the surface of the soil. Celery seeds need light to germinate, so don’t bury them too deeply. Gently press them into the soil.
3. Provide Light and Moisture: Cover the seed tray with a clear plastic dome or plastic wrap to create a humid environment. Place the tray under grow lights or in a bright, sunny window. Keep the soil consistently moist, but not soggy. Use a spray bottle to mist the soil regularly.
4. Germination: Celery seeds can take 2-3 weeks to germinate. Once the seedlings emerge, remove the plastic cover and continue to provide light and moisture.
5. Thin the Seedlings: Once the seedlings have a few true leaves, thin them out, leaving only the strongest seedlings in each pot.
6. Harden Off the Seedlings: Before transplanting the seedlings outdoors, you’ll need to harden them off. This process gradually acclimates the seedlings to outdoor conditions. Start by placing the seedlings outdoors in a sheltered location for a few hours each day, gradually increasing the amount of time they spend outdoors over the course of a week.
Transplanting Seedlings (The Faster Route)
If you’re using seedlings, you can skip the seed-starting process and jump right to transplanting. This is the method I usually prefer because it’s quicker and easier.
1. Prepare the Container: Fill your large container with high-quality potting mix. Leave a few inches of space at the top of the container.
2. Water the Seedlings: Water the seedlings thoroughly before transplanting them. This will help them settle into their new home.
3. Carefully Remove the Seedlings: Gently remove the seedlings from their pots, being careful not to damage the roots. If the roots are tightly bound, gently loosen them with your fingers.
4. Plant the Seedlings: Dig small holes in the potting mix, spacing the seedlings about 6-8 inches apart. Place the seedlings in the holes and gently backfill with potting mix.
5. Water Thoroughly: Water the transplanted seedlings thoroughly.
6. Add Mulch (Optional): Add a layer of mulch around the base of the plants to help retain moisture and suppress weeds.
Caring for Your Container Celery
Now that your celery is planted, it’s time to provide the care it needs to thrive.
1. Watering: Celery needs consistent moisture. Water deeply whenever the top inch of soil feels dry to the touch. Avoid letting the soil dry out completely, as this can stress the plants. I usually water my celery every day or two, depending on the weather.
2. Fertilizing: Celery is a heavy feeder, so regular fertilization is essential. Apply a slow-release fertilizer according to the package directions. You can also supplement with liquid fertilizer every few weeks. I like to use a balanced fertilizer with equal parts nitrogen, phosphorus, and potassium.
3. Sunlight: Celery needs at least 6 hours of sunlight per day. Place your container in a sunny location. If you live in a hot climate, provide some afternoon shade to prevent the plants from overheating.
4. Blanching (Optional): Blanching is the process of excluding light from the celery stalks to make them more tender and less bitter. You can blanch celery by wrapping the stalks with newspaper or cardboard for a few weeks before harvesting. However, some varieties are self-blanching and don’t require this step.
5. Pest and Disease Control: Keep an eye out for pests and diseases. Aphids, spider mites, and celery leaf tiers are common pests. Treat infestations with insecticidal soap or neem oil. Celery can also be susceptible to fungal diseases, such as early blight and late blight. Prevent these diseases by providing good air circulation and avoiding overhead watering. If you notice any signs of disease, remove the affected leaves and treat the plants with a fungicide.
Harvesting Your Celery
The moment we’ve all been waiting for! You can start harvesting celery when the stalks are at least 6 inches long.
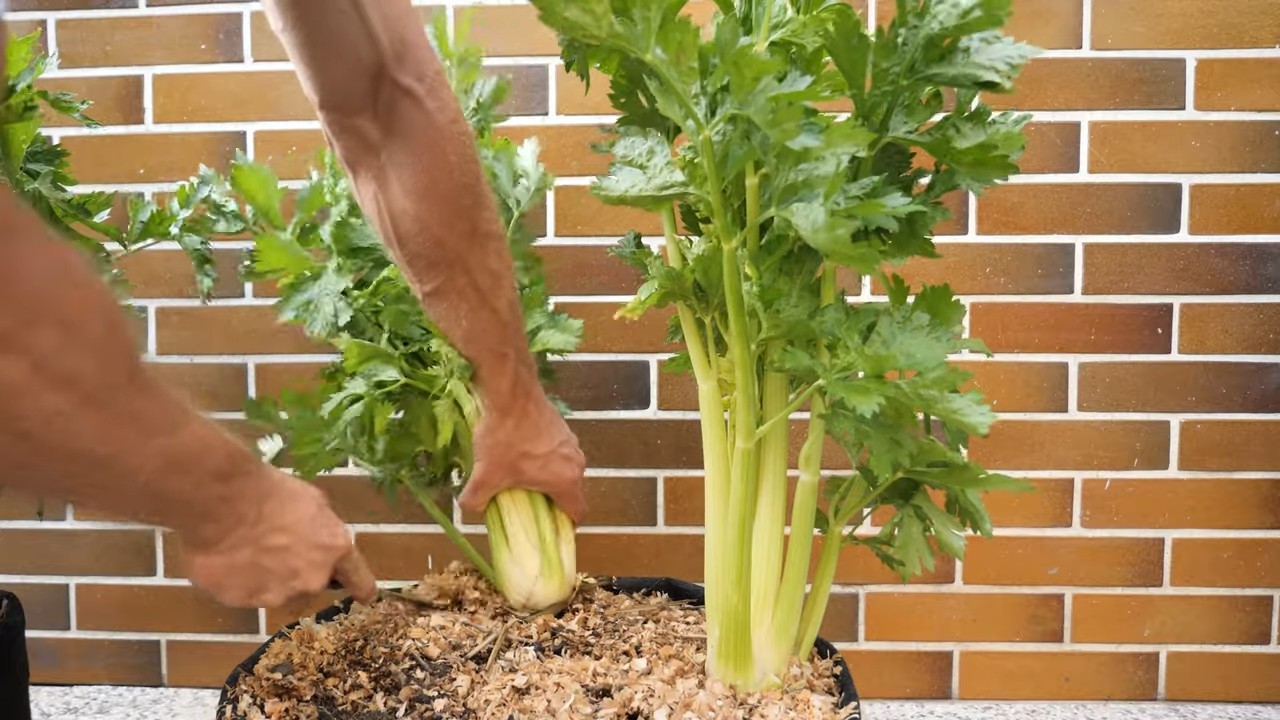
1. Harvest Individual Stalks: You can harvest individual stalks as needed by cutting them off at the base of the plant. This allows the remaining stalks to continue growing.
2. Harvest the Entire Plant: If you want to harvest the entire plant, cut it off at the base.
3. Storage: Store harvested celery in the refrigerator. Wrap the stalks in a damp paper towel and place them in a plastic bag. Celery can last for several weeks in the refrigerator.
Troubleshooting
Even with the best care, you might encounter some challenges when growing celery in containers. Here are a few common problems and how to address them:
* Yellowing Leaves: Yellowing leaves can be a sign of nutrient deficiency. Make sure you’re fertilizing your celery regularly.
* Stunted Growth: Stunted growth can be caused by a variety of factors, including poor soil, lack of sunlight, and insufficient watering. Make sure your celery is planted in high-quality potting mix, receiving at least 6 hours of sunlight per day, and being watered regularly.
* Bitter Taste: A bitter taste can be caused by insufficient blanching or stress from heat or drought. Try blanching your celery for a few weeks before harvesting. Also, make sure your celery is receiving adequate water and is protected from extreme heat.
* Pest Infestations: Regularly inspect your celery for pests. Treat infestations with insecticidal soap or neem oil.
Enjoying Your Homegrown Celery
Congratulations! You’ve successfully grown celery in containers. Now it’s time to enjoy the fruits (or rather, vegetables) of your labor. Use your homegrown celery in soups, salads, smoothies, and snacks. You can even use the celery leaves to add flavor to your dishes.
Growing celery in containers is a rewarding experience that allows you to enjoy fresh, homegrown produce right at your fingertips. With a little patience and attention, you can have a thriving celery patch on your patio, balcony, or in your backyard. Happy gardening!
Conclusion
So, there you have it! Growing celery in containers isn’t just a quirky gardening experiment; it’s a genuinely rewarding way to enjoy fresh, crisp celery right at your fingertips. We’ve walked you through the entire process, from selecting the right container and soil to nurturing your celery plants to a bountiful harvest.
Why is this DIY trick a must-try? Because it empowers you to control the quality and freshness of your celery. No more limp, store-bought stalks that have lost their flavor and crunch. Imagine the satisfaction of snipping off a few stalks from your own container garden to add to your salads, soups, or even just to enjoy as a healthy snack. Plus, growing your own celery is significantly more sustainable than relying on commercially grown produce that has traveled long distances. You’re reducing your carbon footprint and supporting a more localized food system.
But the benefits don’t stop there. Container gardening allows you to grow celery even if you don’t have a traditional garden space. Whether you have a small balcony, a sunny patio, or even just a well-lit windowsill, you can cultivate your own celery patch. It’s a fantastic way to bring a touch of green into your urban environment and connect with nature.
Looking for variations? Consider experimenting with different celery varieties. ‘Golden Self-Blanching’ offers a milder flavor, while ‘Utah Tall’ is known for its robust taste and crisp texture. You can also try companion planting. Marigolds, for example, can help deter pests, while onions and garlic can enhance the flavor of your celery.
Don’t be afraid to get creative with your container selection, too. While a standard pot works perfectly well, you could also repurpose old buckets, tubs, or even wooden crates. Just make sure your chosen container has adequate drainage holes to prevent waterlogging.
We’re confident that you’ll find growing celery in containers to be a fun, educational, and ultimately delicious experience. It’s a project that’s suitable for gardeners of all skill levels, from beginners to seasoned pros. The key is to be patient, pay attention to your plants’ needs, and don’t be afraid to experiment.
So, what are you waiting for? Grab a container, some potting mix, and a celery plant or seeds, and get started on your own container celery growing adventure today! We’re eager to hear about your experiences. Share your photos, tips, and challenges in the comments below. Let’s build a community of container celery growers and inspire others to embrace the joy of homegrown produce. We believe that everyone can enjoy the taste of fresh, homegrown celery, no matter where they live. Happy gardening!
Frequently Asked Questions (FAQ)
What is the best type of container to use for growing celery?
The ideal container for growing celery should be at least 10-12 inches deep and wide to accommodate the plant’s root system. A pot, tub, or even a repurposed bucket will work as long as it has adequate drainage holes. Celery needs consistent moisture, so a container that retains moisture well is beneficial, but avoid anything that will cause the soil to become waterlogged. Consider using a dark-colored container, as it will absorb more heat and help the celery grow faster, especially in cooler climates.
What kind of soil is best for growing celery in containers?
Celery thrives in rich, well-draining soil that is high in organic matter. A good potting mix specifically formulated for vegetables is an excellent choice. You can also amend your own potting mix by adding compost, aged manure, or other organic materials. The ideal pH for celery is between 6.0 and 6.8. Before planting, consider testing your soil’s pH and adjusting it if necessary.
How often should I water my container celery?
Celery is a water-loving plant and requires consistent moisture to thrive. Water your container celery deeply and regularly, especially during hot, dry weather. Aim to keep the soil consistently moist but not waterlogged. Check the soil moisture level daily by sticking your finger into the soil. If the top inch feels dry, it’s time to water. In general, you may need to water your container celery every day or every other day, depending on the weather conditions.
How much sunlight does container celery need?
Celery needs at least 6 hours of sunlight per day to grow well. Choose a sunny location for your container celery, such as a south-facing balcony or patio. If you live in a particularly hot climate, provide some afternoon shade to prevent the leaves from scorching. If you don’t have access to enough natural sunlight, you can supplement with grow lights.
How do I fertilize my container celery?
Celery is a heavy feeder and requires regular fertilization to produce a good harvest. Start fertilizing your container celery about two weeks after transplanting or when the seedlings have developed a few true leaves. Use a balanced liquid fertilizer, such as a 10-10-10 or 20-20-20, diluted to half strength. Fertilize every two to three weeks throughout the growing season. You can also supplement with organic fertilizers, such as compost tea or fish emulsion.
What are some common pests and diseases that affect container celery?
Celery can be susceptible to several pests and diseases, including aphids, celery leaf tiers, and fungal diseases like early blight and late blight. Regularly inspect your plants for signs of pests or diseases. If you spot any problems, take action immediately. For aphids, you can try spraying the plants with a strong stream of water or using insecticidal soap. For fungal diseases, ensure good air circulation around the plants and avoid overhead watering. You can also use a fungicide if necessary.
How do I harvest my container celery?
You can start harvesting celery stalks when they are about 6-8 inches tall. Simply cut the outer stalks near the base of the plant, leaving the inner stalks to continue growing. You can harvest celery stalks gradually as needed, or you can harvest the entire plant at once. To harvest the entire plant, cut it off at the base. Celery is best eaten fresh, but you can also store it in the refrigerator for up to two weeks.
Can I grow celery from seed in containers?
Yes, you can grow celery from seed in containers, but it requires patience and attention to detail. Celery seeds are very small and can be slow to germinate. Start the seeds indoors about 10-12 weeks before the last expected frost. Sow the seeds thinly on the surface of a seed-starting mix and gently press them into the soil. Keep the soil consistently moist and provide plenty of light. Once the seedlings have developed a few true leaves, transplant them into individual pots. Harden off the seedlings before transplanting them into their final containers outdoors.
How do I blanch my container celery?
Blanching celery stalks makes them more tender and less bitter. To blanch your container celery, you can either mound soil around the stalks or wrap them with paper or cardboard. Start blanching about two weeks before you plan to harvest. Make sure to leave the tops of the stalks exposed to sunlight.
Is container celery growing worth the effort?
Absolutely! While growing celery in containers requires some effort and attention, the rewards are well worth it. You’ll have access to fresh, flavorful celery right at your fingertips, and you’ll be able to control the quality and sustainability of your produce. Plus, it’s a fun and educational gardening project that can be enjoyed by gardeners of all skill levels.


Leave a Comment