
Collard Greens Planting Hack: Unlock the secrets to a bountiful harvest with this simple, yet incredibly effective DIY trick! Have you ever dreamed of rows upon rows of lush, vibrant collard greens gracing your garden? I know I have! For generations, collard greens have been a staple in Southern cuisine, symbolizing prosperity and good fortune. Their rich, earthy flavor and incredible nutritional value make them a must-have for any home garden. But let’s be honest, sometimes getting those greens to thrive can feel like a real challenge.
That’s where this game-changing collard greens planting hack comes in. Forget complicated gardening techniques and expensive equipment. This method is all about simplicity and maximizing your yield. I’m going to share a little secret that will help you overcome common problems like poor germination, pest infestations, and slow growth. Whether you’re a seasoned gardener or just starting out, this DIY trick will empower you to grow the most delicious and abundant collard greens you’ve ever tasted. Get ready to transform your garden and impress your friends and family with your green thumb!
Collard Greens Planting Hack: From Seed to Stalk Like a Pro!
Hey there, fellow gardening enthusiasts! I’m so excited to share my favorite collard greens planting hack with you. Forget those flimsy seedlings from the garden center – we’re going to start from seed and get a jumpstart on a bountiful harvest. This method is all about maximizing your space and ensuring strong, healthy plants right from the get-go. Trust me, once you try this, you’ll never go back!
Why This Hack Works
Before we dive in, let’s talk about why this method is so effective. Collard greens, like many brassicas, can be a bit finicky when transplanted. Their roots are delicate, and disturbing them can stunt their growth. Starting them in individual cells allows for minimal root disturbance when transplanting, giving them a significant head start. Plus, you get to choose exactly which seeds to plant, ensuring you’re growing the varieties you love most!
Materials You’ll Need
* Collard greens seeds (choose your favorite variety!)
* Seed starting mix (a light, well-draining mix is crucial)
* Seed starting trays with individual cells (or repurposed egg cartons – more on that later!)
* Spray bottle filled with water
* Grow lights (optional, but highly recommended for strong seedlings)
* Heat mat (optional, but helpful for faster germination)
* Small trowel or spoon
* Plant labels and a permanent marker
* Well-draining garden soil or raised bed mix
* Compost or other organic matter
Phase 1: Seed Starting Indoors
This is where the magic begins! We’re going to create the perfect environment for our collard greens seeds to sprout and thrive.
1. Prepare Your Seed Starting Trays: First, grab your seed starting trays. If you’re using new trays, give them a quick rinse to remove any dust or debris. If you’re repurposing egg cartons (a great eco-friendly option!), make sure they’re clean and dry. I like to poke a small drainage hole in the bottom of each egg carton cell to prevent waterlogging.
2. Fill the Cells with Seed Starting Mix: Now, it’s time to fill each cell with seed starting mix. Don’t pack it down too tightly; you want the mix to be light and airy. Leave about half an inch of space at the top of each cell.
3. Moisten the Soil: Gently moisten the seed starting mix with your spray bottle. You want the soil to be damp, but not soaking wet. Think of it like a wrung-out sponge.
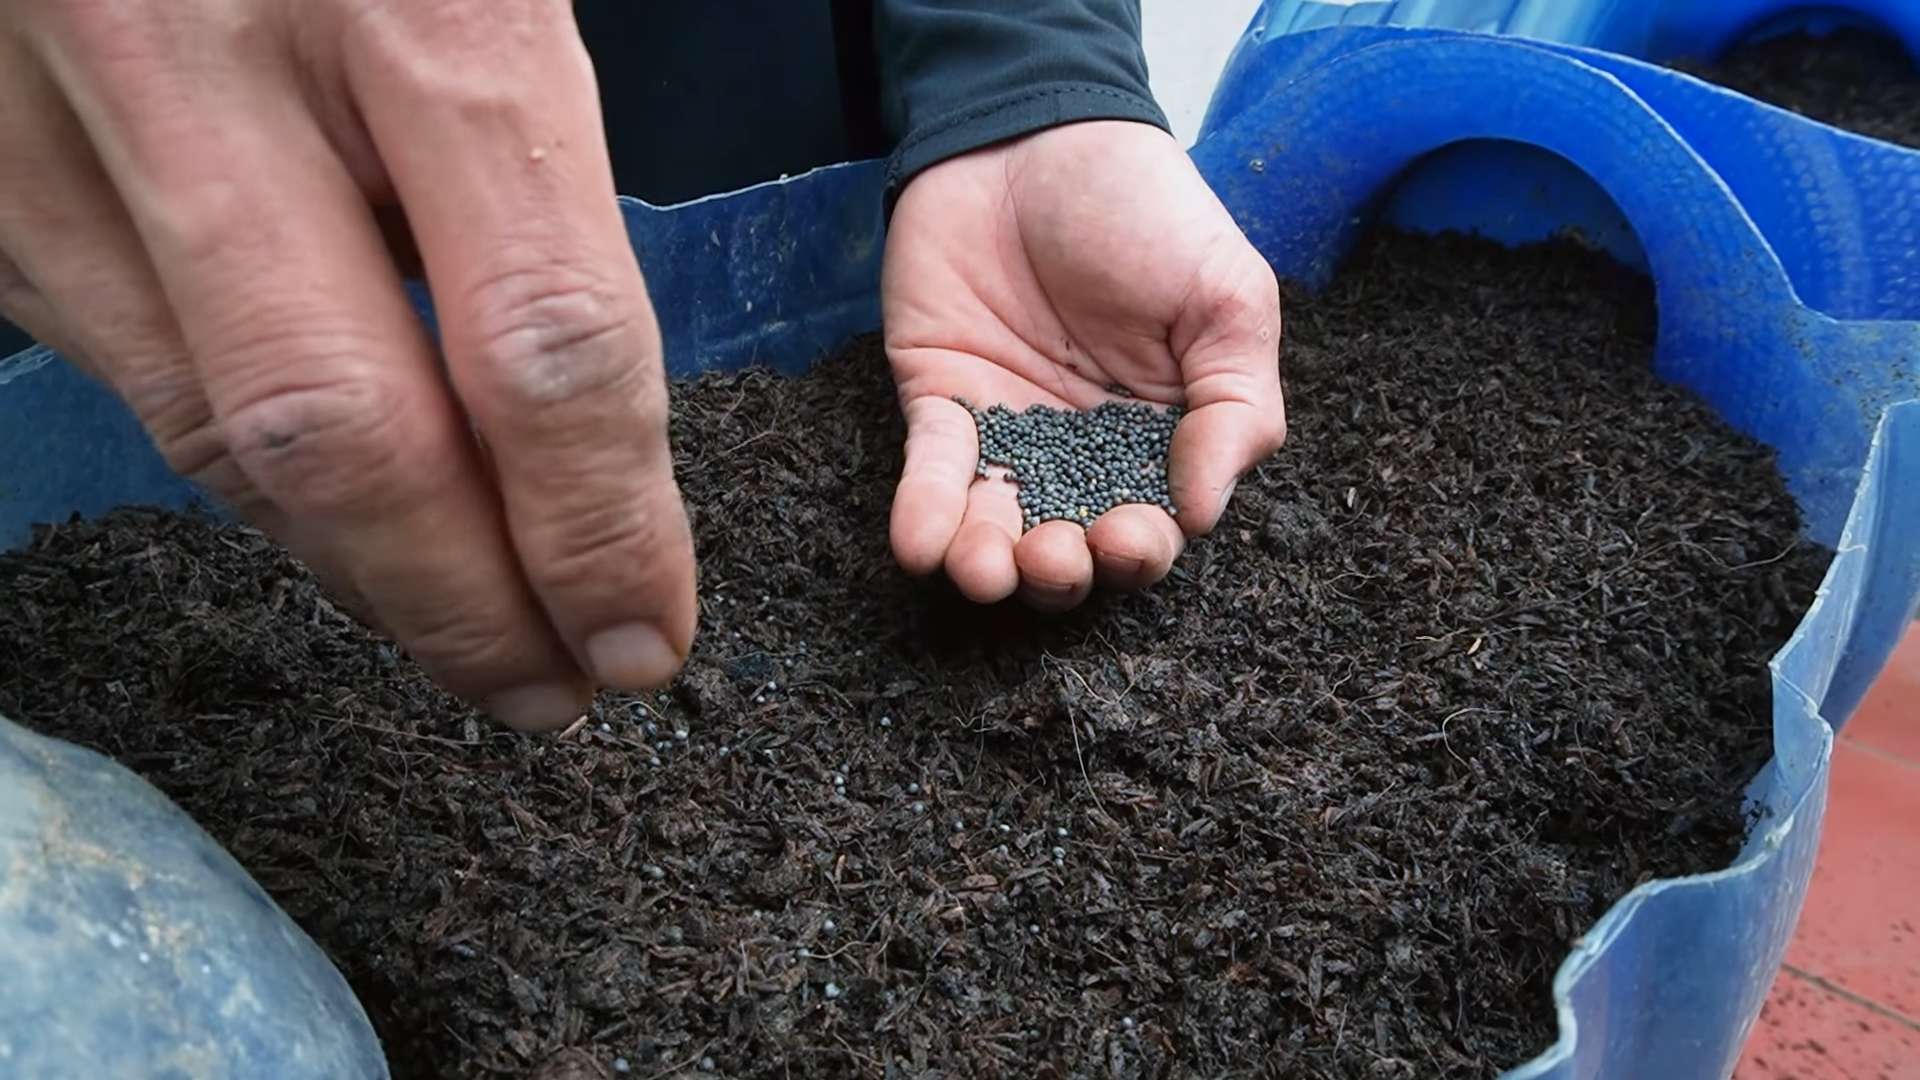
4. Sow the Seeds: This is the fun part! Place 2-3 collard greens seeds in the center of each cell. Planting multiple seeds increases your chances of germination.
5. Cover the Seeds: Lightly cover the seeds with a thin layer of seed starting mix. About 1/4 inch is perfect.
6. Water Again: Gently mist the surface of the soil again with your spray bottle.
7. Label Your Trays: Don’t forget to label your trays with the variety of collard greens you’re planting and the date. This will help you keep track of everything.
8. Provide Warmth and Light: Place your seed starting trays on a heat mat (if using) and under grow lights. The ideal temperature for collard greens germination is between 70-75°F (21-24°C). If you don’t have grow lights, place the trays in a sunny window, but be sure to rotate them regularly to prevent the seedlings from leaning towards the light.
9. Maintain Moisture: Keep the seed starting mix consistently moist, but not soggy. Check the moisture level daily and mist with your spray bottle as needed.
Phase 2: Nurturing Your Seedlings
Once your seeds have germinated (usually within 5-10 days), it’s time to focus on nurturing your seedlings and helping them grow strong and healthy.
1. Thin the Seedlings: Once the seedlings have developed their first true leaves (the second set of leaves that appear after the initial seed leaves), it’s time to thin them. Using small scissors or your fingers, carefully snip or pinch off the weaker seedlings, leaving only one strong seedling per cell. This ensures that each seedling has enough space and nutrients to thrive.
2. Adjust Grow Lights: As your seedlings grow, adjust the height of your grow lights to keep them about 2-3 inches above the plants. This will prevent the seedlings from becoming leggy and weak.
3. Water Regularly: Continue to water your seedlings regularly, keeping the soil consistently moist. Avoid overwatering, which can lead to root rot.
4. Fertilize (Optional): If you want to give your seedlings an extra boost, you can fertilize them with a diluted liquid fertilizer specifically formulated for seedlings. Follow the instructions on the fertilizer label carefully. I usually wait until they have a few sets of true leaves before fertilizing.
5. Harden Off the Seedlings: About a week before you plan to transplant your seedlings outdoors, it’s important to harden them off. This process gradually acclimates the seedlings to outdoor conditions, preventing transplant shock. Start by placing the seedlings outdoors in a sheltered location for a few hours each day, gradually increasing the amount of time they spend outside. Protect them from direct sunlight and strong winds.
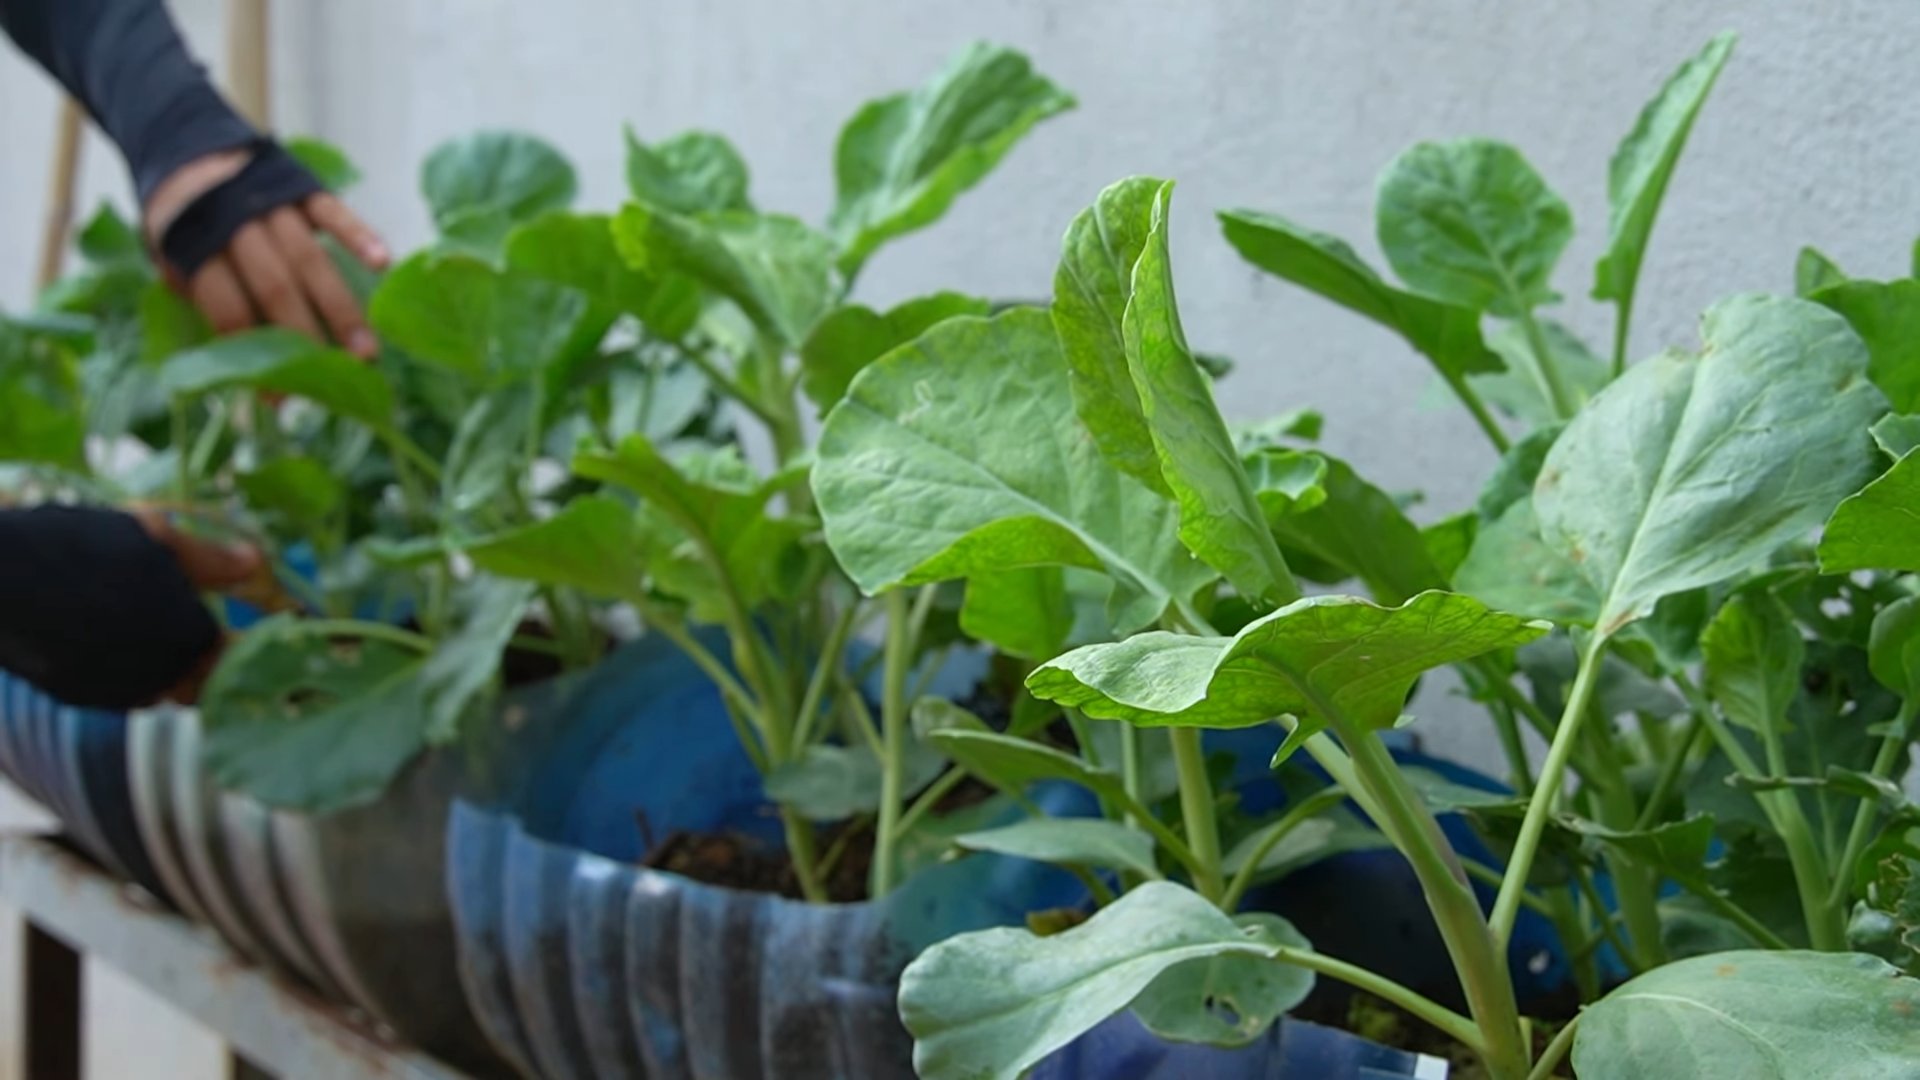
Phase 3: Transplanting Outdoors
The moment we’ve been waiting for! It’s time to transplant our healthy collard greens seedlings into the garden.
1. Choose the Right Location: Collard greens thrive in full sun, so choose a location that receives at least 6 hours of direct sunlight per day. They also prefer well-draining soil that is rich in organic matter.
2. Prepare the Soil: Before transplanting, prepare the soil by amending it with compost or other organic matter. This will improve drainage, fertility, and water retention.
3. Dig the Holes: Dig holes that are slightly larger than the root balls of your seedlings. Space the holes about 12-18 inches apart.
4. Carefully Remove the Seedlings: Gently remove the seedlings from their cells. If you’re using egg cartons, you can simply tear off each cell. Be careful not to damage the roots.
5. Plant the Seedlings: Place the seedlings in the holes, making sure that the top of the root ball is level with the surrounding soil.
6. Fill the Holes: Fill the holes with soil, gently firming it around the seedlings.
7. Water Thoroughly: Water the seedlings thoroughly after transplanting.
8. Mulch (Optional): Apply a layer of mulch around the seedlings to help retain moisture, suppress weeds, and regulate soil temperature. Straw, wood chips, or shredded leaves are all good options.
9. Protect from Pests: Collard greens are susceptible to a variety of pests, including cabbage worms, aphids, and flea beetles. Monitor your plants regularly and take action to control pests as needed. Row covers can be an effective way to protect your plants from pests.
Extra Tips for Success
* Choose the Right Variety: There are many different varieties of collard greens to choose from, each with its own unique flavor and characteristics. Experiment with different varieties to find your favorites. Some popular varieties include ‘Georgia Southern’, ‘Champion’, and ‘Vates’.
* Succession Planting: To extend your harvest, consider succession planting. Sow new seeds every 2-3 weeks to ensure a continuous supply of collard greens throughout the growing season.
* Water Deeply: Water your collard greens deeply and regularly, especially during hot, dry weather.
* Fertilize Regularly: Collard greens are heavy feeders, so fertilize them regularly with a balanced fertilizer.
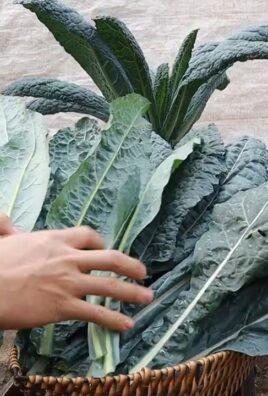
* Harvesting: You can start harvesting collard greens when the leaves are about 10-12 inches long. Harvest the outer leaves first, leaving the inner leaves to continue growing.
* Pest Control: Keep an eye out for pests like cabbage worms and aphids. Handpicking them off or using organic pest control methods can help keep your plants healthy.
* Enjoy Your Harvest: Collard greens are delicious and nutritious! Enjoy them steamed, sautéed, or added to soups and stews.
Troubleshooting
* Seedlings Not Germinating: If your seeds aren’t germinating, make sure the soil is warm enough and consistently moist. You may also want to try using a different batch of seeds.
* Leggy Seedlings: If your seedlings are leggy, they’re not getting enough light. Move them closer to your grow lights or place them in a sunnier location.
* Yellowing Leaves: Yellowing leaves can be a sign of nutrient deficiency. Fertilize your plants with a balanced fertilizer.
* Pest Problems: If you’re having pest problems, identify the pest and take appropriate action. Organic pest
Conclusion
So, there you have it! This simple yet effective collard greens planting hack is more than just a gardening shortcut; it’s a game-changer for anyone looking to cultivate a thriving collard greens patch with minimal effort and maximum yield. We’ve shown you how to bypass common pitfalls like poor germination, weed competition, and inconsistent spacing, all while nurturing healthier, more robust plants from the very beginning.
Why is this a must-try? Because it streamlines the entire planting process. No more painstakingly sowing tiny seeds, thinning out overcrowded seedlings, or battling relentless weeds that steal vital nutrients. This method gives your collard greens a head start, allowing them to establish strong root systems and leafy growth before other garden challenges even have a chance to take hold. Imagine rows of vibrant, healthy collard greens, ready to harvest weeks earlier than if you’d used traditional planting methods. That’s the power of this simple hack.
But the beauty of gardening lies in experimentation, so don’t be afraid to adapt this technique to your specific needs and preferences. For example, if you live in an area with particularly poor soil, consider enriching your planting holes with compost or well-rotted manure before transplanting your seedlings. This will provide an extra boost of nutrients and help your collard greens thrive. You could also experiment with different types of biodegradable pots or even create your own using recycled materials like newspaper or egg cartons. The possibilities are endless!
Another variation to consider is succession planting. By starting new batches of seedlings every few weeks, you can ensure a continuous harvest of fresh collard greens throughout the growing season. This is especially useful if you have a large family or enjoy sharing your harvest with friends and neighbors.
Ultimately, the success of any gardening endeavor depends on your willingness to try new things and learn from your experiences. This collard greens planting hack is a fantastic starting point, but we encourage you to explore other techniques and find what works best for you and your garden.
We are confident that this method will revolutionize your collard greens growing experience. It’s efficient, effective, and incredibly rewarding to watch your seedlings flourish into mature, leafy plants.
Now, it’s your turn! We urge you to give this collard greens planting hack a try. We are eager to hear about your results, any modifications you make, and the overall impact on your collard greens harvest. Share your experiences, photos, and tips in the comments section below. Let’s create a community of thriving collard greens growers! Happy gardening!
Frequently Asked Questions (FAQ)
What type of soil is best for collard greens?
Collard greens thrive in well-drained soil that is rich in organic matter. A slightly acidic to neutral pH (between 6.0 and 7.0) is ideal. Before planting, amend your soil with compost, aged manure, or other organic materials to improve its fertility and drainage. If your soil is heavy clay, consider adding sand or perlite to improve drainage. A soil test can help you determine the specific nutrient needs of your soil.
How often should I water my collard greens?
Collard greens need consistent moisture, especially during hot, dry weather. Water deeply and regularly, aiming to keep the soil consistently moist but not waterlogged. A good rule of thumb is to water when the top inch of soil feels dry to the touch. Mulching around your plants can help retain moisture and suppress weeds. Consider using a soaker hose or drip irrigation system for efficient watering.
What are some common pests and diseases that affect collard greens, and how can I prevent them?
Common pests include aphids, cabbage worms, flea beetles, and slugs. Diseases include black rot, clubroot, and downy mildew. To prevent these problems, practice good garden hygiene, such as removing plant debris and weeds. Use row covers to protect your plants from pests. Inspect your plants regularly for signs of pests or diseases and take action promptly. Organic pest control methods, such as insecticidal soap or neem oil, can be effective. Crop rotation can also help prevent soilborne diseases.
How long does it take for collard greens to mature?
Collard greens typically take 55 to 75 days to mature from seed. However, you can start harvesting leaves as soon as they are large enough to use, usually when they are about 10-12 inches long. The lower leaves are usually the first to be harvested.
Can I grow collard greens in containers?
Yes, collard greens can be successfully grown in containers. Choose a large container (at least 12 inches in diameter) with good drainage. Use a high-quality potting mix and provide regular watering and fertilization. Container-grown collard greens may need more frequent watering than those grown in the ground.
What are some good companion plants for collard greens?
Companion planting can help improve the growth and health of your collard greens. Good companion plants include herbs like rosemary, thyme, and sage, which can help repel pests. Marigolds are also effective at deterring nematodes. Other beneficial companion plants include onions, garlic, and dill. Avoid planting collard greens near other members of the brassica family, such as broccoli, cabbage, and kale, as they can attract the same pests and diseases.
How do I harvest collard greens?
Harvest collard greens by cutting the outer leaves with a sharp knife or scissors. Leave the inner leaves to continue growing. You can harvest leaves gradually over several weeks, or harvest the entire plant at once. For the best flavor, harvest collard greens after a light frost, as this can sweeten the leaves.
Can I freeze collard greens?
Yes, collard greens can be frozen for later use. Wash the leaves thoroughly and remove any tough stems. Blanch the leaves in boiling water for 2-3 minutes, then immediately transfer them to an ice bath to stop the cooking process. Drain the leaves well and pack them into freezer bags or containers. Frozen collard greens can be stored for up to 12 months.
What are some ways to use collard greens in cooking?
Collard greens are a versatile vegetable that can be used in a variety of dishes. They are often braised or simmered with ham hocks or other smoked meats. They can also be steamed, sautéed, or added to soups and stews. Collard greens are a good source of vitamins A, C, and K, as well as fiber and antioxidants.
Is this collard greens planting hack suitable for all climates?
While this hack is generally applicable, adjustments might be needed based on your specific climate. In colder climates, starting seedlings indoors earlier is crucial to extend the growing season. In hotter climates, providing shade during the hottest part of the day can prevent seedlings from drying out. Always consider your local growing conditions and adjust your planting schedule accordingly.
What if my seedlings get leggy (tall and spindly)?
Leggy seedlings are often a sign of insufficient light. Ensure your seedlings are receiving adequate sunlight or are under grow lights. You can also try gently brushing the tops of the seedlings a few times a day to encourage them to develop stronger stems. When transplanting, you can bury the stems deeper in the soil to provide additional support.
Leave a Comment