
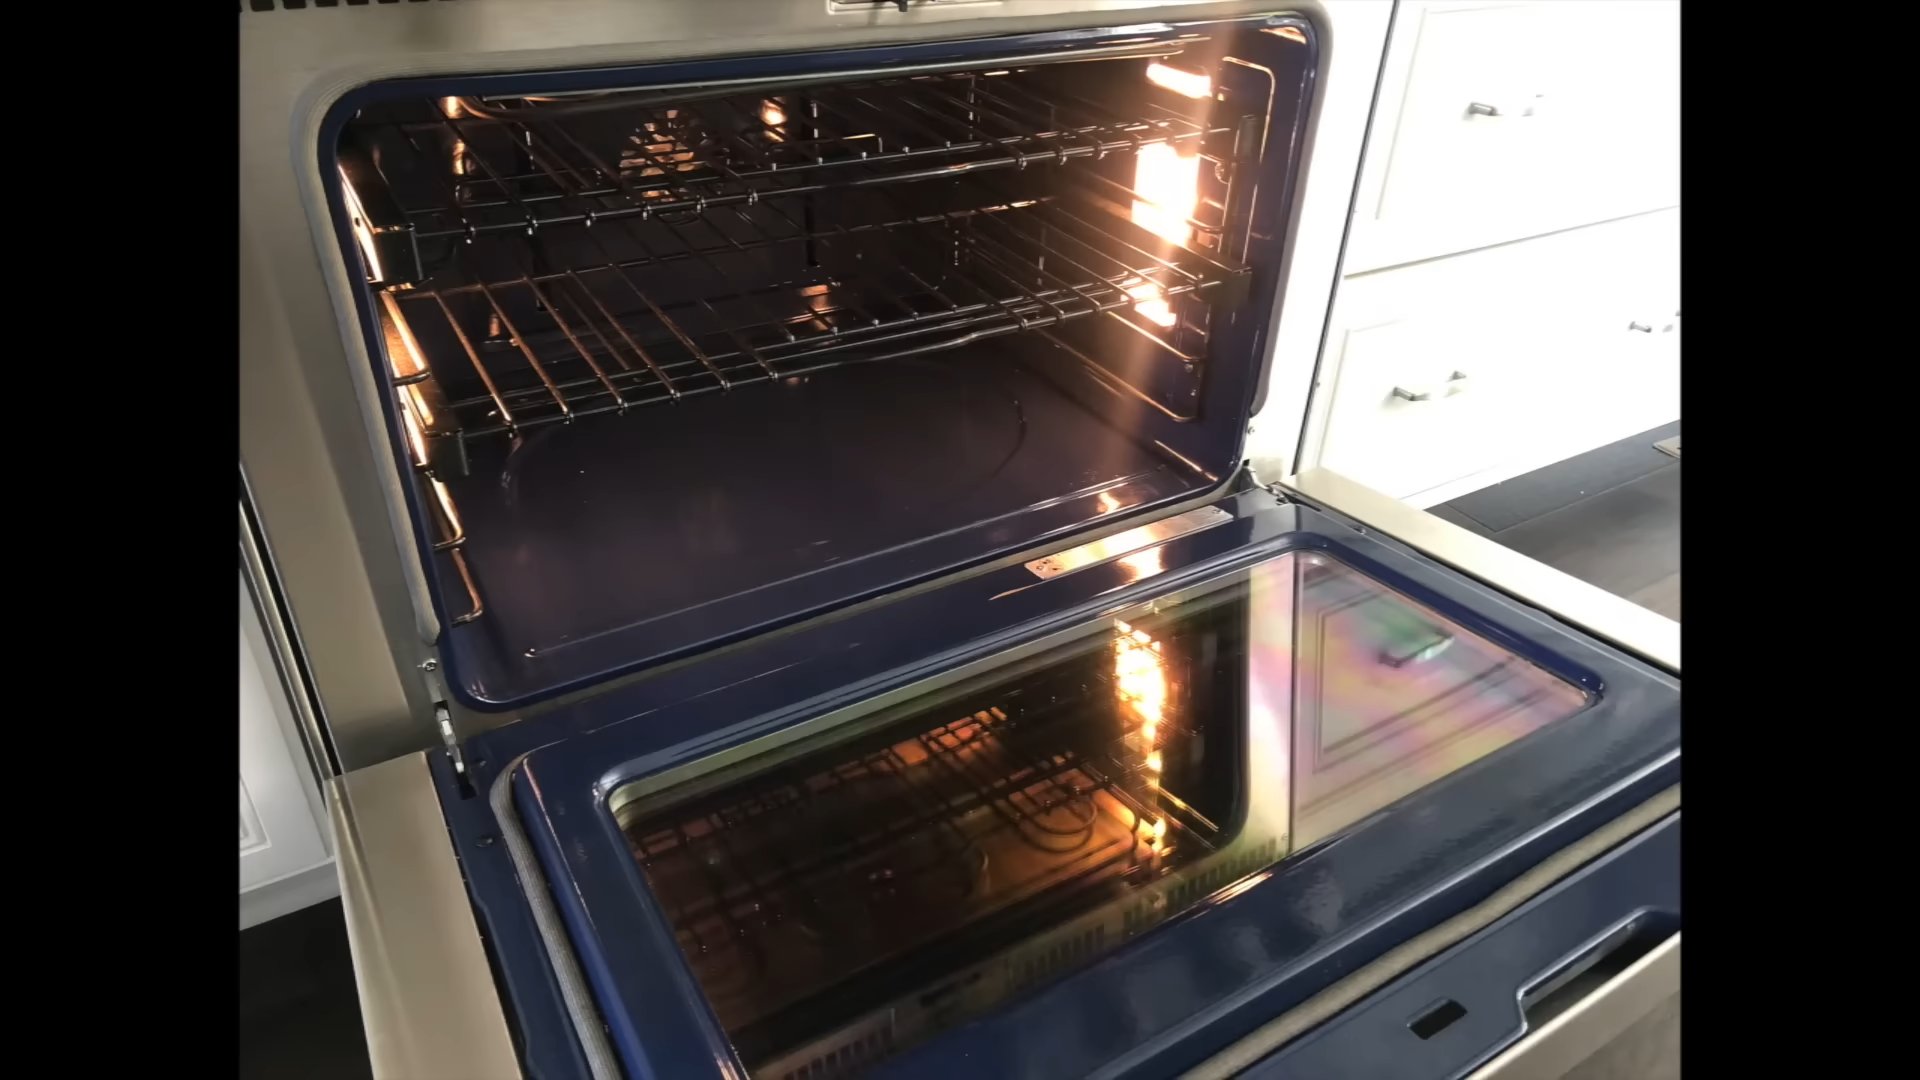
Clean Oven Naturally 鈥?sounds like a dream, right? I know, I know, the thought of tackling that greasy, burnt mess inside your oven can be daunting. But what if I told you that you could achieve a sparkling clean oven without harsh chemicals or back-breaking scrubbing? That’s exactly what we’re diving into today!
For generations, resourceful homemakers have relied on natural ingredients to keep their homes clean and fresh. Before the advent of commercial cleaning products, things like vinegar, baking soda, and lemon were the go-to solutions for everything from disinfecting surfaces to tackling tough stains. This tradition of natural cleaning is not only effective but also gentler on our environment and our health.
Let’s face it, nobody enjoys breathing in the fumes of chemical oven cleaners. Plus, those products can be expensive and sometimes even damage your oven’s interior. That’s why learning how to clean oven naturally is such a valuable skill. Not only will you save money and protect your health, but you’ll also feel a sense of accomplishment knowing you’re using eco-friendly methods. So, grab your baking soda and vinegar, and let’s get started on this easy, effective, and all-natural oven cleaning adventure! I promise, you’ll be amazed at the results.
DIY Oven Cleaning: A Natural and Effective Guide
Hey there, fellow DIY enthusiasts! I know, cleaning the oven is probably on everyone’s list of least favorite chores. But, trust me, it doesn’t have to be a toxic, fume-filled nightmare. I’m going to walk you through a super effective, all-natural method that uses ingredients you probably already have in your pantry. Get ready to say goodbye to baked-on grime and hello to a sparkling clean oven!
What You’ll Need
Before we dive in, let’s gather our supplies. This is a pretty simple list, which is one of the things I love about this method.
* Baking soda
* White vinegar
* Water
* Spray bottle
* Spatula or scraper (plastic is best to avoid scratching)
* Sponge or scrub brush
* Rubber gloves (optional, but recommended)
* Clean cloths or paper towels
* Small bowl
Step-by-Step Cleaning Process
Okay, let’s get started! I promise, it’s easier than you think.
1. Preparation is Key: First things first, remove the oven racks. I usually soak mine in hot, soapy water in the sink while I’m working on the oven itself. This gives the grime a head start on loosening up. Also, remove any large pieces of food debris from the bottom of the oven. A quick sweep with a brush or even your hand (with a glove on, of course!) will do the trick.
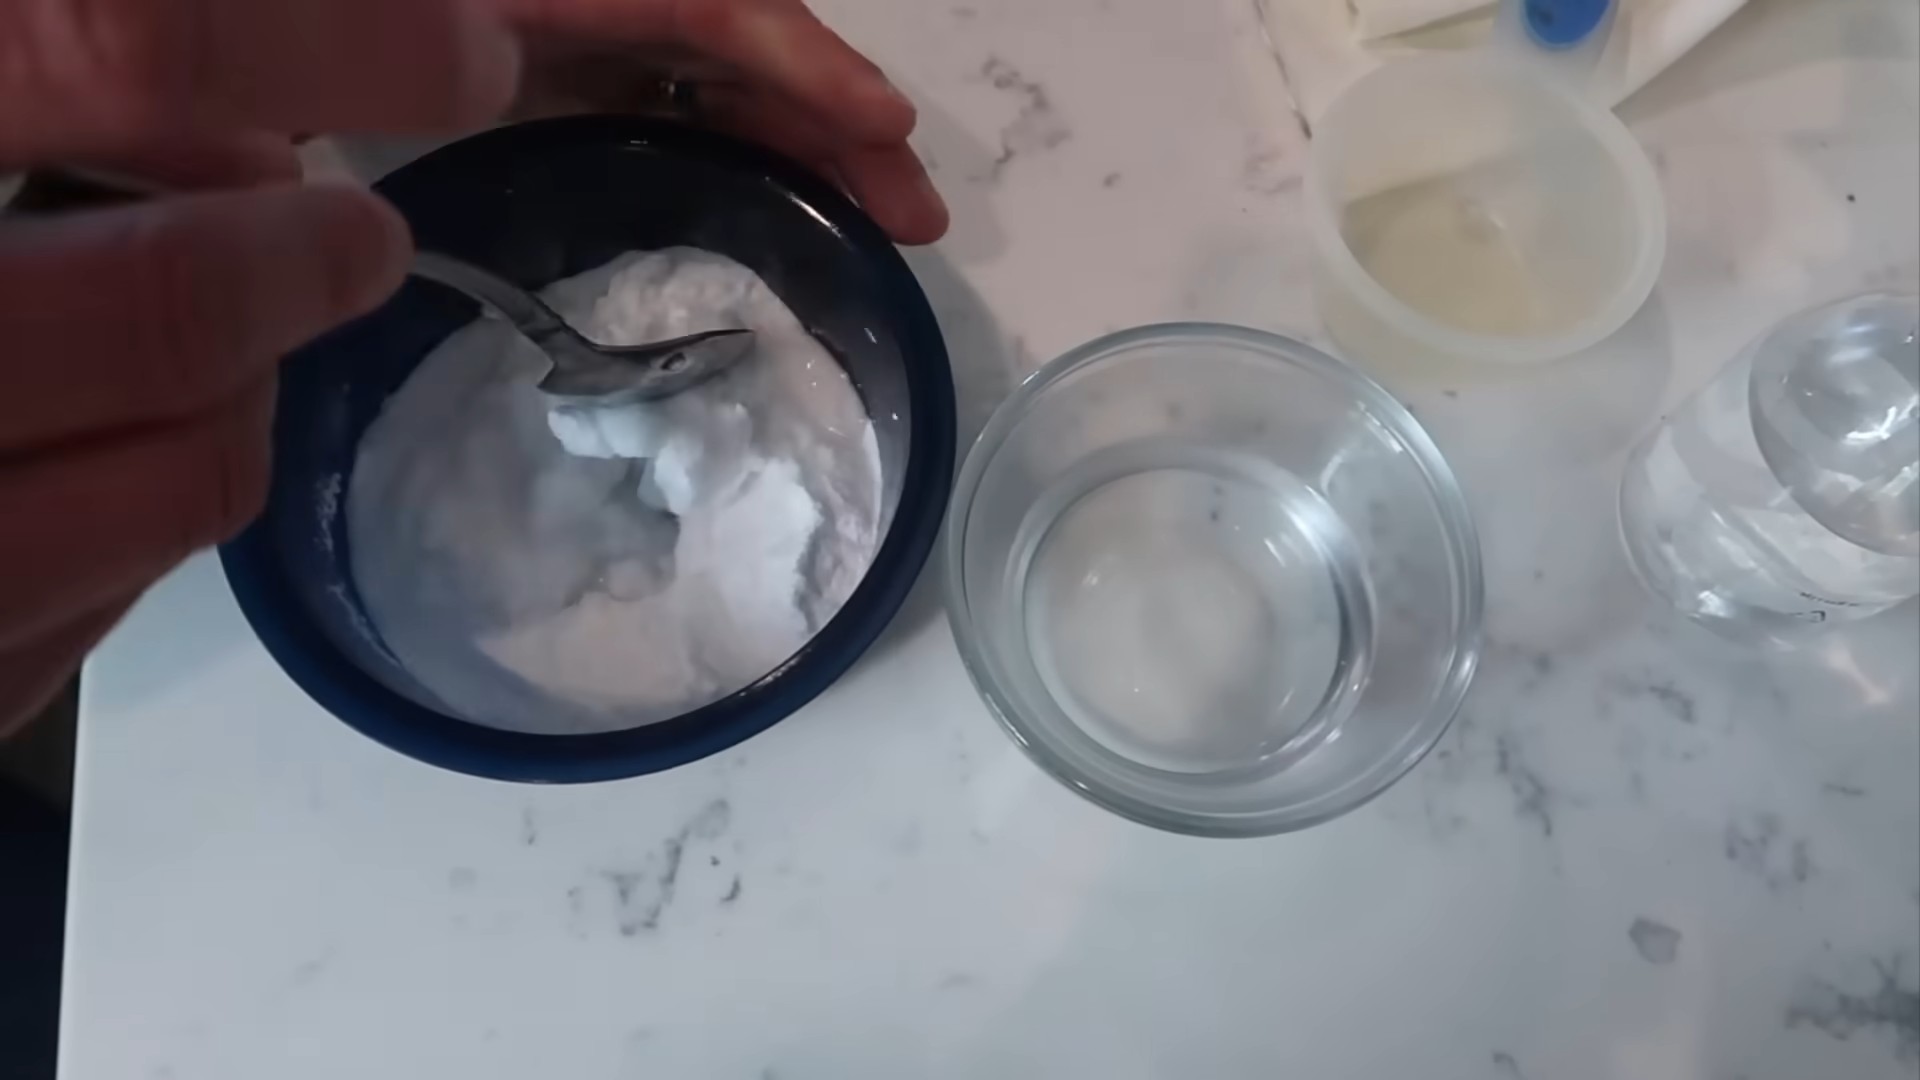
2. Baking Soda Paste Power: In your small bowl, mix together about 陆 cup of baking soda with enough water to form a spreadable paste. You want it to be thick enough to stick to the oven surfaces, but not so thick that it’s difficult to apply. I usually aim for a consistency similar to frosting.
3. Apply the Paste Generously: Now, the fun part! Using your hands (with gloves on, remember!), a sponge, or even a spatula, spread the baking soda paste all over the interior surfaces of your oven. This includes the back, sides, bottom, top, and even the inside of the oven door. Avoid the heating elements, though. I usually try to get a pretty thick layer on the really grimy areas.
4. Let it Sit (and Work its Magic): This is the most important step: patience! Let the baking soda paste sit in your oven for at least 12 hours, or even overnight. The longer it sits, the more time it has to loosen up the baked-on grease and grime. I usually apply the paste before I go to bed and then tackle the cleaning in the morning.
5. Vinegar Time: After the baking soda has had its time to work, grab your spray bottle and fill it with white vinegar. Lightly spray the baking soda paste all over the inside of the oven. The vinegar will react with the baking soda, causing it to fizz. This is a good thing! It helps to further loosen the grime.
6. Wipe Away the Grime: Now, armed with your sponge or scrub brush, start wiping away the baking soda and vinegar mixture. You might need to use a little elbow grease, especially in those really stubborn areas. The spatula or scraper can be helpful for scraping away thicker deposits. Rinse your sponge or brush frequently with clean water.
7. Rinse and Repeat (If Necessary): Once you’ve wiped away most of the baking soda and vinegar mixture, give the inside of your oven a good rinse with a clean, damp cloth. You might need to rinse it several times to remove all traces of the baking soda. If you still see some stubborn grime, repeat steps 5 and 6.
8. Clean the Oven Door: Don’t forget the oven door! I usually clean the glass with a mixture of vinegar and water. Spray it on, let it sit for a few minutes, and then wipe it clean. For really stubborn spots, you can use a razor blade scraper (carefully!) to remove the grime.
9. Reassemble and Dry: Once you’re satisfied with the cleanliness of your oven, replace the oven racks. Before you use your oven, make sure it’s completely dry inside. You can leave the door open for a few hours to allow it to air dry, or you can use a clean cloth to dry it manually.
Cleaning the Oven Racks
As I mentioned earlier, I usually soak the oven racks while I’m working on the oven itself. Here’s how I clean them:
1. Soak in Hot, Soapy Water: Fill your sink or a large tub with hot water and add a generous amount of dish soap. Submerge the oven racks in the water and let them soak for at least an hour, or even overnight.
2. Scrub Away the Grime: After soaking, use a scrub brush or steel wool to scrub away the grime. You might need to use a little elbow grease, but the soaking should have loosened most of it.
3. Rinse and Dry: Rinse the oven racks thoroughly with clean water and then dry them with a clean cloth.
Dealing with Stubborn Stains
Sometimes, you might encounter some really stubborn stains that just won’t budge. Here are a few tips for dealing with them:
* More Baking Soda Paste: For particularly stubborn stains, try applying a thicker layer of baking soda paste and letting it sit for even longer.
* Lemon Power: Cut a lemon in half and rub it directly onto the stain. The citric acid in the lemon can help to break down the grime.
* Salt Scrub: Make a paste of salt and water and use it to scrub the stain. The abrasive nature of the salt can help to remove stubborn deposits.
* Commercial Oven Cleaner (as a Last Resort): If all else fails, you can use a commercial oven cleaner. However, be sure to follow the instructions carefully and wear gloves and eye protection. I always try to avoid these if possible due to the harsh chemicals.
Tips for Keeping Your Oven Clean
Prevention is always better than cure! Here are a few tips for keeping your oven clean and avoiding those dreaded deep cleans:
* Line the Bottom of Your Oven: Line the bottom of your oven with aluminum foil or a silicone baking mat to catch drips and spills.
* Clean Up Spills Immediately: If something spills in your oven, clean it up as soon as possible. The longer it sits, the harder it will be to remove.
* Self-Cleaning Cycle (Use Sparingly): If your oven has a self-cleaning cycle, use it sparingly. These cycles can generate a lot of heat and fumes, and they can also damage your oven over time.
* Regular Wipe-Downs: Give your oven a quick wipe-down after each use to remove any splatters or spills.
Why I Love This Method
I’m a huge fan of this natural oven cleaning method for several reasons:
* It’s Non-Toxic: I love that it uses only natural ingredients, so I don’t have to worry about breathing in harsh chemicals.
* It’s Effective: It really works! It might take a little more time and effort than using a commercial oven cleaner, but the results are just as good, if not better.
* It’s Affordable: Baking soda and vinegar are both very inexpensive, so this method is a budget-friendly option.
* It’s Environmentally Friendly: By using natural ingredients, I’m reducing my impact on the environment.
Final Thoughts
Hey there, fellow DIY enthusiasts! I know, cleaning the oven is probably on everyone’s list of least favorite chores. But, trust me, it doesn’t have to be a toxic, fume-filled nightmare. I’m going to walk you through a super effective, all-natural method that uses ingredients you probably already have in your pantry. Get ready to say goodbye to baked-on grime and hello to a sparkling clean oven!
What You’ll Need
Before we dive in, let’s gather our supplies. This is a pretty simple list, which is one of the things I love about this method.
* Baking soda
* White vinegar
* Water
* Spray bottle
* Spatula or scraper (plastic is best to avoid scratching)
* Sponge or scrub brush
* Rubber gloves (optional, but recommended)
* Clean cloths or paper towels
* Small bowl
Step-by-Step Cleaning Process
Okay, let’s get started! I promise, it’s easier than you think.
1. Preparation is Key: First things first, remove the oven racks. I usually soak mine in hot, soapy water in the sink while I’m working on the oven itself. This gives the grime a head start on loosening up. Also, remove any large pieces of food debris from the bottom of the oven. A quick sweep with a brush or even your hand (with a glove on, of course!) will do the trick.
2. Baking Soda Paste Power: In your small bowl, mix together about 陆 cup of baking soda with enough water to form a spreadable paste. You want it to be thick enough to stick to the oven surfaces, but not so thick that it’s difficult to apply. I usually aim for a consistency similar to frosting.
3. Apply the Paste Generously: Now, the fun part! Using your hands (with gloves on, remember!), a sponge, or even a spatula, spread the baking soda paste all over the interior surfaces of your oven. This includes the back, sides, bottom, top, and even the inside of the oven door. Avoid the heating elements, though. I usually try to get a pretty thick layer on the really grimy areas.
4. Let it Sit (and Work its Magic): This is the most important step: patience! Let the baking soda paste sit in your oven for at least 12 hours, or even overnight. The longer it sits, the more time it has to loosen up the baked-on grease and grime. I usually apply the paste before I go to bed and then tackle the cleaning in the morning.
5. Vinegar Time: After the baking soda has had its time to work, grab your spray bottle and fill it with white vinegar. Lightly spray the baking soda paste all over the inside of the oven. The vinegar will react with the baking soda, causing it to fizz. This is a good thing! It helps to further loosen the grime.
6. Wipe Away the Grime: Now, armed with your sponge or scrub brush, start wiping away the baking soda and vinegar mixture. You might need to use a little elbow grease, especially in those really stubborn areas. The spatula or scraper can be helpful for scraping away thicker deposits. Rinse your sponge or brush frequently with clean water.
7. Rinse and Repeat (If Necessary): Once you’ve wiped away most of the baking soda and vinegar mixture, give the inside of your oven a good rinse with a clean, damp cloth. You might need to rinse it several times to remove all traces of the baking soda. If you still see some stubborn grime, repeat steps 5 and 6.
8. Clean the Oven Door: Don’t forget the oven door! I usually clean the glass with a mixture of vinegar and water. Spray it on, let it sit for a few minutes, and then wipe it clean. For really stubborn spots, you can use a razor blade scraper (carefully!) to remove the grime.
9. Reassemble and Dry: Once you’re satisfied with the cleanliness of your oven, replace the oven racks. Before you use your oven, make sure it’s completely dry inside. You can leave the door open for a few hours to allow it to air dry, or you can use a clean cloth to dry it manually.
Cleaning the Oven Racks
As I mentioned earlier, I usually soak the oven racks while I’m working on the oven itself. Here’s how I clean them:
1. Soak in Hot, Soapy Water: Fill your sink or a large tub with hot water and add a generous amount of dish soap. Submerge the oven racks in the water and let them soak for at least an hour, or even overnight.
2. Scrub Away the Grime: After soaking, use a scrub brush or steel wool to scrub away the grime. You might need to use a little elbow grease, but the soaking should have loosened most of it.
3. Rinse and Dry: Rinse the oven racks thoroughly with clean water and then dry them with a clean cloth.
Dealing with Stubborn Stains
Sometimes, you might encounter some really stubborn stains that just won’t budge. Here are a few tips for dealing with them:
* More Baking Soda Paste: For particularly stubborn stains, try applying a thicker layer of baking soda paste and letting it sit for even longer.
* Lemon Power: Cut a lemon in half and rub it directly onto the stain. The citric acid in the lemon can help to break down the grime.
* Salt Scrub: Make a paste of salt and water and use it to scrub the stain. The abrasive nature of the salt can help to remove stubborn deposits.
* Commercial Oven Cleaner (as a Last Resort): If all else fails, you can use a commercial oven cleaner. However, be sure to follow the instructions carefully and wear gloves and eye protection. I always try to avoid these if possible due to the harsh chemicals.
Tips for Keeping Your Oven Clean
Prevention is always better than cure! Here are a few tips for keeping your oven clean and avoiding those dreaded deep cleans:
* Line the Bottom of Your Oven: Line the bottom of your oven with aluminum foil or a silicone baking mat to catch drips and spills.
* Clean Up Spills Immediately: If something spills in your oven, clean it up as soon as possible. The longer it sits, the harder it will be to remove.
* Self-Cleaning Cycle (Use Sparingly): If your oven has a self-cleaning cycle, use it sparingly. These cycles can generate a lot of heat and fumes, and they can also damage your oven over time.
* Regular Wipe-Downs: Give your oven a quick wipe-down after each use to remove any splatters or spills.
Why I Love This Method
I’m a huge fan of this natural oven cleaning method for several reasons:
* It’s Non-Toxic: I love that it uses only natural ingredients, so I don’t have to worry about breathing in harsh chemicals.
* It’s Effective: It really works! It might take a little more time and effort than using a commercial oven cleaner, but the results are just as good, if not better.
* It’s Affordable: Baking soda and vinegar are both very inexpensive, so this method is a budget-friendly option.
* It’s Environmentally Friendly: By using natural ingredients, I’m reducing my impact on the environment.
Final Thoughts
So, there you have it! My go-to method for cleaning my oven naturally. I hope you found this guide helpful. Remember, a little patience and elbow grease can go a long way. Happy cleaning! And remember, a clean oven makes for happier cooking!
Conclusion
So, there you have it! A simple, effective, and entirely natural way to clean your oven naturally without resorting to harsh chemicals or expensive cleaning products. We’ve walked you through the process, highlighting the ease and accessibility of this DIY method. But why is this a must-try?
Firstly, it’s about your health and the health of your family. Commercial oven cleaners are often laden with volatile organic compounds (VOCs) that can linger in your oven and potentially contaminate your food. By opting for a natural solution like baking soda and vinegar, you’re eliminating that risk and creating a safer cooking environment.
Secondly, it’s about your wallet. Baking soda and vinegar are incredibly inexpensive and readily available in most households. Think of all the money you’ll save by ditching those pricey oven cleaners! That extra cash can go towards more delicious ingredients for your next culinary masterpiece.
Thirdly, it’s about the environment. Traditional oven cleaners contribute to air and water pollution. By choosing a natural alternative, you’re reducing your environmental footprint and making a conscious effort to live more sustainably.
But the benefits don’t stop there. This method is also incredibly effective at removing baked-on grease and grime. The combination of baking soda’s abrasive properties and vinegar’s acidity works wonders to loosen stubborn messes, leaving your oven sparkling clean.
Variations and Suggestions:
* Lemon Power: For an extra boost of cleaning power and a fresh scent, add a few tablespoons of lemon juice to your baking soda paste. The citric acid in lemon juice will help to break down grease and leave your oven smelling delightful.
* Essential Oil Infusion: Add a few drops of your favorite essential oil to the vinegar spray for a pleasant aroma. Lavender, tea tree, and eucalyptus are all great options for their antibacterial and deodorizing properties.
* Overnight Soak: For particularly stubborn messes, let the baking soda paste sit overnight before scrubbing. This will give it more time to penetrate the grime and make it easier to remove.
* Preventative Measures: To keep your oven clean for longer, consider using oven liners or baking sheets to catch spills and splatters. Wipe up any messes as soon as they occur to prevent them from baking on.
* Borax Boost: For a more powerful cleaning solution, add a tablespoon of borax to the baking soda paste. Borax is a natural mineral that acts as a cleaning booster and helps to remove tough stains. Be sure to wear gloves when using borax.
We’re confident that you’ll be amazed by the results of this simple yet effective DIY trick. It’s a win-win situation: a cleaner oven, a healthier home, and a happier planet.
So, what are you waiting for? Give it a try! We encourage you to share your experiences with us. Let us know how this method worked for you, what variations you tried, and any tips you have to share. Your feedback will help others discover the joys of cleaning their oven naturally. Post your before-and-after photos on social media and tag us! We can’t wait to see your sparkling clean ovens!
Frequently Asked Questions (FAQ)
Q: Is this method safe for all types of ovens?
A: Generally, yes. This method is safe for most standard ovens, including electric and gas ovens. However, it’s always a good idea to consult your oven’s manual for specific cleaning instructions and recommendations. If you have a self-cleaning oven, it’s best to avoid using this method, as it could potentially damage the self-cleaning mechanism. For convection ovens, ensure all baking soda residue is removed to prevent any impact on the fan’s performance.
Q: How often should I clean my oven using this method?
A: The frequency of cleaning depends on how often you use your oven and how messy it gets. As a general guideline, cleaning your oven every 3-6 months is a good practice. However, if you notice spills or splatters, it’s best to clean them up immediately to prevent them from baking on and becoming more difficult to remove. Regular spot cleaning can significantly reduce the need for deep cleaning.
Q: What if the baking soda paste is too dry or too runny?
A: The consistency of the baking soda paste should be similar to that of a thick frosting. If it’s too dry, add a little more water, one teaspoon at a time, until you reach the desired consistency. If it’s too runny, add a little more baking soda, one teaspoon at a time, until it thickens up. The ideal consistency will allow the paste to adhere to the oven surfaces without dripping.
Q: How long should I leave the baking soda paste on the oven surfaces?
A: For best results, leave the baking soda paste on the oven surfaces for at least 12 hours, or preferably overnight. This will give the baking soda ample time to penetrate the baked-on grease and grime, making it easier to remove. If you’re short on time, you can leave it on for a minimum of 2-3 hours, but the results may not be as dramatic.
Q: What if the vinegar doesn’t fizz when I spray it on the baking soda paste?
A: The fizzing reaction between the vinegar and baking soda is what helps to loosen the grime. If you don’t see a fizzing reaction, it could be because the baking soda paste has dried out too much. Try spraying the paste with a little water before applying the vinegar. You can also try using a different brand of vinegar, as some brands may be more acidic than others. Ensure the baking soda is fresh, as old baking soda may lose its potency.
Q: How do I remove the baking soda residue after scrubbing?
A: After scrubbing the oven surfaces, use a damp cloth or sponge to wipe away the baking soda residue. You may need to rinse the cloth or sponge several times to remove all the residue. For hard-to-reach areas, use a small brush or cotton swab to remove any remaining residue. A final wipe down with a clean, dry cloth will leave your oven sparkling clean.
Q: Can I use this method to clean the oven door glass?
A: Yes, this method is safe and effective for cleaning the oven door glass. Apply the baking soda paste to the glass, let it sit for a few hours, and then scrub it clean with a damp cloth or sponge. For stubborn stains, you can use a non-abrasive scrubbing pad. Be careful not to scratch the glass.
Q: What if I have a self-cleaning oven? Should I still use this method?
A: It’s generally not recommended to use this method on self-cleaning ovens. The self-cleaning cycle uses extremely high temperatures to burn off food residue, and using baking soda and vinegar could potentially damage the self-cleaning mechanism. Consult your oven’s manual for specific cleaning instructions for self-cleaning ovens.
Q: Can I use this method to clean the racks and trays?
A: Absolutely! This method works great for cleaning oven racks and trays. Soak the racks and trays in a solution of hot water and baking soda for a few hours, or overnight. Then, scrub them clean with a brush or sponge. For stubborn stains, you can use a non-abrasive scrubbing pad. Rinse thoroughly with water and dry completely before placing them back in the oven.
Q: What are some other natural cleaning alternatives I can use in my kitchen?
A: Besides baking soda and vinegar, there are many other natural cleaning alternatives you can use in your kitchen. Lemon juice is a great degreaser and disinfectant. Salt is a natural abrasive that can be used to scrub away stains. Castile soap is a versatile cleaner that can be used for a variety of purposes. Essential oils can be used to add a pleasant scent and antibacterial properties to your cleaning solutions.


Leave a Comment