
Clean Kitchen Sink Naturally: Is your kitchen sink looking less than sparkling? Are you tired of harsh chemicals and expensive cleaners that promise the world but deliver little? I understand! I’ve been there, scrubbing away with little success, feeling frustrated and defeated. But what if I told you that a sparkling clean kitchen sink is achievable with ingredients you probably already have in your pantry?
For generations, resourceful homemakers have relied on natural remedies to keep their homes clean and fresh. Before the advent of commercial cleaners, simple ingredients like vinegar, baking soda, and lemon were the go-to solutions for tackling grime and odors. This tradition, passed down through families, highlights the effectiveness and sustainability of natural cleaning methods. It’s time we revisit these time-tested techniques!
A clean kitchen sink isn’t just about aesthetics; it’s about hygiene. Your sink is a breeding ground for bacteria and germs, making it essential to keep it clean and sanitized. This DIY guide will provide you with simple, effective, and eco-friendly methods to clean kitchen sink naturally, eliminating odors, removing stains, and preventing the buildup of harmful bacteria. Say goodbye to harsh chemicals and hello to a sparkling clean, healthy kitchen sink using the power of nature!
DIY: Sparkling Clean Kitchen Sink, Naturally!
Okay, let’s face it, the kitchen sink is a breeding ground for all sorts of gunk and grime. But don’t worry! You don’t need harsh chemicals to get it sparkling again. I’m going to show you my favorite method for cleaning your kitchen sink naturally, using ingredients you probably already have in your pantry. This method is effective, eco-friendly, and leaves your sink smelling fresh.
What You’ll Need:
* Baking Soda
* White Vinegar
* Lemon (or Lemon Juice)
* Salt (Coarse Salt is preferable)
* Dish Soap (Natural Dish Soap is best!)
* Boiling Water
* Old Toothbrush or Scrub Brush
* Microfiber Cloth
* Rubber Gloves (Optional, but recommended)
Why These Ingredients Work:
* Baking Soda: A mild abrasive that helps scrub away grime and deodorizes.
* White Vinegar: A natural disinfectant and descaler, great for breaking down hard water stains and soap scum.
* Lemon: Contains citric acid, which is a natural cleaner and deodorizer. Plus, it leaves a lovely fresh scent!
* Salt: Another mild abrasive that helps scrub away stubborn stains.
* Dish Soap: Helps to cut through grease and grime.
* Boiling Water: Helps to flush out the drain and dissolve grease buildup.
Step-by-Step Instructions:
Okay, let’s get started! Follow these steps for a sparkling clean sink:
1. Clear the Sink: First things first, remove everything from your sink 鈥?dishes, sponges, dish rack, everything! You want a completely empty sink to work with.
2. Rinse the Sink: Give the sink a good rinse with warm water to loosen any loose debris. This will make the cleaning process easier.
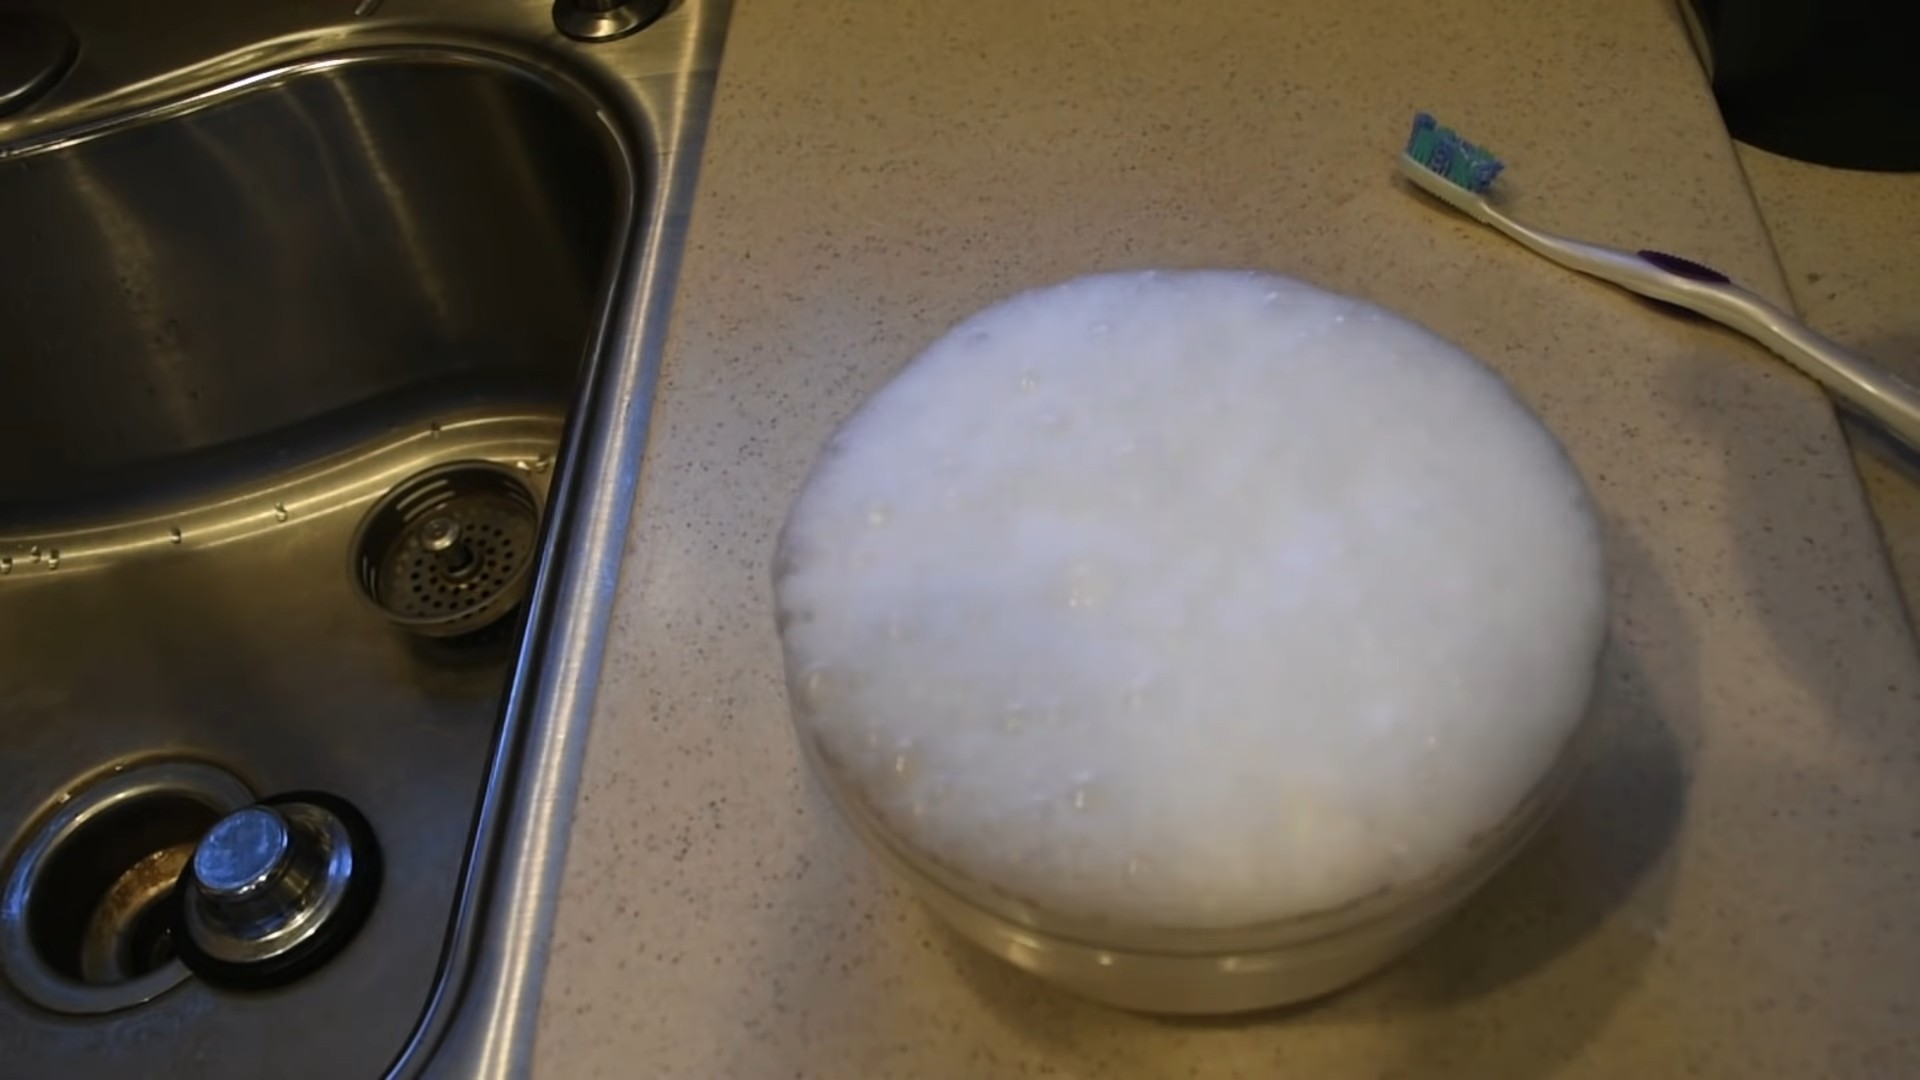
3. Baking Soda Power: Generously sprinkle baking soda all over the sink, including the sides, bottom, and around the drain. Don’t be shy! The more baking soda, the better. I usually use about half a cup.
4. Vinegar Time! Now, slowly pour white vinegar over the baking soda. You’ll see it fizz and bubble 鈥?that’s the magic happening! The chemical reaction between the baking soda and vinegar helps to loosen grime and break down buildup. Let this mixture sit for about 5-10 minutes. This gives it time to really work its magic.
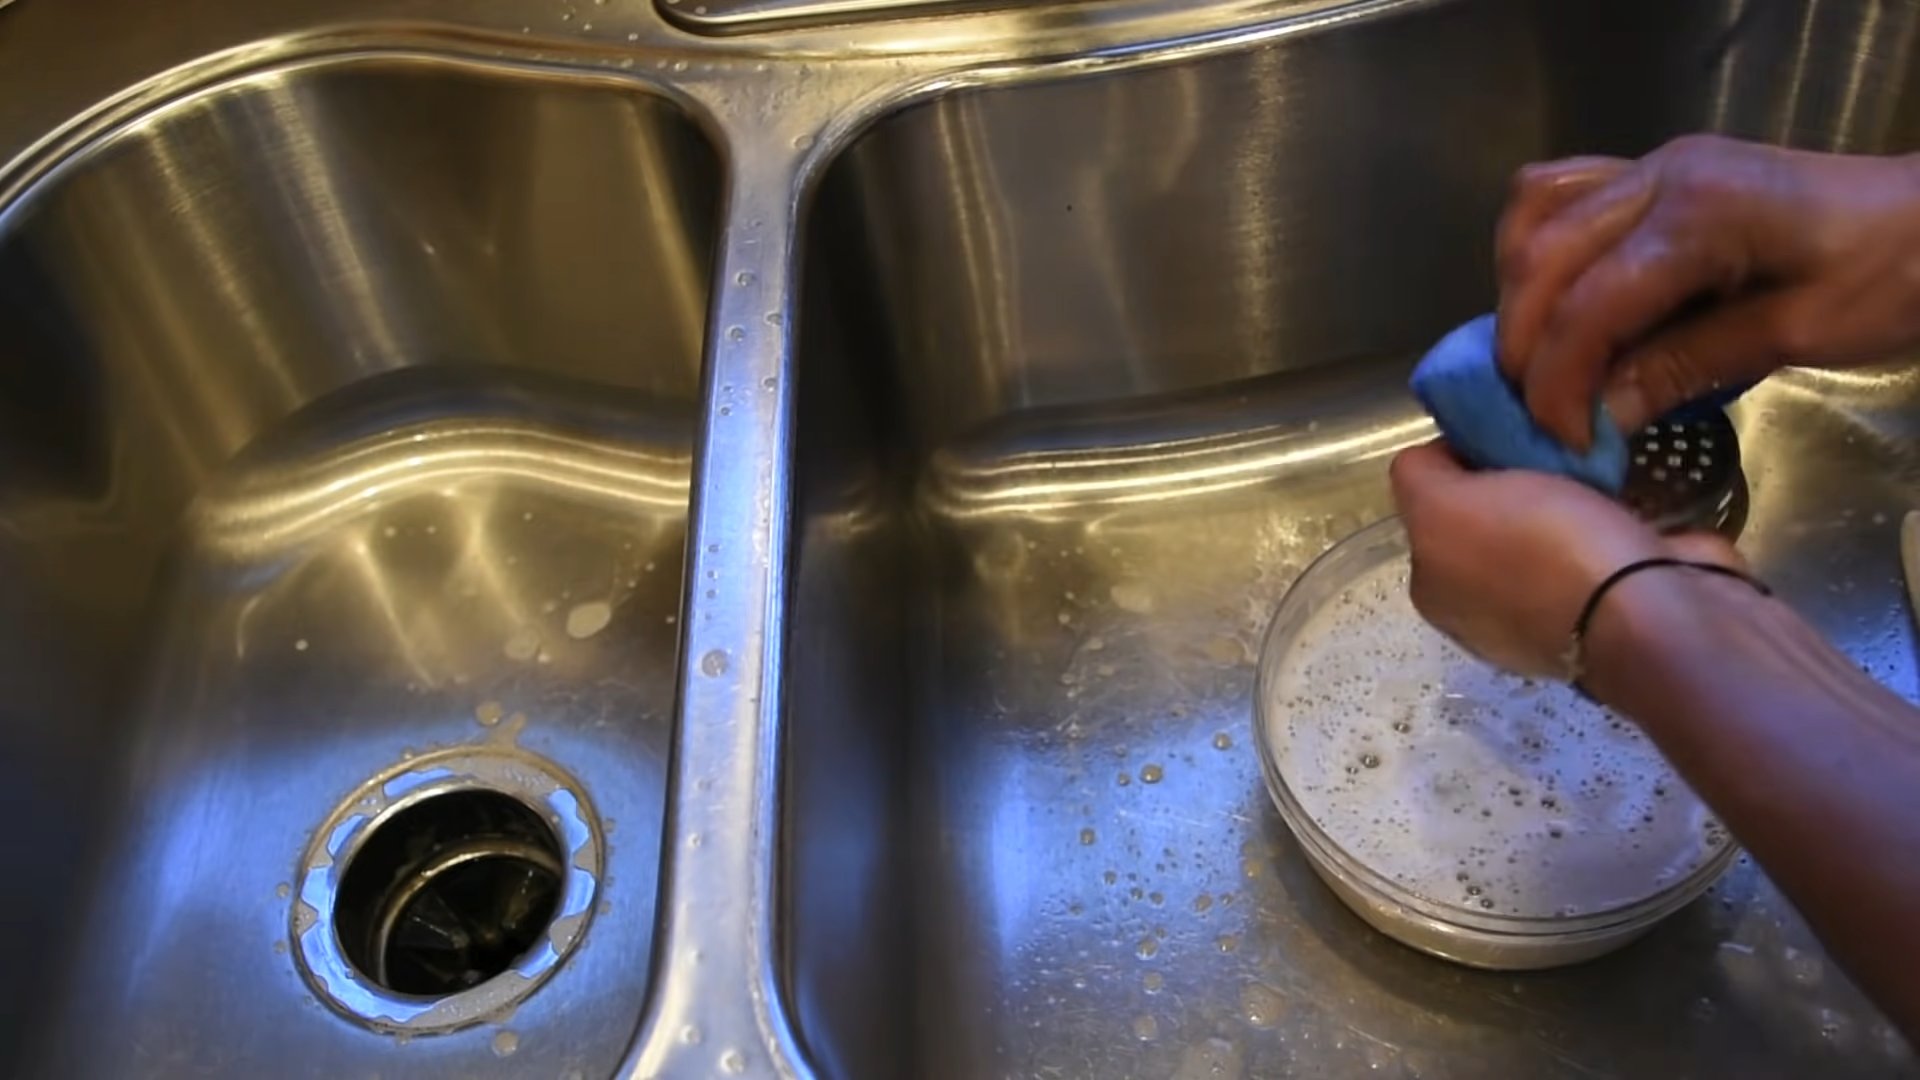
5. Scrub-a-Dub-Dub: Using your old toothbrush or scrub brush, scrub the entire sink thoroughly. Pay special attention to areas with stubborn stains, around the drain, and the faucet base. Really put some elbow grease into it! I find that the toothbrush is perfect for getting into those hard-to-reach corners and crevices.
6. Rinse Again: Rinse the sink thoroughly with warm water to remove all the baking soda and vinegar residue. Make sure you get everything!
7. Lemon Power (Optional, but Recommended): Cut a lemon in half and rub it all over the sink, focusing on areas that need extra cleaning or deodorizing. You can also squeeze some lemon juice directly onto the sink. The citric acid in the lemon will help to brighten the sink and leave it smelling fresh. If you don’t have a lemon, you can use bottled lemon juice.
8. Salt Scrub (For Stubborn Stains): If you have any stubborn stains that didn’t come off with the baking soda and vinegar, sprinkle some coarse salt onto the stain and scrub it with your brush or a damp cloth. The salt acts as a gentle abrasive to help remove the stain.
9. Dish Soap Wash: Squirt a small amount of dish soap onto your scrub brush or sponge and wash the entire sink again. This will help to remove any remaining grime and leave your sink sparkling clean.
10. Final Rinse: Rinse the sink thoroughly with warm water to remove all the dish soap.
11. Boiling Water Flush: Carefully pour a kettle of boiling water down the drain. This will help to flush out any remaining grease and debris and prevent clogs. Be careful not to splash yourself with the boiling water!
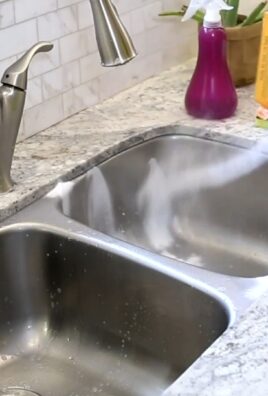
12. Dry and Shine: Use a clean microfiber cloth to dry the sink thoroughly. This will prevent water spots and leave your sink looking shiny and new.
Cleaning the Faucet:
The faucet often gets overlooked, but it’s just as important to clean as the sink itself. Here’s how I tackle it:
1. Vinegar Soak: If your faucet has hard water stains, soak a cloth in white vinegar and wrap it around the faucet. Let it sit for about 30 minutes to an hour. This will help to dissolve the mineral deposits.
2. Scrub and Rinse: After soaking, scrub the faucet with your toothbrush or a soft cloth to remove any remaining stains. Rinse thoroughly with water.
3. Polish: Use a clean, dry microfiber cloth to polish the faucet and make it shine.
Cleaning the Drain:
A clean drain is essential for preventing odors and clogs. Here’s how I keep my drain clean:
1. Remove Debris: Remove any visible debris from the drain opening.
2. Baking Soda and Vinegar Flush: Pour about 1/2 cup of baking soda down the drain, followed by 1 cup of white vinegar. Let it fizz for about 30 minutes.
3. Boiling Water Flush: Pour a kettle of boiling water down the drain to flush out any remaining debris.
Preventative Measures:
Okay, now that your sink is sparkling clean, let’s talk about how to keep it that way! Here are a few preventative measures I take:
* Rinse After Use: Rinse your sink after each use to prevent food particles and grime from building up.
* Wipe Down Regularly: Wipe down your sink with a damp cloth and a little dish soap every day to keep it clean and shiny.
* Avoid Harsh Chemicals: Harsh chemicals can damage your sink’s finish. Stick to natural cleaning methods whenever possible.
* Don’t Pour Grease Down the Drain: Grease can clog your drain and cause unpleasant odors. Dispose of grease properly in a container.
* Use a Drain Strainer: A drain strainer will catch food particles and prevent them from going down the drain.
Dealing with Stubborn Stains:
Sometimes, you might encounter stubborn stains that are difficult to remove with the basic cleaning method. Here are a few tips for dealing with them:
* Baking Soda Paste: Make a paste of baking soda and water and apply it to the stain. Let it sit for a few minutes, then scrub and rinse.
* Hydrogen Peroxide: Hydrogen peroxide is a mild bleach that can help to remove stains. Apply it to the stain, let it sit for a few minutes, then scrub and rinse.
* Commercial Natural Cleaner: If all else fails, you can try using a commercial natural cleaner specifically designed for kitchen sinks.
Maintaining a Stainless Steel Sink:
If you have a stainless steel sink, here are a few extra tips to keep it looking its best:
* Clean with the Grain: When cleaning your stainless steel sink, always scrub in the direction of the grain to avoid scratching.
* Use a Stainless Steel Cleaner: You can use a commercial stainless steel cleaner to remove fingerprints and water spots.
* Dry Thoroughly: Always dry your stainless steel sink thoroughly after each use to prevent water spots.
Maintaining a Porcelain Sink:
If you have a porcelain sink, here are a few extra tips to keep it looking its best:
* Avoid Abrasive Cleaners: Abrasive cleaners can scratch the surface of your porcelain sink.
* Use a Mild Cleaner: Use a mild cleaner specifically designed for porcelain sinks.
* Rinse Thoroughly: Rinse your porcelain sink thoroughly after each use to prevent soap scum buildup.
A Note on Safety:
* Always wear rubber gloves when cleaning to protect your hands.
* Be careful when pouring boiling water down the drain to avoid splashing.
* Avoid mixing baking soda and vinegar in a closed container, as this can create pressure and cause an explosion.
And there you have it! A sparkling clean kitchen sink, naturally! I hope you found this guide helpful. With a little bit of effort and these simple ingredients, you can keep your sink looking its best without resorting to harsh chemicals. Happy cleaning!
Conclusion
So, there you have it! A simple, effective, and entirely natural way to keep your kitchen sink sparkling clean. This isn’t just about aesthetics; it’s about creating a healthier home environment by eliminating harsh chemicals and embracing the power of readily available ingredients. We’ve shown you how to clean your kitchen sink naturally, and we truly believe it’s a game-changer.
Why is this DIY trick a must-try? Because it’s cost-effective, eco-friendly, and incredibly easy. You likely already have everything you need in your pantry: baking soda, vinegar, and maybe some essential oils for an extra boost of freshness. Forget about expensive, store-bought cleaners filled with questionable chemicals. This method is gentle on your sink, tough on grime, and safe for your family and pets.
But the best part? It works! The combination of baking soda’s mild abrasive properties and vinegar’s fizzing action effectively loosens dirt, grease, and food particles. The hot water rinse washes it all away, leaving your sink clean, shiny, and smelling fresh.
Looking for variations? Absolutely! For extra stubborn stains, create a paste of baking soda and water and let it sit on the affected area for a few minutes before scrubbing. You can also add a few drops of your favorite essential oil, like lemon, tea tree, or lavender, to the baking soda for a pleasant scent and added antibacterial benefits. If you have a stainless steel sink, consider using a microfiber cloth for polishing after rinsing to prevent water spots and enhance the shine. For porcelain sinks, be gentle with your scrubbing to avoid scratching the surface.
Don’t be intimidated by the idea of DIY cleaning. This method is so straightforward that anyone can do it. It takes just a few minutes, and the results are immediately noticeable. You’ll be amazed at how clean and fresh your kitchen sink can be without relying on harsh chemicals.
We wholeheartedly encourage you to try this DIY trick for cleaning your kitchen sink naturally. It’s a small change that can make a big difference in your home and your well-being. Once you experience the satisfaction of a sparkling clean sink achieved with natural ingredients, you’ll never go back to conventional cleaners.
We’re confident that you’ll love this method as much as we do. So, give it a try, and don’t forget to share your experience with us! Let us know in the comments below how this DIY trick worked for you, what variations you tried, and any tips you discovered along the way. We’re excited to hear your success stories and learn from your experiences. Together, we can create a cleaner, healthier, and more sustainable home environment, one sparkling kitchen sink at a time.
Frequently Asked Questions (FAQs)
1. How often should I clean my kitchen sink naturally using this method?
The frequency depends on how often you use your sink and how quickly it gets dirty. As a general guideline, we recommend cleaning your kitchen sink naturally using this method at least once a week. If you cook frequently or notice buildup more often, you might want to clean it every few days. Regular cleaning prevents grime and stains from setting in, making the process easier and more effective in the long run. You can also do a quick rinse with hot water after each use to prevent food particles from accumulating.
2. Can I use this method on all types of kitchen sinks?
This method is generally safe for most types of kitchen sinks, including stainless steel, porcelain, and composite sinks. However, it’s always a good idea to test a small, inconspicuous area first, especially if you have a delicate or antique sink. For stainless steel sinks, be sure to rinse thoroughly and dry with a microfiber cloth to prevent water spots. For porcelain sinks, avoid using abrasive scrub brushes that could scratch the surface. If you have a copper sink, consult the manufacturer’s instructions before using any cleaning products, as copper requires special care.
3. What if I don’t have vinegar? Can I use something else?
Vinegar is a key ingredient in this method because of its acidity, which helps to break down grease and grime. If you don’t have vinegar on hand, you can try using lemon juice as a substitute. Lemon juice also has acidic properties and a pleasant scent. However, vinegar is generally more effective and readily available. In a pinch, you could also try using a mild dish soap diluted in water, but it won’t have the same cleaning power as vinegar.
4. My sink has a really bad odor. Will this method get rid of it?
Yes, this method can help to eliminate bad odors in your kitchen sink. The baking soda and vinegar react to neutralize odors, while the hot water helps to flush away any lingering smells. For particularly stubborn odors, you can pour a cup of baking soda down the drain, followed by a cup of vinegar. Let it fizz for about 30 minutes, then flush with hot water. You can also add a few drops of essential oils, such as lemon or tea tree oil, to the baking soda for an extra boost of freshness. If the odor persists, it could indicate a problem with your drain or plumbing, in which case you may need to consult a professional.
5. Can I use this method to clean my garbage disposal?
Yes, this method is also effective for cleaning your garbage disposal. Simply follow the same steps: pour baking soda down the drain, followed by vinegar, let it fizz, and then flush with hot water. This will help to loosen food particles and eliminate odors in your garbage disposal. You can also add a few ice cubes to the disposal while running it to help sharpen the blades and remove any buildup. Avoid putting harsh chemicals or large amounts of grease down your garbage disposal, as this can damage it.
6. Is baking soda abrasive enough to scratch my sink?
Baking soda is a mild abrasive, but it’s generally safe for most types of kitchen sinks when used with a soft cloth or sponge. However, if you have a particularly delicate sink, such as a vintage porcelain sink, it’s always a good idea to test a small, inconspicuous area first. Avoid using abrasive scrub brushes or scouring pads, as these can scratch the surface. When scrubbing, use gentle, circular motions to avoid damaging the sink.
7. What are the benefits of using natural cleaning methods over commercial cleaners?
There are many benefits to using natural cleaning methods over commercial cleaners. Natural cleaning methods are generally safer for your health, as they don’t contain harsh chemicals that can irritate your skin, eyes, and respiratory system. They’re also better for the environment, as they don’t contribute to pollution or harm aquatic life. Natural cleaning methods are often more cost-effective, as you can use readily available ingredients like baking soda, vinegar, and lemon juice. Finally, natural cleaning methods are just as effective as commercial cleaners in many cases, and they can leave your home smelling fresh and clean without the use of artificial fragrances.
8. What essential oils are best to use for cleaning the kitchen sink?
Several essential oils have antibacterial and antifungal properties that make them ideal for cleaning the kitchen sink. Some popular choices include lemon, tea tree, lavender, eucalyptus, and peppermint. Lemon essential oil has a fresh, citrusy scent and is known for its degreasing properties. Tea tree oil is a powerful antiseptic and can help to kill germs and bacteria. Lavender oil has a calming scent and also has antibacterial properties. Eucalyptus oil has a refreshing scent and can help to disinfect surfaces. Peppermint oil has a cooling scent and can also help to repel insects. When using essential oils, be sure to dilute them properly and avoid using them on surfaces that could be damaged by oils. A few drops added to the baking soda are usually sufficient.


Leave a Comment