
Carrot soil bag method: Ever dreamt of harvesting a bounty of vibrant, sweet carrots right from your own backyard, but felt intimidated by the prospect of tilling, weeding, and battling rocky soil? I get it! Growing carrots can seem like a daunting task, especially if you’re short on space or dealing with less-than-ideal garden conditions. But what if I told you there’s a simple, almost magical way to cultivate these crunchy delights with minimal effort?
For centuries, gardeners have sought innovative ways to coax the best from their land. While the exact origins of container gardening are debated, the spirit of adapting to limitations is timeless. Think of the hanging gardens of Babylon, or even the resourceful victory gardens of the World Wars – people have always found ways to grow food, no matter the circumstances.
That’s where the carrot soil bag method comes in! This ingenious DIY trick bypasses the need for extensive digging and provides a perfectly controlled environment for your carrots to thrive. Imagine plump, juicy carrots, free from the deformities often caused by rocky soil, ready to be pulled straight from a bag. This method is perfect for apartment dwellers, balcony gardeners, or anyone looking for a low-maintenance way to enjoy homegrown goodness. Plus, it’s a fantastic project to get the kids involved in! So, ditch the garden gloves (maybe just for a bit!) and let’s dive into this easy and rewarding gardening hack. I’m excited to share all the secrets to successful carrot growing using this simple technique!

DIY Carrot Growing: The Soil Bag Method – A Gardener’s Delight!
Hey fellow gardeners! Are you dreaming of plump, juicy carrots but short on space or blessed with rocky, unforgiving soil? Well, I’ve got a fantastic solution for you: growing carrots in soil bags! This method is super easy, incredibly effective, and perfect for balconies, patios, or even just a small corner of your garden. Trust me, once you try it, you’ll be hooked!
Why Choose the Soil Bag Method for Carrots?
Before we dive into the nitty-gritty, let’s talk about why this method is so awesome:
* Space-Saving: Ideal for small gardens, balconies, or patios. You can grow a surprising number of carrots in a single bag.
* Excellent Drainage: Soil bags naturally provide good drainage, which is crucial for preventing root rot and ensuring healthy carrot growth.
* Weed Control: Less weeding compared to traditional garden beds. The bag acts as a barrier, minimizing weed invasion.
* Soil Control: You have complete control over the soil composition, ensuring your carrots get the perfect growing medium.
* Easy Harvesting: Harvesting is a breeze! Simply reach into the bag and pull out your beautiful carrots.
* Portability: You can easily move the bag around to chase the sun or protect your carrots from harsh weather.
Materials You’ll Need
Okay, let’s gather our supplies. Here’s what you’ll need to get started:
* Heavy-Duty Soil Bag: Choose a large, sturdy bag. I recommend a bag that’s at least 24 inches tall and 18 inches wide. You can often find these at garden centers or hardware stores. Look for bags that previously held topsoil or compost.
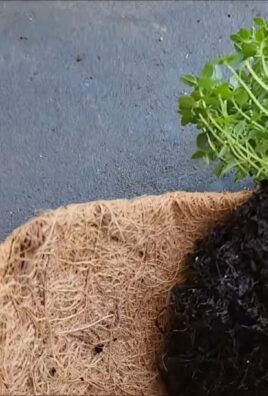
* Potting Mix: This is crucial! Don’t use garden soil directly in the bag. It’s often too heavy and compacts easily. Opt for a high-quality potting mix that’s light, fluffy, and well-draining. A mix specifically formulated for vegetables is even better.
* Sand: Adding sand to your potting mix improves drainage and helps prevent the soil from becoming compacted. Coarse sand is ideal.
* Compost: Compost is black gold for gardeners! It adds essential nutrients to the soil and improves its overall structure.
* Carrot Seeds: Choose your favorite carrot variety! Shorter, rounder varieties like ‘Parisian’ or ‘Thumbelina’ are particularly well-suited for container growing, but you can definitely grow longer varieties too. Just make sure the bag is deep enough.
* Watering Can or Hose: For watering your carrots, of course!
* Scissors or Utility Knife: For making drainage holes in the bag.
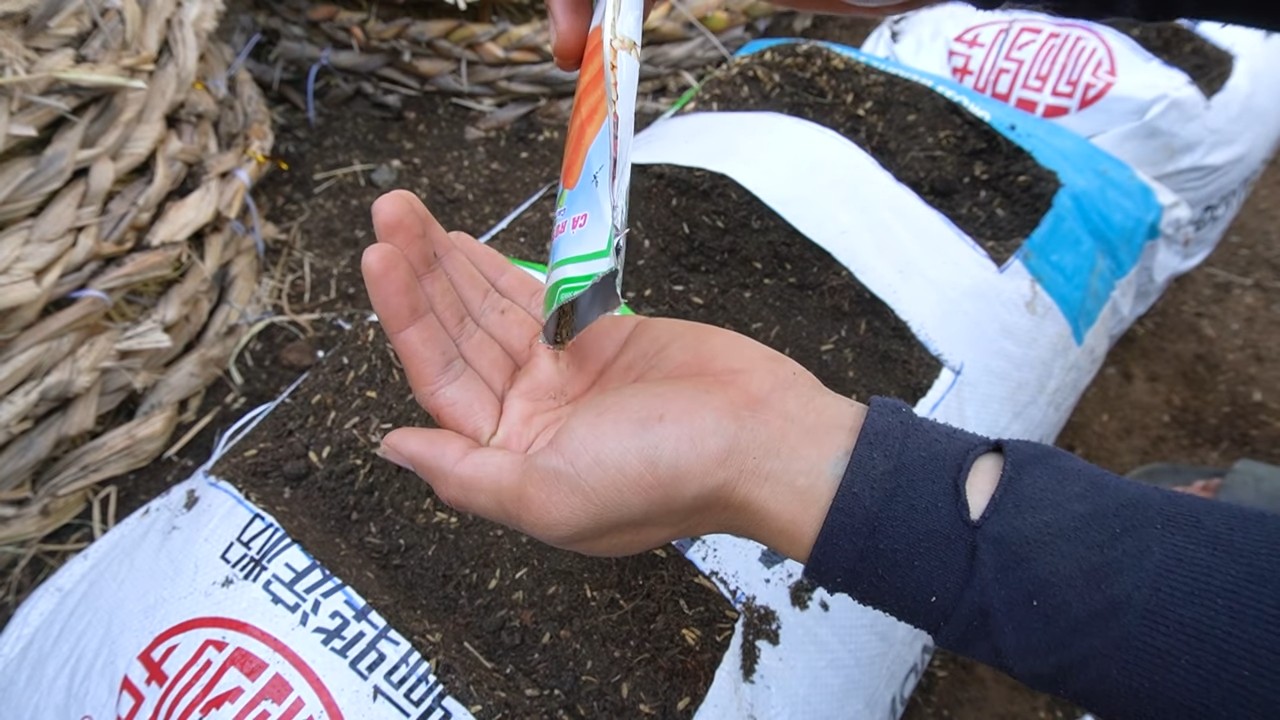
* Slow-Release Fertilizer (Optional): This can provide a steady supply of nutrients to your carrots throughout the growing season.
Step-by-Step Instructions: Planting Your Carrots
Alright, let’s get our hands dirty! Here’s how to plant your carrots in a soil bag:
1. Prepare the Soil Bag:
* Carefully lay the soil bag flat on the ground.
* Using your scissors or utility knife, cut several drainage holes in the bottom of the bag. Space them about 4-6 inches apart. This is super important to prevent waterlogging.
* If you’re reusing a bag, make sure it’s clean and free of any debris.
2. Mix Your Soil:
* In a large container or wheelbarrow, combine your potting mix, sand, and compost. I usually go for a ratio of 2 parts potting mix, 1 part sand, and 1 part compost.
* Mix everything thoroughly until it’s well combined. The mixture should be light, fluffy, and well-draining.
3. Fill the Bag:
* Carefully start filling the soil bag with your prepared soil mixture.
* Fill the bag almost to the top, leaving about 2-3 inches of space at the top.
* Gently pat down the soil to remove any air pockets.
4. Sow the Seeds:
* Now comes the fun part! Sprinkle your carrot seeds evenly over the surface of the soil.
* Carrot seeds are tiny, so don’t sow them too thickly. Overcrowding can lead to smaller, less developed carrots.
* Gently press the seeds into the soil.
* Cover the seeds with a thin layer of soil, about 1/4 inch deep.
5. Water Thoroughly:
* Using your watering can or hose, gently water the soil until it’s evenly moist.
* Be careful not to wash away the seeds. A gentle shower setting on your hose is ideal.
6. Label and Place:
* Label your bag with the date and the variety of carrots you planted. This will help you keep track of your progress.
* Place the bag in a sunny location. Carrots need at least 6-8 hours of sunlight per day.
Caring for Your Carrots: From Seedling to Harvest
Now that your carrots are planted, it’s time to nurture them and watch them grow! Here’s what you need to do to keep them happy and healthy:
1. Watering:
* Keep the soil consistently moist, but not waterlogged. Water when the top inch of soil feels dry to the touch.
* Water deeply and thoroughly, ensuring the water reaches the bottom of the bag.
* Avoid overhead watering, as this can promote fungal diseases.
2. Thinning:
* This is super important! Once your seedlings emerge and have a few true leaves, you’ll need to thin them out.
* Thinning allows the remaining carrots to have enough space to grow and develop properly.
* Carefully remove the weaker seedlings, leaving about 1-2 inches of space between each carrot.
* Don’t just pull them out! Gently snip them off at the soil line to avoid disturbing the roots of the remaining carrots.
3. Fertilizing:
* If you didn’t add slow-release fertilizer at planting time, you’ll need to fertilize your carrots regularly.
* Use a balanced fertilizer that’s specifically formulated for vegetables.
* Follow the instructions on the fertilizer package.
* Avoid over-fertilizing, as this can lead to excessive foliage growth and smaller carrots.
4. Weed Control:
* Even though the soil bag helps minimize weeds, you may still need to do some weeding.
* Carefully remove any weeds that pop up, being careful not to disturb the carrot roots.
5. Pest Control:
* Keep an eye out for pests like carrot rust flies and aphids.
* If you notice any pests, take action immediately. You can use organic pest control methods like insecticidal soap or neem oil.
* Companion planting with herbs like rosemary and sage can also help deter pests.
Harvesting Your Carrots: The Sweet Reward
After all your hard work, it’s finally time to harvest your delicious carrots!
1. When to Harvest:
* Carrots are typically ready to harvest 60-80 days after planting, depending on the variety.
* Check the seed packet for specific harvesting instructions.
* You can also gently brush away some of the soil around the top of the carrots to check their size.
2. How to Harvest:
* Gently loosen the soil around the carrots with your fingers or a small trowel.
* Grasp the carrot firmly at the base of the foliage and gently pull it straight up.
* If the carrot is difficult to pull, try wiggling it back and forth to loosen it.
* Wash the carrots thoroughly before eating or storing them.
Troubleshooting: Common Problems and Solutions
Even with the best planning, you might encounter a few challenges along the way. Here are some common problems and how to fix them:
* Poor Germination:
* Make sure your seeds are fresh and viable.
* Keep the soil consistently moist during germination.
* Don’t sow the seeds too deeply.
* Forked or Twisted Carrots:
* This is often caused by rocky or compacted soil.
* Make sure your soil mixture is light, fluffy, and well-draining.
* Remove any rocks or debris from the soil.
* Small Carrots:
* Thin your seedlings properly.
* Fertilize regularly.
* Ensure your carrots are getting enough sunlight.
* Pest Infestations:
* Monitor your plants regularly for pests.
* Use organic pest
Conclusion
So, there you have it! The carrot soil bag method – a simple, effective, and space-saving way to cultivate delicious, homegrown carrots right in your own backyard (or even on your balcony!). We’ve walked you through the process, highlighting the benefits and addressing potential challenges. But why is this DIY trick a must-try?
Firstly, it’s incredibly accessible. You don’t need acres of land or expensive gardening equipment. A simple bag of soil, some carrot seeds, and a little bit of sunshine are all you need to embark on this rewarding journey. This makes it perfect for urban dwellers, apartment residents, or anyone with limited gardening space.
Secondly, the carrot soil bag method offers superior control over your growing environment. You can easily manage soil quality, drainage, and even protect your precious carrots from pests and diseases. This translates to healthier, more vibrant carrots with a richer, more satisfying flavor. Imagine the taste of freshly harvested carrots, still warm from the sun, bursting with sweetness and earthy goodness. That’s the reward that awaits you.
Thirdly, it’s a fantastic learning experience. Gardening is a journey of discovery, and this method provides a hands-on opportunity to connect with nature, understand the growing process, and appreciate the fruits (or rather, vegetables!) of your labor. It’s a therapeutic and fulfilling activity that can bring joy and satisfaction to your life.
But the beauty of this method lies in its adaptability. Feel free to experiment with different carrot varieties. Consider trying Nantes carrots for their cylindrical shape and sweet flavor, or Danvers carrots for their classic tapered form and robust taste. You can also add companion plants like marigolds or basil to your soil bag to deter pests and enhance the overall health of your carrot crop.
For those looking to optimize their carrot soil bag method, consider adding a slow-release fertilizer to the soil mix before planting. This will provide your carrots with a steady supply of nutrients throughout their growing cycle. You can also experiment with different types of soil, such as a mix of compost, peat moss, and perlite, to create the ideal growing medium for your carrots.
Don’t be afraid to get creative and personalize your carrot soil bag garden. You can decorate the bags with colorful paint or stencils, creating a visually appealing display that adds a touch of charm to your outdoor space. You can even involve your children in the process, teaching them about gardening and fostering a love for nature.
Ultimately, the carrot soil bag method is more than just a gardening technique; it’s an invitation to connect with nature, cultivate your own food, and experience the joy of growing something from seed to harvest. So, we wholeheartedly encourage you to give it a try.
We are confident that you’ll be amazed by the results. And once you’ve harvested your first batch of homegrown carrots, we’d love to hear about your experience. Share your photos, tips, and stories with us in the comments section below. Let’s create a community of carrot-growing enthusiasts and inspire others to embrace this simple and rewarding DIY trick. Happy gardening!
FAQ
What type of soil is best for the carrot soil bag method?
The ideal soil for growing carrots in bags is a loose, well-draining mix that is rich in organic matter. Carrots need room to grow downwards, so compacted soil will hinder their development. A good starting point is a mix of equal parts compost, peat moss (or coconut coir), and perlite or vermiculite. The compost provides nutrients, the peat moss/coir helps retain moisture, and the perlite/vermiculite improves drainage and aeration. Avoid using heavy clay soils, as they can become waterlogged and prevent the carrots from growing properly. You can also purchase pre-mixed potting soil specifically formulated for vegetables, which often contains a balanced blend of nutrients and drainage materials. Remember to amend the soil with a slow-release fertilizer to provide a continuous supply of nutrients throughout the growing season.
How often should I water my carrot soil bag?
Watering frequency depends on several factors, including the weather, the size of the bag, and the type of soil you’re using. Generally, you should aim to keep the soil consistently moist but not waterlogged. Check the soil moisture level regularly by sticking your finger about an inch into the soil. If it feels dry to the touch, it’s time to water. Water deeply until you see water draining from the bottom of the bag. Avoid watering shallowly, as this can encourage shallow root growth. During hot, dry weather, you may need to water daily, while during cooler, wetter periods, you may only need to water every few days. Overwatering can lead to root rot, so it’s important to ensure that the bag has adequate drainage.
How much sunlight do carrots need when grown in a soil bag?
Carrots thrive in full sun, which means they need at least 6-8 hours of direct sunlight per day. Choose a location for your carrot soil bag that receives ample sunlight throughout the day. If you live in a particularly hot climate, you may need to provide some afternoon shade to prevent the soil from drying out too quickly. If you don’t have access to a sunny spot, you can supplement with grow lights. Position the grow lights about 6-12 inches above the plants and keep them on for 12-16 hours per day.
What are some common pests and diseases that affect carrots grown in soil bags, and how can I prevent them?
Common pests that can affect carrots include carrot rust flies, aphids, and nematodes. Carrot rust flies lay their eggs near the base of the plants, and the larvae burrow into the roots, causing damage. Aphids suck the sap from the leaves, weakening the plants. Nematodes are microscopic worms that live in the soil and feed on the roots. To prevent these pests, you can use row covers to protect the plants from insects, practice crop rotation to prevent nematodes from building up in the soil, and introduce beneficial insects like ladybugs and lacewings to control aphids. Diseases that can affect carrots include leaf blight and root rot. Leaf blight causes brown spots on the leaves, while root rot causes the roots to decay. To prevent these diseases, ensure that the soil is well-draining, avoid overwatering, and provide good air circulation around the plants. You can also use organic fungicides to control fungal diseases.
How long does it take for carrots to mature when grown in a soil bag?
The time it takes for carrots to mature depends on the variety and the growing conditions. Generally, carrots take between 60 and 80 days to mature. Check the seed packet for the specific maturity time for the variety you’re growing. You can start harvesting carrots when they reach the desired size, even if they haven’t fully matured. To harvest, gently loosen the soil around the carrot and pull it out of the bag. If the soil is dry, water it before harvesting to make it easier to pull the carrots out.
Can I reuse the soil bag for another crop after harvesting the carrots?
While you can technically reuse the soil, it’s generally recommended to replace it with fresh soil for the next crop. This is because the soil may have become depleted of nutrients and may contain pests or diseases. If you do choose to reuse the soil, amend it with plenty of compost and fertilizer to replenish the nutrients. You should also sterilize the soil to kill any pests or diseases. You can do this by baking the soil in the oven at 200 degrees Fahrenheit for 30 minutes or by solarizing it by covering it with clear plastic in the sun for several weeks. However, for best results, it’s always best to start with fresh soil.
What are some good companion plants to grow with carrots in a soil bag?
Companion planting can be beneficial for carrots, as certain plants can help deter pests, improve soil health, or enhance the flavor of the carrots. Some good companion plants for carrots include:
* **Marigolds:** These flowers repel nematodes and other pests.
* **Onions and Garlic:** These plants deter carrot rust flies.
* **Rosemary:** This herb repels carrot rust flies and other insects.
* **Sage:** This herb repels cabbage moths and other pests.
* **Lettuce:** This leafy green provides shade for the carrots and helps retain moisture in the soil.
* **Radishes:** These fast-growing root vegetables help break up the soil and make it easier for the carrots to grow.
Avoid planting carrots near fennel, as it can inhibit their growth.
Leave a Comment