
Boost Cucumber Growth and unlock the secrets to a thriving cucumber patch right in your own backyard! Have you ever dreamed of harvesting baskets overflowing with crisp, juicy cucumbers, perfect for salads, pickles, or just a refreshing snack? I know I have! But sometimes, getting those cucumbers to really take off can feel like a real challenge. That’s where these simple, yet effective, DIY tricks come in.
For centuries, cucumbers have been cultivated across the globe, from their origins in India to their adoption in ancient Greece and Rome. They’ve been a staple in diets and a symbol of freshness and vitality. But even with all that history, modern gardeners still face common hurdles: slow growth, pest infestations, and disappointing yields.
That’s why I’m so excited to share these easy-to-implement hacks that will boost cucumber growth and transform your gardening experience. Whether you’re a seasoned green thumb or just starting out, these tips will help you overcome common obstacles and achieve a bountiful harvest. Imagine the satisfaction of serving up homegrown cucumbers to your family and friends, knowing you nurtured them from seed to table! Let’s dive in and get those cucumbers growing!

Boost Your Cucumber Harvest: A DIY Guide to Thriving Vines
Hey fellow gardeners! Are you dreaming of crisp, refreshing cucumbers bursting from your garden? I know I am! But sometimes, those cucumber vines need a little extra love to really take off. I’ve experimented with a few tricks over the years, and I’m excited to share my favorite DIY methods for boosting cucumber growth and maximizing your harvest. Let’s get started!
Choosing the Right Cucumber Variety
Before we dive into the DIY hacks, it’s crucial to start with the right foundation. Selecting a cucumber variety that thrives in your specific climate and growing conditions is half the battle.
* Consider your climate: Are you in a hot, humid region or a cooler, drier one? Some varieties are more heat-tolerant, while others prefer cooler temperatures.
* Think about space: Bush varieties are perfect for smaller gardens or containers, while vining varieties need more room to spread or a trellis to climb.
* Decide on your purpose: Do you want cucumbers for slicing, pickling, or both? Different varieties are better suited for different uses.
Some of my personal favorites include:
* Spacemaster (Bush): Great for containers and small spaces.
* Marketmore 76 (Vining): A reliable slicer with good disease resistance.
* National Pickling (Vining): Perfect for making crunchy pickles.
Optimizing Soil and Sunlight
Cucumbers are hungry plants, and they need plenty of sunshine to thrive. Before planting, let’s make sure they have the best possible start.
* Soil Preparation: Cucumbers prefer well-drained, fertile soil with a pH between 6.0 and 7.0.
* Sunlight: Aim for at least 6-8 hours of direct sunlight per day.
DIY Soil Amendment for Cucumber Power
This is my secret weapon for supercharging cucumber growth! It’s a simple, all-natural soil amendment that provides essential nutrients and improves soil structure.
Ingredients:
* Compost (2 parts)
* Well-rotted manure (1 part)
* Bone meal (1/2 part)
* Epsom salts (1/4 part)
Instructions:
1. Gather your ingredients: Make sure your compost and manure are well-decomposed. This prevents burning the delicate cucumber roots.
2. Mix thoroughly: Combine all the ingredients in a large container or on a tarp. Use a shovel or garden fork to ensure everything is evenly distributed.
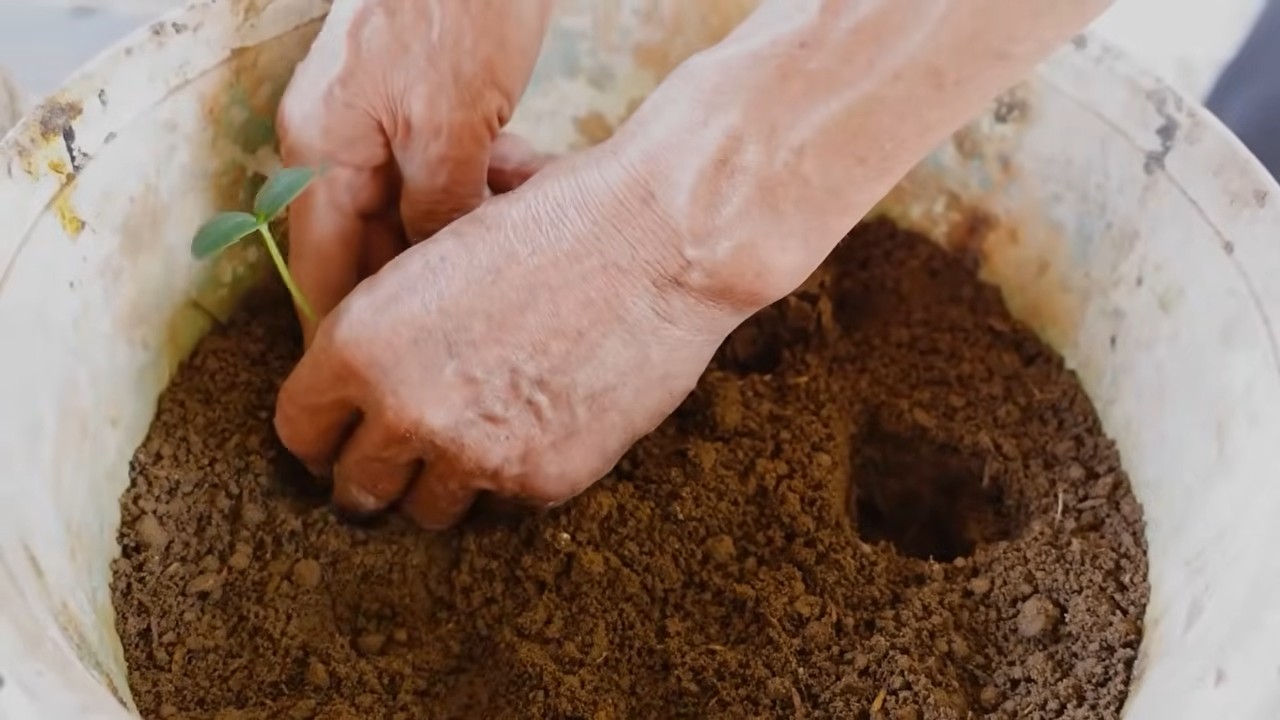
3. Amend the soil: Before planting your cucumber seedlings or seeds, dig a hole and mix the soil amendment into the bottom of the hole. This will give the roots a nutrient-rich environment to grow into.
4. Water well: After planting, water the area thoroughly to help settle the soil and activate the nutrients.
DIY Trellis for Vertical Growth
Cucumbers are natural climbers, and providing them with a trellis not only saves space but also improves air circulation and reduces the risk of disease.
Materials:
* Bamboo poles or wooden stakes
* Twine or garden netting
* Scissors or pruning shears
Instructions:
1. Choose your location: Select a sunny spot in your garden where your cucumbers will have plenty of room to grow vertically.
2. Set up the supports: Drive the bamboo poles or wooden stakes into the ground, spacing them about 2-3 feet apart. Make sure they are sturdy enough to support the weight of the mature cucumber vines.
3. Create the trellis: Tie twine or garden netting between the poles, creating a grid for the cucumbers to climb. You can use a variety of patterns, but a simple horizontal and vertical grid works well.
4. Train the vines: As the cucumber vines grow, gently guide them onto the trellis and tie them loosely with twine if needed. They will naturally start to climb on their own.
DIY Cucumber Fertilizer Tea
This homemade fertilizer tea is a fantastic way to provide your cucumber plants with a boost of nutrients throughout the growing season. It’s easy to make and packed with goodness!
Ingredients:
* Comfrey leaves (fresh or dried)
* Water
* A large bucket or container
Instructions:
1. Gather your comfrey leaves: Comfrey is a nutrient-rich plant that’s perfect for making fertilizer tea. You can use fresh or dried leaves.
2. Fill the bucket: Fill the bucket about halfway with comfrey leaves.
3. Add water: Pour water over the leaves until the bucket is full.
4. Let it steep: Cover the bucket and let the mixture steep for 2-3 weeks. The longer it steeps, the stronger the tea will be.
5. Strain the tea: After steeping, strain the tea through a cheesecloth or fine-mesh sieve to remove the solid particles.
6. Dilute the tea: Dilute the tea with water before using it to fertilize your cucumber plants. A good ratio is 1 part tea to 10 parts water.
7. Apply the tea: Pour the diluted tea around the base of your cucumber plants, avoiding the leaves. You can fertilize your cucumbers with this tea every 2-3 weeks.
DIY Pest Control Solutions
Cucumbers can be susceptible to pests like aphids, cucumber beetles, and squash bugs. Here are a few DIY pest control solutions to keep your plants healthy and productive.
* Neem Oil Spray: Neem oil is a natural insecticide that’s effective against a wide range of pests. Mix neem oil with water according to the instructions on the bottle and spray it on your cucumber plants, paying attention to the undersides of the leaves.
* Insecticidal Soap: Insecticidal soap is another safe and effective option for controlling pests. Mix insecticidal soap with water according to the instructions on the bottle and spray it on your cucumber plants.
* Diatomaceous Earth: Diatomaceous earth is a natural powder made from fossilized algae. It’s harmless to humans and pets but deadly to insects. Sprinkle diatomaceous earth around the base of your cucumber plants to create a barrier against pests.
* Handpicking: For larger pests like squash bugs, handpicking them off your plants is often the most effective solution. Check your plants regularly and remove any pests you find.
DIY Watering System for Consistent Moisture
Consistent moisture is crucial for cucumber growth. Fluctuations in watering can lead to bitter-tasting cucumbers. Here’s a simple DIY watering system you can create:
Materials:
* Plastic bottles (empty and clean)
* Drill or nail
* Scissors or knife
Instructions:
1. Prepare the bottles: Remove the caps from the plastic bottles.
2. Create drainage holes: Use a drill or nail to create several small drainage holes in the bottom of each bottle.
3. Bury the bottles: Dig a hole near each cucumber plant and bury the bottle up to its neck, leaving the top open.
4. Fill with water: Fill the bottles with water. The water will slowly seep into the soil, providing consistent moisture to the roots of your cucumber plants.
5. Refill as needed: Check the bottles regularly and refill them as needed.
DIY Blossom End Rot Prevention
Blossom end rot is a common problem in cucumbers, caused by a calcium deficiency. Here’s how to prevent it with a simple DIY solution:
* Eggshell Calcium Boost: Eggshells are a great source of calcium. Crush eggshells into a fine powder and sprinkle them around the base of your cucumber plants. You can also add eggshells to your compost pile.
* Consistent Watering: As mentioned earlier, consistent watering is crucial for preventing blossom end rot. Fluctuations in watering can interfere with calcium uptake.
* Soil Testing: If you’re consistently experiencing blossom end rot, it’s a good idea to test your soil to determine its calcium levels. You may need to amend your soil with lime or another calcium-rich amendment.
DIY Pollination Assistance
Cucumbers need to be pollinated to produce fruit. If you’re not seeing many bees or other pollinators in your garden, you may need to hand-pollinate your cucumber flowers.
Instructions:
1. Identify male and female flowers: Male flowers have a long, thin stem, while female flowers have a small cucumber-like fruit behind the flower.
2. Collect pollen: Use a small paintbrush or cotton swab to collect pollen from a male flower.
3. Transfer pollen: Gently brush the pollen onto the stigma of a female flower.
4. Repeat: Repeat this process for all the female flowers you want to pollinate.
Harvesting Your Bountiful Crop
Once your cucumbers start to mature, harvest them regularly to encourage continued production.
* Harvest at the right size: Harvest cucumbers when they are the desired size for your chosen
Conclusion
So, there you have it! This simple, yet incredibly effective DIY trick to boost cucumber growth is a game-changer for any gardener, whether you’re a seasoned pro or just starting out. We’ve walked you through the steps, explained the science behind why it works, and hopefully, inspired you to give it a try.
But why is this a must-try? Because it addresses some of the most common challenges faced when growing cucumbers: slow growth, yellowing leaves, and disappointing yields. By providing your cucumber plants with the right nutrients and support, you’re setting them up for success from the very beginning. Imagine harvesting baskets overflowing with crisp, juicy cucumbers, all thanks to a little bit of DIY ingenuity.
This isn’t just about bigger cucumbers; it’s about healthier plants, a more vibrant garden, and the satisfaction of knowing you’ve nurtured something amazing from seed to harvest. Plus, it’s a cost-effective and environmentally friendly alternative to relying solely on commercial fertilizers.
Now, let’s talk about variations. Feel free to experiment with the ingredients based on what you have readily available. For example, if you don’t have Epsom salts, you can try using a diluted solution of seaweed extract, which is also rich in magnesium. If you’re looking for an extra boost of nitrogen, consider adding a small amount of compost tea to your watering routine. Remember to always dilute any amendments properly to avoid burning your plants.
Another variation you might consider is the type of support you provide for your cucumbers. While a simple trellis works wonders, you could also try using a tomato cage or even creating a DIY climbing structure out of bamboo poles. The key is to provide your plants with something sturdy to climb on, allowing them to receive ample sunlight and air circulation.
And don’t forget about companion planting! Planting basil, marigolds, or nasturtiums near your cucumbers can help deter pests and attract beneficial insects, further boosting their growth and overall health.
We are confident that this DIY trick will make a noticeable difference in your cucumber harvest. But the real magic happens when you adapt it to your specific garden conditions and needs. Observe your plants closely, pay attention to their cues, and don’t be afraid to experiment.
We truly believe that this method to boost cucumber growth is a valuable tool for any gardener. We encourage you to try it out and see the results for yourself. And most importantly, we want to hear about your experience! Share your photos, tips, and success stories in the comments below. Let’s create a community of cucumber-growing enthusiasts and learn from each other. Happy gardening!
Frequently Asked Questions (FAQ)
What exactly does this DIY trick do to boost cucumber growth?
This DIY trick primarily focuses on providing cucumbers with essential nutrients and support that are often lacking in garden soil. The Epsom salts provide magnesium, which is crucial for chlorophyll production and overall plant health, leading to greener leaves and more efficient photosynthesis. The balanced fertilizer provides a readily available source of nitrogen, phosphorus, and potassium, which are essential for root development, flowering, and fruit production. The physical support, such as a trellis, allows the plants to climb, maximizing sunlight exposure and air circulation, which reduces the risk of fungal diseases and promotes healthy growth. By addressing these key factors, the DIY trick creates an optimal environment for cucumbers to thrive and produce abundant yields.
How often should I apply this DIY trick to my cucumber plants?
The frequency of application depends on the specific needs of your plants and the quality of your soil. As a general guideline, you can apply the Epsom salt solution every 2-3 weeks. The balanced fertilizer should be applied according to the manufacturer’s instructions, but typically every 4-6 weeks is sufficient. It’s important to observe your plants closely and adjust the frequency accordingly. If you notice signs of nutrient deficiency, such as yellowing leaves or stunted growth, you may need to apply the nutrients more frequently. Conversely, if your plants are growing vigorously and appear healthy, you can reduce the frequency of application. Remember, it’s always better to err on the side of caution and avoid over-fertilizing, which can damage your plants.
Can I use this DIY trick on other plants besides cucumbers?
While this DIY trick is specifically tailored for cucumbers, the principles behind it can be applied to other plants as well. Many plants benefit from magnesium supplementation, so Epsom salts can be used on tomatoes, peppers, roses, and other flowering plants. The balanced fertilizer can also be used on a wide range of vegetables and ornamentals, but it’s important to choose a fertilizer that is appropriate for the specific needs of the plant. For example, leafy greens require more nitrogen than flowering plants. The physical support aspect of the trick can be adapted to any climbing plant, such as beans, peas, or squash. However, it’s always best to research the specific needs of each plant before applying any DIY treatments.
What are some signs that my cucumber plants are not getting enough nutrients?
There are several telltale signs that your cucumber plants may be suffering from nutrient deficiencies. Yellowing leaves, especially between the veins, can indicate a magnesium deficiency. Stunted growth, weak stems, and small leaves can be signs of nitrogen deficiency. Poor flowering and fruit development can be caused by a phosphorus deficiency. And yellowing or browning leaf edges can indicate a potassium deficiency. In addition to these visual cues, you can also perform a soil test to determine the nutrient levels in your garden. This will give you a more accurate assessment of your plants’ needs and allow you to adjust your fertilization strategy accordingly.
What if I don’t have Epsom salts or balanced fertilizer? Are there any alternatives?
Yes, there are several alternatives you can use if you don’t have Epsom salts or balanced fertilizer. For magnesium, you can try using a diluted solution of seaweed extract or compost tea. Seaweed extract is rich in magnesium and other trace minerals, while compost tea provides a slow-release source of nutrients. For balanced fertilizer, you can use compost, aged manure, or other organic amendments. These materials provide a wide range of nutrients and also improve soil health. You can also purchase organic fertilizers that are specifically formulated for vegetables. Just be sure to follow the manufacturer’s instructions carefully.
My cucumbers are growing, but they are bitter. Is this DIY trick going to help with that?
While this DIY trick primarily focuses on boosting growth and overall plant health, it can indirectly help with cucumber bitterness. Bitterness in cucumbers is often caused by stress, such as inconsistent watering, extreme temperatures, or nutrient deficiencies. By providing your plants with the right nutrients and support, you can reduce their stress levels and minimize the risk of bitterness. However, it’s also important to water your cucumbers regularly and protect them from extreme temperatures. Choosing cucumber varieties that are less prone to bitterness can also help.
How do I know if I’m over-fertilizing my cucumber plants?
Over-fertilizing can be just as harmful as under-fertilizing. Signs of over-fertilization include burnt leaf tips, excessive vegetative growth (lots of leaves but few flowers or fruits), and a buildup of salts on the soil surface. If you suspect that you’re over-fertilizing, stop applying fertilizer immediately and flush the soil with plenty of water to remove excess nutrients. You can also perform a soil test to determine the nutrient levels in your garden and adjust your fertilization strategy accordingly. Remember, it’s always better to err on the side of caution and avoid over-fertilizing.
Can I use this DIY trick on container-grown cucumbers?
Yes, this DIY trick can be used on container-grown cucumbers, but you may need to adjust the application rates. Container-grown plants tend to dry out more quickly than plants grown in the ground, so you may need to water them more frequently. You may also need to fertilize them more often, as the nutrients in the potting mix can be depleted more quickly. Be sure to use a high-quality potting mix that is well-draining and provides adequate nutrients. And choose a container that is large enough to accommodate the mature size of your cucumber plants.
Leave a Comment