
Blind cleaning tool: Are you tired of staring at dusty blinds, wishing they would magically clean themselves? I know I am! Let’s face it, cleaning blinds is one of those chores we all dread. It’s fiddly, time-consuming, and often leaves you feeling like you’ve barely made a dent in the grime. But what if I told you there’s a simple, DIY solution that will transform this dreaded task into a breeze?
For generations, keeping homes clean and dust-free has been a sign of pride and care. While our ancestors may not have had the same challenges with modern window coverings, the desire for a bright and airy living space remains constant. Think about it – sunlight streaming through clean blinds instantly brightens a room and lifts your spirits!
That’s why I’m so excited to share this incredible DIY blind cleaning tool hack with you. Not only will it save you time and effort, but it will also save you money on expensive cleaning services or specialized tools. This simple trick utilizes items you likely already have around the house, making it an accessible and effective solution for everyone. Say goodbye to dusty blinds and hello to sparkling clean windows with this easy-to-follow guide!

DIY Blind Cleaning Tool: Sparkling Blinds on a Budget!
Okay, let’s face it, cleaning blinds is one of those chores that everyone dreads. It’s fiddly, time-consuming, and never seems to get them truly clean. But fear not! I’m going to show you how to create a super effective DIY blind cleaning tool that will make this task much easier and, dare I say, almost enjoyable! This method works wonders on Venetian blinds, mini blinds, and even some vertical blinds.
What You’ll Need: The Supply List
Before we dive in, let’s gather our supplies. The beauty of this project is that you probably already have most of these items lying around the house.
* Microfiber Cloths: These are essential! You’ll need a few, as they’ll get dirty quickly. I recommend at least three.
* Wooden Clothespins: The old-fashioned kind, the ones that clamp together. You’ll need several, depending on the width of your blinds. I usually use 5-7 for standard-sized blinds.
* Hot Glue Gun and Glue Sticks: This is what we’ll use to attach the microfiber cloths to the clothespins.
* Spray Bottle: For your cleaning solution.
* Cleaning Solution: You can use a commercial blind cleaner, but I prefer a homemade solution. My go-to is a mixture of warm water, a squirt of dish soap (Dawn works great!), and a splash of white vinegar. The vinegar helps cut through grease and grime.
* Optional: Essential oils (like lemon or lavender) for a fresh scent. Just a few drops will do!
* Optional: Old toothbrush for tackling stubborn spots.
* Optional: Gloves to protect your hands.
Assembling Your DIY Blind Cleaning Tool: Step-by-Step
This is the fun part! Let’s put together our cleaning contraption.
1. Prepare the Clothespins: Make sure your clothespins are clean and dry. If they’re dusty, give them a quick wipe down.
2. Cut the Microfiber Cloths: Cut your microfiber cloths into strips that are slightly wider than the clamping part of your clothespins. You want enough fabric to wrap around the clothespin and have a little overlap. I usually cut mine into strips about 2-3 inches wide and 4-5 inches long.
3. Attach the Microfiber Cloths: This is where the hot glue gun comes in.
* Heat up your hot glue gun.
* Apply a thin line of hot glue to the inside of one side of the clothespin (the part that clamps).
* Quickly attach one end of a microfiber cloth strip to the glue.
* Wrap the cloth around the clothespin, covering the clamping area, and glue the other end of the cloth to the inside of the other side of the clothespin.
* Make sure the cloth is securely attached and covers the entire clamping surface.
* Repeat this process for all of your clothespins.
4. Let the Glue Dry: Allow the hot glue to cool and harden completely before moving on. This will ensure that the cloths are securely attached.
5. Inspect Your Tool: Once the glue is dry, give your new cleaning tool a once-over. Make sure the cloths are firmly attached and that there are no loose threads or glue globs that could scratch your blinds.
Cleaning Your Blinds: The Actual Cleaning Process
Now that we have our awesome DIY tool, let’s get those blinds sparkling!
1. Dust First: Before you start cleaning with any liquid, it’s important to remove any loose dust or debris. You can use a duster, a vacuum cleaner with a brush attachment, or even just a dry microfiber cloth. This will prevent you from just smearing the dust around when you start cleaning with the solution.
2. Prepare Your Cleaning Solution: In your spray bottle, mix your cleaning solution. I usually use about 2 cups of warm water, a teaspoon of dish soap, and a tablespoon of white vinegar. Add a few drops of essential oil if desired. Shake well to combine.
3. Test in an Inconspicuous Area: Before you clean the entire blind, test your cleaning solution in a small, hidden area to make sure it doesn’t damage the finish. This is especially important if you have wooden blinds.
4. Spray the Blinds: Lightly spray the blinds with your cleaning solution. Don’t saturate them! You just want them to be damp.
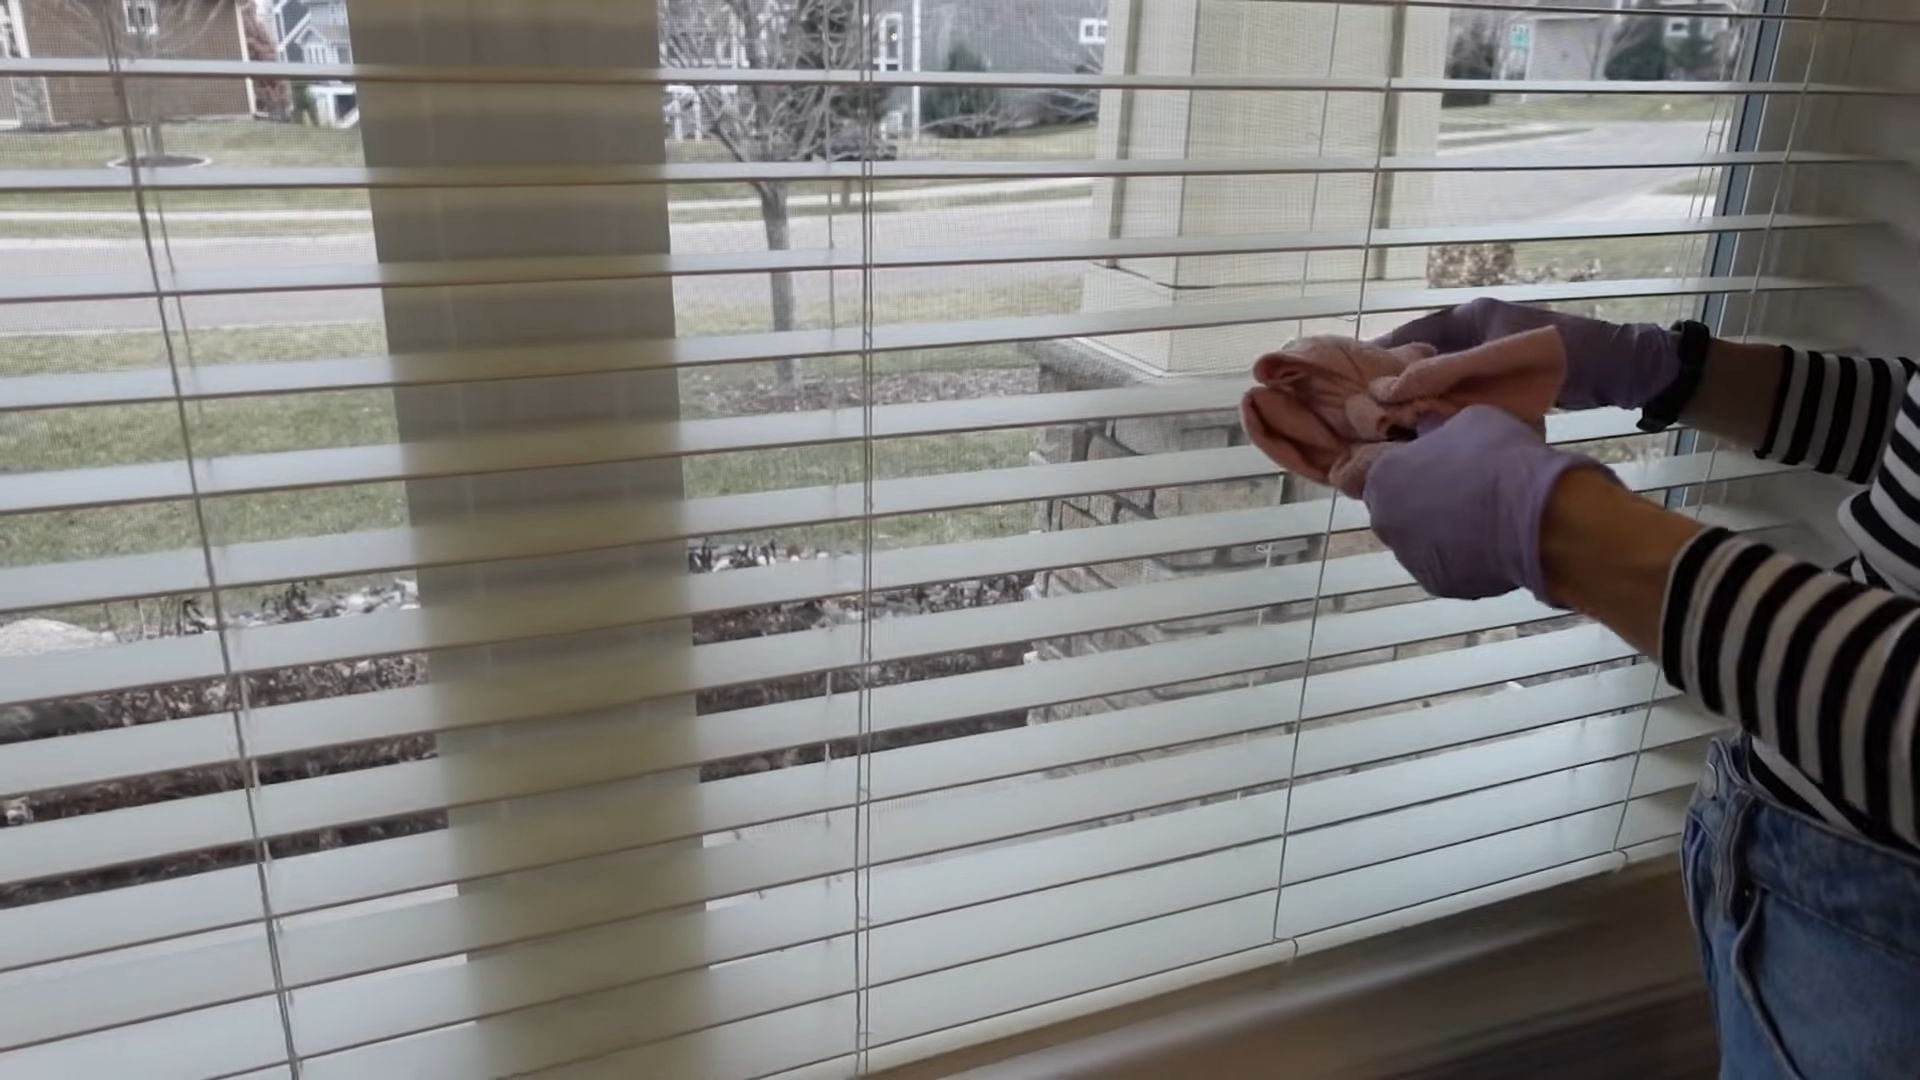
5. Clamp and Clean: Now, take your DIY blind cleaning tool and clamp it onto a blind slat. Gently slide the tool along the slat, cleaning both sides at once. The microfiber cloths will pick up the dirt and grime.
6. Repeat: Repeat this process for each slat of your blinds. You may need to re-spray the blinds with cleaning solution as you go.
7. Rinse (Optional): If you’re using a lot of soap in your cleaning solution, you may want to rinse the blinds with clean water after you’ve cleaned them. You can do this by spraying them lightly with water and then wiping them down with a clean, dry microfiber cloth.
8. Dry: Allow the blinds to air dry completely. You can open a window or turn on a fan to speed up the drying process.
9. Tackle Stubborn Spots: For any stubborn spots or stains, use an old toothbrush dippe
Okay, let’s face it, cleaning blinds is one of those chores that everyone dreads. It’s fiddly, time-consuming, and never seems to get them truly clean. But fear not! I’m going to show you how to create a super effective DIY blind cleaning tool that will make this task much easier and, dare I say, almost enjoyable! This method works wonders on Venetian blinds, mini blinds, and even some vertical blinds.
What You’ll Need: The Supply List
Before we dive in, let’s gather our supplies. The beauty of this project is that you probably already have most of these items lying around the house.
* Microfiber Cloths: These are essential! You’ll need a few, as they’ll get dirty quickly. I recommend at least three.
* Wooden Clothespins: The old-fashioned kind, the ones that clamp together. You’ll need several, depending on the width of your blinds. I usually use 5-7 for standard-sized blinds.
* Hot Glue Gun and Glue Sticks: This is what we’ll use to attach the microfiber cloths to the clothespins.
* Spray Bottle: For your cleaning solution.
* Cleaning Solution: You can use a commercial blind cleaner, but I prefer a homemade solution. My go-to is a mixture of warm water, a squirt of dish soap (Dawn works great!), and a splash of white vinegar. The vinegar helps cut through grease and grime.
* Optional: Essential oils (like lemon or lavender) for a fresh scent. Just a few drops will do!
* Optional: Old toothbrush for tackling stubborn spots.
* Optional: Gloves to protect your hands.
Assembling Your DIY Blind Cleaning Tool: Step-by-Step
This is the fun part! Let’s put together our cleaning contraption.
1. Prepare the Clothespins: Make sure your clothespins are clean and dry. If they’re dusty, give them a quick wipe down.
2. Cut the Microfiber Cloths: Cut your microfiber cloths into strips that are slightly wider than the clamping part of your clothespins. You want enough fabric to wrap around the clothespin and have a little overlap. I usually cut mine into strips about 2-3 inches wide and 4-5 inches long.
3. Attach the Microfiber Cloths: This is where the hot glue gun comes in.
* Heat up your hot glue gun.
* Apply a thin line of hot glue to the inside of one side of the clothespin (the part that clamps).
* Quickly attach one end of a microfiber cloth strip to the glue.
* Wrap the cloth around the clothespin, covering the clamping area, and glue the other end of the cloth to the inside of the other side of the clothespin.
* Make sure the cloth is securely attached and covers the entire clamping surface.
* Repeat this process for all of your clothespins.
4. Let the Glue Dry: Allow the hot glue to cool and harden completely before moving on. This will ensure that the cloths are securely attached.
5. Inspect Your Tool: Once the glue is dry, give your new cleaning tool a once-over. Make sure the cloths are firmly attached and that there are no loose threads or glue globs that could scratch your blinds.
Cleaning Your Blinds: The Actual Cleaning Process
Now that we have our awesome DIY tool, let’s get those blinds sparkling!
1. Dust First: Before you start cleaning with any liquid, it’s important to remove any loose dust or debris. You can use a duster, a vacuum cleaner with a brush attachment, or even just a dry microfiber cloth. This will prevent you from just smearing the dust around when you start cleaning with the solution.
2. Prepare Your Cleaning Solution: In your spray bottle, mix your cleaning solution. I usually use about 2 cups of warm water, a teaspoon of dish soap, and a tablespoon of white vinegar. Add a few drops of essential oil if desired. Shake well to combine.
3. Test in an Inconspicuous Area: Before you clean the entire blind, test your cleaning solution in a small, hidden area to make sure it doesn’t damage the finish. This is especially important if you have wooden blinds.
4. Spray the Blinds: Lightly spray the blinds with your cleaning solution. Don’t saturate them! You just want them to be damp.
5. Clamp and Clean: Now, take your DIY blind cleaning tool and clamp it onto a blind slat. Gently slide the tool along the slat, cleaning both sides at once. The microfiber cloths will pick up the dirt and grime.
6. Repeat: Repeat this process for each slat of your blinds. You may need to re-spray the blinds with cleaning solution as you go.
7. Rinse (Optional): If you’re using a lot of soap in your cleaning solution, you may want to rinse the blinds with clean water after you’ve cleaned them. You can do this by spraying them lightly with water and then wiping them down with a clean, dry microfiber cloth.
8. Dry: Allow the blinds to air dry completely. You can open a window or turn on a fan to speed up the drying process.
9. Tackle Stubborn Spots: For any stubborn spots or stains, use an old toothbrush dipped in your cleaning solution to gently scrub the area.
Tips and Tricks for Sparkling Blinds
Here are a few extra tips to help you get the best results:
* Clean Regularly: The more often you clean your blinds, the easier it will be to keep them clean. I recommend cleaning them at least once a month.
* Wash Your Microfiber Cloths: Be sure to wash your microfiber cloths after each use. You can wash them in the washing machine with your regular laundry. Just don’t use fabric softener, as it can reduce their absorbency.
* Adjust the Clothespin Pressure: If your clothespins are too tight, they may be difficult to slide along the blinds. You can loosen them slightly by gently bending the metal spring.
* Consider the Blind Material: Different blind materials may require different cleaning solutions. For example, wooden blinds should be cleaned with a gentle wood cleaner. Always test your cleaning solution in an inconspicuous area first.
* Vertical Blinds: This tool can also be used on vertical blinds. Simply clamp the tool onto the blind and slide it down the length of the slat. You may need to adjust the size of your microfiber cloth strips to fit the width of the vertical blinds.
* Don’t Forget the Cords: Use a damp microfiber cloth to wipe down the cords that control the blinds. These can also accumulate dust and grime.
* Safety First: Always be careful when using a hot glue gun. Avoid touching the hot glue directly, and work in a well-ventilated area.
Maintaining Your DIY Blind Cleaning Tool
To keep your DIY blind cleaning tool in tip-top shape, here’s what I recommend:
* Replace the Microfiber Cloths: Over time, the microfiber cloths will become worn and less effective. Replace them as needed. You can simply peel off the old cloths and glue on new ones.
* Store Properly: Store your cleaning tool in a clean, dry place. This will prevent it from getting dusty or damaged.
* Check for Loose Glue: Periodically check the glue on your clothespins to make sure it’s still holding strong. If any of the cloths come loose, simply re-glue them.
Troubleshooting Common Issues
Sometimes, things don’t go exactly as planned. Here are a few common issues you might encounter and how to fix them:
* Streaky Blinds: If your blinds are streaky after cleaning, it could be due to a few things. You might be using too much soap in your cleaning solution, or you might not be rinsing the blinds thoroughly enough. Try reducing the amount of soap you use, or rinsing the blinds with clean water after cleaning.
* Dust Still Present: If you’re still seeing dust on your blinds after cleaning, it could be that your microfiber cloths are too dirty. Try using fresh cloths, or washing your cloths more frequently. It’s also important to dust the blinds before you start cleaning with the solution.
* Clothespins Too Tight: If your clothespins are too tight and difficult to slide along the blinds, you can try loosening them slightly by gently bending the metal spring. Be careful not to bend them too much, or they might not clamp properly.
* Cleaning Solution Damaging Blinds: If you notice that your cleaning solution is damaging your blinds, stop using it immediately. Try a different cleaning solution, or consult the manufacturer’s instructions for your blinds.
With this DIY blind cleaning tool and these tips, you’ll be able to keep your blinds sparkling clean
Conclusion
So, there you have it! Mastering the art of cleaning your blinds doesn’t require expensive gadgets or harsh chemicals. This simple, DIY blind cleaning tool is a game-changer for anyone looking to maintain a dust-free and inviting home. We’ve shown you how to create an effective and affordable solution using items you likely already have around the house.
Why is this DIY trick a must-try? Because it’s efficient, cost-effective, and gentle on your blinds. Forget spending hours meticulously wiping each slat individually. This method allows you to clean multiple slats at once, significantly reducing the time and effort involved. Plus, you’re in control of the cleaning solution, allowing you to avoid harsh chemicals that can damage delicate blinds or irritate sensitive skin. This is especially important if you have pets or small children.
But the benefits don’t stop there. This DIY approach is also incredibly versatile. You can easily adapt the cleaning solution to suit your specific needs and preferences. For a deeper clean, consider adding a few drops of essential oil, like lemon or tea tree, for their antibacterial and deodorizing properties. If you have stubborn stains, a slightly stronger solution of vinegar and water might be necessary. Always test any new cleaning solution on an inconspicuous area of your blinds first to ensure it doesn’t cause any discoloration or damage.
Variations and Suggestions:
* Microfiber Magic: While socks work well, consider using microfiber cloths for even better dust absorption. Microfiber is known for its superior cleaning power and gentle touch.
* Handle Helpers: If you find it difficult to grip the tongs or spatula, wrap the handle with a non-slip material like rubber bands or grip tape.
* Dusting Frequency: Aim to dust your blinds at least once a month to prevent dust buildup. In high-traffic areas or homes with pets, you may need to dust more frequently.
* Deep Cleaning: For a more thorough clean, you can remove your blinds and soak them in a bathtub filled with warm, soapy water. Be sure to rinse them thoroughly and allow them to dry completely before rehanging them.
* Static Cling Solution: To minimize dust attraction, lightly spray your blinds with an anti-static spray after cleaning.
We’re confident that this DIY blind cleaning tool will become an indispensable part of your cleaning routine. It’s a simple yet effective way to keep your blinds looking their best, without breaking the bank or resorting to harsh chemicals.
So, what are you waiting for? Gather your supplies, create your DIY blind cleaning tool, and experience the satisfaction of sparkling clean blinds. We encourage you to try this method and share your results with us! Let us know in the comments how it worked for you, any variations you tried, and any tips you have to share with other readers. Your feedback is invaluable and helps us continue to provide helpful and practical cleaning solutions. Happy cleaning!
Frequently Asked Questions (FAQ)
1. What kind of socks should I use for the DIY blind cleaning tool?
Ideally, you should use clean, soft socks made of cotton or microfiber. Avoid using socks with holes or excessive wear, as they may not effectively trap dust and debris. Old socks that are still in good condition are perfect for this purpose. The key is to use a material that is absorbent and gentle on your blinds.
2. Can I use any type of cleaning solution?
While a simple mixture of warm water and dish soap is generally effective, you can customize the cleaning solution to suit your needs. A solution of equal parts water and white vinegar is great for removing stubborn stains and grime. You can also add a few drops of essential oils, such as lemon or tea tree, for their antibacterial and deodorizing properties. However, avoid using harsh chemicals, bleach, or abrasive cleaners, as they can damage or discolor your blinds. Always test any new cleaning solution on an inconspicuous area of your blinds first to ensure it doesn’t cause any adverse effects.
3. How often should I clean my blinds?
The frequency of cleaning depends on several factors, including the location of your blinds, the amount of dust in your home, and whether you have pets or allergies. As a general rule, aim to dust your blinds at least once a month. If you live in a dusty area or have pets, you may need to clean them more frequently, perhaps every two weeks. For a deeper clean, consider washing your blinds every few months.
4. What if my blinds are made of a delicate material like fabric or wood?
If you have delicate blinds, such as fabric or wood blinds, you’ll need to take extra care when cleaning them. For fabric blinds, avoid using excessive moisture, as it can cause them to shrink or warp. Instead, gently dust them with a dry cloth or use a vacuum cleaner with a brush attachment. For wood blinds, use a wood-friendly cleaning solution and avoid soaking them in water. Always test any cleaning solution on an inconspicuous area first to ensure it doesn’t damage the material.
5. How do I clean vertical blinds?
The DIY blind cleaning tool can also be used to clean vertical blinds. Simply slide the tool down each slat, ensuring that you clean both sides. You may need to adjust the angle of the tool to effectively reach all areas of the blinds. For stubborn stains, you can pre-treat the affected areas with a cleaning solution before using the tool.
6. What if I don’t have tongs or a spatula?
If you don’t have tongs or a spatula, you can use other household items to create your DIY blind cleaning tool. A paint stirrer, a ruler, or even a sturdy piece of cardboard can be used as a handle. Just make sure that the handle is long enough to reach all areas of your blinds and that it’s sturdy enough to hold the socks or cloths securely.
7. How do I prevent dust from accumulating on my blinds?
To minimize dust accumulation, consider using an anti-static spray after cleaning your blinds. This will help to repel dust and keep your blinds cleaner for longer. You can also regularly dust your blinds with a dry cloth or a vacuum cleaner with a brush attachment. Additionally, consider using an air purifier to reduce the amount of dust in your home.
8. Can I use this method on mini blinds?
Yes, this method is particularly effective for cleaning mini blinds, which can be notoriously difficult to clean individually. The DIY tool allows you to clean multiple slats at once, saving you time and effort. Just be sure to use a gentle touch to avoid bending or damaging the delicate slats.
9. My blinds have a lot of grease and grime. Will this DIY tool work?
For blinds with heavy grease and grime, you may need to use a stronger cleaning solution. A mixture of warm water, dish soap, and a small amount of degreaser can be effective. You can also try pre-treating the affected areas with a cleaning solution before using the DIY tool. For extremely stubborn grime, you may need to repeat the cleaning process several times.
10. What are the benefits of using a DIY blind cleaning tool compared to commercial blind cleaners?
DIY blind cleaning tools offer several advantages over commercial blind cleaners. They are typically more affordable, as they utilize readily available household items. They also allow you to control the cleaning solution, avoiding harsh chemicals that can damage your blinds or irritate your skin. Furthermore, DIY tools are often more versatile and can be customized to suit your specific needs and preferences. Finally, creating your own cleaning tool is a sustainable practice that reduces waste and promotes resourcefulness.


Leave a Comment