
Bitter Gourd Cooking Tips: Are you ready to transform the notorious bitterness of karela into a culinary delight? I know, I know, the name itself can send shivers down your spine! But trust me, with the right techniques, you can actually *enjoy* this nutrient-packed vegetable. For generations, bitter gourd has held a significant place in traditional medicine and cuisines across Asia, celebrated for its health benefits and unique flavor profile. From India to China, families have passed down secret methods to tame its intensity.
But why bother with all this effort? Well, beyond its historical and cultural importance, bitter gourd is a nutritional powerhouse, brimming with vitamins, minerals, and antioxidants. Incorporating it into your diet can help regulate blood sugar levels, boost immunity, and even aid in weight management. However, the key is knowing how to prepare it properly. That’s where these DIY tricks come in! I’m going to share my favorite, tried-and-true methods to reduce bitterness and unlock the delicious potential of bitter gourd. So, ditch the dread and get ready to discover a whole new world of karela possibilities!
Taming the Bitter Beast: My Guide to Delicious Bitter Gourd
Okay, let’s be honest. Bitter gourd, also known as karela, isn’t exactly winning any popularity contests. That intense bitterness can be a real turn-off. But trust me, with a few simple tricks, you can transform this nutritional powerhouse into a surprisingly delicious dish. I’ve spent years experimenting, and I’m here to share my secrets to minimizing the bitterness and maximizing the flavor.
Understanding the Bitter Truth
Before we dive into the cooking process, let’s understand why bitter gourd is, well, bitter. The bitterness comes from compounds called cucurbitacins. The good news is that these compounds are water-soluble, meaning we can leach them out through various methods.
Choosing the Right Gourd
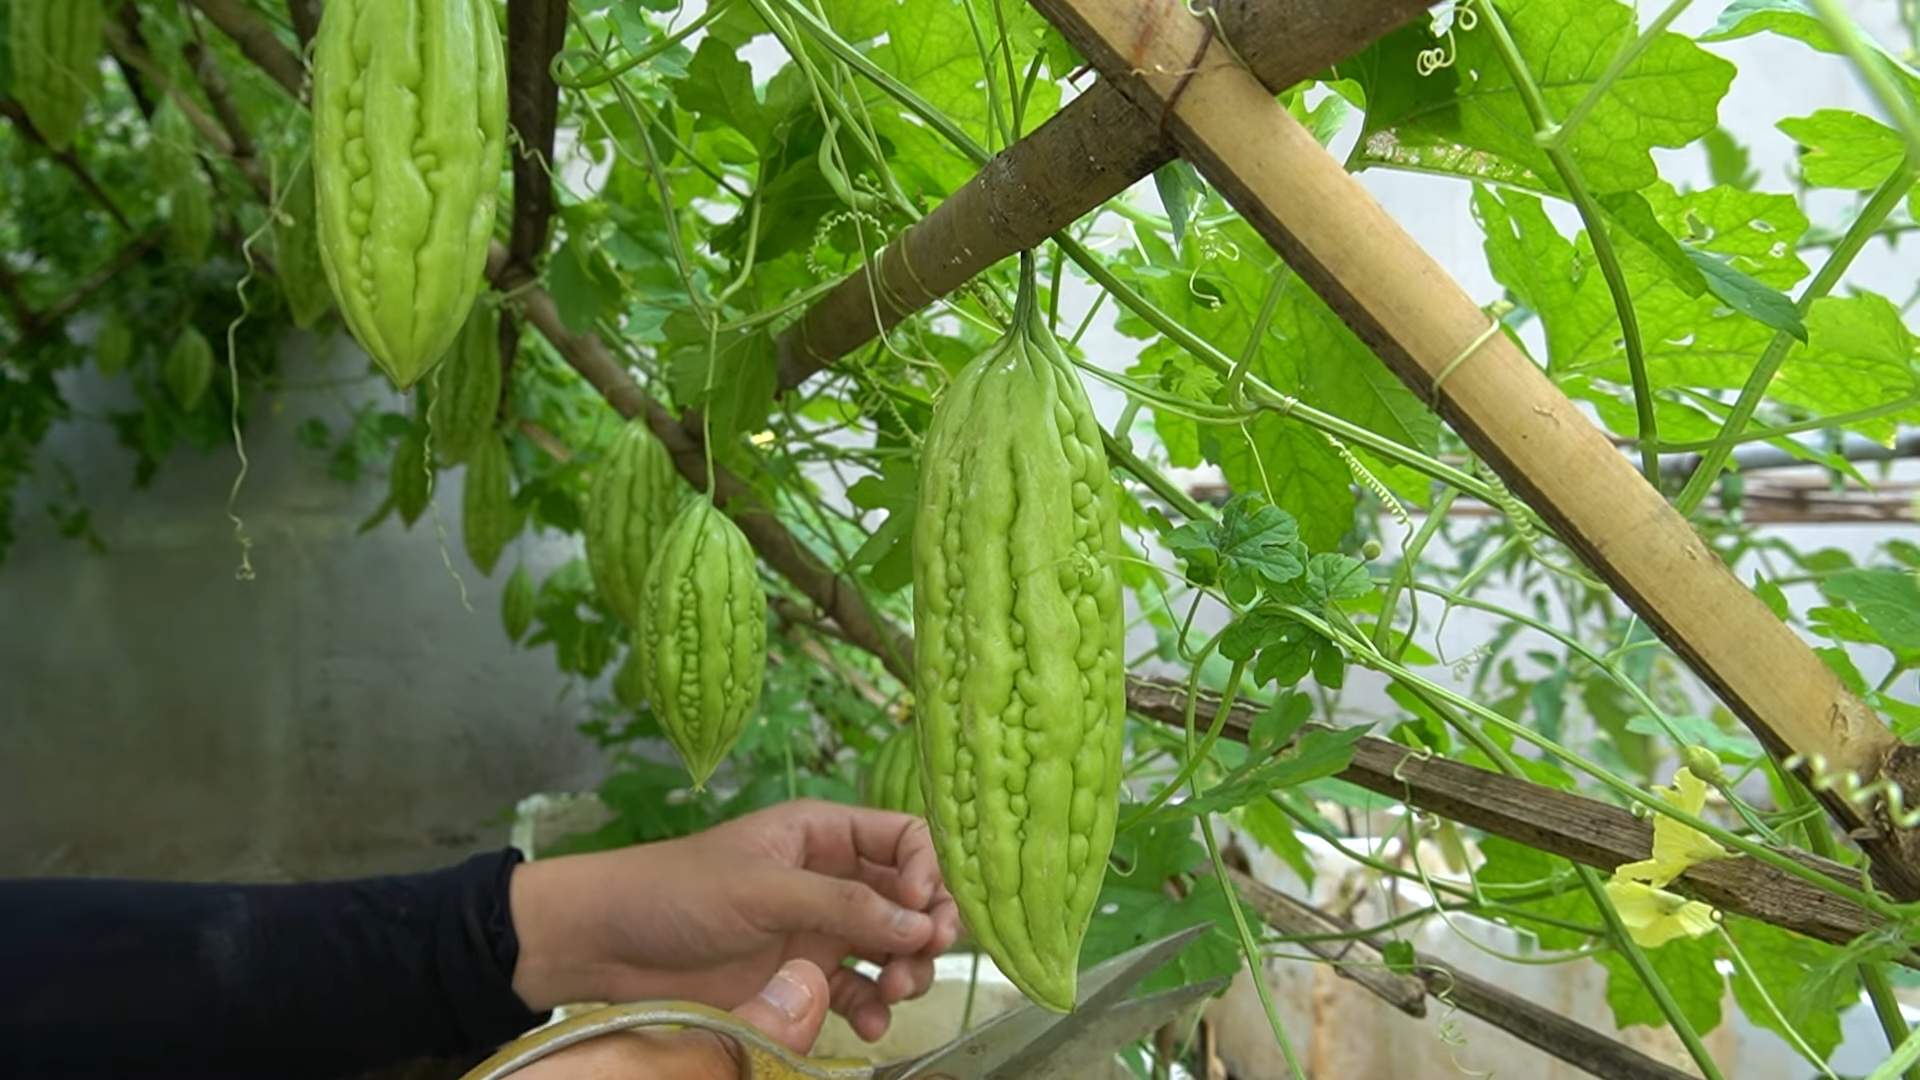
The first step to less bitter karela is selecting the right one at the market.
* Look for lighter green gourds: Darker green ones tend to be more mature and therefore, more bitter.
* Choose firm gourds: Avoid any that feel soft or have blemishes.
* Smaller is better (sometimes): Smaller gourds often have fewer seeds and can be less bitter.
Preparing the Bitter Gourd: The Key to Less Bitterness
This is where the magic happens. Proper preparation is crucial to reducing the bitterness.
1. Wash Thoroughly: Begin by washing the bitter gourd under running water to remove any dirt or debris.
2. Slice and Dice (or Not!): How you slice the gourd depends on your recipe. For stir-fries, I prefer thin slices. For stuffed karela, you’ll want to halve them lengthwise and scoop out the seeds.
3. Remove the Seeds and Pith: This is a non-negotiable step. The seeds and the white pith inside the gourd are major contributors to the bitterness. Use a spoon to scrape them out completely. Don’t be shy – get in there!
4. Salt Therapy: The First Line of Defense: This is my go-to method.
* Place the sliced or halved bitter gourd in a bowl.
* Generously sprinkle salt over the gourd. I’m talking about a good tablespoon or two, depending on the amount of karela.
* Massage the salt into the gourd, ensuring every piece is coated.
* Let it sit for at least 30 minutes, or even up to an hour. You’ll notice water being drawn out – that’s the bitter juice!
* Rinse the salted gourd thoroughly under running water, squeezing out as much excess water as possible. This step is crucial to remove the saltiness.
5. Vinegar Soak: Another Bitterness Buster: If you’re still worried about bitterness, try a vinegar soak after the salt treatment.
* In a bowl, mix water with a tablespoon or two of vinegar (white vinegar or apple cider vinegar works well).
* Soak the rinsed bitter gourd in the vinegar solution for about 15-20 minutes.
* Rinse again thoroughly.
6. Blanching: A Quick Fix: Blanching can also help reduce bitterness, but it can also make the gourd a bit softer.
* Bring a pot of water to a boil.
* Add the sliced or halved bitter gourd and blanch for 2-3 minutes.
* Immediately transfer the gourd to a bowl of ice water to stop the cooking process.
* Drain well.
Cooking Methods: Flavoring Your Way to Success
Now that you’ve prepped your bitter gourd, it’s time to cook it! The cooking method you choose can also influence the final bitterness level.
1. Stir-Frying: Quick and Flavorful: Stir-frying is a great way to cook bitter gourd quickly and retain some of its crunch.
* Heat oil in a wok or frying pan over medium-high heat.
* Add aromatics like garlic, ginger, and onions. Sauté until fragrant.
* Add the prepared bitter gourd and stir-fry for 5-7 minutes, or until tender-crisp.
* Season with soy sauce, a touch of sugar (yes, sugar!), and other spices of your choice. The sugar helps to balance the bitterness.
* Garnish with cilantro or sesame seeds.
2. Stuffing: A Flavorful Disguise: Stuffed karela is a classic dish where the bitterness is cleverly masked by a flavorful filling.
* Prepare a filling of your choice. Common fillings include a mixture of potatoes, onions, spices, and sometimes lentils or ground meat.
* Stuff the prepared bitter gourd halves with the filling.
* You can either steam, bake, or pan-fry the stuffed karela until the gourd is tender and the filling is cooked through.
* Serve with rice or roti.
3. Baking: A Healthier Option: Baking is a great way to cook bitter gourd with minimal oil.
* Preheat your oven to 375°F (190°C).
* Toss the prepared bitter gourd with olive oil, salt, pepper, and any other spices you like.
* Spread the gourd in a single layer on a baking sheet.
* Bake for 20-25 minutes, or until tender and slightly browned.
4. Deep Frying: Indulgent and Delicious (in moderation!): While not the healthiest option, deep-frying can make bitter gourd incredibly palatable. The high heat and oil help to neutralize the bitterness.
* Heat oil in a deep fryer or large pot to 350°F (175°C).
* Dip the prepared bitter gourd in a batter of your choice (gram flour batter is a popular option).
* Deep-fry until golden brown and crispy.
* Drain on paper towels and serve immediately.
Spice it Up: Flavor Combinations That Work
The right spices can work wonders in masking the bitterness and enhancing the flavor of bitter gourd. Here are some of my favorite combinations:
* Sweet and Sour: A touch of sugar, tamarind paste, or amchur (dried mango powder) can balance the bitterness beautifully.
* Spicy and Savory: Chili powder, turmeric, coriander powder, and cumin powder add depth and complexity.
* Aromatic Herbs: Ginger, garlic, onions, and cilantro are essential for adding flavor and aroma.
* Nuts and Seeds: Sesame seeds, peanuts, or cashews add a crunchy texture and nutty flavor.
* Coconut: Grated coconut adds a touch of sweetness and richness.
My Favorite Bitter Gourd Recipe: Stir-Fried Karela with Onions and Spices
This is my go-to recipe for a quick, easy, and delicious bitter gourd dish.
Ingredients:
* 2 medium-sized bitter gourds, prepared as described above
* 1 large onion, thinly sliced
* 2 cloves garlic, minced
* 1 inch ginger, grated
* 1 green chili, finely chopped (optional)
* 1 teaspoon turmeric powder
* 1 teaspoon coriander powder
* 1/2 teaspoon cumin powder
* 1/4 teaspoon red chili powder (optional)
* 1 tablespoon soy sauce
* 1 teaspoon sugar
* 2 tablespoons vegetable oil
* Salt to taste
* Fresh cilantro, chopped, for garnish
Instructions:
1. Heat oil in a wok or frying pan over medium-high heat.
2. Add the sliced onions and sauté until golden brown.
3. Add the minced garlic and grated ginger and sauté for another minute until fragrant.
4. Add the prepared bitter gourd and stir-fry for 5-7 minutes, or until tender-crisp.
5. Add the turmeric powder, coriander powder, cumin powder, and red chili powder (if using). Stir-fry for another minute.
6. Add the soy sauce and sugar and mix well.
7. Season with salt to taste.
8. Garnish with fresh cilantro and serve hot with rice or roti.
Tips and Tricks for Bitter Gourd Success
* Don’t overcook it: Overcooked bitter gourd becomes mushy and even more bitter. Aim for a tender-crisp texture.
* Taste as you go: Adjust the seasonings to your liking. If it’s still too bitter, add a little more sugar or tamarind paste.
* Pair it with other flavors: Bitter gourd pairs well with strong flavors like garlic, ginger, onions, and spices.
* Experiment with different recipes: Don’t be afraid to try different cooking methods and flavor combinations.
* Embrace the bitterness (a little!): Remember, a little bitterness is part of the charm of bitter gourd. It’s what makes it unique and interesting.
Health Benefits: Why You Should Give Bitter Gourd a Chance
Beyond its unique flavor,

Conclusion
If you’ve ever shied away from bitter gourd, convinced its intense bitterness was insurmountable, these cooking tips are your game-changer. We’ve unveiled a simple yet remarkably effective method to significantly reduce the bitterness, transforming this nutritional powerhouse into a palatable and even enjoyable dish. This isn’t just about making bitter gourd edible; it’s about unlocking its potential as a versatile and healthy ingredient in your culinary repertoire.
The pre-treatment process, involving salting and squeezing, is the key to success. By drawing out the bitter compounds, you’re essentially paving the way for a more balanced and flavorful final product. Think of it as a culinary reset button, allowing the other flavors in your dish to shine through without being overshadowed by overwhelming bitterness.
But the journey doesn’t end there. Once you’ve mastered the basic technique, the possibilities are endless. Consider these variations to further customize your bitter gourd experience:
* **Spice it up:** Incorporate chili flakes, cayenne pepper, or a dash of hot sauce to add a fiery kick that complements the subtle bitterness.
* **Sweeten the deal:** A touch of honey, maple syrup, or even a few dates can create a delightful sweet-and-savory contrast.
* **Add some crunch:** Toasted nuts, seeds, or crispy fried onions can provide textural interest and enhance the overall flavor profile.
* **Explore different cuisines:** Bitter gourd is a staple in many Asian cuisines. Experiment with recipes from India, China, and Southeast Asia to discover new and exciting ways to prepare it. Try stuffing it with spiced lentils, stir-frying it with black bean sauce, or adding it to a flavorful curry.
* **Roast it for a different texture:** Instead of stir-frying or sautéing, try roasting your pre-treated bitter gourd. Roasting brings out a slightly sweeter, caramelized flavor and creates a wonderfully crispy texture. Toss it with olive oil, salt, pepper, and your favorite herbs before roasting.
Ultimately, the best way to discover your favorite way to enjoy bitter gourd is to experiment and find what works best for your taste buds. Don’t be afraid to get creative and try new combinations of flavors and textures.
We firmly believe that these **bitter gourd cooking tips** are a must-try for anyone looking to expand their culinary horizons and embrace the health benefits of this often-underappreciated vegetable. It’s a simple, effective, and versatile technique that can transform your perception of bitter gourd forever.
So, go ahead, give it a try! We’re confident that you’ll be pleasantly surprised by the results. And most importantly, we want to hear about your experience. Share your creations, variations, and tips in the comments below. Let’s build a community of bitter gourd enthusiasts and unlock the full potential of this amazing ingredient together! We are eager to hear how these tips helped you overcome the bitterness and enjoy this nutritious vegetable. Your feedback will not only inspire others but also help us refine and improve these techniques for future cooks.
Frequently Asked Questions (FAQ)
Why is bitter gourd so bitter in the first place?
Bitter gourd’s characteristic bitterness comes from the presence of compounds called cucurbitacins. These compounds are naturally occurring and serve as a defense mechanism for the plant against pests. The concentration of cucurbitacins varies depending on the variety of bitter gourd and its maturity. Younger gourds tend to be less bitter than older ones. While the bitterness can be off-putting to some, cucurbitacins are also believed to have several health benefits, including anti-inflammatory and anti-diabetic properties.
How does salting and squeezing reduce the bitterness?
The salting process works by osmosis. Salt draws out moisture from the bitter gourd cells, and with that moisture comes a significant portion of the cucurbitacins responsible for the bitter taste. The squeezing action further helps to remove this bitter liquid, leaving behind a less bitter vegetable. This method is effective because it physically removes the bitter compounds rather than just masking them. The amount of salt and the duration of the salting process are crucial for optimal results. Too little salt or too short a time, and the bitterness won’t be adequately reduced. Too much salt or too long a time, and the bitter gourd can become overly salty and lose its texture.
Can I use other methods to reduce bitterness, like blanching or soaking in water?
Yes, other methods can help reduce bitterness, but they may not be as effective as salting and squeezing. Blanching, which involves briefly boiling the bitter gourd, can help to leach out some of the bitter compounds. Soaking in water, especially salted water, can also help, but it typically requires a longer soaking time than salting and squeezing. The advantage of salting and squeezing is that it’s relatively quick and efficient, and it also helps to improve the texture of the bitter gourd by making it slightly firmer. Some people also suggest removing the seeds and the white pith inside the bitter gourd, as these parts are believed to be particularly bitter.
How long should I salt the bitter gourd?
A general guideline is to salt the bitter gourd for at least 30 minutes, but you can leave it for up to an hour for a more significant reduction in bitterness. The exact time will depend on the size and thickness of the bitter gourd slices, as well as your personal preference. After salting, be sure to rinse the bitter gourd thoroughly to remove excess salt before cooking. Taste a small piece to check the bitterness level and adjust the cooking time or add other flavors accordingly.
What if I accidentally oversalt the bitter gourd?
If you accidentally oversalt the bitter gourd, don’t panic! You can try soaking it in fresh water for 15-30 minutes to draw out some of the excess salt. Change the water a couple of times during the soaking process. After soaking, taste the bitter gourd again to check the salt level. If it’s still too salty, you can try adding a touch of acidity, such as lemon juice or vinegar, to the dish to balance the flavors. In future, be more mindful of the amount of salt you use and the duration of the salting process.
Can I use any type of salt for this method?
While any type of salt will work, coarse salt, such as kosher salt or sea salt, is generally preferred for this method. Coarse salt has larger crystals, which help to draw out moisture more effectively. Table salt can also be used, but you may need to use a slightly larger amount to achieve the same results. Avoid using iodized salt, as it can sometimes impart a slightly metallic taste to the bitter gourd.
How do I know when the bitter gourd is cooked properly?
The cooking time for bitter gourd will vary depending on the cooking method and the size of the pieces. Generally, you want to cook it until it’s tender-crisp. Overcooking can make it mushy and even more bitter. When stir-frying, aim for a slightly charred and slightly softened texture. When roasting, look for a slightly caramelized and crispy exterior. When adding it to curries or soups, cook it until it’s tender but still holds its shape.
Are there any health benefits to eating bitter gourd?
Yes, bitter gourd is packed with nutrients and has numerous health benefits. It’s a good source of vitamins A and C, as well as iron, potassium, and fiber. It’s also believed to have anti-diabetic properties, helping to regulate blood sugar levels. Some studies have also suggested that bitter gourd may have anti-inflammatory and anti-cancer properties. Incorporating bitter gourd into your diet can be a great way to boost your overall health and well-being.
Can I freeze bitter gourd after salting and squeezing?
Yes, you can freeze bitter gourd after salting, squeezing, and rinsing it. This is a great way to preserve it for later use. Before freezing, make sure to pat the bitter gourd dry with paper towels to remove any excess moisture. Then, spread it out in a single layer on a baking sheet and freeze for a few hours until solid. Once frozen, transfer the bitter gourd to a freezer bag or airtight container. This will prevent it from clumping together and make it easier to use in recipes. When you’re ready to use the frozen bitter gourd, you can add it directly to your dish without thawing.
What are some other creative ways to use bitter gourd?
Beyond the traditional stir-fries and curries, bitter gourd can be used in a variety of creative ways. Try adding it to smoothies for a nutritional boost (the bitterness will be masked by other ingredients). You can also juice it for a concentrated dose of nutrients. Bitter gourd can also be pickled or fermented for a unique and tangy flavor. Some people even use it to make tea. Don’t be afraid to experiment and find new and exciting ways to incorporate this versatile vegetable into your diet.


Leave a Comment