
Bean sprouts growing easy at home? Absolutely! Forget those pricey, pre-packaged sprouts from the grocery store. I’m going to show you how to cultivate your own crunchy, nutritious bean sprouts right in your kitchen, and trust me, it’s easier than you think!
Sprouts have been a dietary staple in many Asian cultures for centuries, prized for their nutritional density and ease of cultivation. Think about it – a tiny seed bursting with life, packed with vitamins and enzymes, ready to eat in just a few days. It’s like having a miniature, edible garden on your countertop!
But why bother with DIY bean sprouts? Well, for starters, you’ll save money. Plus, you’ll have complete control over the growing process, ensuring your sprouts are fresh, clean, and free from any unwanted additives. In today’s world, where we’re all looking for ways to eat healthier and be more sustainable, mastering the art of bean sprouts growing easy is a game-changer. Imagine adding a handful of these little powerhouses to your salads, sandwiches, or stir-fries. The possibilities are endless! So, let’s dive in and unlock the secrets to sprouting success!
Growing Bean Sprouts at Home: A Beginner’s Guide
Hey there, fellow sprout enthusiast! Ever wanted to have a constant supply of fresh, crunchy bean sprouts right at your fingertips? Well, you’ve come to the right place! Growing your own bean sprouts at home is surprisingly easy, incredibly rewarding, and way cheaper than buying them at the store. Plus, you know exactly what’s going into them – no weird preservatives or questionable growing practices. I’m going to walk you through everything you need to know to become a sprout-growing pro.
What You’ll Need
Before we dive in, let’s gather our supplies. The beauty of this project is that you probably already have most of these things lying around!
* Bean Seeds: Mung beans are the classic choice for bean sprouts, but you can also use adzuki beans, lentils, chickpeas, or even soybeans. Just make sure they’re specifically labeled for sprouting or food use, not for planting in the garden. You can find these at most health food stores, Asian markets, or online.
* A Wide-Mouth Jar: A quart-sized mason jar works perfectly. The wide mouth makes it easy to rinse and drain the sprouts.
* Sprouting Lid or Cheesecloth: You’ll need something to cover the jar that allows for drainage and airflow. A sprouting lid is ideal, but a piece of cheesecloth secured with a rubber band works just as well.
* Water: Clean, filtered water is best.
* A Dark Place: Sprouts prefer to grow in the dark, so you’ll need a cupboard, drawer, or even a covered box.
* A Bowl or Stand: To angle the jar for proper drainage.
Step-by-Step Sprouting Guide
Alright, let’s get sprouting! This process takes about 3-5 days, so get ready for some quick gratification.
1. Soak the Beans:
* Place about 2-3 tablespoons of bean seeds into your jar. Don’t overfill it – the sprouts will expand significantly!
* Cover the beans with plenty of cool, filtered water. They’ll absorb a lot of water, so make sure they’re fully submerged.
* Secure the sprouting lid or cheesecloth to the jar.
* Let the beans soak for 8-12 hours, or overnight. This rehydrates them and kicks off the germination process. I usually do this before I go to bed so they are ready in the morning.
2. Drain and Rinse:
* After soaking, drain all the water from the jar through the sprouting lid or cheesecloth.
* Rinse the beans thoroughly with fresh, cool water. This helps prevent mold and keeps them happy.
* Drain the water again, making sure to remove as much excess water as possible.
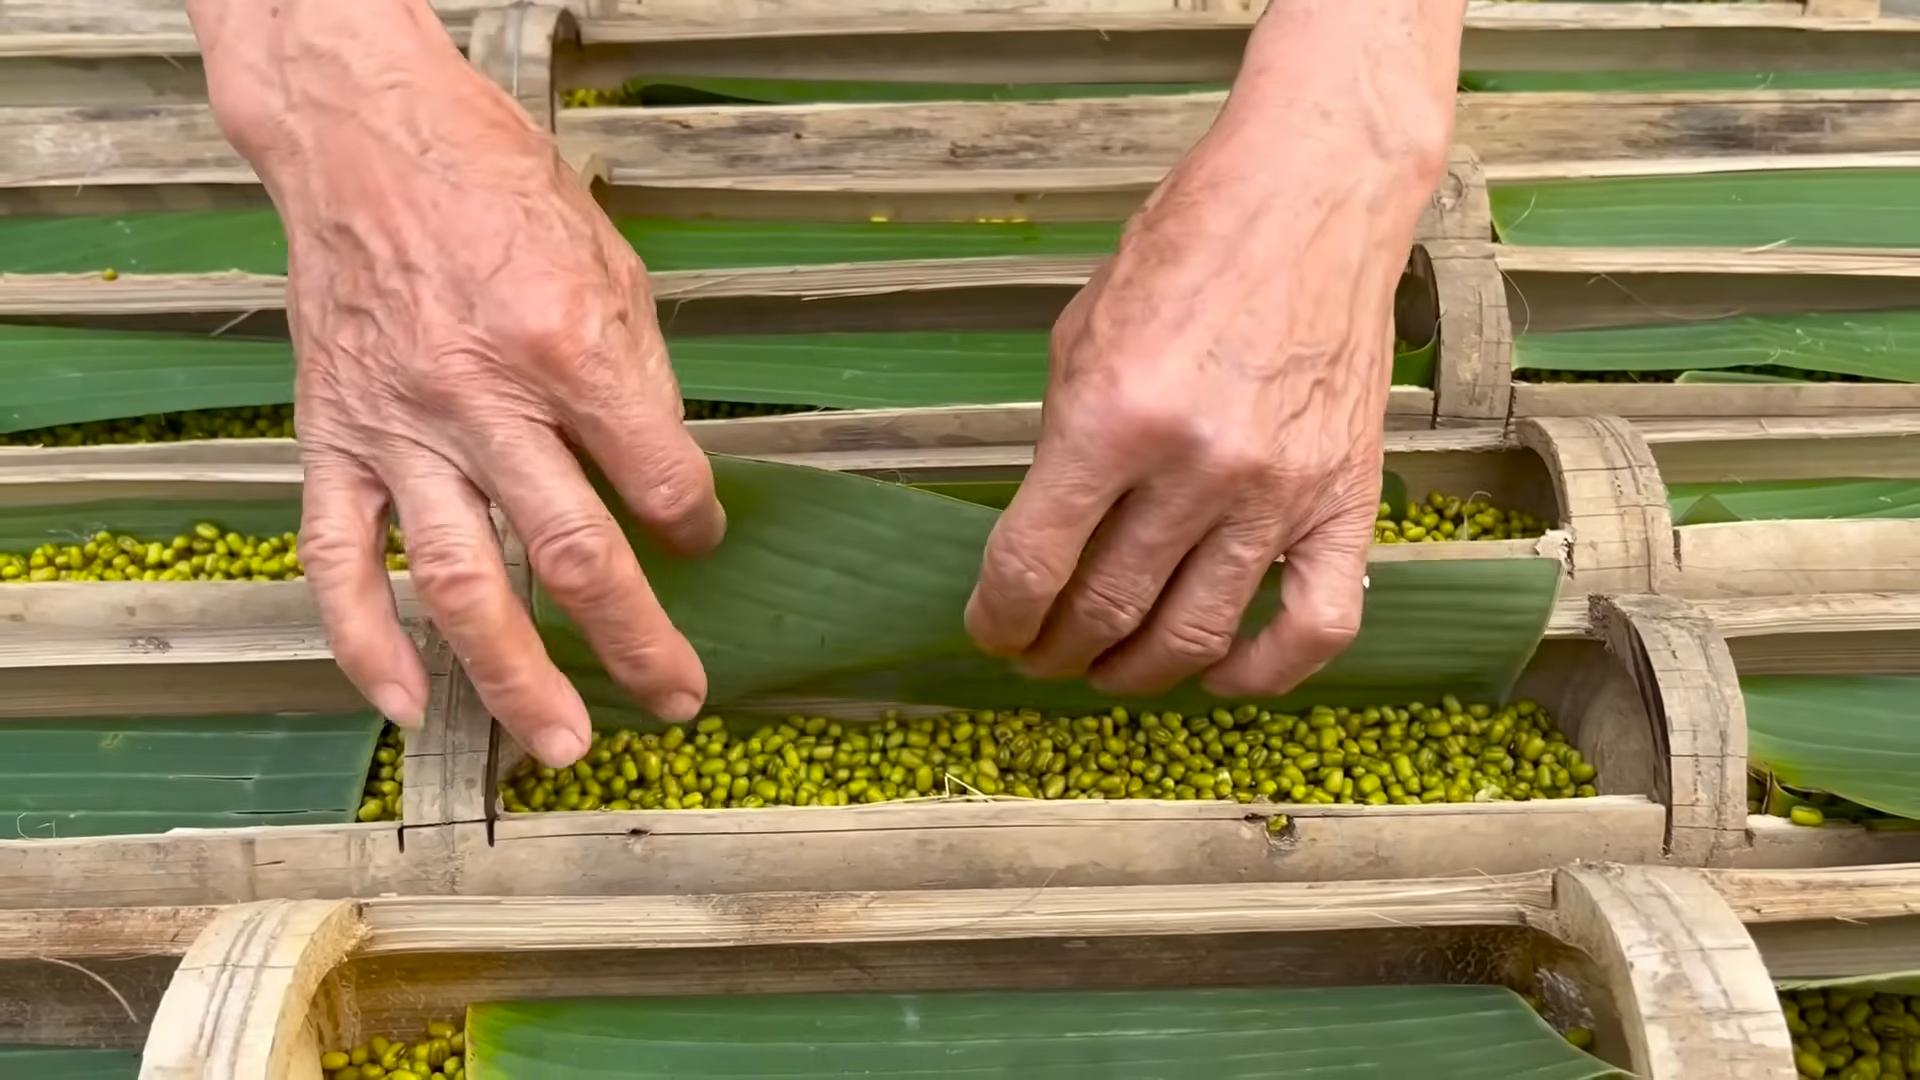
3. Dark and Drainage:
* Place the jar upside down at an angle in a bowl or on a stand. This allows any remaining water to drain out and prevents the sprouts from sitting in water, which can lead to rot.
* Put the jar in a dark, well-ventilated place. A cupboard under the sink works great, or even a dark corner of your pantry.
4. Rinse and Repeat:
* This is the most important step! Rinse and drain the sprouts 2-3 times a day. This keeps them moist, prevents mold, and provides them with the water they need to grow.
* Make sure to use cool, fresh water each time.
* Don’t forget to drain the water thoroughly after each rinse.
5. Observe and Enjoy:
* Over the next few days, you’ll see your bean sprouts start to grow. They’ll get longer and thicker with each rinse.
* Keep rinsing and draining them regularly.
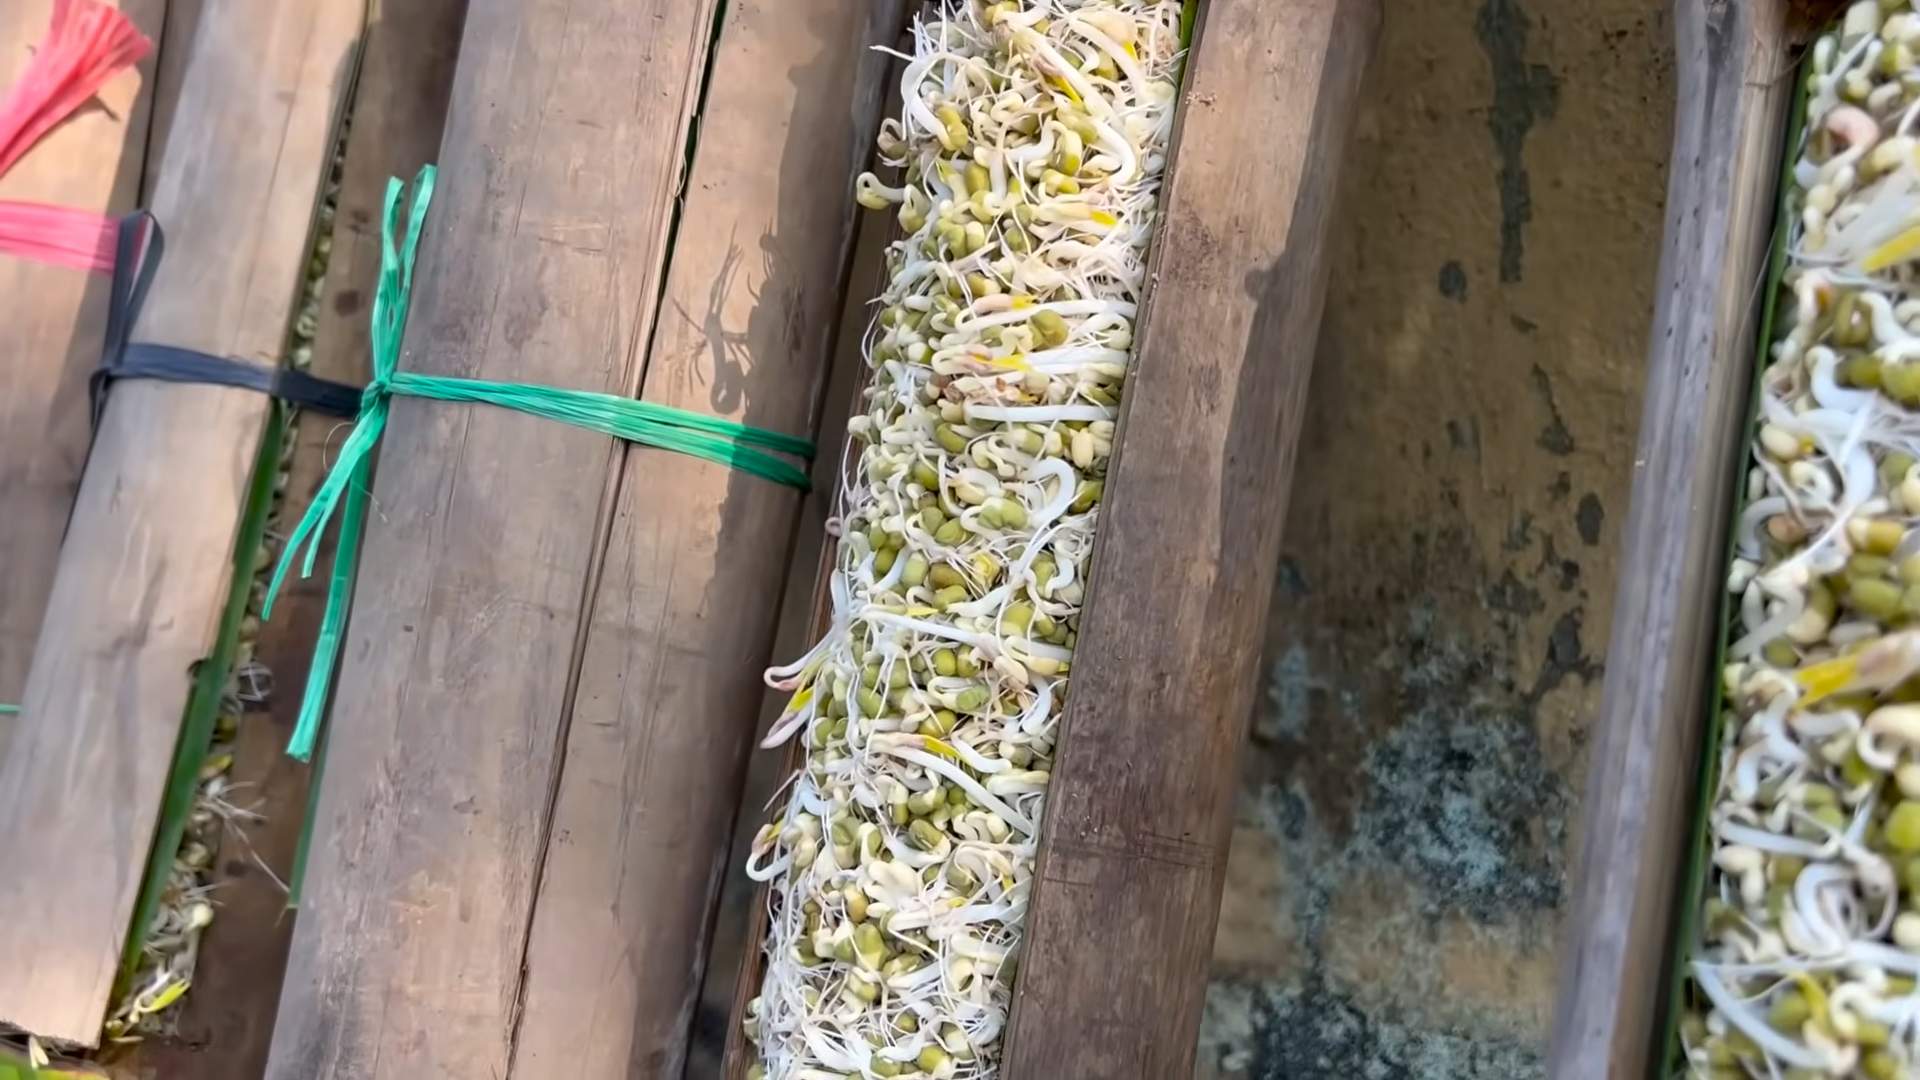
* After 3-5 days, your sprouts should be ready to harvest! They should be about 1-2 inches long.
Harvesting and Storing Your Sprouts
You’ve done it! You’ve successfully grown your own bean sprouts. Now what?
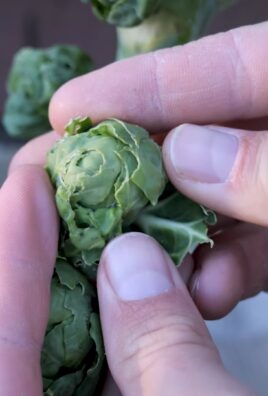
1. Rinse One Last Time: Give your sprouts a final rinse to remove any loose hulls or seed coats.
2. Optional: Green Them Up: If you prefer greener sprouts, you can expose them to indirect sunlight for a few hours before harvesting. This will encourage chlorophyll production and give them a slightly greener hue. Just don’t leave them in direct sunlight, as this can overheat them.
3. Drain Thoroughly: Drain the sprouts very well. Excess moisture is the enemy of fresh sprouts.
4. Store Properly: Store your sprouts in an airtight container lined with a paper towel in the refrigerator. The paper towel will absorb any excess moisture and help keep them fresh.
5. Enjoy Within a Week: Freshly grown bean sprouts are best enjoyed within a week. Use them in salads, stir-fries, sandwiches, or as a crunchy topping for your favorite dishes.
Troubleshooting: Common Sprouting Problems and Solutions
Even with the best intentions, sometimes things don’t go exactly as planned. Here are some common sprouting problems and how to fix them:
* Mold: Mold is usually caused by poor drainage or insufficient rinsing. If you see mold, discard the entire batch and start over. Make sure you’re rinsing and draining the sprouts thoroughly 2-3 times a day. Also, ensure good airflow around the jar.
* Rotting Smell: A rotting smell indicates that the sprouts are decaying. This is usually due to overwatering or poor drainage. Discard the batch and start again, paying close attention to drainage.
* Slow Growth: Slow growth can be caused by several factors, including cold temperatures, old seeds, or insufficient rinsing. Make sure your sprouts are in a warm (but not hot) environment, use fresh seeds, and rinse them regularly.
* Bitter Taste: A bitter taste can sometimes occur if the sprouts are exposed to too much light. Keep them in a dark place during the sprouting process.
* Seed Hulls: Don’t worry too much about seed hulls. They’re perfectly safe to eat. You can try to remove them during the final rinse, but it’s not essential.
Tips and Tricks for Sprouting Success
Here are a few extra tips to help you become a sprouting master:
* Use High-Quality Seeds: The quality of your seeds will directly impact your sprouting success. Choose seeds specifically labeled for sprouting or food use.
* Don’t Overcrowd the Jar: Start with a small amount of seeds. They’ll expand significantly as they sprout.
* Maintain Good Hygiene: Wash your hands and all equipment thoroughly before starting. This helps prevent contamination.
* Experiment with Different Beans: Once you’ve mastered mung bean sprouts, try sprouting other types of beans, lentils, or seeds. Each has its own unique flavor and texture.
* Adjust to Your Climate: Sprouting times may vary depending on your climate. In warmer climates, sprouts may grow faster. In colder climates, they may take a bit longer.
* Keep a Sprouting Journal: Note down what works and what doesn’t. This will help you refine your sprouting technique over time.
Beyond Mung Beans: Exploring Other Sprouting Options
While mung beans are the classic choice, don’t limit yourself! The world of sprouting is vast and full of delicious possibilities. Here are a few other options to try:
* Adzuki Beans: These have a slightly sweeter and nuttier flavor than mung beans.
* Lentils: Lentil sprouts are packed with protein and fiber. They have a slightly earthy flavor.
* Chickpeas: Chickpea sprouts are a bit more challenging to grow, but they’re worth the effort. They have a slightly nutty and savory flavor.
* Broccoli Seeds: Broccoli sprouts are a nutritional powerhouse, packed with antioxidants. They have a slightly spicy flavor.
* Alfalfa Seeds: Alfalfa sprouts are delicate and mild-flavored. They’re a great addition to salads and sandwiches.
* Radish Seeds: Radish sprouts have a peppery and slightly spicy flavor. They’re a great way to add a kick to your meals.
Remember to research the specific sprouting requirements for each type of seed, as they may vary slightly.
Why Sprout? The Benefits of Homegrown Sprouts
Besides being incredibly easy and cost-effective, growing your own bean sprouts offers a ton of health benefits:
* Nutrient-Rich: Sprouts are packed with vitamins, minerals, and enzymes. The sprouting process actually increases the bioavailability of these nutrients, making them easier for your body to absorb.
* Easy to Digest: The sprouting process breaks down complex carbohydrates and proteins, making sprouts easier to digest than mature beans.
* High in Fiber: Sprouts are a good source of fiber, which is essential for digestive health.
* Living Food: Sprouts
Conclusion
So, there you have it! Growing your own bean sprouts at home is not only incredibly easy and cost-effective, but it also provides you with a constant supply of fresh, nutritious sprouts right at your fingertips. Forget those limp, often questionable sprouts from the grocery store. With this simple DIY trick, you’ll be enjoying crisp, flavorful bean sprouts in just a few days.
Why is this a must-try? Because it empowers you to take control of your food source. You know exactly what’s going into your sprouts – no hidden additives, no preservatives, just pure, wholesome goodness. Plus, the satisfaction of watching those tiny seeds transform into vibrant sprouts is surprisingly rewarding. It’s a mini-gardening project that anyone can accomplish, regardless of their green thumb status.
Beyond the basic method, there’s plenty of room for experimentation. Try using different types of beans, such as mung beans (the most common), adzuki beans, or even lentils. Each variety will offer a slightly different flavor and texture profile. You can also adjust the sprouting time to achieve your preferred sprout length. Some people prefer shorter, crunchier sprouts, while others like them a bit longer and more developed.
Consider adding your homemade bean sprouts to stir-fries, salads, sandwiches, or even as a topping for soups and noodle dishes. Their versatility is truly remarkable. They add a delightful crunch and a boost of nutrients to any meal.
Don’t be intimidated by the simplicity of this DIY trick. It’s truly foolproof. Just follow the steps outlined, and you’ll be amazed at how quickly and easily you can grow your own bean sprouts.
We wholeheartedly encourage you to give this a try. It’s a fun, rewarding, and healthy project that the whole family can enjoy. And once you’ve experienced the joy of growing your own bean sprouts, we’re confident you’ll be hooked.
But don’t just take our word for it! Try it out for yourself and see the difference fresh, homemade sprouts can make. We’re eager to hear about your experiences. Share your tips, tricks, and variations in the comments below. Let’s build a community of sprout enthusiasts and spread the word about this fantastic DIY trick. Let us know what beans you used, how long you sprouted them, and what delicious dishes you incorporated them into. Your feedback will help others discover the joys of home-grown bean sprouts and inspire them to embark on their own sprouting adventures. So, get sprouting and share your success stories!
Frequently Asked Questions (FAQ)
What kind of beans can I use for sprouting?
The most common and readily available bean for sprouting is the mung bean. However, you can also successfully sprout adzuki beans, lentils, chickpeas, and even some types of peas. Experiment with different varieties to discover your favorite flavors and textures. Keep in mind that sprouting times may vary depending on the type of bean you use. Always ensure that the beans you choose are specifically intended for sprouting and are not treated with any chemicals or pesticides. Organic beans are always a good choice for sprouting.
How long does it take to grow bean sprouts?
Typically, bean sprouts will be ready to harvest in 3 to 5 days. The exact time will depend on the type of bean, the temperature, and the humidity. Check your sprouts daily and rinse them thoroughly. They are ready when they have a small tail and the bean has started to open.
What if my bean sprouts start to smell bad?
A foul odor is a sign that your bean sprouts are contaminated with bacteria or mold. This is usually due to insufficient rinsing or poor drainage. Discard the sprouts immediately and start a new batch, being extra careful to rinse them thoroughly at least twice a day. Ensure that your sprouting container has adequate drainage to prevent water from pooling.
How do I store bean sprouts?
Once your bean sprouts are ready, rinse them thoroughly and drain them well. Store them in an airtight container lined with a paper towel in the refrigerator. The paper towel will help absorb excess moisture and keep the sprouts fresh for up to a week. Check them daily and discard any that show signs of spoilage.
Can I eat the bean shells?
Yes, the bean shells are perfectly edible. They contain fiber and nutrients. However, some people prefer to remove them for a smoother texture. You can easily remove the shells by gently rubbing the sprouts under running water.
Why are my bean sprouts not growing?
There could be several reasons why your bean sprouts are not growing. First, make sure your beans are viable and specifically intended for sprouting. Old or damaged beans may not germinate. Second, ensure that the beans are kept consistently moist but not waterlogged. Third, the temperature may be too cold. Bean sprouts prefer a warm environment (around 70-75°F). Finally, make sure the beans are not exposed to direct sunlight, which can inhibit growth.
Do I need to use special equipment to grow bean sprouts?
No, you don’t need any special equipment. A simple jar, a sprouting lid or cheesecloth, and a rubber band are all you need to get started. You can also purchase specialized sprouting containers, but they are not necessary. The key is to have a container that allows for good drainage and ventilation.
Are bean sprouts safe to eat raw?
While bean sprouts are often eaten raw, there is a small risk of foodborne illness associated with consuming raw sprouts. To minimize this risk, purchase your beans from a reputable source, rinse them thoroughly before sprouting, and maintain good hygiene throughout the sprouting process. If you are concerned about food safety, you can lightly cook the sprouts before eating them.
Can I grow bean sprouts in soil?
While it’s possible to grow bean sprouts in soil, it’s not the traditional or most efficient method. Sprouting in a jar or container with just water is much simpler and faster. Soil can introduce additional variables and potential for contamination.
What are the nutritional benefits of bean sprouts?
Bean sprouts are a good source of vitamins, minerals, and fiber. They are low in calories and fat and contain antioxidants. They are particularly rich in vitamin C, vitamin K, and folate. Adding bean sprouts to your diet can contribute to overall health and well-being.
Leave a Comment