
Malabar Spinach Growing Tips: Unlock the secrets to cultivating this vibrant, leafy green right in your own backyard! Have you ever dreamt of stepping outside and harvesting fresh, nutritious spinach for your dinner, but felt intimidated by the thought of gardening? Well, dream no more! This guide is packed with simple, effective DIY tricks that will transform even the most novice gardener into a Malabar Spinach pro.
Malabar Spinach, also known as Ceylon Spinach or vine spinach, isn’t actually a true spinach, but its delicious flavor and impressive nutritional profile have made it a beloved vegetable in Asian and African cuisines for centuries. Imagine adding its slightly peppery, citrusy leaves to your stir-fries, soups, or salads – all grown with your own two hands!
Why do you need these Malabar Spinach Growing Tips? Because store-bought greens simply can’t compare to the freshness and satisfaction of harvesting your own. Plus, growing your own food is a fantastic way to connect with nature, reduce your carbon footprint, and save money. I’m going to share my favorite DIY hacks for everything from seed starting to pest control, ensuring you have a thriving Malabar Spinach patch in no time. Let’s get growing!
Growing Malabar Spinach: A Beginner’s Guide to This Climbing Green
Hey there, fellow gardening enthusiasts! I’m so excited to share my experience with growing Malabar spinach. This isn’t your typical spinach; it’s a heat-loving vine that thrives in warm weather and offers a slightly tangy, earthy flavor. If you’re looking for a spinach alternative that can handle the summer heat, or just want to add a unique climbing plant to your garden, Malabar spinach is definitely worth a try. Let’s dive into how you can successfully grow this delicious and beautiful plant.
What You’ll Need
Before we get started, let’s gather everything you’ll need. This will make the whole process smoother and more enjoyable.
* Malabar Spinach Seeds or Seedlings: You can find these online or at your local nursery. Seeds need a little extra prep, which we’ll cover.
* Potting Mix (if starting indoors) or Garden Soil: Choose a well-draining mix. For the garden, amend your soil with compost for added nutrients.
* Pots (if starting indoors): Small pots, about 3-4 inches in diameter, are perfect for starting seeds.
* Trowel or Garden Shovel: For planting and transplanting.
* Watering Can or Hose: For keeping your plants hydrated.
* Trellis or Support Structure: Malabar spinach is a vine, so it needs something to climb on. A trellis, fence, or even a sturdy tomato cage will work.
* Compost or Organic Fertilizer: To enrich the soil and provide nutrients.
* Gardening Gloves: To keep your hands clean and protected.
* Optional: Seed Starting Tray with Dome: This helps maintain humidity for better germination.
Starting from Seeds vs. Seedlings
You have two main options for starting your Malabar spinach journey: seeds or seedlings. Each has its pros and cons.
* Seeds: Starting from seeds is more economical, but it requires a bit more patience and effort. Malabar spinach seeds have a hard outer shell, so they need scarification (scratching the surface) and soaking to improve germination rates.
* Seedlings: Buying seedlings is faster and easier, but it can be more expensive. You’ll skip the germination process and get a head start on growing.
Starting Malabar Spinach from Seeds: A Step-by-Step Guide
If you’re like me and enjoy the satisfaction of watching a plant grow from a tiny seed, then starting from seeds is the way to go! Here’s how I do it:
Seed Preparation (Scarification and Soaking)
1. Scarify the Seeds: Gently rub the seeds with sandpaper or nick them with a knife. Be careful not to damage the inside of the seed. The goal is to weaken the outer shell to allow water to penetrate.
2. Soak the Seeds: Place the scarified seeds in a bowl of warm water and let them soak for 24-48 hours. This will further soften the seed coat and encourage germination. Change the water every 12 hours.
Sowing the Seeds
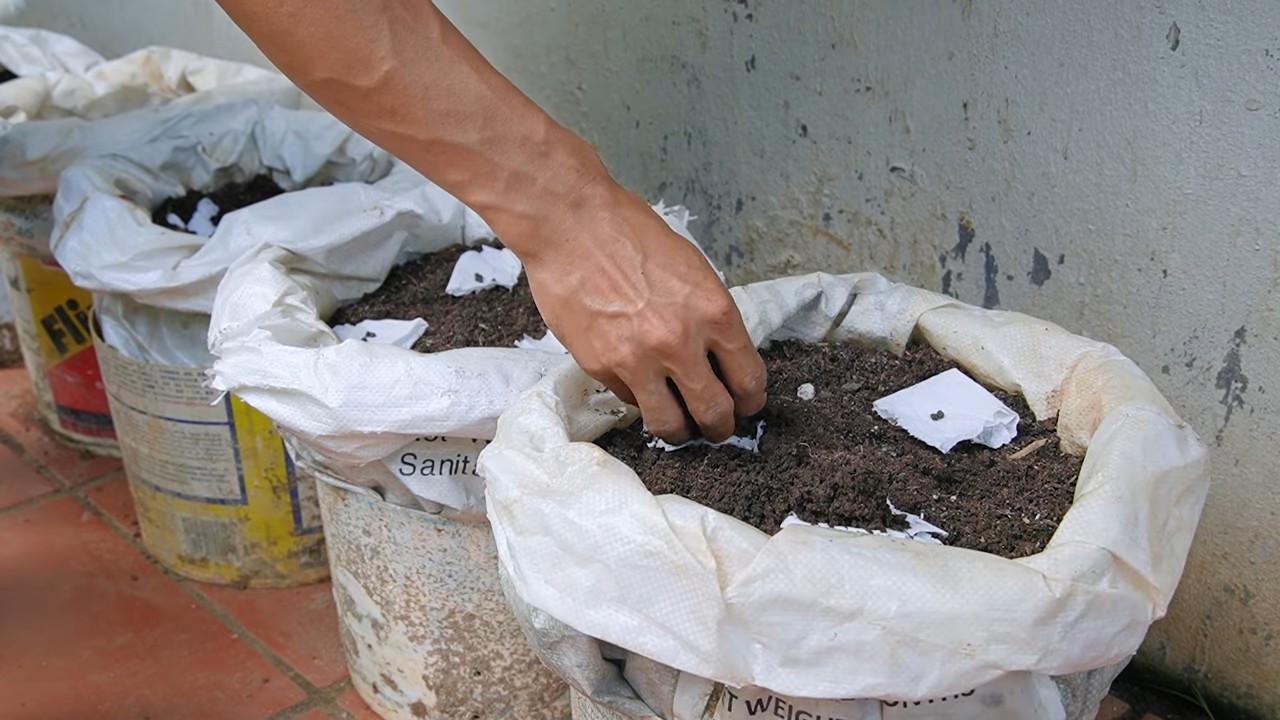
1. Prepare Your Pots: Fill your small pots with a good quality potting mix. Moisten the soil before planting.
2. Plant the Seeds: Make a small hole (about 1/2 inch deep) in the center of each pot. Place 2-3 seeds in each hole. This increases your chances of at least one seed germinating.
3. Cover the Seeds: Gently cover the seeds with soil and lightly pat it down.
4. Water Gently: Water the pots gently to avoid disturbing the seeds. Use a spray bottle or a watering can with a rose attachment.
5. Provide Warmth and Humidity: Place the pots in a warm location (around 70-80°F). A seed starting tray with a dome can help maintain humidity. If you don’t have a dome, you can cover the pots with plastic wrap.
6. Wait for Germination: Germination can take anywhere from 7-21 days, so be patient. Keep the soil consistently moist but not waterlogged.
Caring for Seedlings
1. Provide Light: Once the seedlings emerge, they need plenty of light. Place them under grow lights or in a sunny window. If using a window, rotate the pots regularly to prevent the seedlings from leaning towards the light.
2. Thin the Seedlings: Once the seedlings have a few sets of true leaves, thin them out by snipping off the weaker seedlings at the soil level. Leave only the strongest seedling in each pot.
3. Water Regularly: Keep the soil consistently moist, but avoid overwatering.
4. Harden Off the Seedlings: Before transplanting the seedlings outdoors, you need to harden them off. This means gradually exposing them to outdoor conditions over a period of 7-10 days. Start by placing them in a sheltered spot outdoors for a few hours each day, gradually increasing the amount of time they spend outside.
Transplanting Seedlings or Planting Store-Bought Seedlings
Whether you’ve grown your own seedlings or purchased them from a nursery, the transplanting process is the same.
1. Choose a Sunny Location: Malabar spinach needs at least 6 hours of sunlight per day.
2. Prepare the Soil: Amend your garden soil with compost or well-rotted manure. This will improve drainage and provide nutrients.
3. Dig a Hole: Dig a hole that is slightly larger than the root ball of the seedling.
4. Gently Remove the Seedling: Carefully remove the seedling from its pot, being careful not to damage the roots. Gently loosen the roots if they are tightly bound.
5. Plant the Seedling: Place the seedling in the hole and backfill with soil. Gently pat the soil around the base of the plant.
6. Water Thoroughly: Water the seedling thoroughly after planting.
7. Add Support: Install a trellis, fence, or other support structure near the plant. Malabar spinach is a vine and needs something to climb on.
Caring for Your Malabar Spinach Plant
Once your Malabar spinach is planted, it’s relatively easy to care for. Here are some tips to keep your plant healthy and productive:
* Watering: Water regularly, especially during hot, dry weather. Malabar spinach prefers consistently moist soil.
* Fertilizing: Fertilize every 2-3 weeks with a balanced organic fertilizer or compost tea.
* Mulching: Apply a layer of mulch around the base of the plant to help retain moisture, suppress weeds, and regulate soil temperature.
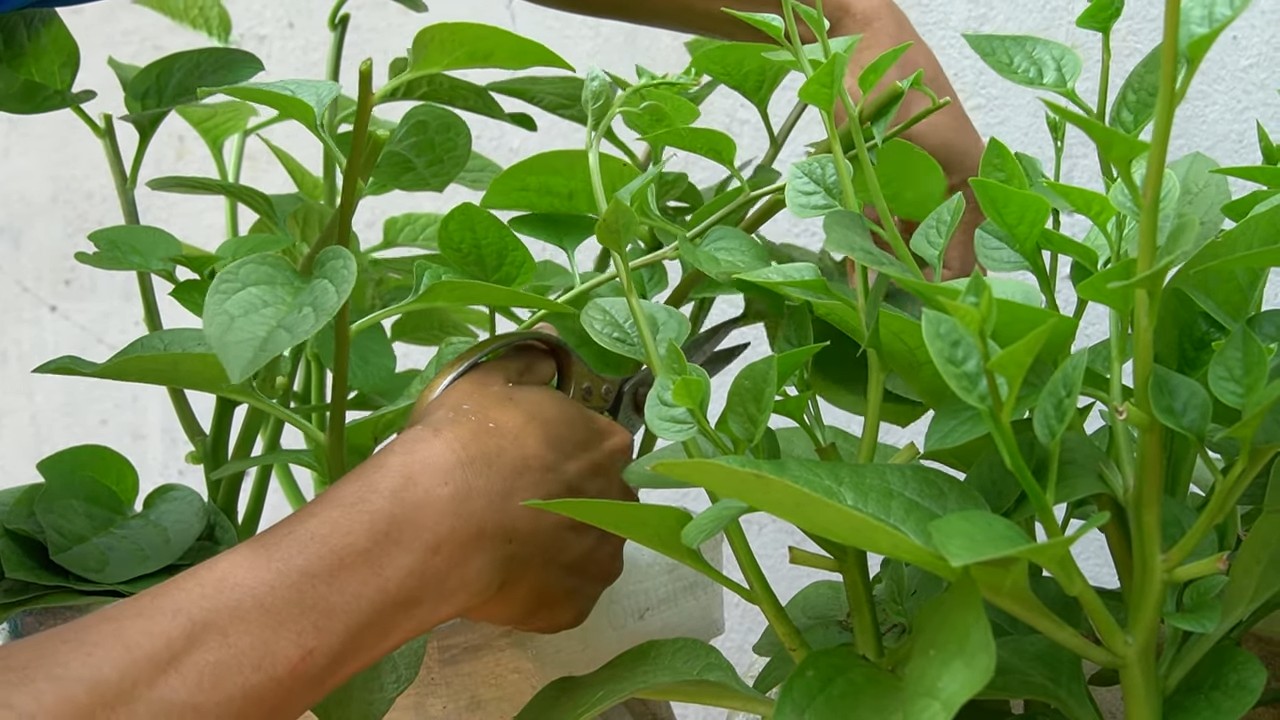
* Pruning: Prune the plant regularly to encourage branching and bushier growth. You can also prune to control its size and shape.
* Pest and Disease Control: Malabar spinach is relatively pest and disease resistant. However, keep an eye out for aphids, spider mites, and fungal diseases. Treat any problems promptly with organic pest control methods.
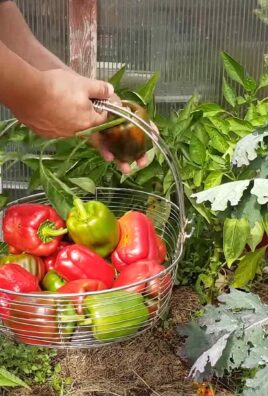
Harvesting Malabar Spinach
One of the best parts of growing Malabar spinach is harvesting the delicious leaves!
* When to Harvest: You can start harvesting leaves as soon as the plant is large enough, usually about 6-8 weeks after planting.
* How to Harvest: Simply snip off the leaves and stems with scissors or pruning shears. Harvest regularly to encourage continued growth.
* Storage: Freshly harvested Malabar spinach leaves can be stored in the refrigerator for several days.
Troubleshooting Common Problems
Even with the best care, you might encounter some problems while growing Malabar spinach. Here are some common issues and how to address them:
* Slow Growth: If your plant is growing slowly, it could be due to lack of sunlight, poor soil, or insufficient watering. Make sure your plant is getting enough sunlight, amend the soil with compost, and water regularly.
* Yellowing Leaves: Yellowing leaves can be a sign of overwatering, nutrient deficiency, or disease. Check the soil moisture and adjust your watering accordingly. Fertilize with a balanced organic fertilizer.
* Pest Infestations: If you notice pests on your plant, such as aphids or spider mites, treat them with insecticidal soap or neem oil.
* Fungal Diseases: Fungal diseases can be caused by excessive moisture and poor air circulation. Improve air circulation by pruning the plant and avoid overwatering. Treat with a fungicide if necessary.
Enjoying Your Harvest
Now that you’ve successfully grown and harvested your Malabar spinach, it’s time to enjoy the fruits (or rather, leaves!) of your labor. Malabar spinach can be used in a variety of dishes, just like regular spinach.
* Raw: The young, tender leaves can be eaten raw in salads.
* Cooked: Malabar spinach can be steamed, sautéed, or added to soups and stews. It
Conclusion
So, there you have it! Mastering the art of growing Malabar spinach doesn’t require a green thumb blessed by the gardening gods. It’s about understanding the plant’s needs, providing the right environment, and employing a few simple, yet effective, techniques. We’ve covered everything from seed germination to harvesting, ensuring you have all the knowledge you need to cultivate a thriving Malabar spinach patch right in your own backyard.
But why should you bother with this delightful leafy green? Beyond its vibrant color and unique, slightly citrusy flavor, Malabar spinach offers a wealth of nutritional benefits. It’s packed with vitamins A and C, iron, and calcium, making it a powerhouse addition to your diet. Plus, unlike traditional spinach, it thrives in warm weather, providing a continuous harvest throughout the summer months when other greens are struggling.
Think of the possibilities! You can toss it into salads for a refreshing crunch, stir-fry it with garlic and ginger for a quick and healthy side dish, or even add it to soups and stews for a boost of nutrients and flavor. And if you’re feeling adventurous, why not try pickling the stems for a tangy condiment?
Don’t be afraid to experiment with different growing methods. While we’ve outlined the basics, there’s always room for customization. Try different soil mixes to see what works best in your area. Experiment with different trellising systems to maximize your vertical space. And don’t hesitate to adjust your watering schedule based on the weather conditions.
Consider these variations to elevate your Malabar spinach growing experience:
* Vertical Gardening: Malabar spinach is a natural climber, making it perfect for vertical gardens. Use trellises, fences, or even repurposed pallets to create a stunning green wall. This not only saves space but also improves air circulation around the plants.
* Container Gardening: If you’re short on space, you can easily grow Malabar spinach in containers. Choose a large pot with good drainage and use a high-quality potting mix. Be sure to provide adequate support for the vines as they grow.
* Companion Planting: Enhance your Malabar spinach’s growth by planting it alongside beneficial companions like basil, marigolds, and nasturtiums. These plants can help deter pests and attract pollinators.
* Seed Saving: Once your Malabar spinach plants mature, you can collect the seeds for future planting. Allow the berries to dry on the vine, then harvest them and store them in a cool, dry place. This is a great way to ensure a continuous supply of seeds for years to come.
Growing Malabar spinach is a rewarding experience that connects you with nature and provides you with a delicious and nutritious food source. It’s a sustainable and eco-friendly way to add fresh greens to your diet, and it’s a skill that you can pass down to future generations.
So, what are you waiting for? Grab some seeds or cuttings, prepare your garden bed or containers, and get ready to embark on your Malabar spinach growing journey. We’re confident that you’ll be amazed by the results.
And most importantly, we want to hear about your experiences! Share your tips, tricks, and successes in the comments below. Let’s create a community of Malabar spinach enthusiasts and learn from each other. Happy gardening!
Frequently Asked Questions (FAQ)
What is the best time of year to plant Malabar spinach?
Malabar spinach thrives in warm weather, so the best time to plant it is in late spring or early summer, after the last frost has passed. The soil temperature should be at least 65°F (18°C) for optimal germination. If you live in a colder climate, you can start the seeds indoors 4-6 weeks before the last frost and transplant them outdoors once the weather warms up.
How much sunlight does Malabar spinach need?
Malabar spinach requires at least 6 hours of direct sunlight per day to grow well. Choose a location in your garden that receives plenty of sunlight throughout the day. If you’re growing it in containers, make sure to place them in a sunny spot.
What type of soil is best for Malabar spinach?
Malabar spinach prefers well-drained soil that is rich in organic matter. Amend your soil with compost or well-rotted manure before planting to improve its fertility and drainage. A slightly acidic to neutral pH (6.0-7.0) is ideal.
How often should I water Malabar spinach?
Malabar spinach needs consistent moisture to thrive, especially during hot weather. Water deeply whenever the top inch of soil feels dry to the touch. Avoid overwatering, as this can lead to root rot. Mulching around the plants can help retain moisture in the soil.
Does Malabar spinach need fertilizer?
Yes, Malabar spinach benefits from regular fertilization. Apply a balanced fertilizer every 2-3 weeks during the growing season. You can also use organic fertilizers like compost tea or fish emulsion. Avoid over-fertilizing, as this can lead to excessive foliage growth at the expense of flavor.
How do I harvest Malabar spinach?
You can start harvesting Malabar spinach leaves as soon as the plants are large enough, usually about 6-8 weeks after planting. Harvest the young, tender leaves and stems regularly to encourage continued growth. You can also harvest the entire vine by cutting it back to a few inches above the ground. The plant will regrow quickly.
How do I control pests and diseases on Malabar spinach?
Malabar spinach is generally resistant to pests and diseases, but it can occasionally be affected by aphids, spider mites, or fungal diseases. Inspect your plants regularly and take action promptly if you notice any problems. You can control aphids and spider mites with insecticidal soap or neem oil. Prevent fungal diseases by providing good air circulation and avoiding overwatering.
Can I grow Malabar spinach indoors?
Yes, you can grow Malabar spinach indoors, but it requires a lot of light. Place the plants near a sunny window or use grow lights to provide adequate illumination. Make sure to provide support for the vines as they grow.
Is Malabar spinach the same as regular spinach?
No, Malabar spinach is not the same as regular spinach. It is a different species (Basella alba) and belongs to the Basellaceae family, while regular spinach (Spinacia oleracea) belongs to the Amaranthaceae family. Malabar spinach is more heat-tolerant than regular spinach and has a slightly different flavor and texture.
How do I save seeds from Malabar spinach?
To save seeds from Malabar spinach, allow the berries to mature on the vine until they turn dark purple or black. Harvest the berries and remove the seeds. Spread the seeds out on a tray to dry completely. Once dry, store the seeds in an airtight container in a cool, dry place.

Leave a Comment