
Grow Kailan for Bigger Harvest: Unlock the secrets to a bountiful garden! Have you ever dreamt of harvesting kailan so lush and abundant, it rivals what you find at the market? I know I have! For centuries, kailan, also known as Chinese kale, has been a staple in Asian cuisine, prized for its nutritional value and delicious flavor. From stir-fries to steamed dishes, this leafy green is incredibly versatile. But let’s be honest, sometimes growing it can be a bit…challenging.
That’s where these DIY tricks and hacks come in! Many gardeners struggle with achieving that perfect, robust kailan harvest. Pests, nutrient deficiencies, and improper watering can all lead to disappointing results. But fear not! I’m here to share my tried-and-true methods for maximizing your yield and ensuring you grow kailan for bigger harvest than you ever thought possible.
This isn’t just about gardening; it’s about connecting with nature, enjoying fresh, homegrown food, and saving money at the grocery store. So, grab your gardening gloves, and let’s dive into these simple yet effective techniques that will transform your kailan growing experience. Get ready to impress your friends and family with your impressive harvest!
Grow Kailan for a Bigger Harvest: My DIY Guide
Hey there, fellow gardening enthusiasts! I’m so excited to share my tried-and-true methods for getting a bumper crop of kailan. Kailan, also known as Chinese kale, is a delicious and nutritious leafy green that’s surprisingly easy to grow. I’ve learned a few tricks over the years, and I’m confident that by following these steps, you’ll be enjoying a kailan harvest that’s the envy of the neighborhood!
Choosing the Right Kailan Variety
Before we dive into the nitty-gritty, let’s talk about kailan varieties. While most kailan looks pretty similar, there are subtle differences that can affect your yield and taste.
* Consider your climate: Some varieties are more heat-tolerant than others. If you live in a warmer region, look for varieties specifically bred for those conditions.
* Think about size: Some kailan varieties grow larger than others. If you have limited space, opt for a compact variety.
* Taste preferences: Some kailan varieties have a slightly sweeter or more bitter flavor than others. Experiment to find your favorite!
I personally love the ‘Green Lance’ variety because it’s relatively compact, produces a good yield, and has a mild, slightly sweet flavor. But feel free to explore and find what works best for you!
Preparing Your Soil for Kailan Success
Kailan thrives in rich, well-draining soil. Here’s how I prepare my soil to give my kailan plants the best possible start:
* Soil Testing: Before you do anything, it’s a good idea to test your soil’s pH. Kailan prefers a slightly acidic to neutral pH of around 6.0 to 7.0. You can buy a soil testing kit at most garden centers.
* Amending the Soil: If your soil is lacking in nutrients or doesn’t drain well, you’ll need to amend it.
* Compost: This is my go-to amendment! Compost adds organic matter, improves drainage, and provides essential nutrients. I usually add a generous layer of compost (about 2-3 inches) to my garden bed.
* Well-rotted manure: This is another excellent source of nutrients. Make sure it’s well-rotted to avoid burning your plants.
* Other organic matter: You can also use other organic matter like shredded leaves, grass clippings (untreated), or aged sawdust.
* Improving Drainage: If your soil is heavy clay, it’s important to improve drainage. You can do this by adding sand or perlite to the soil.
* Tilling or Turning the Soil: Once you’ve added your amendments, till or turn the soil to incorporate them thoroughly. This will create a loose, well-aerated soil that’s perfect for kailan.
Sowing Kailan Seeds: Starting Strong
You can start kailan seeds indoors or directly sow them in your garden. I prefer starting them indoors because it gives them a head start and protects them from pests.
* Starting Seeds Indoors:
1. Choose your containers: I like to use seed trays or small pots. Make sure they have drainage holes.
2. Fill with seed-starting mix: Use a high-quality seed-starting mix that’s lightweight and well-draining.
3. Sow the seeds: Sow the seeds about 1/4 inch deep.
4. Water gently: Water the seeds gently to moisten the soil.
5. Provide warmth and light: Place the seed trays in a warm location (around 70-75°F) and provide plenty of light. You can use a grow light or place them near a sunny window.
6. Keep the soil moist: Keep the soil consistently moist, but not soggy.
7. Transplant seedlings: Once the seedlings have developed a few true leaves (usually after 4-6 weeks), they’re ready to be transplanted into your garden.
* Direct Sowing:
1. Prepare the soil: Make sure the soil is well-prepared as described above.
2. Sow the seeds: Sow the seeds about 1/2 inch deep and 1-2 inches apart.
3. Water gently: Water the seeds gently to moisten the soil.
4. Thin seedlings: Once the seedlings emerge, thin them to about 6-12 inches apart.
Transplanting Kailan Seedlings: Giving Them Space to Grow
Transplanting is a crucial step in getting a bigger harvest. Here’s how I do it:
1. Harden off the seedlings: Before transplanting, you need to harden off the seedlings. This means gradually exposing them to outdoor conditions over a period of about a week. Start by placing them outside for a few hours each day, gradually increasing the amount of time they spend outdoors.
2. Choose a cloudy day: Transplanting on a cloudy day will help prevent the seedlings from getting stressed.
3. Dig holes: Dig holes that are slightly larger than the root balls of the seedlings. Space the holes 12-18 inches apart.
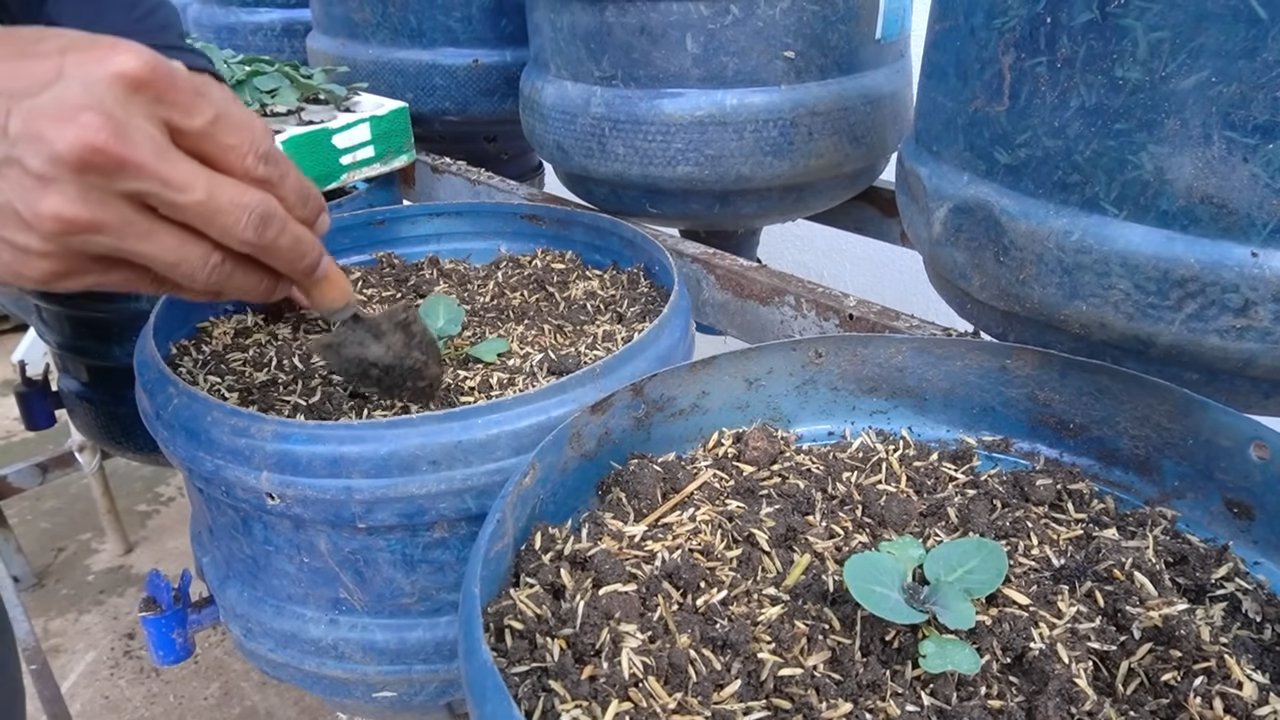
4. Gently remove the seedlings: Gently remove the seedlings from their containers, being careful not to damage the roots.
5. Place the seedlings in the holes: Place the seedlings in the holes and backfill with soil.
6. Water thoroughly: Water the seedlings thoroughly after transplanting.
Caring for Your Kailan Plants: The Key to a Bountiful Harvest
Once your kailan plants are in the ground, it’s important to provide them with the care they need to thrive.
* Watering: Kailan needs consistent moisture, especially during hot weather. Water deeply whenever the top inch of soil feels dry.
* Fertilizing: Kailan is a heavy feeder, so it’s important to fertilize regularly. I like to use a balanced organic fertilizer every 2-3 weeks. You can also side-dress with compost or well-rotted manure.
* Weeding: Keep the area around your kailan plants free of weeds. Weeds compete with kailan for nutrients and water.
* Pest Control: Kailan can be susceptible to pests like aphids, cabbage worms, and flea beetles.
* Aphids: You can control aphids by spraying them with a strong stream of water or by using insecticidal soap.
* Cabbage worms: Cabbage worms can be handpicked or controlled with Bacillus thuringiensis (Bt).
* Flea beetles: Flea beetles can be controlled with row covers or by spraying with neem oil.
* Mulching: Mulching helps to retain moisture, suppress weeds, and regulate soil temperature. I like to use straw or shredded leaves as mulch.
Harvesting Your Kailan: Enjoying the Fruits (or Leaves!) of Your Labor
You can start harvesting kailan leaves when they are about 6-8 inches long.
* Harvesting Technique:
1. Cut the outer leaves: Use a sharp knife or scissors to cut the outer leaves, leaving the inner leaves to continue growing.
2. Harvest regularly: Harvest regularly to encourage continued production.
3. Don’t take too much: Avoid harvesting more than one-third of the plant at a time.
* Extending the Harvest:
* Succession planting: Plant new kailan seeds every few weeks to ensure a continuous harvest.
* Cold frames or row covers: Use cold frames or row covers to protect your kailan plants from frost and extend the growing season.
Boosting Your Kailan Harvest: My Secret Tips
Here are a few extra tips that I’ve found helpful for getting an even bigger kailan harvest:
* Pinch off flower buds: Kailan will eventually bolt (produce flowers), which will make the leaves bitter. To prevent bolting, pinch off any flower buds as soon as you see them.
* Provide shade during hot weather: Kailan can get stressed in hot weather. Provide shade during the hottest part of the day to help keep your plants healthy.
* Companion planting: Plant kailan with companion plants like dill, chamomile, and rosemary. These plants can help to attract beneficial insects and repel pests.
Troubleshooting Common Kailan Problems
Even with the best care, you might encounter some problems with your kailan plants. Here are a few common issues and how to address them:
* Yellowing leaves: This could be a sign of nutrient deficiency, overwatering, or underwatering. Check your soil and adjust your watering and fertilizing accordingly.
* Holes in leaves: This is usually caused by pests like cabbage worms or
Conclusion
So, there you have it! Mastering this simple yet effective DIY trick for growing kailan is a game-changer for any home gardener, whether you’re a seasoned pro or just starting out. We’ve walked you through the process, highlighting how this method can significantly boost your harvest, resulting in larger, more vibrant, and ultimately, more delicious kailan leaves.
Why is this a must-try? Because it addresses the core needs of kailan plants: consistent moisture, nutrient availability, and protection from common pests. By implementing this DIY approach, you’re not just growing kailan; you’re cultivating a thriving ecosystem that supports robust growth and maximizes yield. Imagine the satisfaction of harvesting basketfuls of fresh, homegrown kailan, knowing you achieved it with a simple, cost-effective technique.
But the beauty of gardening lies in experimentation! Feel free to adapt this method to suit your specific environment and preferences. For instance, if you live in a particularly hot climate, consider using a thicker layer of mulch to retain even more moisture. You could also experiment with different types of organic fertilizers, such as compost tea or worm castings, to further enrich the soil. Another variation could involve companion planting. Consider planting marigolds around your kailan to deter pests naturally, or basil to attract beneficial insects.
Don’t be afraid to get creative and tailor this DIY trick to your unique gardening style. The key is to observe your plants closely and adjust your approach as needed. Remember, gardening is a journey of learning and discovery, and every experiment, successful or not, brings you one step closer to becoming a more skilled and knowledgeable gardener.
We are confident that this DIY trick will transform your kailan growing experience. It’s easy to implement, cost-effective, and yields impressive results. So, what are you waiting for? Give it a try and witness the difference for yourself!
We’re eager to hear about your experiences! Share your results, tips, and variations in the comments below. Let’s create a community of kailan enthusiasts who are passionate about growing their own fresh, healthy produce. Your insights could inspire others and contribute to a wealth of knowledge that benefits all. Happy gardening, and may your kailan harvest be bountiful! Remember, growing kailan doesn’t have to be complicated. With a little ingenuity and this simple DIY trick, you can enjoy a continuous supply of fresh, delicious greens right from your own backyard.
Frequently Asked Questions (FAQ)
What exactly is kailan, and why should I grow it?
Kailan, also known as Chinese kale or Chinese broccoli, is a leafy green vegetable similar to broccoli but with larger, flatter leaves and thicker stems. It’s incredibly nutritious, packed with vitamins A, C, and K, as well as fiber and antioxidants. Growing your own kailan ensures you have access to fresh, healthy greens that are free from pesticides and other harmful chemicals. Plus, it’s a rewarding experience to nurture a plant from seed to harvest!
Is this DIY trick suitable for all climates?
While this DIY trick is generally effective in most climates, you may need to make adjustments based on your specific conditions. In hotter climates, ensure you provide adequate shade during the hottest part of the day and use a thicker layer of mulch to retain moisture. In colder climates, you may need to protect your kailan plants from frost by covering them with a frost blanket or moving them indoors. Monitor your plants closely and adjust your watering and fertilization schedule accordingly.
What type of soil is best for growing kailan?
Kailan thrives in well-draining, fertile soil that is rich in organic matter. Aim for a soil pH between 6.0 and 7.5. Before planting, amend your soil with compost, aged manure, or other organic materials to improve its structure and fertility. If your soil is heavy clay, consider adding sand or perlite to improve drainage.
How often should I water my kailan plants?
Kailan requires consistent moisture to thrive. Water deeply and regularly, especially during dry periods. Aim to keep the soil consistently moist but not waterlogged. Check the soil moisture level regularly by sticking your finger into the soil. If the top inch feels dry, it’s time to water. The DIY trick helps retain moisture, but you still need to monitor and water as needed.
What kind of fertilizer should I use for kailan?
Kailan is a heavy feeder, so it benefits from regular fertilization. Use a balanced organic fertilizer or a fertilizer specifically formulated for leafy greens. Apply fertilizer according to the package instructions, typically every 2-3 weeks. You can also supplement with compost tea or worm castings to provide additional nutrients.
How do I protect my kailan plants from pests?
Common pests that affect kailan include aphids, cabbage worms, and flea beetles. To protect your plants, consider using row covers to prevent pests from accessing them. You can also handpick pests off the plants or use organic pest control methods such as insecticidal soap or neem oil. Companion planting with marigolds or basil can also help deter pests.
When is the best time to harvest kailan?
You can start harvesting kailan leaves when they are about 6-8 inches long. Harvest the outer leaves first, leaving the inner leaves to continue growing. This will encourage the plant to produce more leaves. You can harvest kailan continuously throughout the growing season.
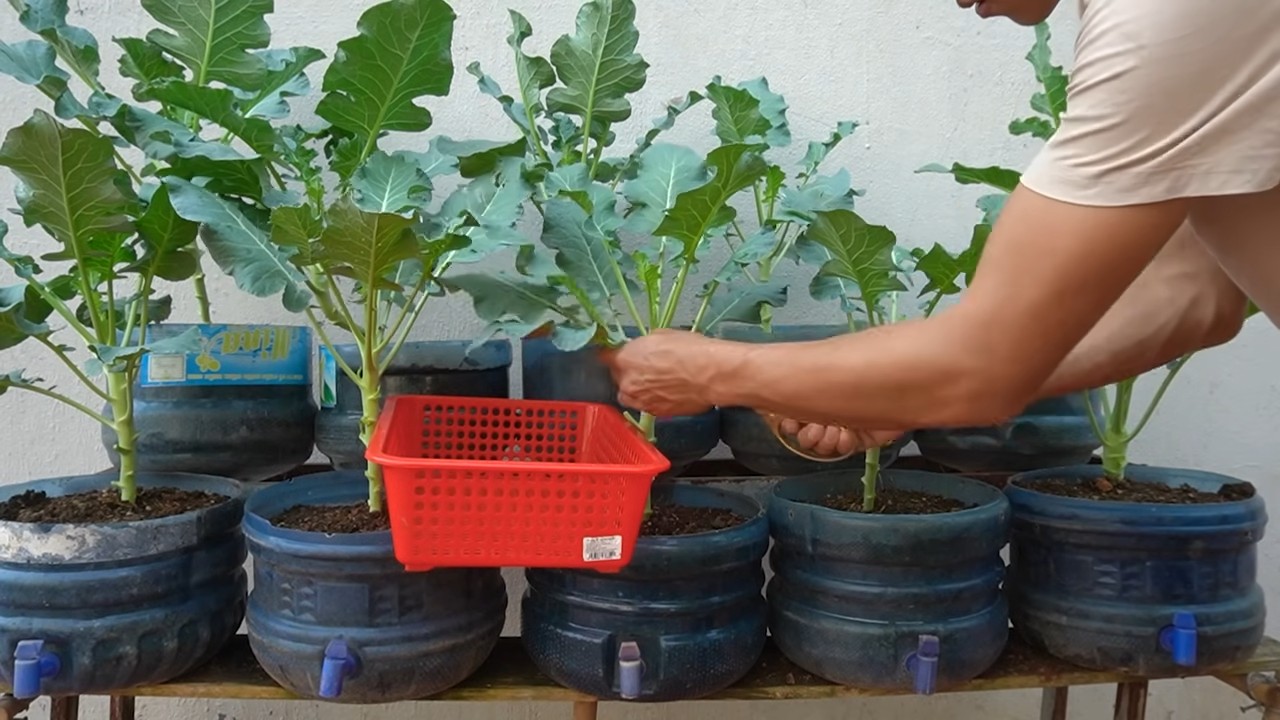
Can I grow kailan in containers?
Yes, kailan can be successfully grown in containers. Choose a container that is at least 12 inches deep and wide to provide enough room for the roots to grow. Use a well-draining potting mix and follow the same watering and fertilization guidelines as for plants grown in the ground.
How do I store harvested kailan?
To store harvested kailan, wash the leaves thoroughly and pat them dry. Wrap them in a damp paper towel and store them in a plastic bag in the refrigerator. Kailan can be stored for up to a week.
What are some ways to use kailan in cooking?
Kailan is a versatile vegetable that can be used in a variety of dishes. It can be steamed, stir-fried, sautéed, or added to soups and stews. It’s also delicious in salads or as a side dish. Try it with garlic, ginger, soy sauce, or oyster sauce for a flavorful meal.
What if my kailan plants are bolting (going to seed)?
Bolting is when a plant prematurely flowers and goes to seed, often due to stress from heat or lack of water. Once a plant bolts, the leaves can become bitter. To prevent bolting, ensure your kailan plants receive adequate water and shade during hot weather. If your plants do bolt, you can still harvest the leaves, but they may not be as palatable.
Can I save seeds from my kailan plants?
Yes, you can save seeds from your kailan plants, but it requires allowing the plant to bolt and produce seed pods. Once the seed pods are dry and brown, you can harvest them and extract the seeds. Store the seeds in a cool, dry place for future planting. However, be aware that kailan can cross-pollinate with other members of the Brassica family, so the seeds may not be true to type.
How does this DIY trick specifically help with growing kailan?
This DIY trick focuses on creating an optimal growing environment for kailan. By improving soil moisture retention, providing consistent nutrient availability, and offering some protection from pests, it addresses the key challenges in growing healthy and productive kailan plants. The result is a bigger, better harvest with minimal effort. It’s a simple and effective way to maximize your kailan growing potential.

Leave a Comment