
Grow More Melons than you ever thought possible, right in your own backyard! Imagine biting into a juicy, sun-ripened watermelon, cantaloupe, or honeydew, bursting with flavor that no store-bought melon can ever match. Sounds dreamy, right? Well, it doesn’t have to be just a dream! This DIY guide is packed with simple yet effective tricks to help you maximize your melon harvest, even if you’re a beginner gardener.
Melons have a rich history, cultivated for centuries across various cultures. From ancient Egypt, where watermelons were found in tombs, to the vibrant markets of Asia, melons have always been a symbol of abundance and sweetness. But growing them successfully can sometimes feel like a challenge. That’s where these DIY hacks come in!
Let’s face it, we all want the most from our gardens. Who wouldn’t want to grow more melons with less effort? These tricks address common issues like pollination problems, space constraints, and nutrient deficiencies, ensuring you get a bumper crop of delicious melons. I’m excited to share these secrets with you, so you can enjoy the satisfaction of harvesting your own homegrown goodness. Get ready to transform your garden into a melon paradise!
DIY: Supercharge Your Melon Patch for a Bumper Crop!
Okay, melon lovers, let’s talk about getting serious about our melon game! I’m going to walk you through my tried-and-true methods for coaxing the biggest, juiciest, most flavorful melons you’ve ever tasted right out of your own backyard. This isn’t just about planting seeds and hoping for the best; this is about creating the *perfect* environment for your melons to thrive. Get ready to roll up your sleeves and get your hands dirty!
Understanding Melon Needs: The Foundation for Success
Before we dive into the nitty-gritty, let’s quickly cover what melons *really* need to flourish. Think of it like this: happy melons = happy gardener!
* Sunlight: Melons are sun worshippers. They need at least 6-8 hours of direct sunlight per day. The more, the merrier!
* Warmth: These guys are heat-loving plants. Soil temperatures need to be consistently warm (around 70°F or higher) for optimal growth.
* Well-Drained Soil: Melons hate soggy feet! They need soil that drains well to prevent root rot.
* Rich Soil: Melons are heavy feeders. They need soil that’s rich in organic matter and nutrients.
* Consistent Watering: Consistent moisture is key, especially during fruit development.
* Pollination: Melons need to be pollinated to produce fruit. We’ll talk about how to help them out if needed.
* Air Circulation: Good air circulation helps prevent fungal diseases.
Phase 1: Soil Preparation – Laying the Groundwork for Melon Magic
This is arguably the most important step. You can’t expect amazing melons from poor soil. I’m a firm believer in starting strong!
1. Choose Your Location Wisely: Select a spot in your garden that gets plenty of sunshine and has good drainage. Observe the area throughout the day to ensure it receives at least 6 hours of direct sunlight. If your garden soil is heavy clay, consider raised beds or amending the soil extensively.
2. Soil Testing (Optional, but Recommended): A soil test can tell you the pH level and nutrient content of your soil. This will help you determine what amendments you need to add. You can purchase a soil test kit at most garden centers or send a sample to your local agricultural extension office. I usually skip this step if I know my soil is generally healthy, but it’s a great idea if you’re unsure.
3. Amend the Soil: This is where the magic happens! Melons love soil that’s rich in organic matter. Here’s my go-to recipe:
* Compost: Add a generous amount of compost to the soil. This will improve drainage, add nutrients, and help retain moisture. I usually aim for a 2-3 inch layer.
* Well-Rotted Manure: If you have access to well-rotted manure (cow, horse, or chicken), incorporate it into the soil. Manure is a fantastic source of nutrients. Be sure it’s well-rotted to avoid burning the plants.
* Bone Meal: Bone meal is a great source of phosphorus, which is essential for root development and fruit production. Follow the instructions on the package for application rates.
* Potassium: Melons love potassium. Wood ash is a good source, but be careful not to add too much, as it can raise the soil pH. You can also use a potassium-rich fertilizer.
* Epsom Salts: A little Epsom salt (magnesium sulfate) can help improve nutrient uptake. Add about a tablespoon per plant.
4. Till or Dig: Thoroughly till or dig the soil to a depth of at least 12 inches, incorporating the amendments as you go. This will loosen the soil and make it easier for the melon roots to grow.
5. Create Mounds or Rows: Melons grow best on slightly raised mounds or rows. This improves drainage and warms the soil more quickly. Create mounds that are about 12 inches high and 2-3 feet wide. Space the mounds about 3-4 feet apart.
Phase 2: Planting and Early Care – Nurturing Your Melon Seedlings
Now that our soil is prepped, it’s time to get those melon seeds or seedlings in the ground!
1. Starting Seeds Indoors (Optional): If you live in a cooler climate with a shorter growing season, you can start melon seeds indoors 3-4 weeks before the last expected frost. Use peat pots or biodegradable pots to avoid disturbing the roots when transplanting. Sow seeds about 1 inch deep. Keep the soil moist and warm (around 80°F) until germination. Once the seedlings emerge, provide them with plenty of light.
2. Direct Sowing: If you live in a warmer climate, you can direct sow melon seeds directly into the garden. Wait until the soil has warmed up to at least 70°F. Sow seeds about 1 inch deep, spacing them according to the variety you’re growing (check the seed packet for recommendations).
3. Transplanting Seedlings: If you started seeds indoors, harden off the seedlings by gradually exposing them to outdoor conditions for a week before transplanting. Choose a cloudy day to transplant to minimize stress. Dig a hole slightly larger than the root ball. Gently remove the seedling from the pot and place it in the hole. Backfill with soil and water thoroughly.
4. Watering: Water the seedlings regularly, especially during dry periods. Aim to keep the soil consistently moist, but not waterlogged. Water deeply and less frequently, rather than shallowly and often.
5. Mulching: Apply a layer of mulch around the plants to help retain moisture, suppress weeds, and regulate soil temperature. Straw, hay, or shredded leaves are good options. Black plastic mulch can also be used to warm the soil more quickly, but be sure to remove it once the weather warms up.
6. Fertilizing: Once the seedlings have established themselves, fertilize them with a balanced fertilizer (e.g., 10-10-10) every 2-3 weeks. Follow the instructions on the fertilizer package for application rates. You can also use a liquid seaweed fertilizer for a gentle boost.
7. Pest and Disease Control: Keep an eye out for common melon pests, such as aphids, squash bugs, and cucumber beetles. Handpick pests or use insecticidal soap if necessary. To prevent fungal diseases, ensure good air circulation and avoid overhead watering. If you notice any signs of disease, treat with a fungicide.
Phase 3: Supporting Growth and Encouraging Fruiting – The Home Stretch!
This is where we focus on maximizing fruit production and ensuring those melons reach their full potential.
1. Pruning (Optional): Some gardeners prune their melon vines to encourage more fruit production. To prune, remove any suckers (small shoots that grow from the base of the plant) and any unproductive vines. This will direct the plant’s energy towards fruit development. I usually only prune if the vines are getting overly crowded.
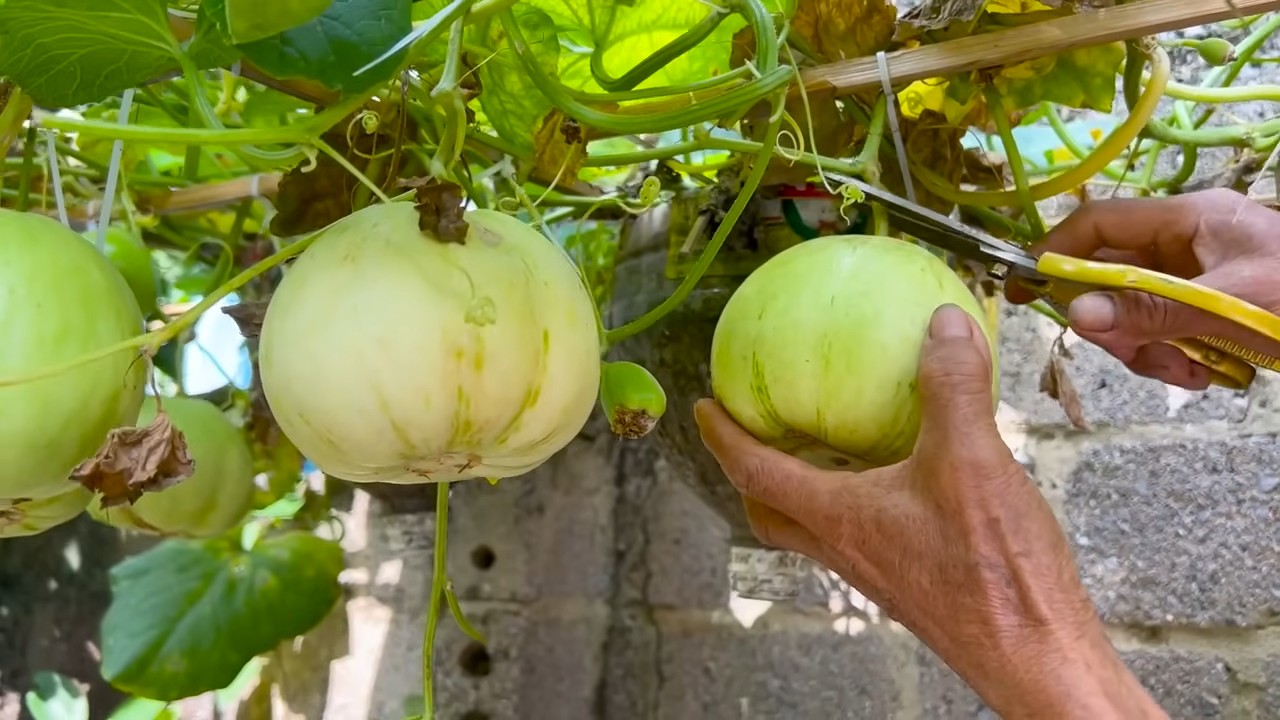
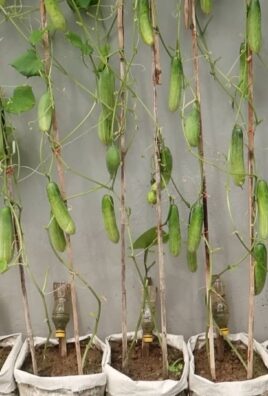
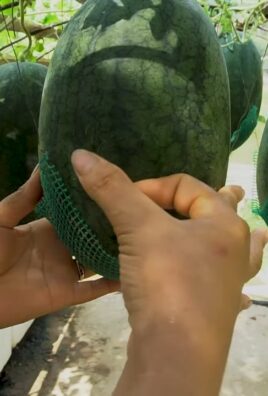
2. Supporting the Fruit: As the melons grow larger, they may need support to prevent them from rotting on the ground. You can use slings made from old pantyhose or netting to support the fruit. You can also place the melons on pieces of wood or cardboard to keep them off the soil.
3. Hand Pollination (If Necessary): If you’re not seeing a lot of bees in your garden, you may need to hand pollinate your melon flowers. To do this, use a small paintbrush to transfer pollen from the male flowers to the female flowers. Male flowers have a long, thin stem, while female flowers have a small, immature melon at the base. The best time to hand pollinate is in the morning, when the flowers are open.
4. Watering During Fruit Development: Consistent watering is crucial during fruit development. Water deeply and regularly, especially during dry periods. Avoid overhead watering to prevent fungal diseases.
5. Fertilizing During Fruit Development: Switch to a fertilizer that’s higher in phosphorus and potassium during fruit development. This will help the melons grow larger and sweeter. Bone meal and wood ash are good sources of these nutrients.
6. Sun Protection: In very hot climates, the melons may need some protection from the sun to prevent sunburn. You can shade the melons with shade cloth or by placing them under the leaves of the plant.
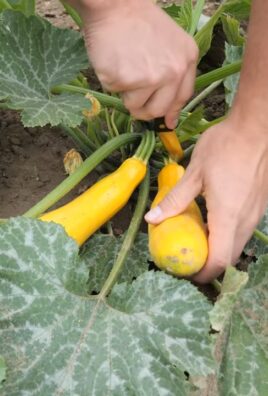
Phase 4: Harvesting and Enjoying Your Melon Bounty!
The moment we’ve all been waiting for! Knowing when to harvest a melon can be tricky, but here are a few tips:
1. Check the Tendril: The tendril closest to the melon stem will start to dry out and turn brown when the melon is ripe.
2. Thump Test: Give the melon a gentle thump. A ripe melon will sound hollow.
3. Ground Spot: The spot where the melon rests on the ground will

Conclusion
So, there you have it! This simple yet effective DIY trick to grow more melons is a game-changer for any gardener, regardless of experience level. We’ve walked you through the process, highlighting the benefits of increased yield, healthier plants, and ultimately, more delicious melons for you to enjoy.
But why is this a must-try? It’s not just about quantity; it’s about quality. By implementing this technique, you’re actively promoting stronger root systems, better nutrient absorption, and improved pollination – all crucial factors in producing truly exceptional melons. Imagine biting into a perfectly ripe, juicy melon that you nurtured from seed to harvest, knowing you played a direct role in its superior flavor and texture. That’s the reward waiting for you.
Beyond the basic method, feel free to experiment and personalize this technique to suit your specific needs and growing conditions. For instance, if you live in a particularly hot climate, consider using a shade cloth to protect your young melon plants from excessive sun exposure. Alternatively, if you’re dealing with poor soil, amending it with compost or other organic matter will provide your melons with the essential nutrients they need to thrive. You can also explore different varieties of melons to see which ones respond best to this DIY trick in your garden. Consider trying cantaloupe, honeydew, or even watermelon, adjusting the support structures as needed for the larger varieties.
Don’t be afraid to get creative! Perhaps you could try using different types of support structures, such as trellises or even repurposed materials like old ladders or fencing. The possibilities are endless, and the only limit is your imagination.
We are confident that this DIY trick will transform your melon-growing experience. It’s a small investment of time and effort that yields significant returns in terms of both the quantity and quality of your harvest.
Now, it’s your turn! We encourage you to try this DIY trick in your own garden and witness the difference it makes. Document your progress, take photos, and most importantly, share your experiences with us and the wider gardening community. Let us know what worked well for you, what challenges you encountered, and any modifications you made along the way. Your feedback is invaluable and will help us refine and improve this technique for future generations of melon growers.
We can’t wait to hear about your success stories and see the abundance of delicious melons you’ll be harvesting! Happy gardening!
Frequently Asked Questions (FAQ)
What types of melons does this DIY trick work best for?
This DIY trick is generally effective for a wide variety of melons, including cantaloupe, honeydew, and smaller watermelons. However, the size and weight of the melon will influence the type of support structure you need. For larger watermelons, you’ll need a sturdier support system to prevent the fruit from breaking off the vine. Consider using slings made of burlap or strong netting to cradle the melons as they grow. Experimentation is key to finding what works best for your specific melon variety.
How often should I water my melon plants after implementing this DIY trick?
Watering frequency depends on several factors, including your climate, soil type, and the stage of growth of your melon plants. Generally, melons need consistent moisture, especially during flowering and fruit development. Check the soil moisture regularly by sticking your finger about an inch deep into the soil. If it feels dry, it’s time to water. Aim for deep watering, allowing the water to soak into the soil and reach the roots. Avoid overhead watering, as this can promote fungal diseases. Drip irrigation is an excellent option for providing consistent moisture directly to the roots.
What kind of fertilizer should I use for my melon plants?
Melons benefit from a balanced fertilizer that provides essential nutrients like nitrogen, phosphorus, and potassium. A fertilizer with a higher phosphorus content is particularly beneficial during flowering and fruit development. Look for a fertilizer specifically formulated for fruits and vegetables, or use a general-purpose fertilizer and adjust the application rate according to the instructions. Organic fertilizers, such as compost tea or fish emulsion, are also excellent options for providing nutrients to your melon plants. Avoid over-fertilizing, as this can lead to excessive foliage growth at the expense of fruit production.
How do I protect my melon plants from pests and diseases?
Pests and diseases can be a major challenge for melon growers. To minimize these problems, start by selecting disease-resistant melon varieties. Practice good garden hygiene by removing weeds and debris that can harbor pests and diseases. Regularly inspect your plants for signs of infestation or disease, such as aphids, squash bugs, or powdery mildew. If you detect any problems, take action promptly. Insecticidal soap or neem oil can be effective for controlling many common pests. For fungal diseases, consider using a copper-based fungicide or a baking soda solution. Crop rotation can also help prevent the buildup of soilborne diseases.
When is the best time to harvest my melons?
Knowing when to harvest your melons is crucial for enjoying their full flavor and sweetness. The specific indicators of ripeness vary depending on the melon variety. For cantaloupe, look for a distinct aroma, a slight softening at the blossom end, and a stem that slips easily from the vine. Honeydew melons are ripe when they turn a creamy yellow color and have a slightly waxy feel. Watermelons are ripe when the tendril closest to the fruit turns brown and dry, and the underside of the melon turns a creamy yellow color. You can also thump the watermelon; a ripe watermelon will sound hollow.
Can I use this DIY trick in a container garden?
Yes, this DIY trick can be adapted for container gardening, especially for smaller melon varieties like cantaloupe or personal-sized watermelons. Choose a large container with good drainage and use a high-quality potting mix. Provide adequate support for the vines, such as a trellis or stakes. Be sure to water and fertilize your container-grown melons regularly, as they will dry out and deplete nutrients more quickly than melons grown in the ground.
What if my melon plants aren’t producing fruit?
There are several reasons why your melon plants might not be producing fruit. One common cause is poor pollination. Melons require pollination to set fruit, so ensure that there are plenty of pollinators, such as bees, in your garden. You can attract pollinators by planting flowers that provide nectar and pollen. If pollination is a problem, you can hand-pollinate your melon flowers by transferring pollen from the male flowers to the female flowers using a small brush. Other potential causes of poor fruit production include inadequate sunlight, insufficient watering, or nutrient deficiencies. Make sure your melon plants are getting at least six hours of sunlight per day, are watered regularly, and are fertilized with a balanced fertilizer.
How do I store my harvested melons?
Proper storage is essential for preserving the quality and flavor of your harvested melons. Whole melons can be stored at room temperature for a few days, but they will ripen more quickly. To slow down the ripening process, store whole melons in the refrigerator. Cut melons should be stored in an airtight container in the refrigerator and consumed within a few days.
Leave a Comment