
Cabbage garden in plastic bottles? Sounds a little crazy, right? But trust me, it’s a game-changer! I’m so excited to share this ingenious DIY trick that will revolutionize your home gardening experience, especially if you’re short on space or dealing with less-than-ideal soil conditions.
For centuries, humans have cultivated cabbage, a humble yet incredibly versatile vegetable. From ancient Roman feasts to hearty Irish stews, cabbage has nourished communities across the globe. But let’s face it, growing cabbage can sometimes be a challenge. Pests, soil quality, and limited garden space can all stand in the way of a bountiful harvest. That’s where this clever hack comes in!
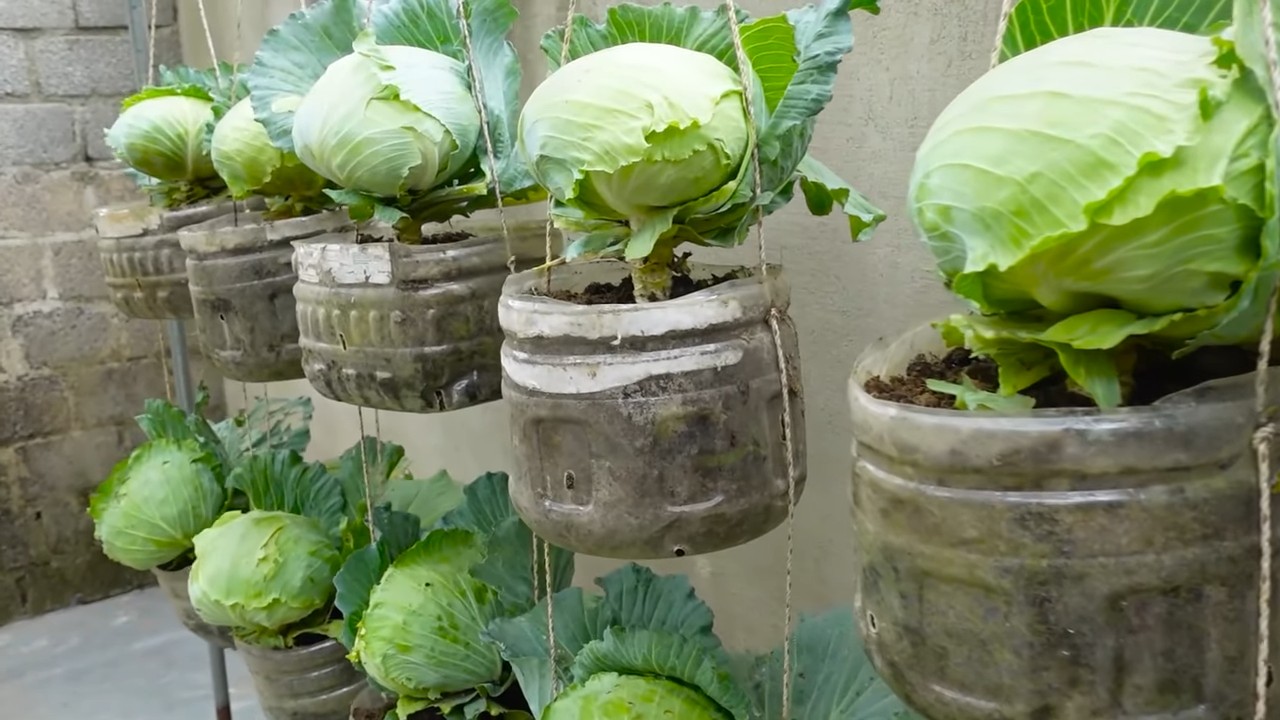
Imagine enjoying fresh, homegrown cabbage even if you live in an apartment or have a tiny balcony. This method allows you to create a thriving cabbage garden in plastic bottles, repurposing waste and maximizing your yield. It’s not just about growing food; it’s about sustainable living and connecting with nature, no matter where you are. I’ve found that this method is particularly useful for protecting young cabbage plants from slugs and other ground-dwelling pests. So, are you ready to ditch the traditional garden bed and embrace a more innovative approach? Let’s dive in and discover how to create your very own vertical cabbage oasis!
DIY Vertical Cabbage Garden from Plastic Bottles: A Step-by-Step Guide
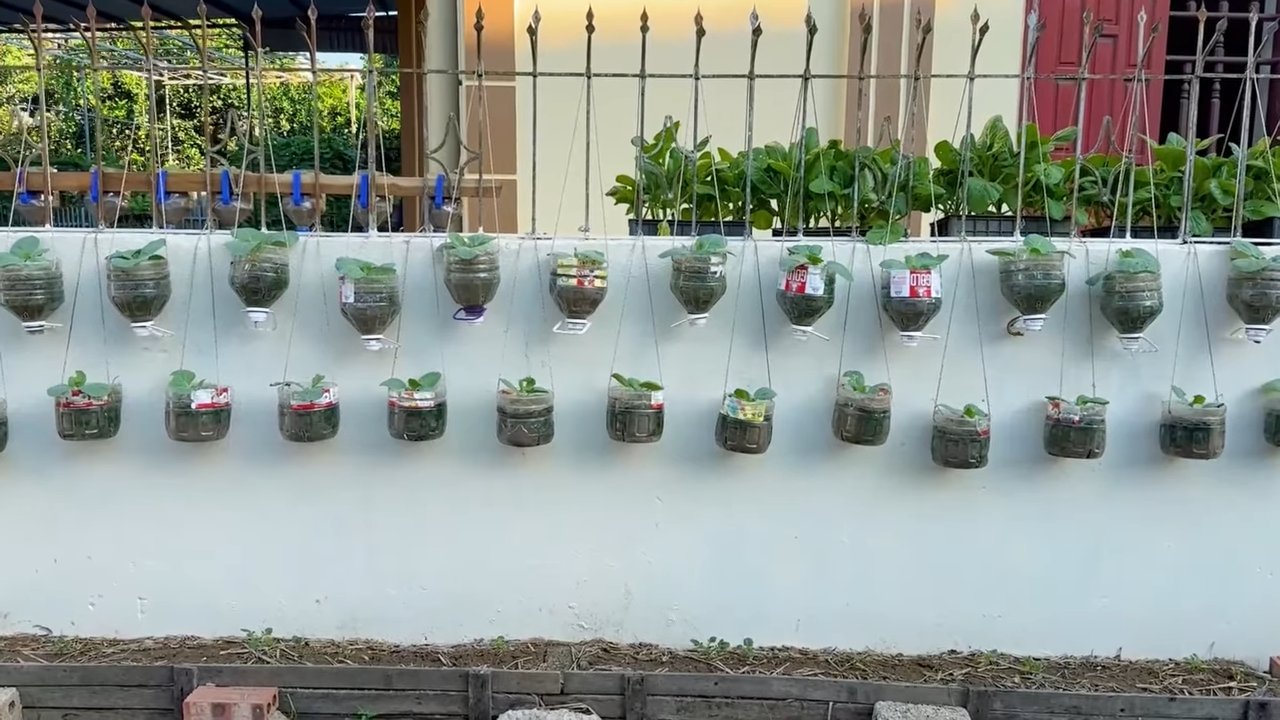
Hey there, fellow gardening enthusiasts! Are you short on space but craving fresh, homegrown cabbage? Well, I’ve got just the project for you: a vertical cabbage garden made entirely from recycled plastic bottles! This is a fantastic way to maximize your yield, minimize your environmental impact, and add a unique touch to your garden or balcony. Trust me, it’s easier than you think, and the results are incredibly rewarding. Let’s dive in!
What You’ll Need:
Before we get started, let’s gather our supplies. Here’s a comprehensive list of everything you’ll need to create your own vertical cabbage garden:
* Plastic Bottles: Lots of them! The number will depend on how tall you want your garden to be. I recommend using 2-liter bottles, as they provide ample space for the cabbage roots to grow. Make sure they are clean and dry. Aim for at least 10-15 bottles to start.
* Potting Soil: A good quality potting mix is essential for healthy cabbage growth. Look for a mix that drains well but also retains moisture.
* Cabbage Seedlings: You can either start your own cabbage seedlings indoors or purchase them from a local nursery. Choose varieties that are well-suited to your climate and growing conditions. I personally love ‘Early Jersey Wakefield’ for its compact size and early harvest.
* Scissors or Utility Knife: For cutting the plastic bottles. Be careful!
* Drill or Awl: To create drainage holes in the bottles.
* Strong Rope or Twine: To hang the bottles. I prefer using nylon rope, as it’s durable and weather-resistant.
* Measuring Tape or Ruler: To ensure consistent spacing between the bottles.
* Gloves: To protect your hands while working with soil and plastic.
* Watering Can or Hose: For watering your cabbage plants.
* Optional: Spray Paint: If you want to add a pop of color to your garden, you can spray paint the bottles before assembling them. Just make sure to use paint that is safe for plants.
* Optional: Landscape Fabric or Burlap: To line the bottles and help retain moisture.
Preparing the Bottles:
This is where the magic begins! We’ll transform those ordinary plastic bottles into mini-planters ready to house our cabbage seedlings.
1. Clean and Dry the Bottles: Thoroughly wash each bottle with soap and water to remove any residue. Make sure they are completely dry before proceeding. This will help prevent mold and mildew growth.
2. Cut the Bottles: Using your scissors or utility knife, carefully cut each bottle in half horizontally. You’ll be using the bottom halves as planters. I usually cut them about 2-3 inches from the bottom. Be extra cautious with the knife, and always cut away from yourself.
3. Create Drainage Holes: Using your drill or awl, create several drainage holes in the bottom of each bottle half. This is crucial for preventing waterlogging, which can lead to root rot. I usually make about 4-5 holes per bottle.
4. (Optional) Line the Bottles: If you’re using landscape fabric or burlap, cut pieces that are slightly larger than the bottle halves. Line each bottle with the fabric, leaving some overhang. This will help retain moisture and prevent soil from washing out.
5. (Optional) Paint the Bottles: If you want to add some color to your garden, now’s the time to spray paint the bottles. Choose colors that complement your surroundings or create a vibrant, eye-catching display. Let the paint dry completely before moving on to the next step.
Assembling the Vertical Garden:
Now comes the fun part – putting everything together! This is where your vision starts to take shape.
1. Measure and Mark: Decide how tall you want your vertical garden to be and measure the desired length of your rope or twine. Add some extra length for tying knots and hanging the garden.
2. Create Hanging Loops: Tie a loop at the top of the rope or twine. This loop will be used to hang the entire structure. Make sure the knot is secure.
3. Attach the First Bottle: Take one of your prepared bottle halves and carefully thread the rope through the drainage holes. Position the bottle so that it’s hanging securely from the rope. You might need to tie a knot below the bottle to prevent it from sliding down.
4. Space the Bottles: Measure the desired distance between the bottles. I usually space them about 8-10 inches apart to allow for adequate sunlight and airflow. Mark the rope at each interval.
5. Attach the Remaining Bottles: Repeat step 3 for each remaining bottle, ensuring that they are evenly spaced and securely attached to the rope. Use knots to secure each bottle in place.
6. Reinforce the Structure: For added stability, you can tie additional pieces of rope or twine horizontally between the bottles. This will help prevent the garden from swaying too much in the wind.
Planting the Cabbage Seedlings:
Almost there! Now it’s time to give your vertical garden some life by planting those cabbage seedlings.
1. Fill the Bottles with Soil: Carefully fill each bottle half with potting soil, leaving about an inch of space at the top. Gently pat down the soil to remove any air pockets.
2. Plant the Seedlings: Dig a small hole in the center of each bottle and carefully transplant a cabbage seedling into the hole. Make sure the roots are covered with soil.
3. Water Thoroughly: Water the seedlings thoroughly after planting. This will help settle the soil and encourage root growth.
4. Add More Soil if Needed: As the soil settles, you may need to add more to ensure the seedlings are securely planted.
Caring for Your Vertical Cabbage Garden:
Congratulations! You’ve successfully created your own vertical cabbage garden. Now, let’s talk about how to keep it thriving.
* Watering: Cabbage plants need consistent moisture, so water your vertical garden regularly, especially during hot, dry weather. Check the soil moisture by sticking your finger into the soil. If it feels dry, it’s time to water. Water deeply until the water drains out of the drainage holes.
* Sunlight: Cabbage plants need at least 6 hours of sunlight per day. Choose a location for your vertical garden that receives plenty of sunlight. If you live in a particularly hot climate, you may need to provide some afternoon shade to prevent the plants from scorching.
* Fertilizing: Cabbage plants are heavy feeders, so fertilize your vertical garden regularly with a balanced fertilizer. Follow the instructions on the fertilizer package. I like to use a liquid fertilizer diluted in water every two weeks.
* Pest Control: Keep an eye out for pests such as cabbage worms, aphids, and slugs. Handpick any pests you find or use an organic insecticide if necessary. You can also use companion planting to deter pests. For example, planting marigolds near your cabbage plants can help repel nematodes.
* Weeding: Remove any weeds that may sprout in the bottles. Weeds can compete with your cabbage plants for nutrients and water.
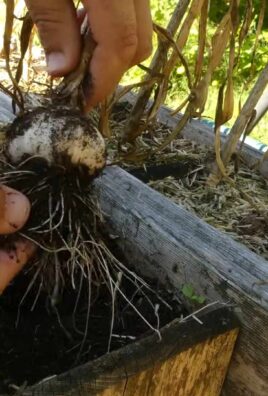
* Harvesting: Cabbage is typically ready to harvest in 60-80 days, depending on the variety. Harvest when the heads are firm and tightly packed. Cut the head off at the base of the plant, leaving the outer leaves intact. These leaves may produce smaller heads later in the season.
Troubleshooting:
Even with the best care, you might encounter some challenges along the way. Here are some common problems and how to address them:
* Yellowing Leaves: This could be a sign of overwatering, underwatering, or nutrient deficiency. Check the soil moisture and adjust your watering schedule accordingly. Fertilize the plants with a balanced fertilizer.
* Stunted Growth: This could be caused by poor soil, lack of sunlight, or pest infestation. Make sure your plants are getting enough sunlight and nutrients. Check for pests and take appropriate action.
* Root Rot: This is caused by overwatering and poor drainage. Make sure your bottles have adequate drainage holes. Avoid overwatering the plants.
* Pest Infestation: Regularly inspect your plants for pests and take action as soon as you notice them. Use organic insecticides or handpick the pests.
Tips and Tricks for Success:
Here are a few extra tips to help you get the most out of your vertical cabbage garden:
* Choose the Right Cabbage Variety: Select cabbage varieties that are well-suited to your climate and growing conditions. Consider the size of the mature heads and choose varieties that will fit comfortably in the bottles.
* Start with Healthy Seedlings: Start with healthy, vigorous seedlings. This will give your plants a head start and increase your chances of success.
* Use High-Quality Potting Soil: Use a good quality potting mix that drains well but also retains moisture.
Conclusion
So, there you have it! Transforming humble plastic bottles into a thriving cabbage garden is not just a quirky DIY project; it’s a game-changer for urban gardeners, space-conscious enthusiasts, and anyone looking to add a touch of sustainable charm to their lives. We’ve explored how this ingenious method allows you to cultivate fresh, delicious cabbage even if you’re short on space, time, or traditional gardening resources.
But why is this DIY trick a must-try? Beyond the sheer satisfaction of repurposing waste and contributing to a greener planet, growing cabbage in plastic bottles offers a multitude of benefits. It’s incredibly space-efficient, allowing you to maximize your yield even on a small balcony or patio. The controlled environment within the bottles provides protection from pests and harsh weather conditions, leading to healthier, more robust plants. Plus, the vertical nature of the garden makes it easier to manage and harvest your cabbage.
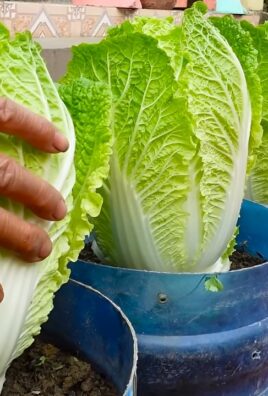
The possibilities don’t end there! Feel free to experiment with different varieties of cabbage to discover your favorites. Red cabbage, savoy cabbage, or even Chinese cabbage can all thrive in this bottle garden setup. You can also explore companion planting by adding herbs like dill or chamomile to deter pests and enhance the flavor of your cabbage. Consider painting the bottles in bright colors to add a visual appeal to your garden, or even creating a tiered system for a more dramatic display.
Don’t be afraid to get creative and personalize your cabbage garden to suit your own style and preferences.
We wholeheartedly encourage you to give this DIY cabbage garden in plastic bottles a try. It’s a rewarding experience that connects you with nature, promotes sustainability, and provides you with a fresh, homegrown source of nutritious vegetables. The process is simple, the materials are readily available, and the results are truly remarkable.
Once you’ve embarked on this gardening adventure, we’d love to hear about your experiences! Share your photos, tips, and challenges in the comments section below. Let’s build a community of bottle garden enthusiasts and inspire others to embrace this innovative and eco-friendly approach to growing their own food. Your insights could be invaluable to fellow gardeners and help us all learn and grow together.
Remember, every small step towards sustainability makes a difference. By transforming waste into a thriving garden, you’re not only providing yourself with fresh cabbage but also contributing to a healthier planet for future generations. So, grab those plastic bottles, gather your supplies, and get ready to experience the joy of growing your own cabbage in a unique and rewarding way. This method of growing cabbage is a great way to start your gardening journey.
FAQ
Q: What type of plastic bottles are best for growing cabbage?
A: Ideally, you should use sturdy, food-grade plastic bottles. Two-liter soda bottles or larger water bottles work well. Avoid using bottles that have contained harsh chemicals or cleaning products, as these could contaminate your soil and affect the growth of your cabbage. Make sure to thoroughly clean the bottles with soap and water before using them. Clear or translucent bottles are preferable as they allow sunlight to reach the soil.
Q: How do I prepare the plastic bottles for planting?
A: First, thoroughly clean the bottles with soap and water. Then, cut a large rectangular opening in the side of each bottle, leaving enough space at the bottom for drainage and soil. You can cut the opening lengthwise or widthwise, depending on your preference. Make sure the opening is large enough to easily plant and harvest your cabbage. Drill drainage holes in the bottom of the bottle to prevent waterlogging.
Q: What type of soil should I use for growing cabbage in plastic bottles?
A: A well-draining potting mix is essential for growing healthy cabbage in plastic bottles. You can use a commercially available potting mix or create your own by combining equal parts of garden soil, compost, and perlite or vermiculite. The compost will provide nutrients for your cabbage, while the perlite or vermiculite will improve drainage and aeration. Avoid using heavy clay soil, as it can become waterlogged and suffocate the roots of your cabbage.
Q: How often should I water my cabbage plants in plastic bottles?
A: The frequency of watering will depend on the weather conditions and the type of soil you’re using. Generally, you should water your cabbage plants whenever the top inch of soil feels dry to the touch. Water thoroughly until water drains out of the drainage holes at the bottom of the bottle. Avoid overwatering, as this can lead to root rot. During hot, dry weather, you may need to water your plants more frequently.
Q: How much sunlight do cabbage plants need?
A: Cabbage plants need at least six hours of direct sunlight per day to thrive. Choose a location for your bottle garden that receives plenty of sunlight throughout the day. If you live in a particularly hot climate, you may need to provide some shade during the hottest part of the afternoon to prevent the leaves from scorching.
Q: How do I fertilize my cabbage plants in plastic bottles?
A: Cabbage plants are heavy feeders and require regular fertilization to produce a good harvest. You can use a balanced liquid fertilizer, such as a 10-10-10 formula, diluted according to the package instructions. Fertilize your plants every two to three weeks during the growing season. You can also add compost tea to the soil to provide additional nutrients.
Q: How do I protect my cabbage plants from pests and diseases?
A: Cabbage plants are susceptible to a variety of pests and diseases, including cabbage worms, aphids, and clubroot. To prevent pest infestations, inspect your plants regularly and remove any pests you find by hand. You can also use insecticidal soap or neem oil to control pests. To prevent diseases, ensure good air circulation around your plants and avoid overwatering. If you notice any signs of disease, remove the affected leaves immediately.
Q: When is the best time to harvest my cabbage?
A: Cabbage is typically ready to harvest when the head is firm and compact. The exact time will depend on the variety of cabbage you’re growing and the weather conditions. Generally, cabbage takes about 70 to 80 days to mature. To harvest, simply cut the head off the plant at the base with a sharp knife.
Q: Can I reuse the plastic bottles for multiple growing seasons?
A: Yes, you can reuse the plastic bottles for multiple growing seasons, provided they are still in good condition. Clean the bottles thoroughly after each harvest to remove any soil or debris. Inspect the bottles for cracks or damage and replace them if necessary.
Q: What other vegetables can I grow in plastic bottles besides cabbage?
A: Many other vegetables can be successfully grown in plastic bottles, including lettuce, spinach, herbs, tomatoes, peppers, and strawberries. The key is to choose vegetables that are well-suited to container gardening and provide them with the appropriate growing conditions.

Leave a Comment