
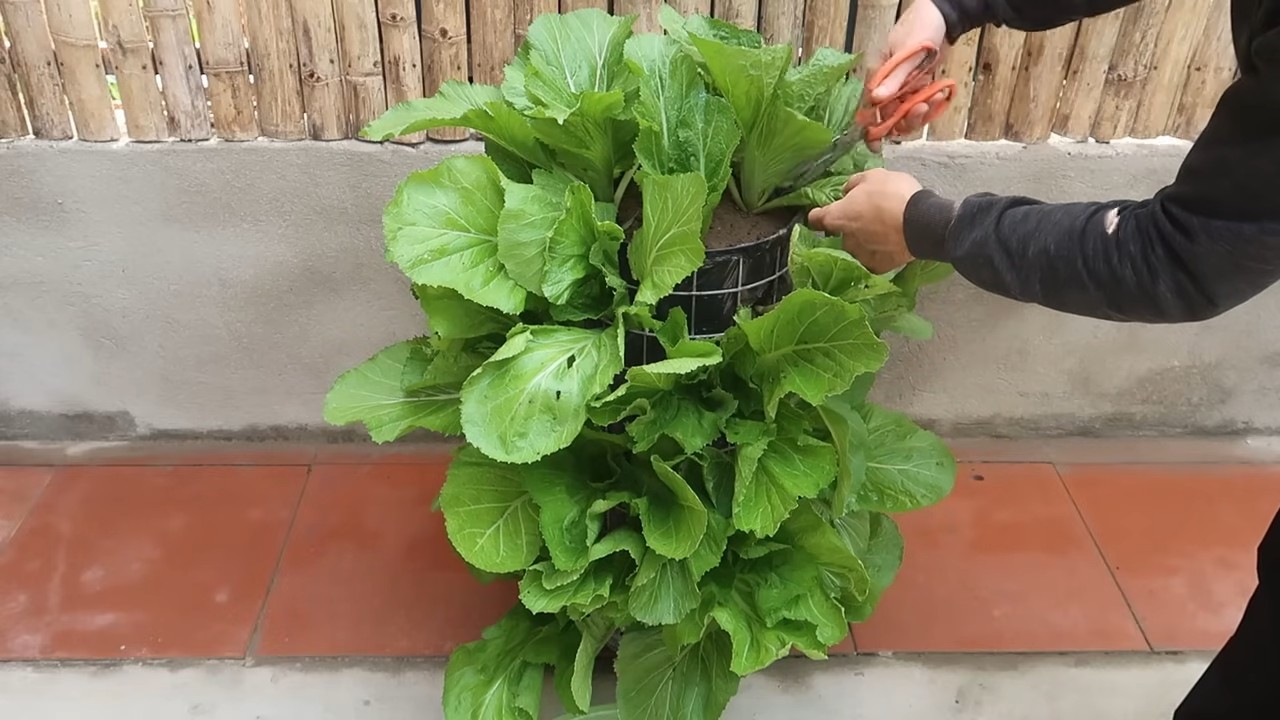
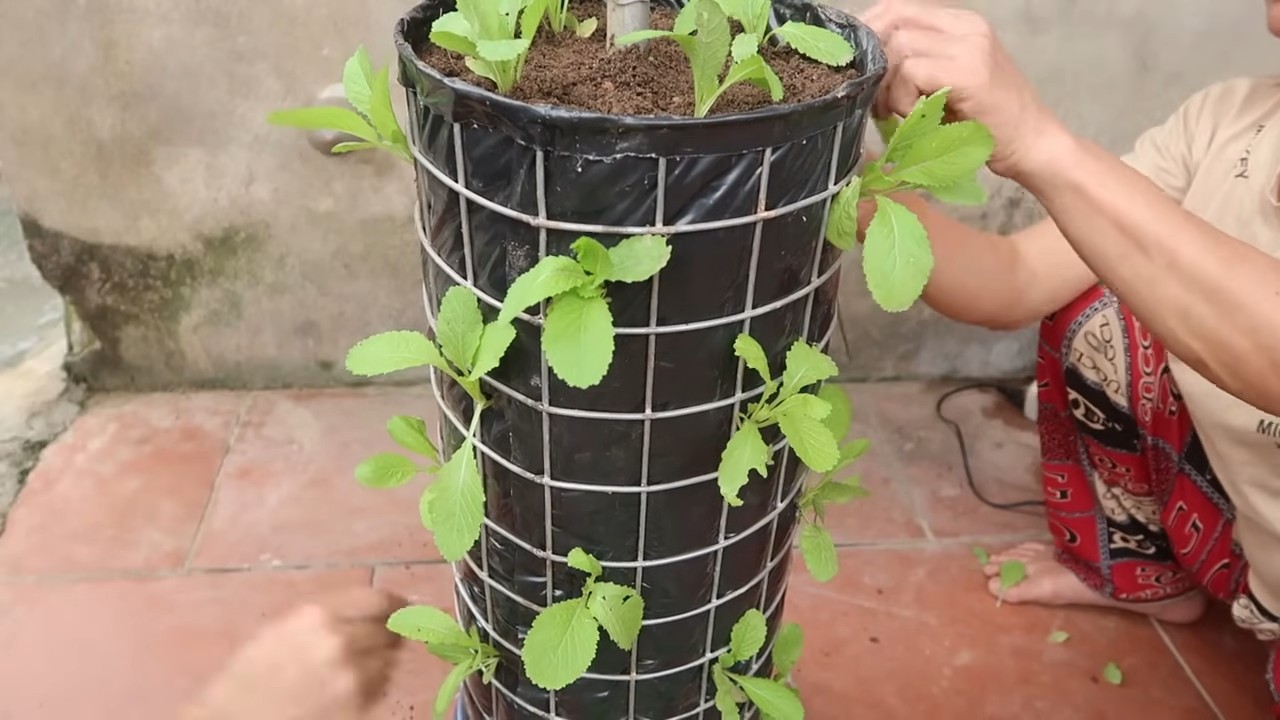
DIY Vertical Garden Watering: Tired of lugging around a watering can and struggling to reach those plants perched high in your vertical garden? I know the feeling! I’ve been there, done that, and ended up with more water on myself than on my leafy greens. But fear not, fellow gardening enthusiasts, because I’m about to share some game-changing DIY tricks that will make watering your vertical garden a breeze.
Vertical gardens, also known as living walls, have a surprisingly rich history. While modern iterations are relatively new, the concept dates back to ancient civilizations like the Hanging Gardens of Babylon, one of the Seven Wonders of the Ancient World. Though we may not be building wonders on that scale, the desire to bring greenery into our limited spaces remains strong. Today, vertical gardens are a popular way to add beauty and life to balconies, patios, and even indoor walls.
However, the unique structure of vertical gardens presents a watering challenge. Traditional methods often lead to uneven distribution, wasted water, and potential root rot. That’s where these DIY hacks come in! I’ll show you how to create efficient and cost-effective watering systems that will keep your plants thriving without the hassle. With these DIY Vertical Garden Watering solutions, you’ll spend less time watering and more time enjoying the lush beauty of your vertical oasis. Get ready to transform your gardening experience!
DIY Vertikale Gartenbewässerung: Dein automatisches Bewässerungssystem für die Wand
Hallo Pflanzenfreunde! Habt ihr auch das Problem, dass eure vertikalen Gärten zwar wunderschön aussehen, aber das Gießen eine echte Herausforderung ist? Ich kenne das nur zu gut! Deshalb zeige ich euch heute, wie ihr ein automatisches Bewässerungssystem für euren vertikalen Garten selber bauen könnt. Keine Sorge, es ist einfacher als es aussieht und spart euch jede Menge Zeit und Nerven.
Was du brauchst: Die Materialliste
Bevor wir loslegen, hier eine Liste aller Materialien, die du für dieses Projekt benötigst. Du findest die meisten davon im Baumarkt oder online.
* Wasserbehälter: Ein Eimer, eine Regentonne oder ein anderer Behälter, der groß genug ist, um deine Pflanzen für einige Tage mit Wasser zu versorgen. Ich empfehle einen Behälter mit mindestens 20 Litern Fassungsvermögen.
* Wasserpumpe: Eine kleine Tauchpumpe, die für Aquarien oder kleine Springbrunnen geeignet ist. Achte darauf, dass die Pumpe eine ausreichende Förderhöhe hat, um das Wasser bis zur obersten Pflanze in deinem vertikalen Garten zu pumpen.
* Zeitschaltuhr: Eine Zeitschaltuhr, um die Pumpe automatisch ein- und auszuschalten. Du kannst eine analoge oder digitale Zeitschaltuhr verwenden.
* Schlauch: Ein flexibler Schlauch, der zur Pumpe passt und lang genug ist, um alle Pflanzen in deinem vertikalen Garten zu erreichen. Ich empfehle einen Schlauch mit einem Durchmesser von 4 mm.
* Tropfer oder Micro-Sprinkler: Kleine Tropfer oder Micro-Sprinkler, die du an den Schlauch anschließen kannst, um das Wasser gezielt zu den Pflanzen zu leiten. Die Anzahl der Tropfer/Sprinkler hängt von der Anzahl der Pflanzen in deinem vertikalen Garten ab.
* Verbinder und T-Stücke: Verschiedene Verbinder und T-Stücke, um den Schlauch zu verbinden und zu verzweigen.
* Kabelbinder oder Schlauchschellen: Um den Schlauch an den Pflanzen oder der Wand zu befestigen.
* Bohrmaschine und Bohrer: Um Löcher in den Wasserbehälter zu bohren (falls erforderlich).
* Messer oder Schere: Um den Schlauch zuzuschneiden.
* Optional: Filter: Ein kleiner Filter, um das Wasser sauber zu halten und die Pumpe vor Verstopfung zu schützen.
* Optional: Dünger: Flüssigdünger, den du dem Wasser hinzufügen kannst, um deine Pflanzen zusätzlich zu versorgen.
Schritt-für-Schritt-Anleitung: So baust du dein Bewässerungssystem
Jetzt geht’s ans Eingemachte! Folge diesen Schritten, um dein automatisches Bewässerungssystem zu bauen:
1. Vorbereitung des Wasserbehälters:
* Zuerst musst du den Wasserbehälter vorbereiten. Wenn dein Behälter keinen Auslass für den Schlauch hat, musst du ein Loch bohren. Achte darauf, dass das Loch die richtige Größe für den Schlauchverbinder hat.
* Befestige den Schlauchverbinder am Behälter. Ich empfehle, etwas Dichtungsband zu verwenden, um sicherzustellen, dass alles dicht ist.
* Platziere den Wasserbehälter an einem geeigneten Ort in der Nähe deines vertikalen Gartens. Achte darauf, dass der Behälter stabil steht und vor direkter Sonneneinstrahlung geschützt ist.
2. Installation der Wasserpumpe:
* Tauche die Wasserpumpe in den Wasserbehälter. Achte darauf, dass die Pumpe vollständig mit Wasser bedeckt ist.
* Verbinde den Schlauch mit dem Auslass der Wasserpumpe. Verwende eine Schlauchschelle, um den Schlauch fest zu sichern.
* Lege den Schlauch entlang deines vertikalen Gartens.
3. Anbringen der Tropfer/Micro-Sprinkler:
* Schneide den Schlauch an den Stellen durch, an denen du die Tropfer oder Micro-Sprinkler anbringen möchtest.
* Verbinde die Tropfer/Sprinkler mit dem Schlauch. Verwende T-Stücke, um den Schlauch zu verzweigen, falls du mehrere Pflanzen gleichzeitig bewässern möchtest.
* Platziere die Tropfer/Sprinkler in der Nähe der Wurzeln deiner Pflanzen.
4. Befestigung des Schlauchs:
* Befestige den Schlauch mit Kabelbindern oder Schlauchschellen an der Wand oder den Pflanzen. Achte darauf, dass der Schlauch nicht knickt oder abquetscht wird.
* Verlege den Schlauch so, dass er nicht im Weg ist und keine Stolpergefahr darstellt.
5. Anschluss der Zeitschaltuhr:
* Stecke die Wasserpumpe in die Zeitschaltuhr.
* Stelle die Zeitschaltuhr so ein, dass die Pumpe regelmäßig für eine bestimmte Zeit eingeschaltet wird. Die Bewässerungsdauer und -häufigkeit hängt von den Bedürfnissen deiner Pflanzen ab. Ich empfehle, mit kurzen Bewässerungszeiten zu beginnen und diese bei Bedarf anzupassen.
6. Testlauf und Anpassung:
* Schalte die Zeitschaltuhr ein und beobachte, ob alle Pflanzen ausreichend bewässert werden.
* Passe die Position der Tropfer/Sprinkler an, falls einige Pflanzen zu wenig oder zu viel Wasser bekommen.
* Überprüfe regelmäßig den Wasserstand im Behälter und fülle ihn bei Bedarf nach.
Zusätzliche Tipps und Tricks für dein Bewässerungssystem
Hier sind noch ein paar Tipps, die dir helfen können, dein Bewässerungssystem zu optimieren:
* Verwende einen Filter: Ein Filter hält das Wasser sauber und verhindert, dass die Pumpe verstopft. Das ist besonders wichtig, wenn du Leitungswasser verwendest, das Kalk oder andere Ablagerungen enthalten kann.
* Füge Dünger hinzu: Flüssigdünger im Wasser versorgt deine Pflanzen mit wichtigen Nährstoffen. Achte darauf, den Dünger gemäß den Anweisungen auf der Verpackung zu dosieren.
* Passe die Bewässerung an die Jahreszeit an: Im Sommer benötigen deine Pflanzen mehr Wasser als im Winter. Passe die Bewässerungsdauer und -häufigkeit entsprechend an.
* Überprüfe regelmäßig die Tropfer/Sprinkler: Stelle sicher, dass die Tropfer/Sprinkler nicht verstopft sind und das Wasser gleichmäßig verteilen.
* Verwende Regenwasser: Regenwasser ist weicher als Leitungswasser und enthält keine schädlichen Chemikalien. Sammle Regenwasser in einer Regentonne und verwende es für dein Bewässerungssystem.
* Automatische Befüllung: Du kannst dein System noch weiter automatisieren, indem du einen Schwimmerschalter in den Wasserbehälter einbaust, der automatisch Wasser nachfüllt, wenn der Wasserstand zu niedrig ist.
Häufige Probleme und Lösungen
Auch beim besten DIY-Projekt können Probleme auftreten. Hier sind einige häufige Probleme und wie du sie beheben kannst:
* Pumpe funktioniert nicht: Überprüfe, ob die Pumpe richtig angeschlossen ist und ob die Zeitschaltuhr eingeschaltet ist. Stelle sicher, dass die Pumpe vollständig mit Wasser bedeckt ist. Wenn die Pumpe immer noch nicht funktioniert, ist sie möglicherweise defekt und muss ausgetauscht werden.
* Tropfer/Sprinkler verstopft: Reinige die Tropfer/Sprinkler mit einer Nadel oder einem kleinen Draht. Du kannst sie auch in Essigwasser einweichen, um Kalkablagerungen zu entfernen.
* Schlauch undicht: Repariere den Schlauch mit einem Schlauchflicken oder ersetze ihn durch einen neuen Schlauch.
* Pflanzen bekommen zu wenig Wasser: Erhöhe die Bewässerungsdauer oder -häufigkeit. Überprüfe, ob die Tropfer/Sprinkler richtig positioniert sind und das Wasser direkt zu den Wurzeln der Pflanzen leiten.
* Pflanzen bekommen zu viel Wasser: Reduziere die Bewässerungsdauer oder -häufigkeit. Stelle sicher, dass der Boden gut entwässert ist und keine Staunässe entsteht.
Fazit: Dein grüner Daumen für die Wand
Mit diesem DIY-Bewässerungssystem kannst du deinen vertikalen Garten ganz einfach und bequem bewässern. Es spart dir Zeit und Mühe und sorgt dafür, dass deine Pflanzen immer optimal versorgt sind. Ich hoffe, diese Anleitung hat dir geholfen und wünsche dir viel Spaß beim Nachbauen! Und denk daran
Conclusion
So, there you have it! Creating your own DIY vertical garden watering system isn’t just a fun project; it’s a game-changer for anyone looking to cultivate a thriving green wall without the constant hassle of manual watering. We’ve walked you through a simple, effective method that saves you time, conserves water, and ultimately, helps your plants flourish.
But why is this DIY trick a must-try? Let’s recap. First and foremost, it automates a crucial aspect of vertical gardening. Forget the daily rounds with a watering can, precariously reaching for those top-tier plants. This system delivers water directly to the roots, ensuring consistent hydration and minimizing the risk of over or under-watering. This is especially important for vertical gardens, where drainage and water distribution can be tricky.
Secondly, it’s incredibly cost-effective. Compared to purchasing a pre-made vertical garden watering system, this DIY approach utilizes readily available materials, often repurposed or inexpensive to acquire. You’re not just saving time; you’re saving money.
Thirdly, it’s customizable. You can tailor the system to perfectly suit the size and layout of your vertical garden. Need more drip lines for thirsty plants? Simply add them. Want to adjust the watering schedule? The timer gives you complete control. This adaptability is a huge advantage over one-size-fits-all commercial solutions.
Variations and Suggestions:
Don’t be afraid to experiment! Here are a few ideas to personalize your DIY vertical garden watering system:
* Solar Power: Consider using a solar-powered pump to make your system even more eco-friendly. This is a great option if your garden receives plenty of sunlight.
* Rainwater Harvesting: Connect your water reservoir to a rainwater harvesting system for a truly sustainable approach.
* Nutrient Solution: Add a diluted liquid fertilizer to your water reservoir to provide your plants with essential nutrients during watering. Be sure to use a fertilizer specifically formulated for the types of plants you’re growing.
* Smart Home Integration: For the tech-savvy gardener, explore integrating your watering system with a smart home platform. This allows you to monitor and control watering remotely via your smartphone or tablet.
* Drip Emitters: Experiment with different types of drip emitters to find the best flow rate for your plants. Some plants prefer a slow, steady drip, while others need a more concentrated burst of water.
* Capillary Mats: If you’re using fabric pockets or felt as your growing medium, consider adding a capillary mat at the bottom of each pocket. This will help to distribute water more evenly and prevent dry spots.
We are confident that this DIY vertical garden watering system will transform your gardening experience. It’s a simple, effective, and rewarding project that will bring you closer to a thriving, low-maintenance vertical garden.
Now, it’s your turn! We encourage you to give this DIY project a try. Gather your materials, follow the steps outlined, and witness the difference it makes in your vertical garden. And most importantly, share your experience with us! We’d love to hear about your successes, challenges, and any modifications you make along the way. Post photos of your completed system, share your tips and tricks, and let’s build a community of thriving vertical gardeners! Happy gardening!
Frequently Asked Questions (FAQ)
What if my water pressure is too high?
High water pressure can cause leaks and damage to your DIY vertical garden watering system. The best solution is to install a pressure regulator between your water source and the timer. These are readily available at most hardware stores and are easy to install. Look for a regulator that reduces the pressure to around 20-30 PSI, which is ideal for drip irrigation systems. You can also use a flow restrictor in each drip line to further control the water output.
How often should I water my vertical garden using this system?
The frequency of watering depends on several factors, including the type of plants you’re growing, the climate, and the growing medium. As a general rule, start with watering for 15-30 minutes every other day. Monitor your plants closely for signs of over or under-watering. If the leaves are wilting or turning yellow, you may need to water more frequently. If the soil is constantly soggy, reduce the watering frequency. The beauty of the timer is that you can easily adjust the schedule as needed. Consider using a soil moisture meter to get accurate readings of the moisture levels in your vertical garden.
What type of water reservoir should I use?
The size and type of water reservoir will depend on the size of your vertical garden and the frequency of watering. A large plastic container, such as a storage bin or a repurposed trash can, works well. Make sure the container is clean and food-grade if you plan to use it for edible plants. You can also use a rain barrel or a commercially available water reservoir designed for irrigation systems. The key is to choose a reservoir that is large enough to hold enough water to last for several days between refills. Consider using a dark-colored reservoir to prevent algae growth.
Can I use this system for indoor vertical gardens?
Yes, this DIY vertical garden watering system is suitable for both indoor and outdoor vertical gardens. However, you’ll need to take some precautions to prevent water damage indoors. Make sure your vertical garden is properly sealed and that there is adequate drainage to collect any excess water. You can use a tray or a container to catch the water and empty it regularly. Also, be mindful of humidity levels, as excessive humidity can lead to mold and mildew growth. Consider using a dehumidifier if necessary.
What if my drip lines get clogged?
Clogged drip lines are a common problem with drip irrigation systems. To prevent clogging, use filtered water in your reservoir. You can also install a filter in the main water line to remove any debris. If a drip line does get clogged, try flushing it out with water. You can also use a small needle or a pipe cleaner to clear the blockage. For stubborn clogs, you may need to replace the drip line. Regularly inspect your drip lines for any signs of clogging and clean them as needed.
What are the best plants for a vertical garden with this watering system?
The best plants for a vertical garden are those that are relatively compact, drought-tolerant, and have shallow root systems. Some popular choices include succulents, herbs, strawberries, lettuce, and small flowering plants like petunias and impatiens. When choosing plants, consider the amount of sunlight your vertical garden receives and select plants that are well-suited to those conditions. Also, be sure to choose plants that have similar watering requirements.
How do I winterize my DIY vertical garden watering system?
If you live in an area with freezing temperatures, you’ll need to winterize your DIY vertical garden watering system to prevent damage. Disconnect the system from the water source and drain all the water from the reservoir, tubing, and drip lines. Store the components in a frost-free location, such as a garage or basement. You can also wrap the tubing and drip lines in insulation to protect them from freezing. If you’re using a timer, remove the batteries and store it indoors.
Can I automate the refilling of the water reservoir?
Yes, you can automate the refilling of the water reservoir using a float valve. A float valve is a simple mechanical device that automatically shuts off the water supply when the reservoir is full. You can connect the float valve to a water source, such as a garden hose or a rainwater harvesting system. This will ensure that your reservoir is always full and that your plants receive a consistent supply of water. Be sure to choose a float valve that is compatible with your water pressure and the size of your reservoir.
How do I clean the water reservoir?
Regularly cleaning your water reservoir is important to prevent algae growth and the buildup of sediment. Empty the reservoir and scrub the inside with a brush and soapy water. Rinse thoroughly with clean water. You can also use a diluted bleach solution (1 part bleach to 10 parts water) to disinfect the reservoir. Be sure to rinse thoroughly after using bleach. Allow the reservoir to dry completely before refilling it.

Leave a Comment