
Growing watermelons in small spaces might seem like an impossible dream, right? I get it! You picture sprawling vines taking over your entire yard, leaving no room for anything else. But what if I told you that juicy, homegrown watermelon is totally achievable, even if you’re working with a tiny balcony, patio, or just a small corner of your garden?
For centuries, watermelons have been a symbol of summer, abundance, and pure refreshment. From ancient Egypt, where they were depicted in hieroglyphics, to the vibrant markets of modern-day Asia, this fruit has held a special place in cultures around the world. Now, you can bring that same joy and tradition to your own home, no matter how limited your space may be.
Let’s face it, store-bought watermelons often lack that intense flavor and satisfying crunch that comes from a vine-ripened fruit. Plus, there’s nothing quite like the pride of harvesting something you’ve nurtured yourself! That’s why I’m so excited to share these DIY tricks and hacks that will empower you to successfully growing watermelons in small spaces. We’ll explore everything from choosing the right varieties and containers to mastering vertical gardening techniques and maximizing sunlight. Get ready to enjoy the sweet taste of success – and delicious watermelon – straight from your own little oasis!

Wassermelonenanbau auf kleinem Raum: Mein DIY-Leitfaden für eine reiche Ernte!
Hallo liebe Gartenfreunde! Ihr träumt von saftigen, selbstgezogenen Wassermelonen, habt aber nur einen kleinen Balkon, eine Terrasse oder einen winzigen Garten? Keine Sorge, ich zeige euch, wie ihr auch auf kleinstem Raum erfolgreich Wassermelonen anbauen könnt! Es ist einfacher als ihr denkt, und mit ein paar Tricks und Kniffen könnt ihr euch schon bald über eure eigene Ernte freuen.
Die Grundlagen: Was Wassermelonen zum Wachsen brauchen
Bevor wir loslegen, ist es wichtig zu verstehen, was Wassermelonen wirklich brauchen, um zu gedeihen. Das sind die wichtigsten Punkte:
* Sonne, Sonne, Sonne: Wassermelonen lieben die Sonne! Sie brauchen mindestens 6-8 Stunden direkte Sonneneinstrahlung pro Tag. Wählt also einen Standort, der diese Bedingung erfüllt.
* Guter Boden: Der Boden sollte gut durchlässig, locker und reich an Nährstoffen sein. Wassermelonen sind Starkzehrer, also brauchen sie ordentlich Futter.
* Ausreichend Wasser: Regelmäßiges Gießen ist entscheidend, besonders während der Fruchtbildung. Achtet aber darauf, Staunässe zu vermeiden.
* Platz zum Ranken (oder Klettern!): Wassermelonen sind Rankpflanzen und brauchen Platz, um sich auszubreiten. Aber keine Angst, wir werden sie auch auf kleinem Raum in den Griff bekommen!
* Wärme: Wassermelonen sind wärmeliebend. Die Bodentemperatur sollte idealerweise über 21°C liegen.
Die richtige Sorte wählen: Kleine Melonen für kleine Räume
Nicht jede Wassermelone eignet sich für den Anbau auf kleinem Raum. Wählt Sorten, die kompakt wachsen und kleinere Früchte tragen. Hier sind ein paar Empfehlungen:
* ‘Sugar Baby’: Eine klassische Sorte mit kleinen, runden Früchten und süßem, rotem Fruchtfleisch.
* ‘Golden Midget’: Diese Sorte produziert kleine, gelbe Melonen mit einem süßen, rosa Fruchtfleisch. Sie reift sehr früh, was sie ideal für kurze Sommer macht.
* ‘Bush Sugar Baby’: Eine noch kompaktere Variante der ‘Sugar Baby’, die sich besonders gut für den Anbau in Töpfen eignet.
* ‘Tiger Baby’: Eine Mini-Wassermelone mit gestreifter Schale und süßem, rotem Fruchtfleisch.
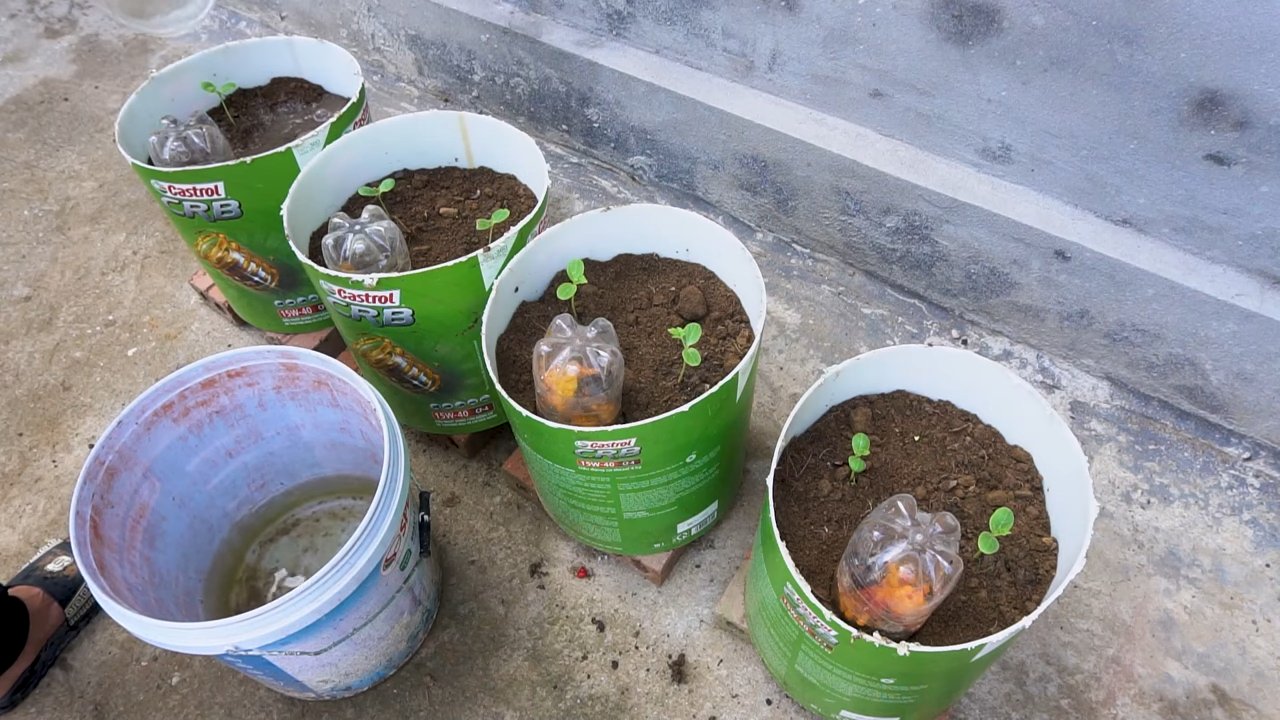
Schritt-für-Schritt-Anleitung: Wassermelonen im Topf anbauen
Jetzt geht’s ans Eingemachte! Hier ist meine detaillierte Anleitung, wie ihr Wassermelonen erfolgreich im Topf anbauen könnt:
1. Die Vorbereitung: Saatgut, Topf und Erde
1. Saatgut besorgen: Kauft hochwertiges Saatgut der oben genannten Sorten. Achtet auf das Haltbarkeitsdatum.
2. Den richtigen Topf wählen: Wassermelonen brauchen Platz für ihre Wurzeln. Wählt einen großen Topf mit einem Durchmesser von mindestens 45 cm und einem Volumen von mindestens 40 Litern. Je größer, desto besser!
3. Die perfekte Erde mischen: Mischt eine hochwertige Blumenerde mit Kompost und etwas Sand oder Perlit, um die Drainage zu verbessern. Wassermelonen mögen einen leicht sauren pH-Wert (zwischen 6,0 und 6,8).
2. Die Aussaat: Der Start ins Melonenleben
1. Vorkultur im Haus (empfohlen): Beginnt die Aussaat am besten im Haus, etwa 4-6 Wochen vor dem letzten erwarteten Frost. Füllt kleine Anzuchttöpfe mit der vorbereiteten Erde und legt 2-3 Samen pro Topf etwa 2 cm tief hinein.
2. Warm und feucht halten: Stellt die Töpfe an einen warmen, hellen Ort (z.B. auf eine Fensterbank) und haltet die Erde feucht, aber nicht nass. Eine Temperatur von 24-27°C ist ideal für die Keimung.
3. Keimung abwarten: Die Keimung dauert in der Regel 7-14 Tage. Sobald die Sämlinge gekeimt sind, entfernt den schwächsten Trieb pro Topf.
4. Direktsaat (Alternative): Wenn ihr in einer Region mit langen, warmen Sommern lebt, könnt ihr die Samen auch direkt in den Topf säen, sobald die Bodentemperatur über 21°C liegt.
3. Das Umpflanzen: Ab ins Freie!
1. Abhärten: Bevor ihr die Sämlinge ins Freie pflanzt, müsst ihr sie abhärten. Stellt die Töpfe für ein paar Stunden pro Tag nach draußen, beginnend mit einer Stunde und steigert die Zeit allmählich über eine Woche.
2. Der richtige Zeitpunkt: Pflanzt die Sämlinge erst aus, wenn keine Frostgefahr mehr besteht und die Bodentemperatur mindestens 21°C beträgt.
3. Umpflanzen: Grabt ein Loch in der Mitte des Topfes, das groß genug ist, um den Wurzelballen aufzunehmen. Setzt den Sämling vorsichtig ein und füllt das Loch mit Erde auf. Drückt die Erde leicht an und gießt gründlich.
4. Die Pflege: Gießen, Düngen und Rankhilfe
1. Regelmäßiges Gießen: Gießt die Wassermelonen regelmäßig, besonders während der Fruchtbildung. Achtet darauf, dass die Erde immer leicht feucht ist, aber vermeidet Staunässe. Am besten gießt ihr morgens, damit die Blätter über den Tag abtrocknen können.
2. Richtig düngen: Wassermelonen sind Starkzehrer und brauchen regelmäßige Düngergaben. Verwendet einen organischen Dünger oder einen speziellen Dünger für Fruchtgemüse. Düngt alle 2-3 Wochen gemäß den Anweisungen auf der Verpackung.
3. Rankhilfe anbringen: Da wir Wassermelonen auf kleinem Raum anbauen, brauchen sie eine Rankhilfe. Ihr könnt einen Obelisken, ein Spalier oder ein Rankgitter verwenden. Leitet die Ranken vorsichtig an der Rankhilfe entlang.
4. Ausgeizen (optional): Um die Fruchtbildung zu fördern, könnt ihr die Seitentriebe der Wassermelone ausbrechen. Lasst nur den Haupttrieb und ein paar Seitentriebe mit Blüten stehen.
5. Bestäubung unterstützen: Wassermelonen sind auf die Bestäubung durch Bienen und andere Insekten angewiesen. Wenn ihr wenig Insekten in eurem Garten habt, könnt ihr die Blüten auch von Hand bestäuben. Nehmt dazu einen weichen Pinsel und übertragt den Pollen von den männlichen Blüten (mit dünnem Stiel) auf die weiblichen Blüten (mit kleinem Fruchtansatz).
5. Die Ernte: Der Lohn der Mühe
1. Den richtigen Zeitpunkt erkennen: Die Reifezeit von Wassermelonen variiert je nach Sorte. Achtet auf folgende Anzeichen:
* Die Schale verliert ihren Glanz und wird matter.
* Die Stelle, an der die Melone auf dem Boden aufliegt, wird gelblich.
* Wenn ihr auf die Melone klopft, sollte sie hohl klingen.
* Die Ranke, die mit der Melone verbunden ist, wird trocken und braun.
2. Ernten: Schneidet die Melone vorsichtig mit einem scharfen Messer oder einer Gartenschere von der Ranke ab. Lasst dabei einen kleinen Stiel an der Melone.
Zusätzliche Tipps für den erfolgreichen Wassermelonenanbau auf kleinem Raum
* Mulchen: Mulcht den Boden um die Wassermelonenpflanzen mit Stroh oder Holzhackschnitzeln, um die Feuchtigkeit zu halten und Unkraut zu unterdrücken.
* Schutz vor Schädlingen und Krankheiten: Achtet auf Schädlinge wie Blattläuse oder Mehltau. Bei Bedarf könnt ihr biologische Schädlingsbekämpfungsmittel einsetzen.
* Drehen der Früchte: Dreht die Wassermelonen regelmäßig, damit sie gleichmäßig reifen.
* Unterstützung der Früchte: Wenn die Melonen größer werden, kann es sinnvoll sein, sie mit einem Netz oder einem Tuch zu unterstützen, um zu verhindern, dass sie abbrechen.
Häufige Fehler vermeiden
* Zu kleiner Topf: Ein zu kleiner Topf
Conclusion
So, there you have it! Growing watermelons in small spaces might seem like an impossible feat, but with the right techniques and a little bit of dedication, you can absolutely enjoy the sweet taste of homegrown watermelon, even if you’re short on square footage. This DIY trick, focusing on vertical gardening and careful variety selection, is a game-changer for urban gardeners and anyone with limited space.
Why is this a must-try? Because it unlocks the potential of your small garden, balcony, or patio. Instead of lamenting the lack of space, you’re actively creating an environment where watermelons can thrive. Imagine the satisfaction of harvesting your own juicy, ripe watermelon, knowing you nurtured it from seed to fruit in a compact area. It’s not just about the watermelon; it’s about the sense of accomplishment and the connection to nature that gardening provides.
But don’t stop there! Experiment with different watermelon varieties suited for small spaces. Consider ‘Sugar Baby’ for its compact size and early maturity, or try ‘Bush Sugar Baby’ for an even more compact bush-type plant. You can also explore different trellising methods. While a sturdy A-frame trellis is a great option, you could also use a tomato cage or even create a DIY trellis from repurposed materials. Remember to provide adequate support for the developing watermelons, using slings made from old t-shirts or netting to prevent them from breaking off the vine.
Another variation to consider is companion planting. Marigolds can help deter pests, while basil can improve the flavor of your watermelons. Planting these alongside your watermelons can create a healthier and more productive growing environment.
We’ve armed you with the knowledge and the inspiration; now it’s time to put it into action. Don’t be intimidated by the prospect of growing watermelons in small spaces. Start small, be patient, and learn from your experiences. Every gardener, regardless of their space, faces challenges, but the rewards are well worth the effort.
We are confident that this DIY trick will transform your small space into a thriving watermelon patch. So, grab your seeds, prepare your soil, and get ready to embark on a rewarding gardening adventure. We can’t wait to hear about your success! Share your photos, tips, and experiences in the comments below. Let’s build a community of small-space watermelon growers and inspire others to embrace the joy of homegrown goodness. Let us know what worked for you, what challenges you faced, and any innovative solutions you came up with. Together, we can unlock the secrets to successful small-space watermelon gardening and enjoy the fruits (literally!) of our labor.
Frequently Asked Questions (FAQ)
Q: What are the best watermelon varieties for small spaces?
A: Choosing the right variety is crucial for success when growing watermelons in limited space. Look for compact or bush-type varieties that don’t require extensive vining. Some excellent options include:
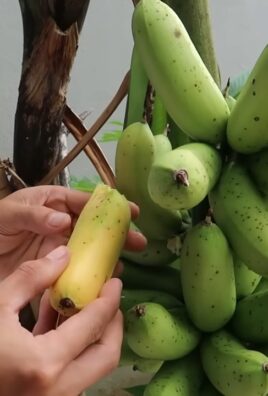
* **Sugar Baby:** This is a popular choice due to its relatively small size (around 8-10 pounds) and early maturity (about 75 days). It produces sweet, juicy red flesh.
* **Bush Sugar Baby:** As the name suggests, this is an even more compact version of Sugar Baby, making it ideal for containers and small gardens.
* **Golden Midget:** This variety produces small, personal-sized watermelons with yellow skin and pink flesh. It matures quickly (around 70 days).
* **Tiger Baby:** A unique variety with striped skin and sweet, crisp flesh. It’s relatively compact and matures in about 75 days.
* **Small Wonder:** This variety is specifically bred for container gardening and produces small, round watermelons.
When selecting a variety, consider your local climate and growing season. Choose varieties that are known to perform well in your region.
Q: How much sunlight do watermelons need?
A: Watermelons are sun-loving plants and require at least 6-8 hours of direct sunlight per day to thrive. Insufficient sunlight can lead to poor fruit production and smaller, less flavorful watermelons. Choose a location for your watermelon plants that receives ample sunlight throughout the day. If you’re growing in containers, you may need to move the plants around to ensure they get enough sun.
Q: What type of soil is best for growing watermelons?
A: Watermelons prefer well-draining, fertile soil with a slightly acidic pH (between 6.0 and 6.8). Amend your soil with compost or other organic matter to improve drainage and fertility. If you’re growing in containers, use a high-quality potting mix specifically formulated for vegetables. Avoid heavy clay soils, as they can retain too much moisture and lead to root rot.
Q: How often should I water my watermelon plants?
A: Watermelons need consistent moisture, especially during fruit development. Water deeply and regularly, aiming to keep the soil consistently moist but not waterlogged. Check the soil moisture regularly by sticking your finger into the soil. If the top inch feels dry, it’s time to water. Avoid overhead watering, as it can increase the risk of fungal diseases. Instead, water at the base of the plant.
Q: How do I support the watermelons as they grow?
A: As the watermelons grow larger, they will need support to prevent them from breaking off the vine. You can use slings made from old t-shirts, netting, or pantyhose to support the fruits. Tie the slings to the trellis or support structure. Make sure the slings are strong enough to support the weight of the watermelons.
Q: How do I know when my watermelons are ripe?
A: Determining when a watermelon is ripe can be tricky, but there are a few telltale signs to look for:
* **The tendril closest to the fruit turns brown and dry:** This is a reliable indicator of ripeness.
* **The underside of the watermelon (where it rests on the ground) turns from white to yellow:** This is known as the “ground spot.”
* **The watermelon sounds hollow when you thump it:** A ripe watermelon will have a deep, resonant sound.
* **The skin becomes dull and less shiny:** A ripe watermelon will lose its glossy appearance.
It may take some practice to accurately determine ripeness, but with experience, you’ll become a watermelon-picking pro.
Q: What are some common pests and diseases that affect watermelons?
A: Watermelons can be susceptible to various pests and diseases, including:
* **Aphids:** These small insects can suck the sap from watermelon leaves, causing them to curl and distort.
* **Squash bugs:** These pests can damage watermelon vines and fruits.
* **Cucumber beetles:** These beetles can transmit diseases and damage watermelon leaves and fruits.
* **Powdery mildew:** This fungal disease can cause a white, powdery coating on watermelon leaves.
* **Fusarium wilt:** This soilborne disease can cause watermelon vines to wilt and die.
To prevent pests and diseases, practice good garden hygiene, such as removing weeds and debris. You can also use organic pest control methods, such as insecticidal soap or neem oil. Choose disease-resistant watermelon varieties whenever possible.
Q: Can I grow watermelons in containers?
A: Yes, you can absolutely grow watermelons in containers, especially if you choose compact or bush-type varieties. Use a large container (at least 20 gallons) with good drainage. Fill the container with a high-quality potting mix and provide adequate support for the vines and fruits. Water regularly and fertilize as needed.
Q: How do I fertilize my watermelon plants?
A: Watermelons are heavy feeders and benefit from regular fertilization. Use a balanced fertilizer (such as 10-10-10) at planting time. Once the plants start to flower, switch to a fertilizer that is higher in phosphorus and potassium to promote fruit development. Follow the instructions on the fertilizer label carefully. You can also supplement with organic fertilizers, such as compost tea or fish emulsion.
Q: What are some companion plants for watermelons?
A: Companion planting can help improve the health and productivity of your watermelon plants. Some good companion plants for watermelons include:
* **Marigolds:** These flowers can help deter pests, such as nematodes and aphids.
* **Basil:** This herb can improve the flavor of watermelons and repel certain pests.
* **Nasturtiums:** These flowers can attract beneficial insects, such as ladybugs and lacewings.
* **Radishes:** These root vegetables can help break up the soil and improve drainage.
* **Beans:** These legumes can fix nitrogen in the soil, which can benefit watermelon plants.


Leave a Comment