
Growing Black Corn in Containers might sound like something out of a fantasy novel, but trust me, it’s totally achievable, even if you don’t have acres of farmland! I’m so excited to share this unique and rewarding gardening adventure with you. Forget the usual yellow kernels; we’re diving into the world of deep, dark, and delicious black corn, right on your patio or balcony.
Corn, in general, has a rich history, deeply intertwined with the cultures of indigenous peoples of the Americas. For centuries, it has been a staple food, a symbol of sustenance, and a vital part of their traditions. While black corn varieties aren’t as widely known as their yellow counterparts, they hold their own special place, often prized for their unique flavor and nutritional benefits. Think of the vibrant colors they can add to your dishes!
But why bother growing black corn in containers? Well, for starters, it’s a fantastic conversation starter! Imagine the look on your friends’ faces when you tell them you grew your own black corn. More importantly, it’s a great way to enjoy fresh, homegrown produce, even with limited space. Plus, it’s incredibly satisfying to nurture a plant from seed to harvest. Many people are looking for ways to be more self-sufficient and connect with nature, and growing black corn in containers is a perfect way to do just that. This DIY guide will walk you through every step, from choosing the right container to harvesting your very own black corn. Let’s get started!
Schwarzer Mais im Topf anbauen: Eine Schritt-für-Schritt-Anleitung
Hallo liebe Gartenfreunde! Habt ihr schon mal von schwarzem Mais gehört? Ich war total fasziniert, als ich das erste Mal davon gelesen habe, und musste es einfach selbst ausprobieren. Und das Beste daran: Man braucht keinen riesigen Garten, um schwarzen Mais anzubauen. Es funktioniert super im Topf! Ich zeige euch heute, wie ihr das ganz einfach selbst machen könnt. Lasst uns loslegen!
Was du brauchst
Bevor wir anfangen, hier eine Liste mit allen Dingen, die du für dein schwarzes Mais-Projekt benötigst:
* Schwarze Maissamen: Diese sind online oder in gut sortierten Gartencentern erhältlich. Achtet darauf, dass es sich um eine Sorte handelt, die für den Anbau in Containern geeignet ist.
* Große Töpfe: Mais braucht Platz! Wählt Töpfe mit einem Durchmesser von mindestens 30 cm und einer Tiefe von 30 cm. Je größer, desto besser.
* Hochwertige Blumenerde: Eine gute Blumenerde ist das A und O für gesundes Wachstum. Ich empfehle eine Mischung aus Blumenerde, Kompost und etwas Perlit für eine gute Drainage.
* Dünger: Mais ist ein Starkzehrer und braucht regelmäßige Düngergaben. Ich verwende gerne einen organischen Dünger speziell für Gemüse.
* Gießkanne oder Gartenschlauch: Um eure Pflanzen regelmäßig zu gießen.
* Pflanzstäbe oder Bambusstäbe: Um die Pflanzen bei Bedarf zu stützen.
* Sonnenreicher Standort: Mais liebt die Sonne! Wählt einen Standort, der mindestens 6-8 Stunden Sonne pro Tag bekommt.
* Geduld: Mais braucht Zeit zum Wachsen, also seid geduldig und gebt nicht auf!
Aussaat und Keimung
Jetzt geht es ans Eingemachte! Die Aussaat ist der erste Schritt zum eigenen schwarzen Mais.
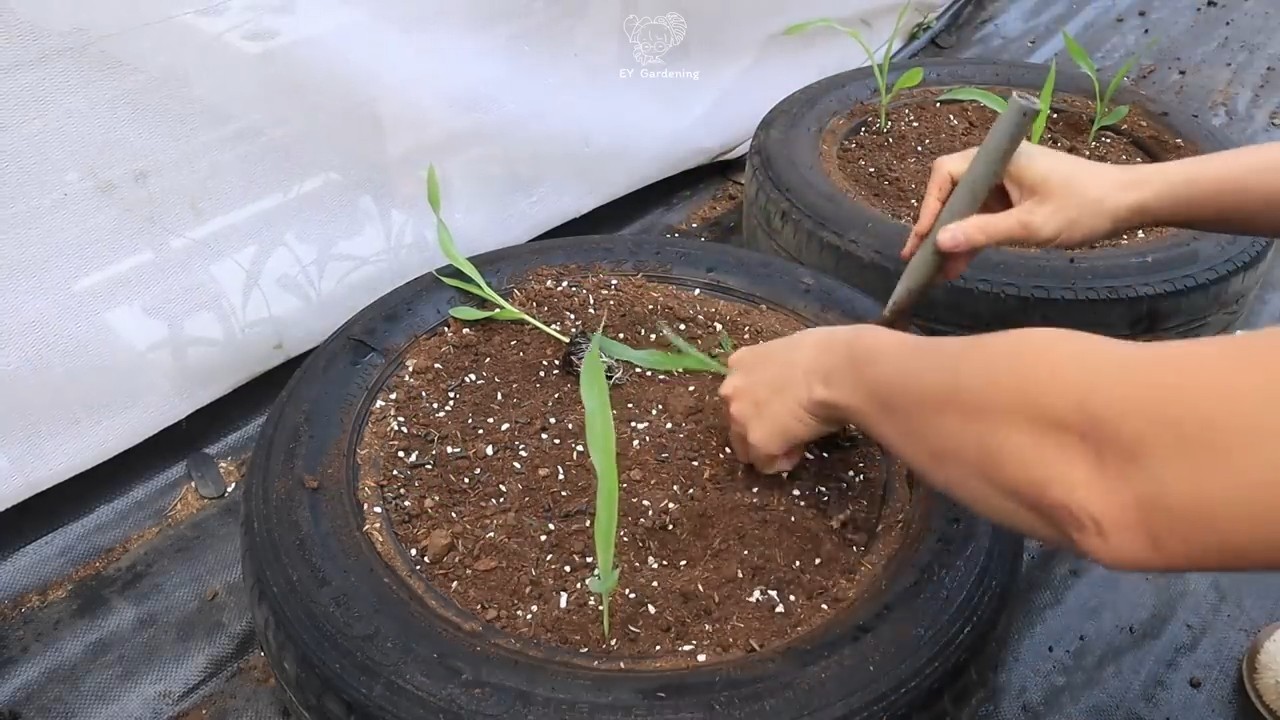
1. Töpfe vorbereiten: Füllt eure Töpfe mit der Blumenerde-Mischung. Lasst etwa 5 cm Platz bis zum Rand.
2. Samen säen: Macht kleine Löcher in die Erde, etwa 2-3 cm tief. Legt 2-3 Samen pro Loch hinein. Das erhöht die Wahrscheinlichkeit, dass mindestens ein Samen keimt.
3. Mit Erde bedecken: Bedeckt die Samen mit Erde und drückt sie leicht an.
4. Gießen: Gießt die Erde vorsichtig an, sodass sie gut durchfeuchtet ist. Achtet darauf, dass die Erde nicht zu nass ist, da die Samen sonst faulen können.
5. Standort wählen: Stellt die Töpfe an einen warmen, sonnigen Ort.
6. Geduld haben: Die Keimung dauert in der Regel 7-14 Tage. Haltet die Erde feucht, aber nicht nass.
Pflege der Maispflanzen
Sobald die ersten Pflänzchen aus der Erde sprießen, beginnt die eigentliche Arbeit. Aber keine Sorge, mit ein paar einfachen Handgriffen könnt ihr eurem Mais zu einem gesunden Wachstum verhelfen.
1. Vereinzeln: Wenn mehrere Samen gekeimt sind, solltet ihr die schwächsten Pflänzchen entfernen, sodass nur die stärkste Pflanze pro Loch übrig bleibt. Das gibt der Pflanze mehr Platz und Nährstoffe.
2. Gießen: Mais braucht viel Wasser, besonders während der Wachstumsphase. Gießt regelmäßig, besonders an heißen Tagen. Achtet darauf, dass die Erde nicht austrocknet, aber auch nicht staunass ist. Am besten gießt ihr morgens oder abends, um Verdunstung zu vermeiden.
3. Düngen: Wie bereits erwähnt, ist Mais ein Starkzehrer. Düngt eure Pflanzen alle 2-3 Wochen mit einem organischen Dünger. Ich verwende gerne einen Flüssigdünger, den ich dem Gießwasser beifüge.
4. Stützen: Wenn die Pflanzen größer werden, können sie bei Wind leicht umknicken. Stützt sie bei Bedarf mit Pflanzstäben oder Bambusstäben. Steckt die Stäbe einfach in die Erde und bindet die Pflanzen locker daran fest.
5. Seitentriebe entfernen: Mais bildet manchmal Seitentriebe, sogenannte “Geiztriebe”. Diese solltet ihr entfernen, damit die Pflanze ihre Energie in die Entwicklung der Maiskolben stecken kann.
6. Bestäubung unterstützen: Mais ist windbestäubt. Wenn ihr nur wenige Pflanzen habt, kann es sinnvoll sein, die Bestäubung manuell zu unterstützen. Schüttelt dazu einfach die Pflanzen leicht, wenn die männlichen Blüten (die Fahnen oben an der Pflanze) Pollen abgeben.
Schädlinge und Krankheiten
Auch beim Maisanbau im Topf können Schädlinge und Krankheiten auftreten. Hier sind einige häufige Probleme und wie ihr sie bekämpfen könnt:
* Blattläuse: Blattläuse saugen Pflanzensaft und können das Wachstum beeinträchtigen. Ihr könnt sie mit einem Wasserstrahl abspritzen oder mit einer Seifenlauge behandeln.
* Maiszünsler: Der Maiszünsler ist ein Schmetterling, dessen Raupen sich in die Maiskolben bohren und sie beschädigen. Ihr könnt ihn mit Nützlingen wie Schlupfwespen bekämpfen oder mit einem biologischen Insektizid.
* Pilzkrankheiten: Bei feuchtem Wetter können Pilzkrankheiten wie Maisbeulen auftreten. Sorgt für eine gute Belüftung und entfernt befallene Blätter.
Erntezeit
Die Erntezeit ist der spannendste Teil! Aber wann ist der Mais reif?
1. Zeitpunkt bestimmen: Die Reifezeit hängt von der Sorte ab, liegt aber in der Regel zwischen 80 und 120 Tagen nach der Aussaat.
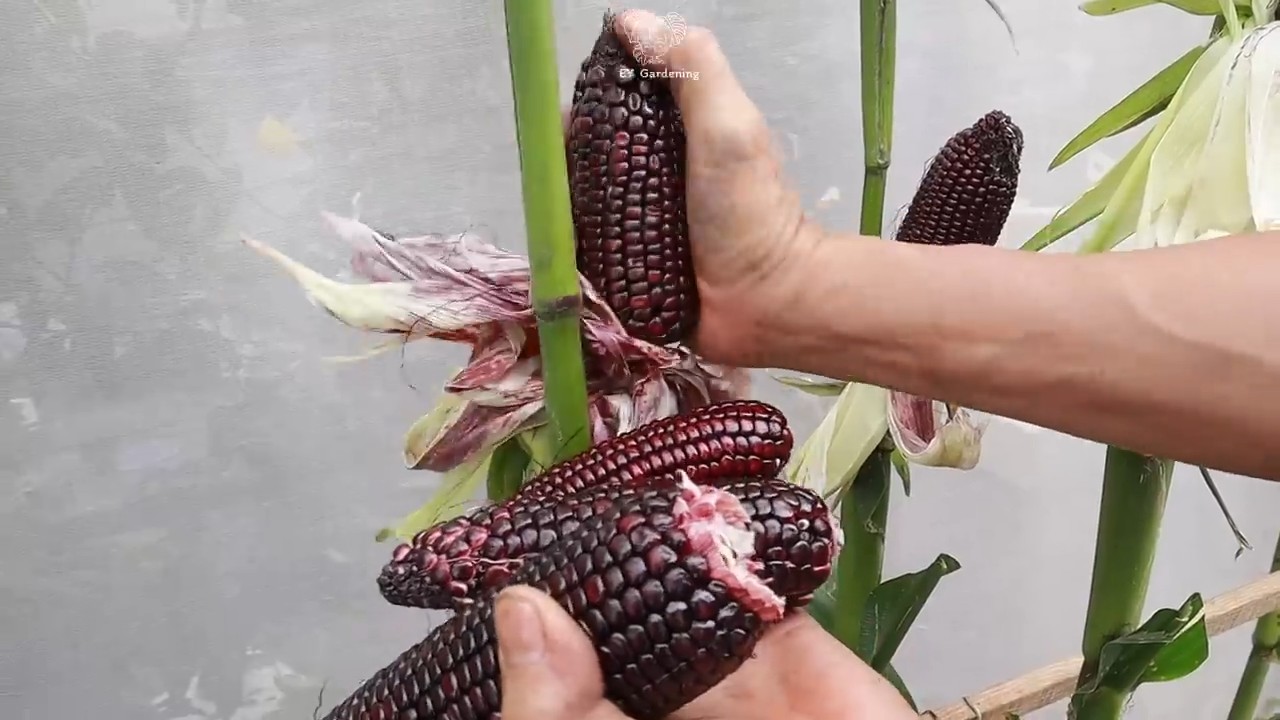
2. Anzeichen erkennen: Ein Zeichen für die Reife ist, wenn die Hüllblätter der Maiskolben trocken und braun werden. Die Maiskörner sollten prall und fest sein. Wenn ihr ein Korn mit dem Fingernagel anpiekst, sollte eine milchige Flüssigkeit austreten.
3. Ernten: Brecht die Maiskolben vorsichtig von der Pflanze ab.
Verwendung des schwarzen Mais
Jetzt habt ihr euren eigenen schwarzen Mais geerntet! Aber was macht man damit?
* Kochen: Ihr könnt den schwarzen Mais genauso kochen wie normalen Mais. Er hat einen leicht süßlichen Geschmack.
* Grillen: Gegrillter schwarzer Mais ist ein echter Hingucker!
* Mehl mahlen: Ihr könnt die getrockneten Maiskörner zu Mehl mahlen und daraus Tortillas, Polenta oder andere Leckereien zubereiten.
* Dekoration: Die getrockneten Maiskolben sind auch eine tolle Dekoration für den Herbst.
Zusätzliche Tipps
Hier noch ein paar zusätzliche Tipps, die euch beim Anbau von schwarzem Mais im Topf helfen können:
* Sortenwahl: Achtet bei der Sortenwahl darauf, dass es sich um eine Sorte handelt, die für den Anbau in Containern geeignet ist. Es gibt spezielle Zwergsorten, die sich besonders gut eignen.
* Windschutz: Stellt die Töpfe an einen windgeschützten Ort, um zu verhindern, dass die Pflanzen umknicken.
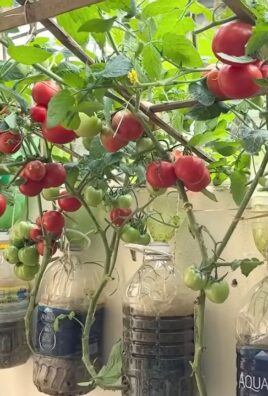
* Nachbarn: Mais profitiert von der Nachbarschaft zu Bohnen und Kürbis. Diese Pflanzen können sich gegenseitig unterstützen.
* Bodenverbesserung: Mischt vor der Aussaat etwas Kompost oder Hornspäne unter die Erde, um den Boden zu verbessern.
* Mulchen: Mulcht die Erde um die Pflanzen herum mit Stroh oder Rasenschnitt, um die Feuchtigkeit zu halten und Unkraut zu unterdrücken.
Ich hoffe, diese Anleitung hat euch geholfen und inspiriert, euren eigenen schwarzen Mais im Topf anzubauen. Es ist wirklich ein tolles Erlebnis, zu sehen, wie die Pflanzen wachsen und gedeihen. Und der Geschmack des selbst geernteten Mais ist einfach unschlagbar! Viel Spaß beim Gärtnern!
Conclusion
If you’ve ever dreamed of harvesting your own vibrant, nutrient-rich black corn, even without a sprawling farm, then growing black corn in containers is an absolute must-try. This isn’t just about adding a unique and visually stunning element to your garden or balcony; it’s about experiencing the satisfaction of cultivating your own food, connecting with nature in a tangible way, and enjoying the unparalleled flavor of freshly grown produce.
The beauty of this DIY project lies in its accessibility. Container gardening democratizes the growing process, making it possible for anyone, regardless of their living situation, to participate in the joy of agriculture. Imagine the pride you’ll feel when you present a dish made with corn you nurtured from seed to harvest. It’s a conversation starter, a testament to your resourcefulness, and a delicious way to impress your friends and family.
Beyond the novelty and aesthetic appeal, black corn offers significant nutritional benefits. Rich in antioxidants, particularly anthocyanins, this variety boasts potential health advantages that make it a worthwhile addition to your diet. By growing your own, you have complete control over the growing process, ensuring that your corn is free from harmful pesticides and chemicals.
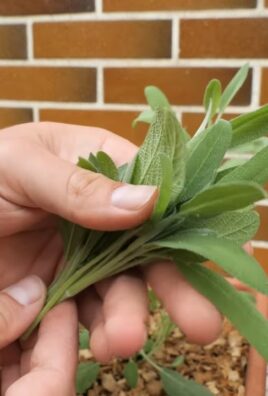
Ready to take your container gardening to the next level? Consider experimenting with different container sizes to see how they impact yield. You could also try companion planting, incorporating herbs like basil or marigolds to deter pests and enhance the overall health of your corn. For a truly unique twist, explore different varieties of black corn, each with its own subtle flavor profile and color variations. Some varieties are bred for ornamental purposes, while others are specifically developed for culinary use.
Don’t be intimidated by the prospect of growing corn in containers. With the right soil, sunlight, and watering schedule, you’ll be well on your way to a bountiful harvest. Remember to be patient and observant, paying close attention to your plants’ needs. The rewards of this endeavor are well worth the effort.
We encourage you to embark on this exciting journey of growing black corn in containers. Share your experiences with us! We’d love to hear about your successes, challenges, and any unique tips or tricks you discover along the way. Post photos of your thriving corn plants, share your favorite recipes using your homegrown harvest, and inspire others to embrace the joys of container gardening. Let’s create a community of passionate gardeners who are dedicated to growing their own food, one container at a time. So grab your seeds, prepare your containers, and get ready to experience the magic of growing your own black corn!
Frequently Asked Questions (FAQ)
What are the best container sizes for growing black corn?
The ideal container size for growing black corn is at least 12 inches in diameter and 12 inches deep. However, larger containers, such as 15-20 gallon pots, are highly recommended, especially if you plan to grow multiple stalks per container. Larger containers provide more room for root development, which translates to healthier plants and a more abundant harvest. If space is limited, you can use smaller containers, but be prepared to water more frequently and potentially sacrifice some yield. Remember that black corn plants can grow quite tall, so a stable and sturdy container is essential to prevent them from tipping over, especially in windy conditions. Consider using weighted containers or placing them in a sheltered location.
How much sunlight does black corn need when grown in containers?
Black corn thrives in full sunlight, requiring at least 6-8 hours of direct sunlight per day. When growing in containers, it’s crucial to position your plants in a location that receives ample sunlight throughout the day. If you’re growing indoors or in a shaded area, you may need to supplement with artificial lighting, such as grow lights. Insufficient sunlight can lead to stunted growth, reduced yields, and pale, underdeveloped kernels. Observe your plants closely and adjust their position as needed to ensure they receive adequate sunlight. Rotate the containers periodically to ensure even exposure to sunlight on all sides of the plant.
What type of soil is best for growing black corn in containers?
The best soil for growing black corn in containers is a well-draining, nutrient-rich potting mix. Avoid using garden soil, as it can be too heavy and compact, hindering root development and drainage. A good potting mix should contain a blend of peat moss, perlite, and vermiculite, which provides excellent drainage and aeration. You can also amend the potting mix with compost or other organic matter to boost its nutrient content. Black corn is a heavy feeder, so it’s essential to provide it with a soil that is rich in nitrogen, phosphorus, and potassium. Consider adding a slow-release fertilizer to the potting mix at planting time to provide a steady supply of nutrients throughout the growing season.
How often should I water black corn grown in containers?
Watering frequency for black corn grown in containers depends on several factors, including the size of the container, the weather conditions, and the stage of plant growth. Generally, you should water your corn plants whenever the top inch of soil feels dry to the touch. During hot, dry weather, you may need to water daily, or even twice a day, to prevent the soil from drying out completely. Overwatering can be just as harmful as underwatering, so be sure to allow the soil to drain properly after each watering. Avoid watering the foliage, as this can increase the risk of fungal diseases. Instead, water at the base of the plant, directing the water towards the roots.
How do I pollinate black corn grown in containers?
Black corn is wind-pollinated, meaning that the pollen from the tassels (male flowers) needs to be transferred to the silks (female flowers) by the wind. When growing in containers, especially indoors or in sheltered locations, you may need to assist with pollination to ensure a good kernel set. You can do this by gently shaking the plants or using a small paintbrush to transfer pollen from the tassels to the silks. It’s best to pollinate in the morning, when the silks are most receptive. Repeat the pollination process for several days to ensure that all of the silks are pollinated. You’ll know that pollination has been successful when the silks begin to turn brown and dry.
What are some common pests and diseases that affect black corn, and how can I prevent them?
Some common pests that can affect black corn include corn earworms, aphids, and spider mites. To prevent pest infestations, inspect your plants regularly and remove any pests you find by hand. You can also use insecticidal soap or neem oil to control pests. Common diseases that can affect black corn include rust, smut, and leaf blight. To prevent diseases, ensure good air circulation around your plants and avoid overhead watering. You can also use a fungicide to control diseases if necessary. Choose disease-resistant varieties of black corn whenever possible. Companion planting with herbs like basil or marigolds can also help to deter pests and diseases.
When is the best time to harvest black corn?
The best time to harvest black corn is when the silks have turned brown and dry, and the kernels are plump and filled with milky sap. You can test for ripeness by piercing a kernel with your fingernail. If the sap is milky, the corn is ready to harvest. If the sap is clear, the corn needs more time to mature. To harvest, simply twist the ear of corn off the stalk. The time from planting to harvest typically ranges from 70 to 100 days, depending on the variety and growing conditions. Enjoy your freshly harvested black corn grilled, boiled, or roasted, or use it to make delicious corn bread, tortillas, or other dishes.
Leave a Comment