
Rooftop Kale Gardening: Imagine stepping onto your roof and harvesting fresh, vibrant kale, ready to be tossed into a salad or blended into a healthy smoothie. Sounds idyllic, right? Well, it’s more achievable than you might think! For centuries, urban dwellers have sought ways to bring nature closer, and rooftop gardens, in particular, have a rich history, from the Hanging Gardens of Babylon to the modern-day green roofs sprouting across our cities.
But why rooftop kale gardening specifically? In today’s world, access to fresh, organic produce can be a challenge, especially if you live in an urban environment. Supermarket kale, while convenient, often lacks the flavor and nutritional punch of homegrown varieties. Plus, let’s be honest, who doesn’t love the satisfaction of growing their own food? This DIY guide will equip you with the knowledge and simple tricks you need to transform your rooftop into a thriving kale oasis, even if you’re a complete beginner. I’m excited to share these easy-to-follow steps that will not only provide you with delicious, healthy greens but also add a touch of green beauty to your urban landscape. Let’s get started!
Dein eigener Dachgarten mit Grünkohl: Eine DIY-Anleitung
Hey Gartenfreunde! Habt ihr auch das Gefühl, dass ihr mehr Grün in eurem Leben braucht, aber keinen Garten habt? Keine Sorge, ich zeige euch, wie ihr euren eigenen Dachgarten mit Grünkohl anlegen könnt! Es ist einfacher, als ihr denkt, und das Ergebnis ist nicht nur wunderschön, sondern auch super gesund. Lasst uns loslegen!
Was du für deinen Dachgarten mit Grünkohl brauchst
Bevor wir anfangen, hier eine Liste mit allen Materialien und Werkzeugen, die du benötigst. Keine Panik, die meisten Sachen hast du wahrscheinlich schon zu Hause oder kannst sie leicht besorgen.
* Geeignete Behälter: Das können große Pflanzkübel, alte Badewannen (mit Abflusslöchern!), oder sogar stabile Plastikboxen sein. Wichtig ist, dass sie groß genug für Grünkohl sind (mindestens 30 cm tief und breit) und Abflusslöcher haben.
* Hochwertige Pflanzerde: Verwende am besten eine spezielle Gemüseerde oder mische Blumenerde mit Kompost. Grünkohl braucht nährstoffreichen Boden.
* Grünkohlsamen oder Jungpflanzen: Du kannst entweder Samen aussäen oder direkt Jungpflanzen kaufen. Jungpflanzen sind einfacher, aber Samen sind günstiger und geben dir mehr Kontrolle.
* Drainagematerial: Blähton, Kies oder Tonscherben helfen, Staunässe zu vermeiden.
* Gießkanne oder Gartenschlauch: Zum Bewässern deiner Pflanzen.
* Gartenschere oder Messer: Zum Ernten des Grünkohls.
* Handschuhe: Um deine Hände sauber zu halten.
* Optional: Dünger (organisch oder mineralisch), Schneckenschutz, Rankhilfe (je nach Grünkohlsorte).
Sicherheit geht vor: Vorbereitung deines Daches
Bevor du loslegst, ist es super wichtig, die Sicherheit zu checken!
* Tragfähigkeit prüfen: Dein Dach muss das Gewicht der Behälter, Erde und Pflanzen tragen können. Im Zweifelsfall frag einen Statiker!
* Abdichtung überprüfen: Stelle sicher, dass dein Dach dicht ist und keine Schäden hat. Wasser kann sonst ins Haus eindringen.
* Sicherheitsvorkehrungen treffen: Trage festes Schuhwerk und achte darauf, nicht zu stolpern. Arbeite am besten nicht alleine.
* Windschutz: Dächer können windig sein. Überlege dir, ob du einen Windschutz brauchst, besonders für junge Pflanzen.
Schritt-für-Schritt-Anleitung: So legst du deinen Grünkohl-Dachgarten an
Okay, jetzt geht’s ans Eingemachte! Hier ist eine detaillierte Anleitung, wie du deinen eigenen Grünkohl-Dachgarten anlegst.
1. Behälter vorbereiten: Reinige deine Behälter gründlich. Wenn sie keine Abflusslöcher haben, bohre welche hinein. Lege eine Schicht Drainagematerial auf den Boden der Behälter. Das verhindert Staunässe und sorgt für eine gute Belüftung der Wurzeln.
2. Erde einfüllen: Fülle die Behälter mit Pflanzerde. Lass oben ein paar Zentimeter Platz, damit du beim Gießen nicht alles überschwemmst.
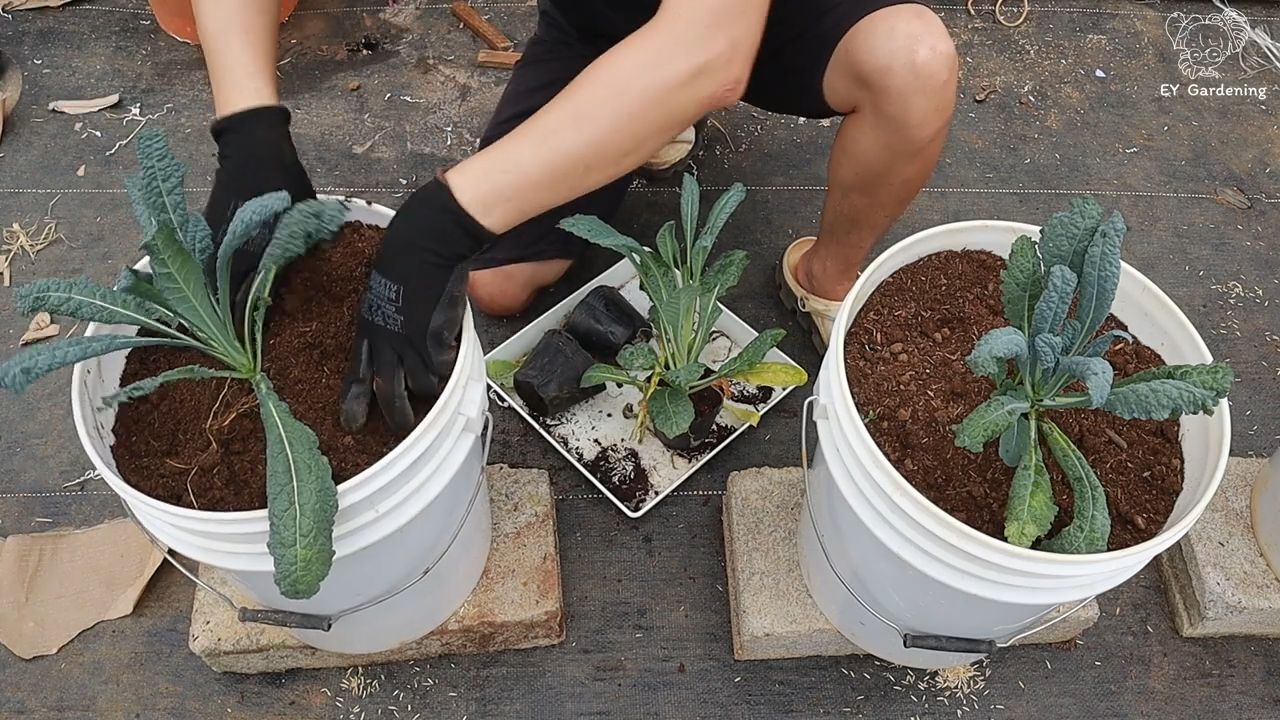
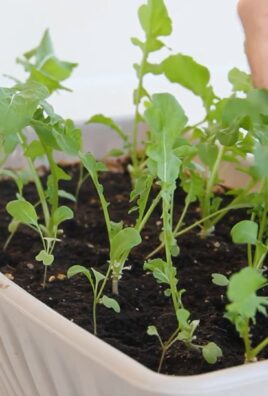
3. Grünkohl aussäen oder pflanzen:
* Aussaat: Wenn du Samen verwendest, säe sie gemäß den Anweisungen auf der Samenpackung aus. Drücke die Samen leicht in die Erde und bedecke sie mit einer dünnen Schicht Erde. Gieße vorsichtig an.
* Pflanzen: Wenn du Jungpflanzen verwendest, grabe kleine Löcher in die Erde, die groß genug für die Wurzelballen sind. Setze die Pflanzen hinein und fülle die Löcher mit Erde auf. Drücke die Erde leicht an und gieße gründlich. Achte darauf, dass die Pflanzen genügend Abstand zueinander haben (ca. 30-40 cm).
4. Gießen: Gieße deine Grünkohlpflanzen regelmäßig, besonders in den ersten Wochen nach der Aussaat oder dem Pflanzen. Die Erde sollte immer leicht feucht sein, aber nicht nass. Vermeide Staunässe.
5. Düngen (optional): Grünkohl ist ein Starkzehrer und braucht viele Nährstoffe. Dünge deine Pflanzen regelmäßig mit einem organischen oder mineralischen Dünger. Beachte die Anweisungen auf der Düngerpackung.
6. Schnecken bekämpfen (optional): Schnecken lieben Grünkohl! Schütze deine Pflanzen mit Schneckenkorn, Schneckenzäunen oder anderen Schneckenbekämpfungsmitteln.
7. Rankhilfe (optional): Einige Grünkohlsorten werden sehr hoch und brauchen eine Rankhilfe. Biete ihnen eine Stütze, damit sie nicht umknicken.
8. Pflege: Entferne regelmäßig Unkraut und abgestorbene Blätter. Kontrolliere deine Pflanzen auf Schädlinge und Krankheiten.
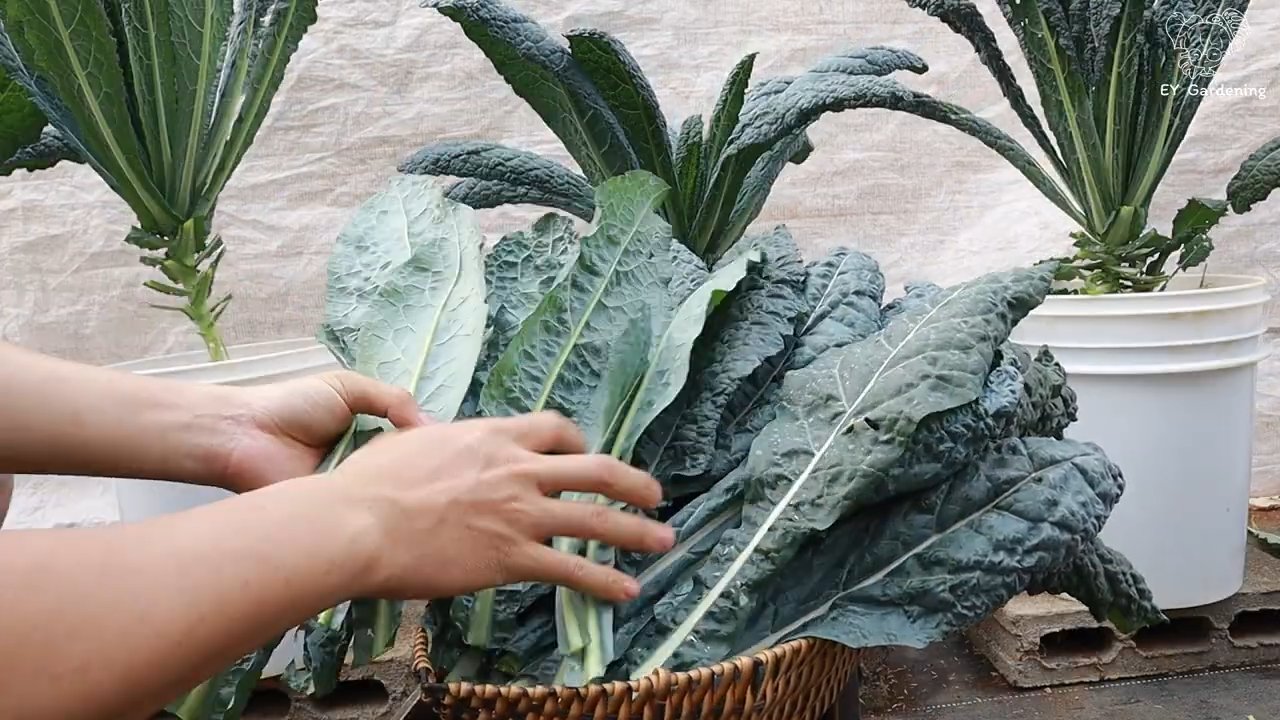
Grünkohl ernten: Der Lohn deiner Arbeit
Nach ein paar Wochen kannst du endlich deinen eigenen Grünkohl ernten!
1. Erntezeitpunkt: Grünkohl kann geerntet werden, sobald die Blätter groß genug sind (ca. 15-20 cm). Die unteren Blätter sind in der Regel zuerst reif.
2. Erntemethode: Schneide die äußeren Blätter mit einer Gartenschere oder einem Messer ab. Lass das Herz der Pflanze stehen, damit sie weiterwachsen kann.
3. Lagerung: Grünkohl ist am besten frisch. Du kannst ihn aber auch ein paar Tage im Kühlschrank lagern.
Häufige Probleme und Lösungen
Auch beim Grünkohl-Anbau auf dem Dach kann es zu Problemen kommen. Hier sind ein paar häufige Probleme und wie du sie lösen kannst:
* Gelbe Blätter: Das kann ein Zeichen für Nährstoffmangel sein. Dünge deine Pflanzen mit einem stickstoffreichen Dünger.
* Schädlinge: Grünkohl kann von verschiedenen Schädlingen befallen werden, wie z.B. Blattläusen, Kohlweißlingen oder Erdflöhen. Bekämpfe die Schädlinge mit geeigneten Mitteln (z.B. Neemöl oder Insektizidseife).
* Krankheiten: Grünkohl kann auch von verschiedenen Krankheiten befallen werden, wie z.B. Mehltau oder Kohlhernie. Achte auf eine gute Belüftung und vermeide Staunässe. Entferne befallene Blätter sofort.
* Wind: Starker Wind kann deine Pflanzen beschädigen. Schütze sie mit einem Windschutz.
* Zu wenig Sonne: Grünkohl braucht mindestens 6 Stunden Sonne pro Tag. Stelle deine Behälter an einen sonnigen Standort.
Grünkohl-Sorten für den Dachgarten
Es gibt viele verschiedene Grünkohlsorten, die sich für den Anbau auf dem Dach eignen. Hier sind ein paar beliebte Sorten:
* ‘Nero di Toscana’ (Palmkohl): Eine italienische Sorte mit langen, schmalen, dunkelgrünen Blättern.
* ‘Red Russian’: Eine russische Sorte mit rot-grünen, gezackten Blättern.
* ‘Lacinato’ (Cavolo Nero): Eine italienische Sorte mit dunkelgrünen, blasigen Blättern.
* ‘Dwarf Blue Curled Vates’: Eine kompakte Sorte mit blaugrünen, gekräuselten Blättern.
Tipps und Tricks für den erfolgreichen Grünkohl-Anbau
Hier sind noch ein paar zusätzliche Tipps und Tricks, die dir helfen, deinen Grünkohl-Dachgarten zum Erfolg zu führen:
* Fruchtfolge beachten: Baue Grünkohl nicht jedes Jahr am selben Standort an. Wechsle die Kulturen, um Krankheiten und Schädlingen vorzubeugen.
* Mulchen: Bedecke die Erde um deine Pflanzen mit Mulch (z.B. Stroh oder Holzhackschnitzel). Das hält die Erde feucht, unterdrückt Unkraut und schützt die Wurzeln vor extremen Temperaturen.
* Regelmäßig gießen: Grünkohl braucht regelmäßig Wasser, besonders in trockenen Perioden. Gieße am besten früh morgens oder spät abends, um Verdunstung zu vermeiden.
* Regelmäßig ernten: Je öfter du erntest, desto mehr neue Blätter wachsen nach.
* Grünkohl im Winter: Grünkohl ist winter
Conclusion
So, there you have it! Transforming your rooftop into a thriving kale garden isn’t just a whimsical dream; it’s an achievable reality that brings fresh, nutritious greens right to your doorstep. We’ve explored the essential steps, from assessing your rooftop’s suitability to selecting the right containers and providing the necessary care. But why should you embark on this green adventure?
The benefits extend far beyond simply having access to fresh kale. Imagine stepping onto your rooftop, a vibrant oasis amidst the urban landscape, and harvesting your own organic produce. You’re not just growing kale; you’re cultivating a connection with nature, reducing your carbon footprint, and enhancing your overall well-being. Plus, the taste of homegrown kale, bursting with flavor and nutrients, is simply unparalleled.
This DIY rooftop kale garden is a must-try because it empowers you to take control of your food source, even in the most urban environments. It’s a sustainable practice that contributes to a healthier planet and a healthier you. And let’s be honest, there’s a certain satisfaction that comes from nurturing a plant from seed to harvest, knowing you played a vital role in its growth.
But the beauty of rooftop kale gardening lies in its adaptability. Feel free to experiment with different kale varieties. Try growing curly kale, dinosaur kale (lacinato), or even red Russian kale for a splash of color. Consider companion planting with herbs like rosemary or thyme to deter pests and enhance the flavor of your kale. You can also explore vertical gardening techniques to maximize space and create a stunning visual display.
Don’t be afraid to get creative with your container choices. While we’ve suggested specific materials, you can repurpose old buckets, troughs, or even wooden pallets to create unique and sustainable planters. Just ensure they have adequate drainage to prevent waterlogging.
We understand that starting a rooftop garden can seem daunting, but with a little planning and effort, you can create a flourishing space that provides you with fresh kale for months to come. Remember to monitor your plants regularly, adjust your watering schedule based on the weather, and protect them from extreme temperatures.
We wholeheartedly encourage you to give this DIY trick a try. It’s a rewarding experience that will transform your rooftop into a productive and beautiful space. And most importantly, we want to hear about your journey! Share your successes, challenges, and creative solutions with us. Post photos of your rooftop kale garden on social media using #RooftopKaleGarden and tag us so we can celebrate your green thumb. Let’s inspire others to embrace sustainable urban gardening and create a community of rooftop kale enthusiasts! Your experience could be the inspiration someone else needs to start their own rooftop oasis.
Frequently Asked Questions (FAQ)
1. Is my rooftop suitable for a kale garden?
The most important factor is weight capacity. Consult a structural engineer or building professional to determine if your rooftop can handle the added weight of soil, containers, and plants, especially when saturated with water. Also, consider sunlight exposure. Kale needs at least 6 hours of direct sunlight per day. Assess the amount of sunlight your rooftop receives throughout the day. If sunlight is limited, consider using reflective surfaces or grow lights to supplement. Wind is another factor. Rooftops can be windy, which can damage plants. Consider installing windbreaks, such as trellises or screens, to protect your kale. Finally, ensure you have easy access to water for irrigation.
2. What type of soil should I use for my rooftop kale garden?
Avoid using garden soil directly in containers, as it can become compacted and poorly drained. Instead, opt for a high-quality potting mix specifically designed for container gardening. Look for a mix that contains ingredients like peat moss, perlite, and vermiculite, which provide good drainage and aeration. You can also amend the potting mix with compost to add nutrients and improve water retention. Consider using a lightweight potting mix to reduce the overall weight on your rooftop.
3. How often should I water my rooftop kale plants?
Watering frequency depends on several factors, including the weather, the size of your containers, and the type of potting mix you’re using. Generally, you should water your kale plants when the top inch of soil feels dry to the touch. During hot, dry weather, you may need to water daily, while during cooler, wetter weather, you may only need to water every few days. Avoid overwatering, as this can lead to root rot. Ensure your containers have adequate drainage holes to allow excess water to escape. A good rule of thumb is to water deeply until water drains out of the bottom of the container.
4. What are some common pests and diseases that affect kale, and how can I prevent them?
Common pests that attack kale include aphids, cabbage worms, and flea beetles. To prevent pest infestations, inspect your plants regularly for signs of damage. You can handpick pests off the plants or use insecticidal soap or neem oil to control infestations. Row covers can also be used to protect plants from pests. Common diseases that affect kale include black rot and clubroot. To prevent diseases, choose disease-resistant kale varieties and practice good sanitation. Avoid overhead watering, which can create a humid environment that promotes disease. Ensure good air circulation around your plants. If you notice signs of disease, remove affected leaves or plants immediately.
5. How do I harvest kale from my rooftop garden?
You can start harvesting kale leaves when they are about 6-8 inches long. Harvest the outer leaves first, leaving the inner leaves to continue growing. Avoid harvesting more than one-third of the plant at a time, as this can stress the plant. You can harvest kale leaves throughout the growing season, even after a light frost. In fact, frost can actually improve the flavor of kale. To harvest, simply cut the leaves off the plant with a sharp knife or scissors.
6. Can I grow kale in the winter on my rooftop?
Yes, you can grow kale in the winter, especially in milder climates. Kale is a cold-hardy vegetable that can tolerate temperatures down to 20°F (-6°C). To protect your kale plants from frost and snow, you can cover them with row covers or a cold frame. You can also move your containers to a sheltered location, such as a garage or greenhouse. Even if the leaves freeze, they will often thaw out and continue to grow.
7. What are some creative ways to use my homegrown rooftop kale?
The possibilities are endless! You can use kale in salads, smoothies, soups, stews, and stir-fries. You can also bake kale chips or add kale to omelets and frittatas. Kale is a versatile vegetable that can be used in a variety of dishes. Experiment with different recipes and find your favorite ways to enjoy your homegrown kale. You can also share your harvest with friends and neighbors.
8. How can I ensure my rooftop kale garden is sustainable?
Sustainability is key! Compost your kitchen scraps and yard waste to create nutrient-rich soil for your kale plants. Collect rainwater to reduce your water consumption. Use organic pest control methods to avoid harming beneficial insects. Choose recycled or repurposed containers for your plants. And most importantly, share your knowledge and inspire others to embrace sustainable gardening practices. By making conscious choices, you can create a rooftop kale garden that is both productive and environmentally friendly.
Leave a Comment