
Growing sweet potatoes in containers might sound like a challenge, but trust me, it’s totally achievable and incredibly rewarding! Forget acres of farmland; you can enjoy homegrown sweet potatoes even with a small balcony or patio. For centuries, sweet potatoes have been a staple in diets around the world, originating in Central and South America and spreading globally thanks to their delicious flavor and nutritional benefits. They’re packed with vitamins, minerals, and antioxidants, making them a superfood worth cultivating.
But why bother with containers? Well, let’s face it, not everyone has a sprawling garden. Plus, container gardening offers better control over soil conditions and can protect your precious plants from pests and diseases. Imagine harvesting your own vibrant orange sweet potatoes, knowing exactly where they came from and how they were grown. This DIY guide is your ticket to unlocking the secrets of growing sweet potatoes in containers successfully. I’m going to share my tried-and-true tricks and hacks, ensuring you get a bountiful harvest, no matter your space constraints. So, grab your gardening gloves, and let’s get started!
Süßkartoffeln im Topf anbauen: So geht’s!
Hey Leute! Habt ihr Lust, eure eigenen Süßkartoffeln anzubauen, aber keinen Garten? Kein Problem! Ich zeige euch, wie ihr diese leckeren Knollen ganz einfach in Töpfen ziehen könnt. Es ist einfacher als ihr denkt und macht super viel Spaß! Lasst uns loslegen!
Was ihr braucht:
* Süßkartoffeln (Bio!): Am besten nehmt ihr Bio-Süßkartoffeln, da diese nicht mit Wachstumsinhibitoren behandelt wurden.
* Große Töpfe: Mindestens 30 Liter Volumen pro Pflanze. Je größer, desto besser!
* Hochwertige Blumenerde: Eine Mischung aus Gartenerde, Kompost und Sand ist ideal.
* Wasser: Zum Gießen, natürlich!
* Sonnenlicht: Süßkartoffeln lieben die Sonne!
* Zahnstocher oder Schaschlikspieße: Um die Süßkartoffel im Wasserglas zu stabilisieren.
* Wasserglas oder Gefäß: Für die Bewurzelung der Süßkartoffel.
* Optional: Flüssigdünger für Gemüse.
Phase 1: Süßkartoffel zum Austreiben bringen (Slips ziehen)
Das Wichtigste zuerst: Wir müssen die Süßkartoffel dazu bringen, Triebe, sogenannte “Slips”, zu bilden. Diese Slips werden wir später einpflanzen. Keine Sorge, das ist ganz einfach!
1. Süßkartoffel vorbereiten: Sucht euch eine schöne, gesunde Süßkartoffel aus. Wascht sie gründlich ab, um Erde und Schmutz zu entfernen.
2. Zahnstocher anbringen: Steckt vier Zahnstocher oder Schaschlikspieße etwa in der Mitte der Süßkartoffel ein. Sie sollten gleichmäßig verteilt sein und als Stütze dienen, damit die Süßkartoffel nicht komplett im Wasser versinkt.
3. Ins Wasserglas: Füllt ein Glas oder Gefäß mit Wasser. Achtet darauf, dass nur die untere Hälfte der Süßkartoffel im Wasser ist. Die obere Hälfte sollte trocken bleiben.
4. Warm und hell stellen: Platziert das Glas an einem warmen und hellen Ort, aber nicht in direkter Sonneneinstrahlung. Ein Fensterbrett ist perfekt!
5. Wasserstand kontrollieren: Achtet darauf, dass der Wasserstand immer gleich bleibt. Füllt bei Bedarf Wasser nach.
6. Geduld haben: Es kann ein paar Wochen dauern, bis die Süßkartoffel Triebe bildet. Habt Geduld und lasst euch nicht entmutigen! Ihr werdet sehen, es lohnt sich.
7. Slips ernten: Sobald die Triebe etwa 15-20 cm lang sind, könnt ihr sie vorsichtig von der Süßkartoffel abdrehen oder abschneiden. Achtet darauf, dass ihr die Süßkartoffel nicht beschädigt.
Phase 2: Slips bewurzeln
Bevor wir die Slips in die Töpfe pflanzen, müssen wir sie bewurzeln. Das gibt ihnen einen besseren Start.
1. Slips ins Wasser stellen: Füllt ein Glas mit Wasser und stellt die Slips hinein. Achtet darauf, dass nur die unteren Blätter im Wasser sind. Entfernt gegebenenfalls die unteren Blätter, um Fäulnis zu vermeiden.
2. Wieder warm und hell: Platziert das Glas wieder an einem warmen und hellen Ort.
3. Wurzeln beobachten: Nach ein paar Tagen sollten sich kleine Wurzeln bilden.
4. Geduldsprobe: Lasst die Wurzeln etwa 2-3 cm lang werden, bevor ihr die Slips einpflanzt.
Phase 3: Süßkartoffeln einpflanzen
Jetzt kommt der spannende Teil: Das Einpflanzen der bewurzelten Slips in die Töpfe!
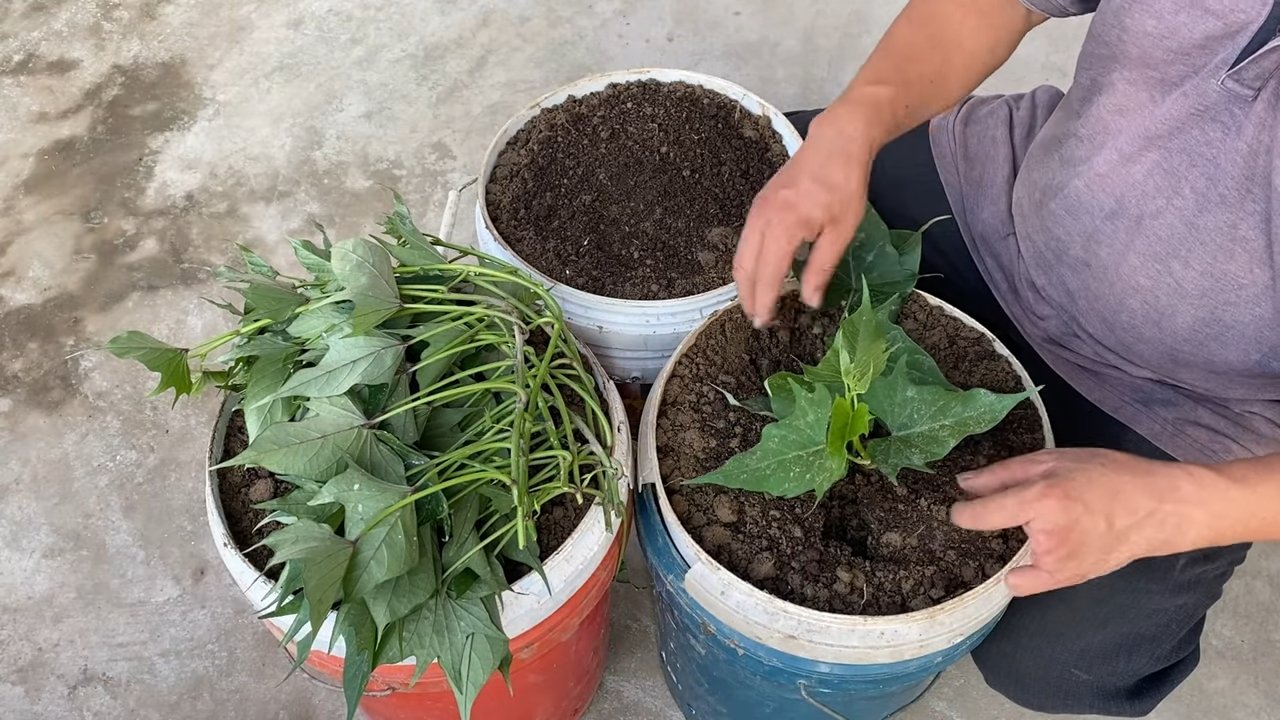
1. Töpfe vorbereiten: Füllt die großen Töpfe mit der hochwertigen Blumenerde. Lasst etwa 5 cm Platz bis zum Rand.
2. Pflanzlöcher graben: Grabt kleine Löcher in die Erde, die groß genug sind, um die Wurzeln der Slips aufzunehmen.
3. Slips einpflanzen: Setzt die Slips vorsichtig in die Löcher und bedeckt die Wurzeln mit Erde. Drückt die Erde leicht an.
4. Angießen: Gießt die frisch gepflanzten Süßkartoffeln gründlich an.
5. Sonniger Standort: Stellt die Töpfe an einen sonnigen Standort. Süßkartoffeln brauchen mindestens 6 Stunden Sonne pro Tag.
Phase 4: Pflege der Süßkartoffelpflanzen
Damit eure Süßkartoffeln prächtig gedeihen, ist die richtige Pflege wichtig.
1. Regelmäßig gießen: Gießt die Pflanzen regelmäßig, besonders an heißen Tagen. Die Erde sollte immer leicht feucht sein, aber nicht nass. Vermeidet Staunässe!
2. Düngen: Düngt die Pflanzen alle paar Wochen mit einem Flüssigdünger für Gemüse. Achtet auf die Dosierungsanleitung auf der Verpackung.
3. Rankhilfe: Süßkartoffeln sind Rankpflanzen. Ihr könnt ihnen eine Rankhilfe anbieten, damit sie sich daran hochranken können. Das ist aber nicht unbedingt notwendig.
4. Unkraut entfernen: Entfernt regelmäßig Unkraut aus den Töpfen.
5. Schädlinge kontrollieren: Achtet auf Schädlinge wie Blattläuse oder Spinnmilben. Bei Bedarf könnt ihr biologische Schädlingsbekämpfungsmittel einsetzen.
Phase 5: Erntezeit!
Nach etwa 3-4 Monaten, je nach Sorte und Wetterbedingungen, sind eure Süßkartoffeln erntereif.
1. Erntezeitpunkt erkennen: Die Blätter der Pflanzen werden gelb und beginnen abzusterben. Das ist ein Zeichen dafür, dass die Süßkartoffeln reif sind.
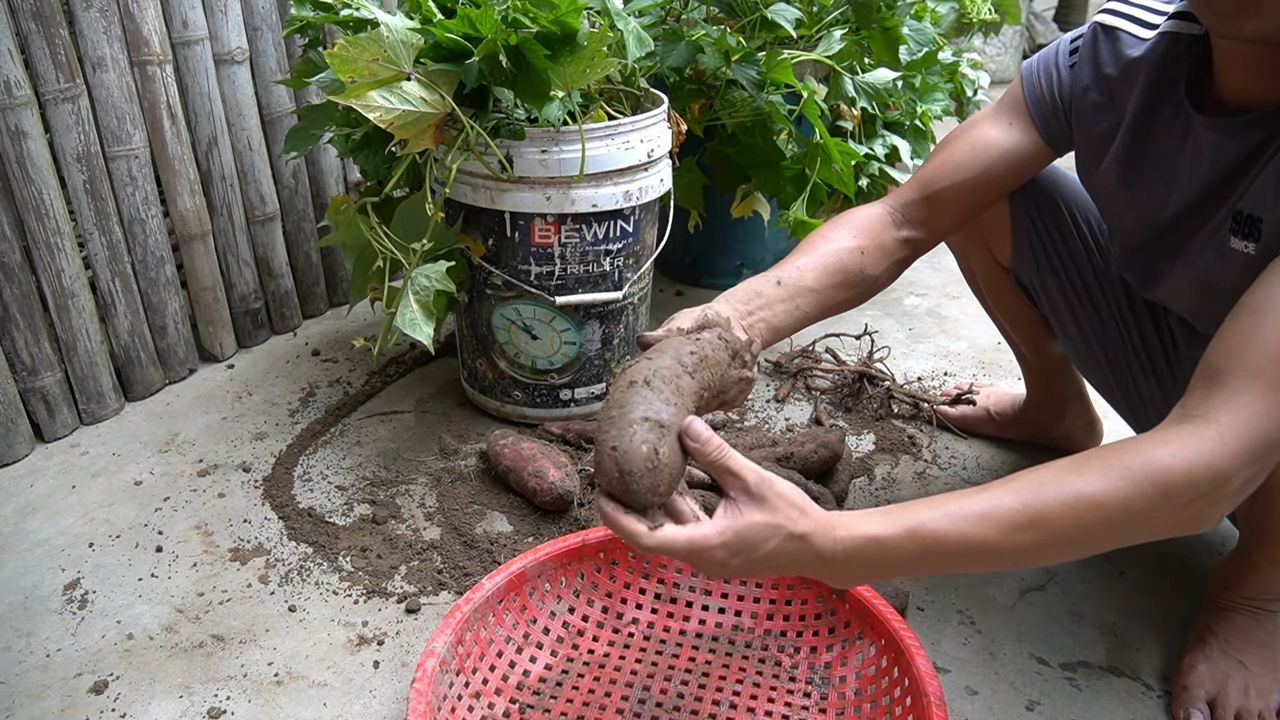
2. Vorsichtig ausgraben: Grabt die Süßkartoffeln vorsichtig aus den Töpfen aus. Achtet darauf, die Knollen nicht zu beschädigen.
3. Trocknen lassen: Lasst die geernteten Süßkartoffeln ein paar Tage an einem warmen und trockenen Ort trocknen. Dadurch wird die Schale härter und die Süßkartoffeln sind länger haltbar.
4. Lagern: Lagert die getrockneten Süßkartoffeln an einem kühlen, dunklen und trockenen Ort. Sie halten sich so mehrere Monate.
Zusätzliche Tipps und Tricks:
* Sortenwahl: Es gibt viele verschiedene Süßkartoffelsorten. Informiert euch, welche Sorten für den Anbau im Topf geeignet sind.
* Mulchen: Mulcht die Erde in den Töpfen mit Stroh oder Rasenschnitt. Das hält die Feuchtigkeit im Boden und unterdrückt Unkraut.
* Schutz vor Frost: Süßkartoffeln sind frostempfindlich. Wenn Frost droht, solltet ihr die Töpfe ins Haus holen oder mit Vlies abdecken.
* Kreative Pflanzgefäße: Ihr könnt auch andere Gefäße als Töpfe verwenden, z.B. alte Eimer, Wannen oder Säcke. Hauptsache, sie sind groß genug und haben Abzugslöcher.
* Experimentieren: Probiert verschiedene Anbaumethoden und Sorten aus. So findet ihr heraus, was für euch am besten funktioniert.
Ich hoffe, diese Anleitung hilft euch dabei, eure eigenen Süßkartoffeln im Topf anzubauen. Es ist ein tolles Gefühl, seine eigenen Lebensmittel anzubauen und zu ernten. Viel Spaß dabei! Und vergesst nicht, eure Erfolge mit mir zu teilen! Ich bin gespannt auf eure Ergebnisse!
Conclusion
So, there you have it! Growing sweet potatoes in containers is not only achievable, but it’s also a remarkably rewarding experience. We’ve walked through the process, from selecting the right container and soil to nurturing your slips and harvesting your bountiful crop. But why should you take the plunge and try this DIY trick?
Firstly, container gardening offers unparalleled convenience, especially for those with limited space. Whether you have a sprawling backyard or just a sunny balcony, you can enjoy the satisfaction of harvesting your own homegrown sweet potatoes. No more relying solely on grocery store produce – you’ll have fresh, flavorful sweet potatoes right at your fingertips.
Secondly, growing your own sweet potatoes allows you to control the entire process, from the type of soil to the amount of sunlight your plants receive. This level of control translates to healthier, more delicious sweet potatoes, free from harmful pesticides and chemicals. You know exactly what’s going into your food, giving you peace of mind and a superior culinary experience.
Thirdly, and perhaps most importantly, growing sweet potatoes in containers is simply fun! It’s a fantastic way to connect with nature, learn about plant life cycles, and enjoy the fruits (or rather, the roots!) of your labor. There’s nothing quite like the thrill of digging into the soil and unearthing those beautiful, orange treasures.
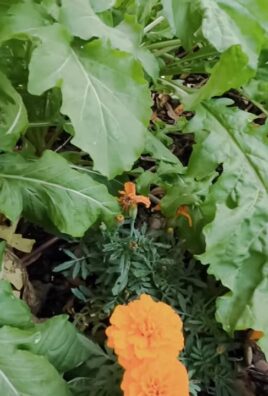
But the journey doesn’t end here! Feel free to experiment with different varieties of sweet potatoes. Try growing Beauregard, Jewel, or even the purple-skinned Okinawan sweet potato for a unique twist. You can also explore different container sizes and shapes to see what works best for your space and growing conditions. Consider adding companion plants like marigolds or nasturtiums to deter pests and attract beneficial insects.
And don’t forget about the vines! Sweet potato vines are incredibly ornamental and can add a touch of beauty to your patio or balcony. You can train them to climb a trellis or let them cascade over the edges of your container for a stunning visual display.
We encourage you to embrace this DIY trick and embark on your own sweet potato growing adventure. It’s a simple, satisfying, and sustainable way to enjoy fresh, delicious produce. Once you’ve harvested your first crop, you’ll be hooked!
Now, we want to hear from you! Share your experiences, tips, and tricks in the comments below. What varieties of sweet potatoes did you grow? What challenges did you encounter, and how did you overcome them? What are your favorite ways to prepare and enjoy your homegrown sweet potatoes? Let’s create a community of container gardening enthusiasts and learn from each other.
So, grab your containers, soil, and sweet potato slips, and get ready to experience the joy of growing your own sweet potatoes. You won’t regret it! Happy gardening!
Frequently Asked Questions (FAQ)
What is the best size container for growing sweet potatoes?
The ideal container size for growing sweet potatoes is at least 10 gallons, but larger is generally better. A 15-20 gallon container will provide ample space for the roots to develop and produce a good yield. The container should also be at least 12 inches deep to accommodate the growing sweet potatoes. Remember, sweet potatoes grow underground, so they need plenty of room to expand. Using a smaller container may result in smaller sweet potatoes or a reduced harvest. Consider using grow bags, large pots, or even repurposed containers like plastic bins, as long as they have adequate drainage holes.
What type of soil is best for growing sweet potatoes in containers?
Sweet potatoes thrive in well-draining, loose soil that is rich in organic matter. A good potting mix specifically formulated for vegetables is an excellent choice. You can also create your own mix by combining equal parts of compost, peat moss (or coconut coir), and perlite or vermiculite. Avoid using heavy clay soil, as it can become waterlogged and hinder root development. The soil pH should be slightly acidic, ideally between 6.0 and 6.5. Adding compost to your soil mix will provide essential nutrients and improve drainage.
How often should I water my sweet potato plants in containers?
Water sweet potato plants regularly, especially during hot, dry weather. The soil should be kept consistently moist, but not waterlogged. Check the soil moisture by sticking your finger about an inch deep into the soil. If it feels dry, it’s time to water. Water deeply, allowing the water to drain out of the bottom of the container. Avoid overhead watering, as this can promote fungal diseases. Mulching around the base of the plants can help retain moisture and suppress weeds. During periods of heavy rain, you may need to reduce watering frequency.
How much sunlight do sweet potato plants need?
Sweet potato plants require at least 6-8 hours of direct sunlight per day to thrive. Choose a sunny location for your containers where the plants will receive ample sunlight throughout the day. If you live in a particularly hot climate, providing some afternoon shade can help prevent the plants from overheating. Insufficient sunlight can result in leggy growth, reduced yields, and smaller sweet potatoes. If you don’t have a sunny location, you may need to supplement with artificial grow lights.
When is the best time to harvest sweet potatoes from containers?
Sweet potatoes are typically ready to harvest about 90-120 days after planting. The leaves will start to turn yellow and the vines may begin to die back, indicating that the sweet potatoes are mature. To harvest, gently tip the container over and carefully remove the sweet potatoes from the soil. Avoid damaging the skin, as this can shorten their storage life. Cure the sweet potatoes by placing them in a warm, humid place (80-85°F and 85-90% humidity) for about 7-10 days. This process helps to heal any wounds and improve their flavor and storage life.
Can I grow sweet potatoes from store-bought sweet potatoes?
Yes, you can grow sweet potatoes from store-bought sweet potatoes, but it’s important to choose organic sweet potatoes that haven’t been treated with sprout inhibitors. To sprout a sweet potato, suspend it in a jar of water, with the bottom half submerged. Place the jar in a warm, sunny location. After a few weeks, sprouts (slips) will begin to emerge from the sweet potato. Once the slips are about 6-8 inches long, gently twist them off and root them in water before planting them in your containers. Keep in mind that store-bought sweet potatoes may not produce the same variety as the parent plant.
What are some common pests and diseases that affect sweet potato plants?
Common pests that can affect sweet potato plants include aphids, flea beetles, and sweet potato weevils. Diseases include fungal diseases like stem rot and leaf spot. Regularly inspect your plants for signs of pests or diseases. You can control aphids and flea beetles with insecticidal soap or neem oil. To prevent fungal diseases, ensure good air circulation, avoid overhead watering, and use a fungicide if necessary. Sweet potato weevils can be a serious problem, so it’s important to source your slips from a reputable supplier and practice good sanitation.
Can I reuse the soil from my sweet potato containers?
Yes, you can reuse the soil from your sweet potato containers, but it’s important to amend it with fresh compost and other organic matter to replenish nutrients. You should also sterilize the soil to kill any potential pests or diseases. You can sterilize the soil by baking it in the oven at 180°F for 30 minutes or by solarizing it in a black plastic bag for several weeks during the summer. Alternatively, you can simply discard the old soil and start with fresh potting mix.
Are sweet potato leaves edible?
Yes, sweet potato leaves are edible and nutritious! They can be cooked and eaten like spinach or other leafy greens. They are a good source of vitamins A and C, as well as fiber and antioxidants. Choose young, tender leaves for the best flavor. Avoid eating leaves that have been treated with pesticides or herbicides. Sweet potato leaves can be added to salads, stir-fries, soups, and stews.
How do I store harvested sweet potatoes?
After curing your sweet potatoes, store them in a cool, dry, and dark place with good ventilation. The ideal storage temperature is between 55-60°F. Avoid storing sweet potatoes in the refrigerator, as this can cause them to develop a hard core and lose their flavor. Properly cured and stored sweet potatoes can last for several months. Check them periodically for signs of spoilage and discard any that are soft or moldy.

Leave a Comment