
Growing Purple Basil in Pots: Unlock the secrets to cultivating vibrant, aromatic purple basil right on your patio or balcony! Have you ever dreamt of adding a splash of deep, rich color and a unique peppery flavor to your culinary creations, all sourced from your own little garden oasis? Well, dream no more! This DIY guide is your passport to a thriving purple basil patch, even if you’re short on space.
Basil, in general, boasts a rich history, dating back thousands of years. Revered in ancient cultures for its medicinal properties and symbolic significance, it’s been a staple in gardens and kitchens worldwide. Purple basil, a more recent and visually stunning variation, brings that same historical charm with an added touch of modern flair. Its introduction has allowed gardeners to add a new dimension to their herb gardens.
But why should you bother with this particular DIY project? Because growing purple basil in pots offers a multitude of benefits! Not only does it provide you with fresh, flavorful herbs at your fingertips, but it also adds a beautiful aesthetic element to your outdoor space. Plus, it’s incredibly rewarding to nurture something from seed to harvest. In this article, I’ll share my tried-and-true tips and tricks for successfully growing purple basil in pots, ensuring you have a bountiful supply of this gorgeous herb all season long. Let’s get started!
Lila Basilikum im Topf ziehen: Dein DIY-Leitfaden für ein farbenfrohes Kräuterparadies
Hallo liebe Gartenfreunde! Ich liebe es, meinen Garten mit farbenfrohen und nützlichen Pflanzen zu füllen, und lila Basilikum ist da ganz vorne mit dabei. Es ist nicht nur wunderschön anzusehen, sondern auch unglaublich aromatisch und vielseitig in der Küche. In diesem Artikel zeige ich dir, wie du ganz einfach lila Basilikum in Töpfen ziehen kannst, egal ob du einen großen Garten oder nur einen kleinen Balkon hast. Los geht’s!
Warum Lila Basilikum?
Bevor wir loslegen, lass mich dir kurz erzählen, warum ich so begeistert von lila Basilikum bin:
* Ästhetik: Die tiefvioletten Blätter sind ein echter Hingucker und bringen Farbe in jeden Garten oder auf jeden Balkon.
* Aroma: Der Geschmack ist etwas würziger und intensiver als bei grünem Basilikum, mit einem Hauch von Anis und Nelke.
* Vielseitigkeit: Du kannst es in Salaten, Saucen, Suppen, Pesto und vielem mehr verwenden.
* Gesundheitliche Vorteile: Basilikum ist reich an Antioxidantien und Vitaminen.
Was du brauchst: Die Materialliste
Bevor wir mit dem Pflanzen beginnen, solltest du sicherstellen, dass du alles Notwendige zur Hand hast. Hier ist eine Liste der Dinge, die du benötigst:
* Lila Basilikumsamen oder Jungpflanzen: Du kannst Samen online oder in einem Gartencenter kaufen. Jungpflanzen sind natürlich einfacher, aber das Ziehen aus Samen macht auch Spaß!
* Töpfe: Wähle Töpfe mit einem Durchmesser von mindestens 15 cm. Sie sollten Drainagelöcher haben, damit das Wasser gut ablaufen kann.
* Hochwertige Blumenerde: Verwende eine gut durchlässige Blumenerde, die reich an Nährstoffen ist. Ich mische gerne etwas Kompost unter die Erde.
* Gießkanne: Zum sanften Bewässern deiner Basilikumpflanzen.
* Optional:
* Pflanzschilder: Um deine Basilikumsorte zu kennzeichnen.
* Dünger: Ein organischer Flüssigdünger für Kräuter.
* Mulch: Um die Feuchtigkeit im Boden zu halten und Unkraut zu unterdrücken.
Aussaat oder Jungpflanzen? Die Entscheidung
Du hast zwei Möglichkeiten, lila Basilikum anzubauen: aus Samen oder mit Jungpflanzen. Beide haben ihre Vor- und Nachteile.
* Aussaat:
* Vorteile: Günstiger, größere Auswahl an Sorten, befriedigendes Gefühl, die Pflanze von Anfang an aufzuziehen.
* Nachteile: Braucht mehr Zeit und Geduld, höhere Ausfallrate.
* Jungpflanzen:
* Vorteile: Schneller Erfolg, einfacher, weniger anfällig für Krankheiten.
* Nachteile: Teurer, weniger Sortenvielfalt.
Ich persönlich ziehe es vor, aus Samen zu säen, weil ich den Prozess liebe. Aber wenn du es eilig hast oder Anfänger bist, sind Jungpflanzen eine gute Wahl.
Aussaat von Lila Basilikum: Schritt für Schritt
Wenn du dich für die Aussaat entschieden hast, hier ist eine detaillierte Anleitung:
1. Vorbereitung der Töpfe: Fülle die Töpfe mit Blumenerde, lasse aber etwa 2-3 cm Platz bis zum Rand. Drücke die Erde leicht an.
2. Aussaat der Samen: Verteile die Samen gleichmäßig auf der Erde. Sie sind sehr klein, also sei vorsichtig. Bedecke die Samen dann mit einer dünnen Schicht Erde (ca. 0,5 cm).
3. Bewässerung: Befeuchte die Erde vorsichtig mit einer Gießkanne. Vermeide es, die Samen wegzuspülen.
4. Standort: Stelle die Töpfe an einen warmen und hellen Ort. Basilikum braucht viel Sonne, um gut zu wachsen. Eine Fensterbank oder ein Gewächshaus sind ideal.
5. Keimung: Die Samen keimen normalerweise innerhalb von 1-2 Wochen. Halte die Erde während dieser Zeit feucht, aber nicht nass.
6. Pikieren: Wenn die Sämlinge groß genug sind (ca. 5-7 cm), kannst du sie pikieren. Das bedeutet, dass du die schwächsten Pflanzen entfernst und die stärksten in separate Töpfe umpflanzt. So haben sie mehr Platz zum Wachsen.
Pflanzen von Jungpflanzen: So geht’s
Wenn du Jungpflanzen gekauft hast, ist das Pflanzen noch einfacher:
1. Vorbereitung der Töpfe: Fülle die Töpfe mit Blumenerde, lasse aber etwa 2-3 cm Platz bis zum Rand. Drücke die Erde leicht an.
2. Entfernen der Jungpflanzen aus dem Anzuchttopf: Drücke vorsichtig auf den Boden des Anzuchttopfes, um die Pflanze herauszudrücken. Achte darauf, die Wurzeln nicht zu beschädigen.
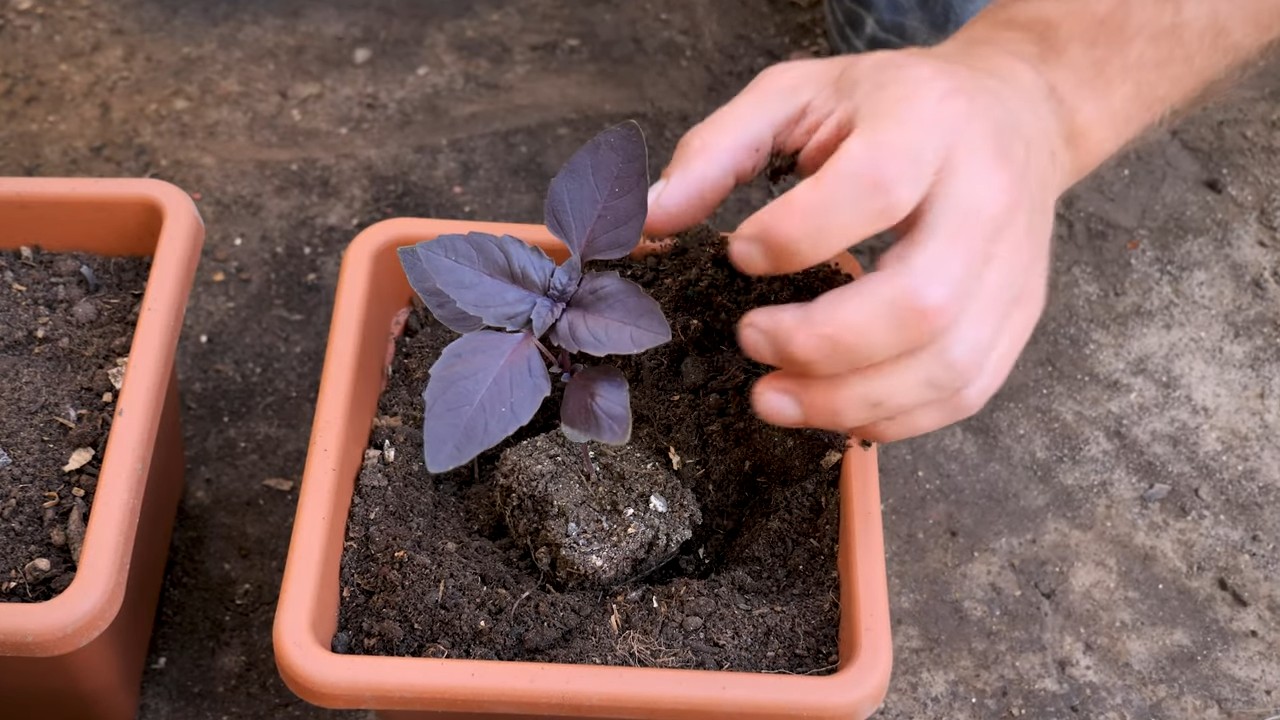
3. Pflanzen der Jungpflanzen: Setze die Jungpflanze in die Mitte des Topfes. Die Oberseite des Wurzelballens sollte mit der Oberfläche der Erde abschließen.
4. Auffüllen mit Erde: Fülle den Topf mit Erde auf und drücke sie leicht an.
5. Bewässerung: Gieße die Pflanze gründlich.
6. Standort: Stelle den Topf an einen warmen und hellen Ort.
Pflege deines Lila Basilikums: Tipps und Tricks
Damit dein lila Basilikum prächtig gedeiht, ist die richtige Pflege entscheidend. Hier sind einige Tipps, die du beachten solltest:
* Bewässerung: Basilikum braucht regelmäßige Bewässerung, besonders an heißen Tagen. Die Erde sollte immer leicht feucht sein, aber nicht nass. Vermeide Staunässe, da dies zu Wurzelfäule führen kann. Ich prüfe die Feuchtigkeit der Erde immer mit dem Finger. Wenn sich die oberste Schicht trocken anfühlt, ist es Zeit zum Gießen.
* Sonneneinstrahlung: Basilikum liebt die Sonne! Stelle deine Töpfe an einen Ort, an dem sie mindestens 6 Stunden Sonnenlicht pro Tag bekommen.
* Düngen: Während der Wachstumsperiode (Frühling und Sommer) solltest du dein Basilikum regelmäßig düngen. Verwende einen organischen Flüssigdünger für Kräuter. Ich dünge meine Pflanzen alle 2-3 Wochen.
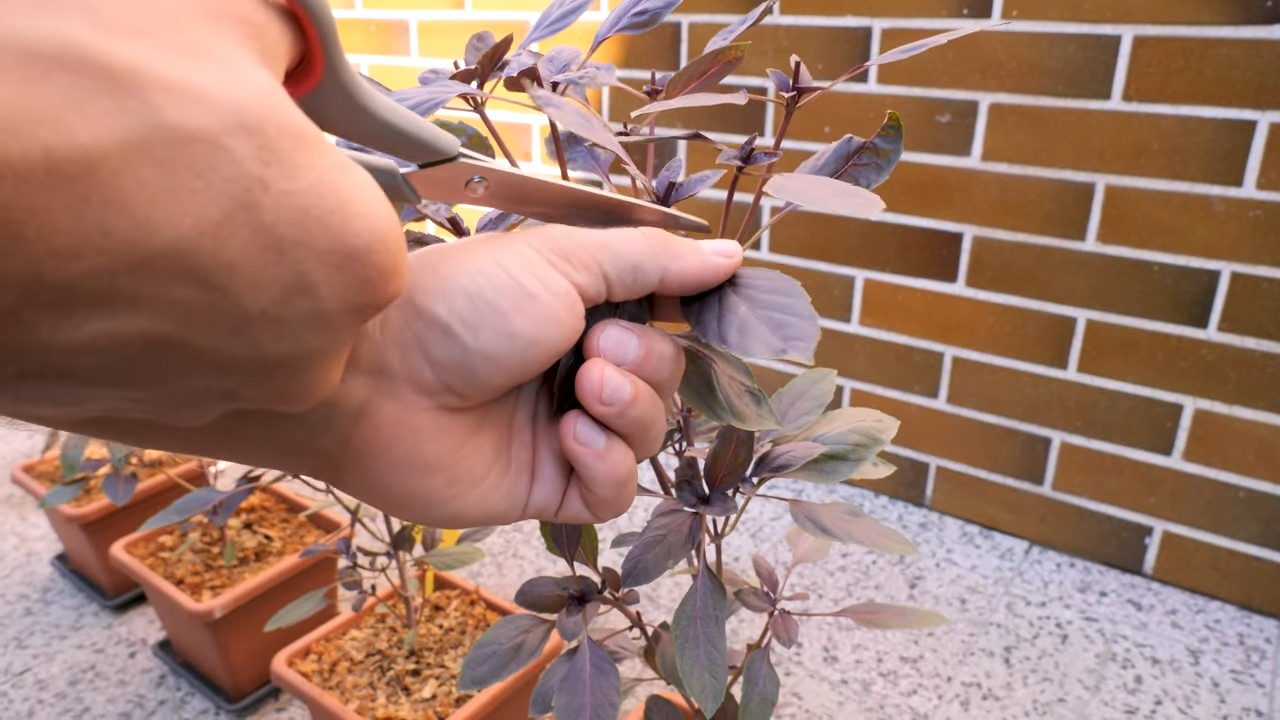
* Schneiden: Regelmäßiges Schneiden fördert das Wachstum und verhindert, dass die Pflanze blüht. Schneide die Triebspitzen ab, kurz bevor die Pflanze blüht. So verzweigt sie sich besser und produziert mehr Blätter. Du kannst die abgeschnittenen Blätter natürlich sofort in der Küche verwenden!
* Schutz vor Schädlingen: Basilikum kann von Blattläusen, Schnecken und anderen Schädlingen befallen werden. Kontrolliere deine Pflanzen regelmäßig und entferne Schädlinge bei Bedarf. Du kannst auch natürliche Schädlingsbekämpfungsmittel verwenden, wie z.B. eine Seifenlösung.
* Überwinterung: Basilikum ist nicht winterhart. Wenn du dein Basilikum überwintern möchtest, solltest du es vor dem ersten Frost ins Haus holen. Stelle es an einen hellen und kühlen Ort und gieße es sparsam.
Ernte deines Lila Basilikums: Der Lohn der Arbeit
Nachdem du dein Basilikum gepflegt hast, ist es endlich Zeit zu ernten!
* Wann ernten: Du kannst Basilikum ernten, sobald die Pflanze groß genug ist. Am besten erntest du am Morgen, wenn die ätherischen Öle am konzentriertesten sind.
* Wie ernten: Schneide die Blätter mit einer Schere oder einem Messer ab. Schneide immer ganze Triebe ab, anstatt einzelne Blätter zu zupfen. So förderst du das Wachstum der Pflanze.
* Verwendung: Verwende das frische Basilikum sofort in der Küche. Du kannst es auch trocknen oder einfrieren, um es länger haltbar zu machen.
Lila Basilikum in der Küche: Inspirationen
Lila Basilikum ist unglaublich vielseitig in der Küche. Hier sind einige Ideen, wie du es verwenden kannst:
* Salate:
Conclusion
So, there you have it! Growing purple basil in pots is not only achievable, but it’s also incredibly rewarding. From the vibrant color that adds a touch of drama to your garden or balcony, to the intense, slightly spicy flavor that elevates your culinary creations, purple basil offers a unique experience that store-bought basil simply can’t match.
This DIY project is a must-try for several reasons. First, it’s cost-effective. A single packet of seeds will yield far more basil than you could ever purchase at the grocery store, and you’ll have the satisfaction of knowing exactly where your herbs came from and how they were grown. Second, it’s incredibly versatile. You can tailor your growing conditions to suit your specific climate and space, ensuring a healthy and productive plant. Third, and perhaps most importantly, it’s a fantastic way to connect with nature and experience the joy of nurturing something from seed to harvest.
Don’t be afraid to experiment with different varieties of purple basil. ‘Dark Opal’ is a classic choice with deep purple leaves, while ‘Red Rubin’ offers a slightly milder flavor and a more reddish hue. You can also try growing different types of basil alongside your purple basil to create a beautiful and fragrant herb garden. Consider companion planting with tomatoes, peppers, or marigolds to deter pests and promote healthy growth.
For a fun variation, try infusing olive oil with your fresh purple basil. Simply combine a handful of leaves with a cup of high-quality olive oil in a jar, let it sit for a few days, and then strain. The resulting oil will have a beautiful purple tint and a delicious basil flavor, perfect for drizzling over salads, pasta, or grilled vegetables. Another great idea is to make a purple basil pesto. The vibrant color will make your pesto stand out, and the unique flavor will add a delightful twist to your favorite dishes.
We wholeheartedly encourage you to give growing purple basil in pots a try. It’s a simple, satisfying, and delicious way to enhance your garden and your cooking. Once you’ve harvested your first crop, we’d love to hear about your experience! Share your photos, tips, and recipes in the comments below. Let’s build a community of purple basil enthusiasts and inspire others to discover the joys of growing their own herbs. Happy gardening!
Frequently Asked Questions (FAQ)
What kind of pot is best for growing purple basil?
The ideal pot for growing purple basil should be at least 12 inches in diameter to allow ample room for root growth. Choose a pot made from terracotta or plastic, ensuring it has drainage holes to prevent waterlogging. Terracotta pots are porous, which helps with aeration and drainage, but they can dry out more quickly. Plastic pots retain moisture better, but it’s crucial to monitor watering to avoid overwatering. Consider using a self-watering pot if you tend to forget to water your plants regularly.
How much sunlight does purple basil need?
Purple basil thrives in full sun, requiring at least 6-8 hours of direct sunlight per day. If you’re growing your basil indoors, place it near a sunny window or supplement with a grow light. Insufficient sunlight can lead to leggy growth and a less vibrant purple color. If your plant is not getting enough sunlight, you may notice the leaves turning green or a paler shade of purple.
What kind of soil should I use for purple basil?
Use a well-draining potting mix that is rich in organic matter. A mix of compost, peat moss, and perlite is ideal. Avoid using garden soil, as it can be too heavy and may not drain properly. The soil should be slightly acidic to neutral, with a pH between 6.0 and 7.5. You can amend the soil with compost or other organic matter to improve its fertility and drainage.
How often should I water my purple basil?
Water your purple basil regularly, keeping the soil consistently moist but not waterlogged. Check the soil moisture by sticking your finger about an inch deep into the soil. If it feels dry, it’s time to water. Water deeply, allowing the water to drain out of the drainage holes. Avoid overhead watering, as this can lead to fungal diseases. Water in the morning to allow the foliage to dry before nightfall.
How often should I fertilize my purple basil?
Fertilize your purple basil every 2-3 weeks with a balanced liquid fertilizer diluted to half strength. Avoid over-fertilizing, as this can lead to excessive foliage growth at the expense of flavor. You can also use a slow-release fertilizer at the time of planting. Organic fertilizers, such as compost tea or fish emulsion, are also excellent choices.
How do I harvest purple basil?
Harvest purple basil regularly to encourage bushier growth. Pinch off the top sets of leaves, just above a leaf node. This will encourage the plant to branch out and produce more leaves. Avoid harvesting more than one-third of the plant at a time. You can also harvest the flowers, which are edible and have a mild basil flavor.
How do I prevent pests and diseases?
Monitor your purple basil regularly for pests and diseases. Common pests include aphids, spider mites, and whiteflies. You can control these pests with insecticidal soap or neem oil. To prevent fungal diseases, ensure good air circulation and avoid overhead watering. Remove any yellowing or diseased leaves promptly.
Can I grow purple basil indoors?
Yes, you can grow purple basil indoors, provided you give it enough sunlight or supplement with a grow light. Place the pot near a sunny window or under a grow light for at least 6-8 hours per day. Ensure good air circulation and monitor the soil moisture regularly.
How do I propagate purple basil?
You can propagate purple basil from seeds or cuttings. To propagate from seeds, sow the seeds indoors 6-8 weeks before the last frost or directly into the pot after the last frost. To propagate from cuttings, take a 4-6 inch cutting from a healthy plant and remove the lower leaves. Place the cutting in water or directly into moist potting mix. Roots will typically form within a few weeks.
What are some culinary uses for purple basil?
Purple basil has a slightly spicier and more intense flavor than sweet basil, making it a versatile ingredient in a variety of dishes. Use it in salads, pesto, sauces, soups, and stir-fries. It also makes a beautiful garnish. Try using it in Thai-inspired dishes or pairing it with grilled meats and vegetables. Its vibrant color adds a visual appeal to any dish.

Leave a Comment