
Grow Pineapple on Terrace: Imagine plucking a juicy, sun-ripened pineapple straight from your own terrace garden! Sounds like a tropical dream, right? Well, it doesn’t have to be just a dream. I’m here to tell you that with a little know-how and some simple DIY techniques, you can absolutely cultivate your own pineapple paradise, even if you live in an apartment.
Pineapples, originally native to South America, have a rich history, symbolizing hospitality and warmth. Think about it – a pineapple was once a prized possession, a luxurious gift to offer guests! While we might not be offering them to royalty anymore, the joy of sharing a homegrown pineapple is just as special.
But why should you bother with this DIY project? Let’s be honest, store-bought pineapples can be expensive and sometimes lack that intense, fresh flavor. Plus, there’s something incredibly rewarding about nurturing a plant from start to finish and enjoying the fruits (literally!) of your labor. This article will guide you through every step, from selecting the right pineapple top to providing the ideal growing conditions, ensuring you can successfully grow pineapple on terrace. Get ready to impress your friends and family with your green thumb and enjoy the sweet taste of success!
Growing Pineapples on the Patio: Your Tropical DIY Project
Hey guys! Have you ever imagined growing your own pineapple on the patio? Sounds crazy, right? But I can tell you, it’s not only possible, but also super satisfying! I’ve tried it myself and am totally thrilled. In this article, I’ll show you step-by-step how to start your own little pineapple plantation. Don’t worry, it’s easier than you think!
What You Need: The Ingredients for Your Tropical Adventure
Before we get started, here’s a list of everything you’ll need for your pineapple project:
- A ripe pineapple: Preferably one from the supermarket that is already slightly fragrant and has green, healthy leaves.
- A sharp knife: For clean cuts.
- A glass of water: For rooting the pineapple top.
- A planter: With a diameter of at least 20 cm (8 inches).
- High-quality potting soil: A mix of potting soil, sand, and some compost is best.
- Optional: Rooting hormone: Can speed up the rooting process.
- Patience: Pineapples take time to grow!
Preparing the Pineapple Top: The Kick-off for Your Project
This step is crucial for the success of your pineapple project. We need to prepare the pineapple top so that it can root optimally.
- Cut off the pineapple top: Take your sharp knife and cut the top of the pineapple off about 2-3 cm (1 inch) below the leaves. Make sure to make a clean cut.
- Remove the fruit flesh: Carefully remove any remaining fruit flesh from the pineapple top. Leftover fruit can lead to rot and hinder the rooting process.
- Remove the bottom leaves: Remove the lowest leaves from the pineapple top, about 2-3 cm (1 inch) high. This will expose the root nubs.
- Let it dry: Let the pineapple top dry for 2-3 days in a dry, well-ventilated place. This helps to seal the cut surface and prevent rot.
Rooting the Pineapple Top: Patience is Required!
Now comes the exciting part: we’re going to get the pineapple top to sprout roots!
- Place the pineapple top in water: Fill a glass with water and place the pineapple top in it so that only the bottom part, where you removed the leaves, is in the water. The leaves should not be in the water.
- Choose a location: Place the glass in a bright, warm place, but not in direct sunlight.
- Change the water: Change the water every 2-3 days to prevent rot.
- Watch for roots: After a few weeks (it can take 4-8 weeks), you should see the first roots. Be patient!
- Optional: Use rooting hormone: If you wish, you can dip the pineapple top in rooting hormone before placing it in water. This can speed up the rooting process.
Planting the Pineapple: Into the Soil it Goes!
Once the roots are about 2-3 cm (1 inch) long, it’s time to plant the pineapple.
- Prepare the planter: Fill your planter with the prepared potting soil. Make sure the container has drainage holes so excess water can run off.
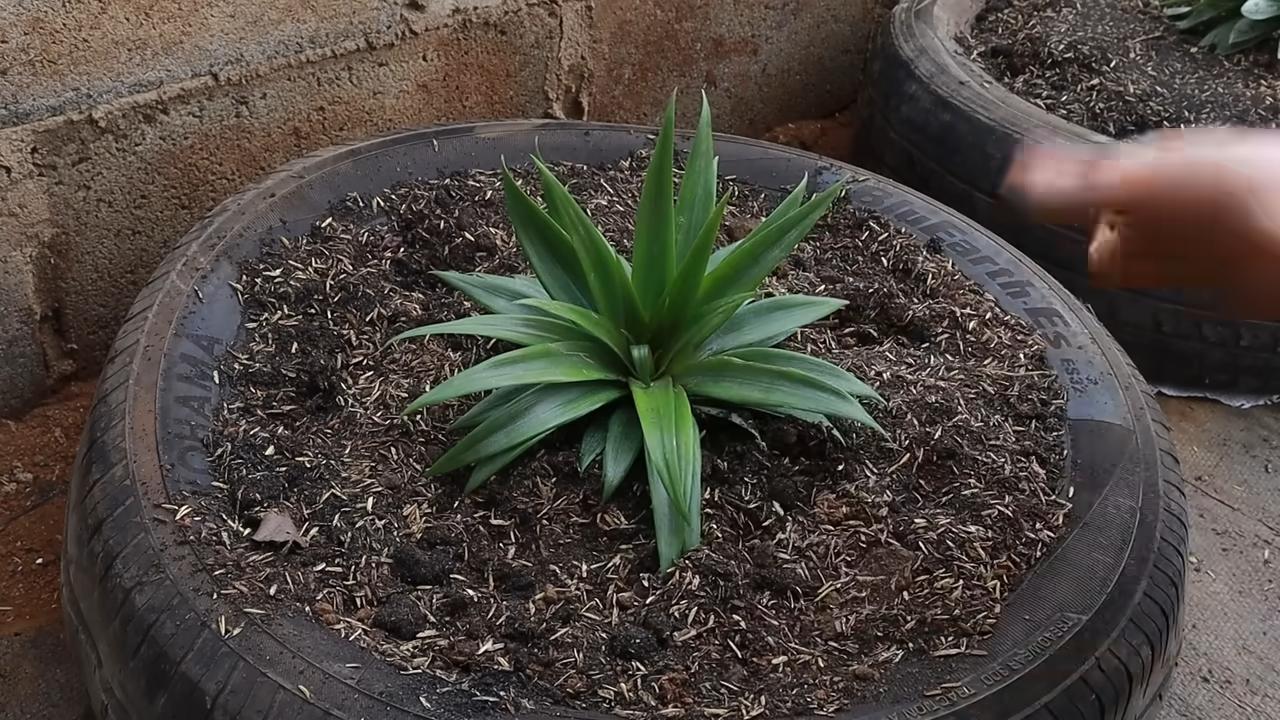
- Plant the pineapple top: Dig a small hole in the soil and carefully place the pineapple top inside. The roots should be well-covered with soil.
- Water: Water the pineapple well after planting.
- Choose a location: Place the planter in a bright, warm location with plenty of sunlight. Pineapples love the sun!
Caring for the Pineapple: How to Keep Your Plant Happy
Proper care is crucial for your pineapple to grow well and maybe even bear fruit.
- Watering: Water the pineapple regularly, but avoid waterlogging. The soil should always be slightly moist.
- Fertilizing: During the growing season (spring and summer), fertilize the pineapple every 2-3 weeks with a liquid fertilizer for fruit plants.
- Temperature: Pineapples love warmth. The ideal temperature is between 20 and 30 degrees Celsius (68-86°F). In winter, you should move the pineapple to a cooler place, but not below 15 degrees Celsius (59°F).
- Humidity: Pineapples like high humidity. You can increase humidity by regularly spraying the leaves with water.
- Repotting: When the pineapple gets too big for its planter, you should repot it into a larger container.
- Pests and diseases: Watch out for pests like spider mites or mealybugs. If necessary, you can treat the pineapple with a suitable pesticide.
When Does the Pineapple Bear Fruit? The Big Question!
This is the question everyone asks! It can take 1-3 years for a pineapple to bear fruit. The waiting time depends on various factors, such as the variety, growing conditions, and care.
How you can encourage fruiting:
There are a few tricks you can use to encourage fruit production:
- Ethylene gas: Place an apple next to the pineapple plant. Apples produce ethylene gas, which can stimulate fruiting.
- Magnesium sulfate (Epsom salt): Occasionally water the pineapple with a solution of magnesium sulfate (1 teaspoon per liter of water).
- Patience: Sometimes it just takes time!
Harvesting the Pineapple: The Reward for Your Effort
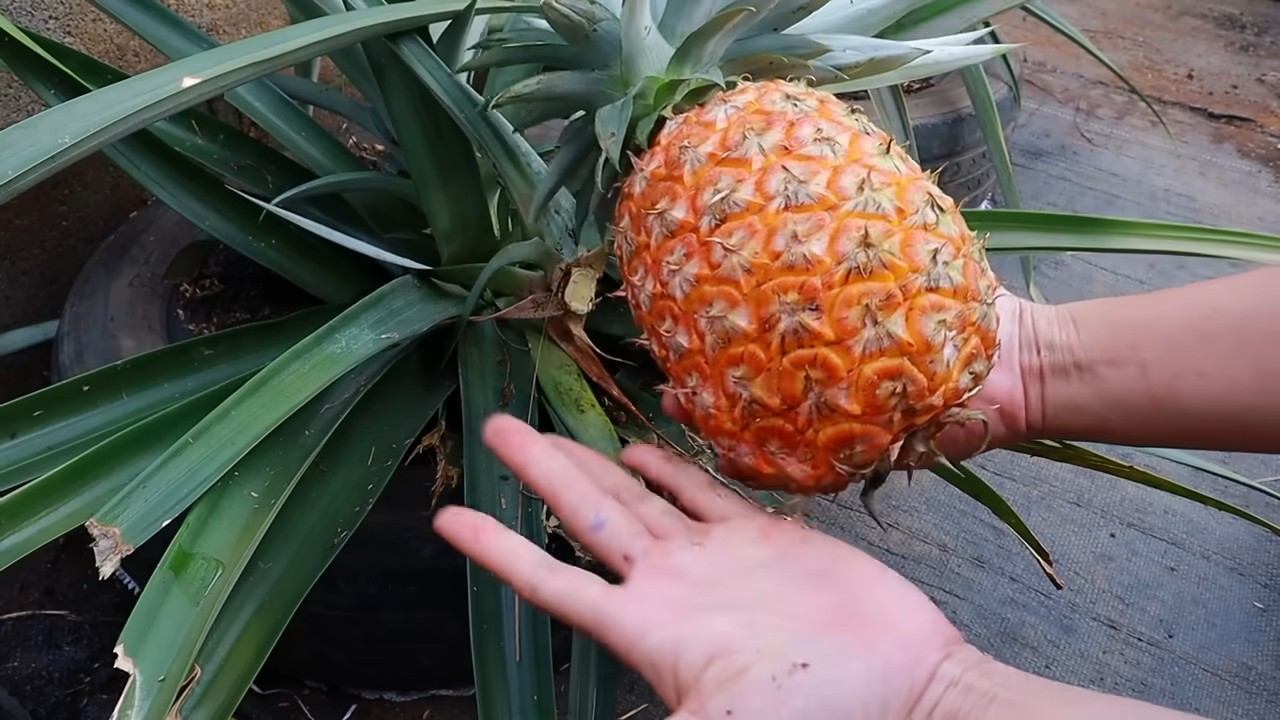
When the pineapple is ripe, it will give off a sweet scent and the skin will turn a yellow-orange color. Carefully cut the pineapple from the stalk and enjoy your homegrown tropical fruit!
Common Problems and Solutions: So Nothing Goes Wrong
Problems can also arise when growing pineapples. Here are some common issues and how to solve them:
- Leaves turning brown: This can have various causes, such as too little water, too much sun, or a nutrient deficiency. Check your care routine and adjust it if necessary.
- No roots: Patience! It can take a while for the pineapple to root. Make sure the pineapple top is in a warm, bright place and the water is changed regularly.
- Rot: Rot is caused by too much moisture. Make sure the soil is well-drained and avoid waterlogging. Remove any affected leaves or parts of the plant.
- Pests: Check the pineapple regularly for pests and treat it with a suitable pesticide if necessary.
I hope this article has helped you start your own pineapple project. It’s an exciting and rewarding DIY project that will bring you a lot of joy. Good luck and have fun growing pineapples
Conclusion
So, there you have it! Growing your own pineapple on your terrace isn’t just a fun project; it’s a rewarding experience that brings a touch of the tropics right to your doorstep. Imagine the satisfaction of harvesting a sweet, juicy pineapple that you nurtured from start to finish. Forget those bland, store-bought pineapples that lack the vibrant flavor of a homegrown fruit. This DIY trick is a must-try for anyone with a sunny terrace, a little patience, and a desire to connect with nature.
The beauty of this method lies in its simplicity and accessibility. You don’t need acres of land or specialized equipment. A pot, some soil, and a pineapple top are all you need to embark on this exciting gardening adventure. Plus, it’s an excellent way to reduce food waste by repurposing the top of a pineapple you’ve already enjoyed.
But don’t stop there! Feel free to experiment with different varieties of pineapples. Try growing a ‘Smooth Cayenne’ for its classic sweetness or a ‘Sugarloaf’ for its exceptionally low acidity. You can also explore different potting mixes to find what works best for your climate and growing conditions. Consider adding slow-release fertilizer to provide your pineapple plant with a steady supply of nutrients.
For those living in colder climates, consider bringing your potted pineapple indoors during the winter months. A sunny windowsill or a grow light can help ensure your plant continues to thrive even when the weather outside is less than ideal. You can also experiment with different mulches to help retain moisture and suppress weeds.
The key to success with this DIY trick is patience. It takes time for a pineapple plant to mature and produce fruit, but the wait is well worth it. As you watch your plant grow and develop, you’ll gain a deeper appreciation for the natural world and the miracle of life.
We encourage you to give this DIY trick a try and share your experience with us. Post photos of your pineapple plants on social media using #TerracePineapple and let us know how it’s going. We’d love to see your progress and learn from your successes (and even your challenges!). Together, we can create a community of urban gardeners who are passionate about growing their own food and bringing a little bit of paradise to their homes. So, grab a pineapple, get your hands dirty, and start growing your own tropical treat today! You’ll be amazed at what you can accomplish with a little bit of effort and a whole lot of love. This method of **growing pineapple on terrace** is not only sustainable but also adds a unique charm to your living space.
Frequently Asked Questions (FAQ)
1. What kind of pineapple should I use to start my plant?
The best type of pineapple to use is a fresh, ripe pineapple from the grocery store. Look for one with healthy, green leaves and no signs of rot or damage. Avoid pineapples that have been refrigerated for an extended period, as this can reduce their chances of rooting successfully. ‘Smooth Cayenne’ is a popular and readily available variety that works well for this purpose. You can also try other varieties, but make sure they are fresh and healthy.
2. How do I prepare the pineapple top for planting?
Preparing the pineapple top is crucial for successful rooting. First, carefully twist or cut off the top of the pineapple, leaving about an inch of fruit attached. Then, remove the bottom few layers of leaves to expose the stem. This will encourage root growth. Allow the pineapple top to dry for a few days in a cool, dry place. This helps to prevent rot. Some people also recommend dipping the cut end in rooting hormone to further promote root development, but this is optional.
3. What kind of soil should I use?
Pineapples prefer well-draining soil that is slightly acidic. A good potting mix for pineapples is a combination of equal parts peat moss, perlite, and vermiculite. You can also add some compost to provide extra nutrients. Avoid using heavy clay soil, as this can lead to root rot. Make sure the pot you use has drainage holes to prevent waterlogging.
4. How often should I water my pineapple plant?
Water your pineapple plant regularly, but avoid overwatering. Allow the soil to dry out slightly between waterings. During the growing season (spring and summer), you may need to water more frequently than during the dormant season (fall and winter). A good rule of thumb is to water when the top inch of soil feels dry to the touch. Be sure to water thoroughly, allowing the water to drain out of the bottom of the pot.
5. How much sunlight does a pineapple plant need?
Pineapple plants need plenty of sunlight to thrive. Aim for at least six hours of direct sunlight per day. If you are growing your pineapple plant indoors, place it near a sunny window or use a grow light to supplement natural light. Insufficient sunlight can lead to slow growth and reduced fruit production.
6. How long does it take for a pineapple plant to produce fruit?
It can take anywhere from 1 to 3 years for a pineapple plant to produce fruit, depending on the variety, growing conditions, and care. Be patient and continue to provide your plant with the proper care, and eventually, you will be rewarded with a delicious, homegrown pineapple.
7. How do I know when my pineapple is ripe?
A ripe pineapple will have a sweet aroma and a slightly golden color. The eyes (the individual segments of the pineapple) will also be flatter and more developed. You can also gently tug on one of the leaves; if it comes off easily, the pineapple is likely ripe.
8. Can I grow a pineapple plant indoors?
Yes, you can grow a pineapple plant indoors, especially if you live in a colder climate. However, you will need to provide it with plenty of sunlight or a grow light. Make sure to choose a pot that is large enough to accommodate the plant’s root system.
9. What are some common problems that pineapple plants face?
Some common problems that pineapple plants face include root rot, mealybugs, and scale. Root rot is caused by overwatering, so be sure to allow the soil to dry out slightly between waterings. Mealybugs and scale are pests that can be controlled with insecticidal soap or neem oil.
10. Can I fertilize my pineapple plant?
Yes, fertilizing your pineapple plant can help to promote healthy growth and fruit production. Use a balanced fertilizer that is specifically formulated for tropical plants. Follow the instructions on the fertilizer label for application rates and frequency. You can also use a slow-release fertilizer to provide your plant with a steady supply of nutrients.

Leave a Comment