
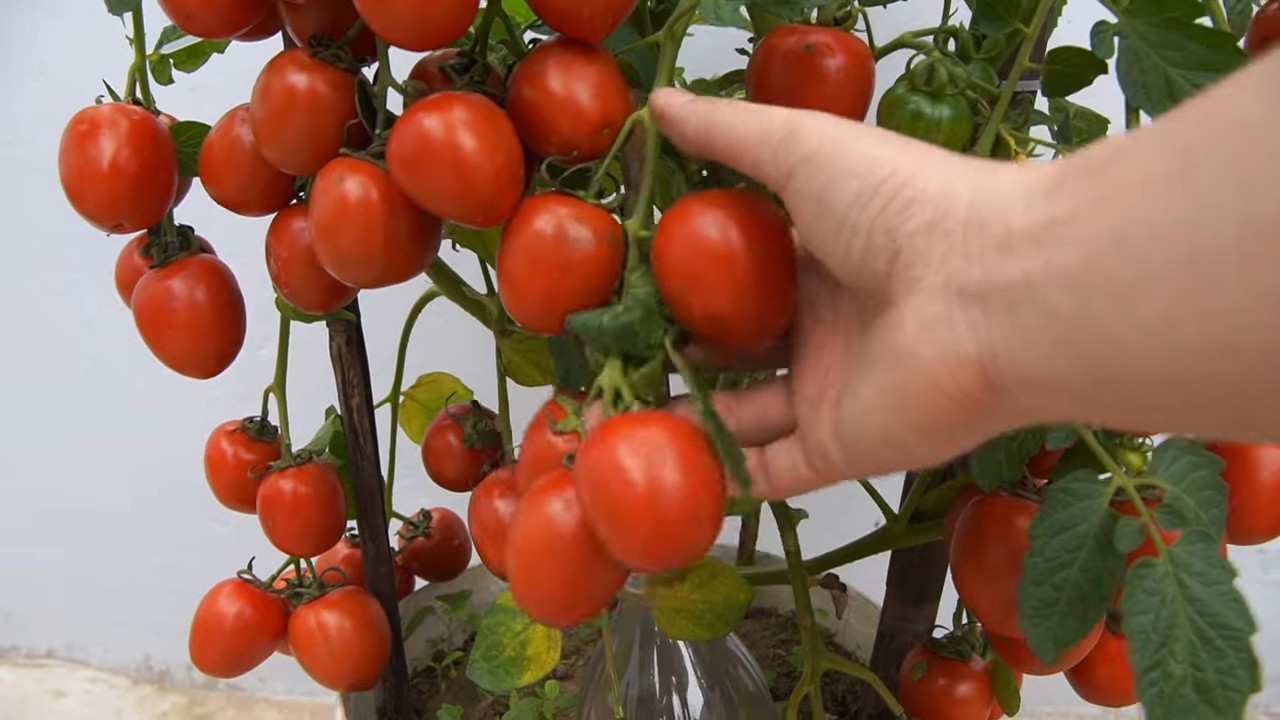
Container Tomatoes Easy Growing: Imagine biting into a juicy, sun-ripened tomato, bursting with flavor, that you grew yourself, right on your patio! Sounds idyllic, doesn’t it? For centuries, cultivating tomatoes has been a cherished practice, from their origins in South America to their adoption by cultures worldwide. Today, even if you lack a sprawling garden, you can experience the joy of homegrown tomatoes with our easy DIY guide.
But why bother with container tomatoes? Well, let’s face it, store-bought tomatoes often lack that vibrant, fresh taste. Plus, gardening is incredibly therapeutic! It connects us with nature, reduces stress, and provides a sense of accomplishment. This article is packed with simple, effective tricks and hacks to ensure your container tomatoes easy growing journey is a resounding success. We’ll cover everything from choosing the right container and soil to watering techniques and pest control, all designed to make growing tomatoes in containers a breeze, even for beginners. So, grab your gardening gloves, and let’s get started on creating your own little tomato paradise!
Tomaten im Topf: So gelingt der Anbau kinderleicht!
Hallo liebe Gartenfreunde! Ich liebe es, frische Tomaten direkt vom Strauch zu naschen. Aber was, wenn man keinen Garten hat? Keine Sorge, denn auch auf dem Balkon oder der Terrasse kann man mit etwas Know-how eine reiche Tomatenernte erzielen. Ich zeige euch, wie ihr ganz einfach Tomaten im Topf anbauen könnt – versprochen, es ist leichter als ihr denkt!
Was ihr für den Tomatenanbau im Topf braucht:
* Tomatensamen oder Jungpflanzen: Am besten wählt ihr Sorten, die für den Anbau im Topf geeignet sind. Buschtomaten, Hängetomaten oder Mini-Tomaten sind eine gute Wahl. Ich persönlich mag die “Roma” oder “San Marzano” für Soßen, aber auch Cherrytomaten sind superlecker zum Snacken.
* Töpfe: Die Größe ist entscheidend! Für Buschtomaten und kleinere Sorten reichen Töpfe mit einem Durchmesser von mindestens 30 cm und einem Volumen von 20 Litern. Für größere Sorten solltet ihr eher zu 40-50 cm Durchmesser und 30-40 Litern greifen. Achtet darauf, dass die Töpfe Abzugslöcher haben, damit überschüssiges Wasser ablaufen kann.
* Tomatenerde: Normale Blumenerde ist nicht ideal. Tomaten brauchen eine spezielle Tomatenerde, die nährstoffreicher ist und eine gute Drainage bietet. Ihr könnt sie im Gartencenter kaufen oder selbst mischen.
* Dünger: Tomaten sind Starkzehrer und brauchen regelmäßige Düngergaben. Flüssigdünger für Tomaten ist einfach in der Anwendung.
* Stützmaterial: Je nach Tomatensorte benötigt ihr Stäbe, Spiralen oder ein Rankgitter, um die Pflanzen zu stützen.
* Gießkanne oder Schlauch: Zum regelmäßigen Gießen.
* Optional: Mulchmaterial (z.B. Stroh oder Holzhackschnitzel) zur Feuchtigkeitsspeicherung und Unkrautunterdrückung.
Schritt-für-Schritt-Anleitung: Tomaten säen oder pflanzen
Phase 1: Aussaat (optional)
Wenn ihr eure Tomaten selbst aus Samen ziehen wollt, beginnt ihr am besten im März oder April.
1. Vorbereitung der Anzuchtgefäße: Füllt kleine Anzuchttöpfe oder eine Anzuchtschale mit Anzuchterde. Diese ist nährstoffarm und verhindert, dass die jungen Keimlinge “verbrennen”.
2. Aussaat: Legt 2-3 Samen pro Topf oder Schale aus und bedeckt sie leicht mit Erde (ca. 0,5 cm).
3. Gießen: Befeuchtet die Erde vorsichtig mit einer Sprühflasche. Sie sollte feucht, aber nicht nass sein.
4. Standort: Stellt die Anzuchtgefäße an einen hellen und warmen Ort (ca. 20-25°C). Ein Mini-Gewächshaus oder eine Fensterbank über der Heizung sind ideal.
5. Keimung: Nach etwa 1-2 Wochen sollten die ersten Keimlinge erscheinen.
6. Pikieren: Sobald die Keimlinge ihre ersten richtigen Blätter (nach den Keimblättern) entwickelt haben, werden sie pikiert. Das bedeutet, dass ihr die stärksten Pflänzchen vorsichtig aus der Anzuchtschale nehmt und in separate Töpfe mit Tomatenerde umpflanzt. Achtet darauf, die Wurzeln nicht zu beschädigen.
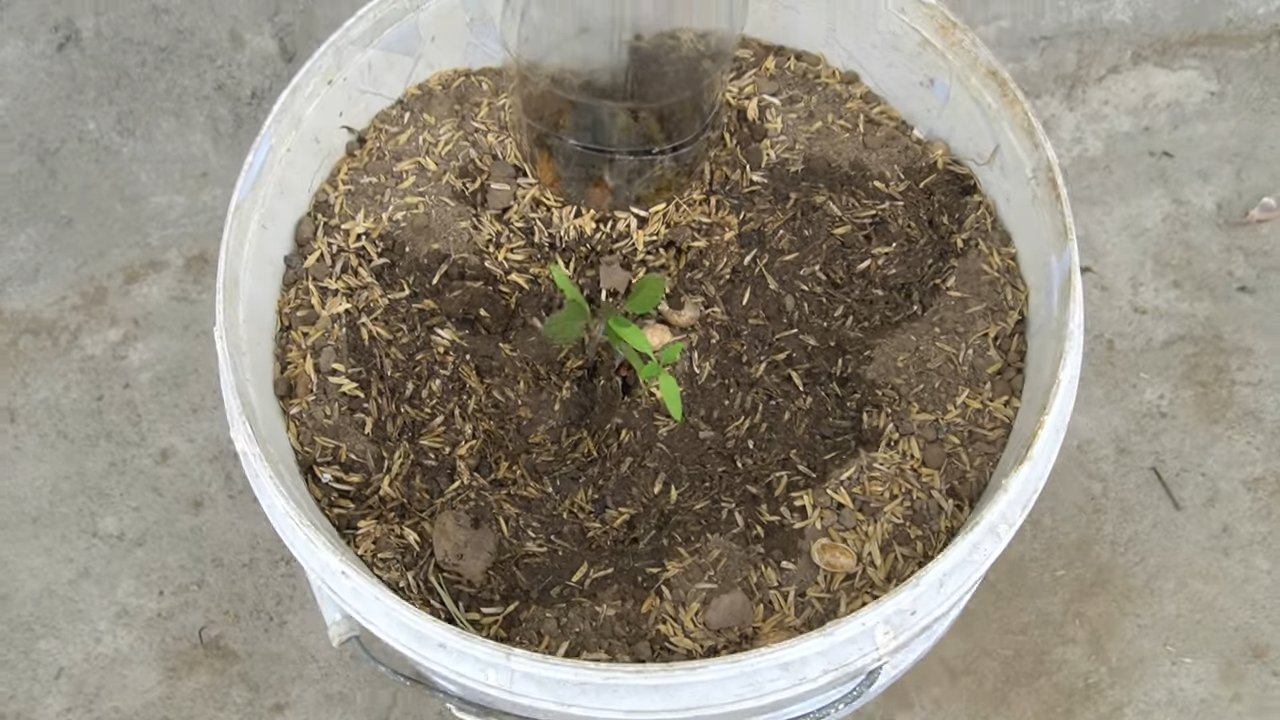
Phase 2: Das Einpflanzen der Tomaten
Wenn ihr Jungpflanzen gekauft habt, könnt ihr diesen Schritt direkt beginnen. Die beste Zeit zum Einpflanzen ist nach den Eisheiligen (Mitte Mai), wenn keine Frostgefahr mehr besteht.
1. Topf vorbereiten: Füllt den Topf mit Tomatenerde. Lasst oben einen Rand von ca. 5 cm frei.
2. Pflanzloch graben: Grabt ein Loch in die Erde, das etwas größer ist als der Wurzelballen der Tomatenpflanze.
3. Tomatenpflanze einsetzen: Nehmt die Tomatenpflanze vorsichtig aus dem Anzuchttopf und setzt sie in das Pflanzloch. Ihr könnt die Pflanze etwas tiefer setzen, als sie vorher im Topf stand. Das fördert die Wurzelbildung.
4. Mit Erde auffüllen: Füllt das Pflanzloch mit Erde auf und drückt sie leicht an.
5. Angießen: Gießt die Tomatenpflanze gründlich an.
Phase 3: Pflege der Tomatenpflanzen
1. Standort: Tomaten lieben die Sonne! Stellt die Töpfe an einen sonnigen und windgeschützten Ort. Mindestens 6 Stunden Sonne pro Tag sind ideal.
2. Gießen: Gießt die Tomatenpflanzen regelmäßig, besonders an heißen Tagen. Die Erde sollte immer leicht feucht sein, aber Staunässe solltet ihr vermeiden. Gießt am besten morgens oder abends direkt an die Wurzeln und vermeidet es, die Blätter zu benetzen, um Pilzkrankheiten vorzubeugen.
3. Düngen: Beginnt etwa 2-3 Wochen nach dem Einpflanzen mit dem Düngen. Verwendet einen speziellen Tomatendünger und haltet euch an die Dosierungsanleitung auf der Verpackung. Düngt am besten einmal pro Woche.
4. Ausgeizen: Tomatenpflanzen bilden in den Blattachseln sogenannte “Geiztriebe”. Diese Triebe nehmen der Pflanze unnötig Kraft und sollten regelmäßig ausgegeizt werden. Brecht die Geiztriebe einfach mit den Fingern ab, solange sie noch klein sind. Bei Buschtomaten ist das Ausgeizen in der Regel nicht notwendig.
5. Stützen: Sobald die Tomatenpflanzen größer werden, benötigen sie eine Stütze. Bindet die Pflanzen locker an Stäbe, Spiralen oder ein Rankgitter.
6. Mulchen: Eine Mulchschicht aus Stroh oder Holzhackschnitzeln hilft, die Feuchtigkeit im Boden zu halten und Unkraut zu unterdrücken.
7. Krankheiten und Schädlinge: Achtet auf Anzeichen von Krankheiten oder Schädlingen. Bei Bedarf könnt ihr biologische Pflanzenschutzmittel einsetzen. Die Braunfäule ist eine häufige Tomatenkrankheit, die durch feuchtes Wetter begünstigt wird. Achtet auf eine gute Belüftung der Pflanzen und entfernt befallene Blätter.
Zusätzliche Tipps für eine reiche Ernte:
* Sortenwahl: Wählt Sorten, die für den Anbau im Topf geeignet sind und eurem Geschmack entsprechen.
* Bodenverbesserung: Mischt der Tomatenerde etwas Kompost oder Hornspäne bei, um die Nährstoffversorgung zu verbessern.
* Regenschutz: Wenn möglich, stellt die Tomatenpflanzen unter ein Vordach oder einen Regenschutz, um sie vor zu viel Regen zu schützen.
* Bestäubung: In Innenräumen oder bei wenig Wind kann es hilfreich sein, die Blüten leicht zu schütteln, um die Bestäubung zu fördern.
* Geduld: Habt Geduld! Es dauert eine Weile, bis die Tomaten reif sind. Aber die Mühe lohnt sich, wenn ihr dann eure eigenen, sonnengereiften Tomaten ernten könnt.
Ich hoffe, diese Anleitung hilft euch dabei, eure eigenen Tomaten im Topf anzubauen. Viel Spaß beim Gärtnern und lasst es euch schmecken!
Conclusion
So, there you have it! Growing your own tomatoes in containers doesn’t have to be a daunting task. With this simple, effective DIY trick, you’re well on your way to enjoying a bountiful harvest of delicious, homegrown tomatoes, even if you’re short on space or gardening experience. This method simplifies the process, making it accessible to everyone, from seasoned gardeners to complete beginners.
Why is this DIY trick a must-try? Because it addresses some of the most common challenges faced when growing tomatoes in containers. It promotes healthy root development, ensures proper drainage, and provides a readily available source of nutrients, all crucial for robust plant growth and abundant fruit production. Forget complicated setups and expensive equipment; this method is all about simplicity and effectiveness.
But don’t stop there! Feel free to experiment and personalize this technique to suit your specific needs and preferences. For example, you could try using different types of organic matter in your soil mix, such as composted leaves or aged manure, to further enrich the soil and provide additional nutrients. Consider adding a slow-release fertilizer specifically formulated for tomatoes to supplement the initial nutrient boost. You can also explore different container sizes and materials to find what works best for your space and climate.
If you’re growing determinate (bush) varieties, a smaller container might suffice, while indeterminate (vining) varieties will thrive in larger containers with ample support. Think about the aesthetics too! Choose containers that complement your outdoor space and add a touch of personality to your garden. Terracotta pots, colorful plastic containers, or even repurposed buckets can all work beautifully.
Another variation to consider is companion planting. Basil, marigolds, and other herbs and flowers can be planted alongside your tomatoes to deter pests, attract beneficial insects, and even improve the flavor of your tomatoes. This is a great way to create a thriving and self-sustaining ecosystem in your container garden.
Remember, gardening is all about experimentation and learning. Don’t be afraid to try new things and see what works best for you. The most important thing is to have fun and enjoy the process of nurturing your plants and watching them grow.
We are confident that this DIY trick will significantly improve your success with container tomatoes. We encourage you to give it a try and see the difference it makes. And most importantly, we want to hear about your experience! Share your photos, tips, and stories with us in the comments below. Let’s create a community of container tomato growers and learn from each other’s successes and challenges. Happy gardening!
Frequently Asked Questions (FAQ)
What type of container is best for growing tomatoes?
The ideal container for growing tomatoes should be large enough to accommodate the plant’s root system and provide adequate drainage. A minimum size of 10 gallons is generally recommended for determinate (bush) varieties, while 15-20 gallons or larger is preferable for indeterminate (vining) varieties. The material of the container is less critical, but terracotta pots can help regulate soil temperature and moisture, while plastic containers are lightweight and durable. Ensure the container has drainage holes to prevent waterlogging.
What kind of soil should I use for container tomatoes?
Avoid using garden soil in containers, as it can become compacted and poorly drained. Instead, opt for a high-quality potting mix specifically formulated for containers. A good potting mix should be lightweight, well-draining, and rich in organic matter. You can also create your own mix by combining equal parts peat moss, perlite, and compost. Adding a slow-release fertilizer to the potting mix will provide a steady supply of nutrients to your tomato plants.
How often should I water my container tomatoes?
Watering frequency will depend on several factors, including the size of the container, the weather conditions, and the type of tomato plant. Generally, container tomatoes need to be watered more frequently than tomatoes grown in the ground. Check the soil moisture regularly by sticking your finger about an inch into the soil. If the soil feels dry, it’s time to water. Water deeply until water drains out of the drainage holes. Avoid overwatering, as this can lead to root rot. During hot, dry weather, you may need to water your container tomatoes daily or even twice a day.
How much sunlight do container tomatoes need?
Tomatoes are sun-loving plants and require at least 6-8 hours of direct sunlight per day to thrive. Choose a location for your container tomatoes that receives plenty of sunlight throughout the day. If you live in a particularly hot climate, you may need to provide some afternoon shade to prevent the plants from overheating.
Do I need to fertilize my container tomatoes?
Yes, container tomatoes require regular fertilization to ensure healthy growth and abundant fruit production. Use a fertilizer specifically formulated for tomatoes, following the instructions on the label. You can use a liquid fertilizer diluted in water or a slow-release granular fertilizer. Fertilize every 2-3 weeks during the growing season.
How do I support my tomato plants in containers?
Indeterminate (vining) tomato varieties require support to prevent them from sprawling and becoming damaged. You can use stakes, cages, or trellises to support your tomato plants. Insert the support structure into the container when you plant the tomato seedling to avoid disturbing the roots later. As the plant grows, tie the stems to the support structure using soft twine or plant ties.
What are some common pests and diseases that affect container tomatoes?
Common pests that can affect container tomatoes include aphids, whiteflies, and tomato hornworms. Diseases include early blight, late blight, and blossom end rot. Monitor your plants regularly for signs of pests or diseases. Treat infestations with insecticidal soap or neem oil. Prevent diseases by providing good air circulation, avoiding overhead watering, and using disease-resistant tomato varieties. Blossom end rot is caused by calcium deficiency and can be prevented by ensuring adequate calcium levels in the soil and providing consistent watering.
Can I grow tomatoes in containers indoors?
Yes, you can grow tomatoes in containers indoors, but you will need to provide them with adequate light. A sunny south-facing window may be sufficient, but you may also need to supplement with grow lights. Choose a compact, determinate tomato variety that is well-suited for indoor growing.
What are some good companion plants for container tomatoes?
Basil, marigolds, and other herbs and flowers can be planted alongside your tomatoes to deter pests, attract beneficial insects, and improve the flavor of your tomatoes. Basil repels tomato hornworms and whiteflies, while marigolds deter nematodes and other soil pests.
How do I know when my tomatoes are ripe?
Tomatoes are typically ripe when they have reached their mature color and are slightly soft to the touch. The color will vary depending on the variety of tomato. Gently twist the tomato from the vine. If it comes off easily, it’s ripe.
Leave a Comment