
DIY hanging garden celery: Sounds intriguing, right? Imagine fresh, crisp celery stalks dangling right outside your kitchen window, ready to be snipped and added to your salad or enjoyed as a healthy snack. Forget trekking to the grocery store – with this simple DIY project, you can have your own miniature celery farm, adding a touch of green and a whole lot of freshness to your life!
Hanging gardens, while perhaps not quite on the scale of the legendary Hanging Gardens of Babylon, have a rich history. From simple window boxes overflowing with herbs to elaborate vertical structures showcasing vibrant flowers, the concept of bringing greenery closer to our living spaces has resonated across cultures for centuries. It’s a way to connect with nature, even in the most urban environments.
But why celery, and why a hanging garden? Well, let’s be honest, celery can be a bit of a pain to store and often ends up wilting in the crisper drawer. Plus, space can be a premium, especially if you live in an apartment or have a small yard. That’s where this DIY hanging garden celery hack comes in! It’s a fantastic way to save space, keep your celery fresh, and add a unique decorative element to your home. I’m going to show you how to create your own thriving celery oasis, even if you don’t have a green thumb. Get ready to impress your friends and enjoy the freshest celery you’ve ever tasted!
DIY Hängegarten für Staudensellerie: Dein eigenes Gemüsebeet an der Wand!
Hey Leute! Habt ihr auch genug von teurem Gemüse aus dem Supermarkt? Oder einfach Lust, eure grüne Ader auszuleben, aber wenig Platz? Dann habe ich genau das Richtige für euch: einen DIY Hängegarten für Staudensellerie! Das ist nicht nur super platzsparend, sondern auch ein echter Hingucker für Balkon, Terrasse oder sogar die Küche. Und das Beste: Es ist einfacher, als ihr denkt!
Was du brauchst: Die Materialliste
Bevor wir loslegen, hier eine Liste mit allen Materialien, die du für deinen Hängegarten benötigst:
* Staudensellerie-Stangen: Am besten Bio-Qualität, damit du sicher sein kannst, dass sie nicht mit Pestiziden behandelt wurden. Du brauchst nur die Stangen, nicht den ganzen Kopf.
* Plastikflaschen: Am besten 1,5-Liter-Flaschen. Je nachdem, wie groß dein Hängegarten werden soll, brauchst du entsprechend viele. Achte darauf, dass sie sauber sind!
* Schere oder Cuttermesser: Zum Zuschneiden der Flaschen. Sei vorsichtig!
* Bohrmaschine oder Nagel und Hammer: Um Löcher für die Aufhängung zu machen.
* Starkes Seil oder Draht: Zum Aufhängen der Flaschen.
* Erde: Normale Blumenerde oder Gemüseerde ist perfekt.
* Wasser: Zum Gießen, logisch!
* Optional: Sprühfarbe, um die Flaschen zu bemalen und deinen Hängegarten noch individueller zu gestalten.
* Optional: Kleine Steine oder Tonscherben für die Drainage.
Schritt-für-Schritt-Anleitung: So baust du deinen Hängegarten
Okay, jetzt geht’s ans Eingemachte! Hier ist eine detaillierte Anleitung, wie du deinen eigenen Hängegarten für Staudensellerie baust:
1. Die Flaschen vorbereiten
1. Reinigen: Zuerst musst du die Plastikflaschen gründlich reinigen. Entferne alle Etiketten und spüle sie mit warmem Wasser und Spülmittel aus. Lass sie gut trocknen.
2. Zuschneiden: Jetzt kommt der knifflige Teil. Mit der Schere oder dem Cuttermesser schneidest du die Flaschen so durch, dass du eine Art “Pflanzgefäß” erhältst. Am besten schneidest du die Flasche etwa 10-15 cm unterhalb des Flaschenhalses ab. Der obere Teil der Flasche wird später umgedreht in den unteren Teil gesteckt.
3. Drainagelöcher: Bohre oder steche mit einem Nagel und Hammer ein paar kleine Löcher in den Boden des unteren Flaschenteils. Diese Löcher sind wichtig, damit überschüssiges Wasser ablaufen kann und die Wurzeln des Selleries nicht faulen.
4. Aufhängungslöcher: Bohre oder steche nun zwei Löcher an den Seiten des oberen Flaschenteils, knapp unterhalb des abgeschnittenen Randes. Durch diese Löcher wird später das Seil oder der Draht gezogen, um die Flasche aufzuhängen.
5. Optional: Bemalen: Wenn du möchtest, kannst du die Flaschen jetzt mit Sprühfarbe bemalen. Das ist natürlich Geschmackssache, aber es kann deinen Hängegarten optisch aufwerten. Lass die Farbe gut trocknen, bevor du weitermachst.
2. Die Flaschen bepflanzen
1. Drainage: Lege eine Schicht kleine Steine oder Tonscherben auf den Boden des unteren Flaschenteils. Das verbessert die Drainage und verhindert Staunässe.
2. Erde einfüllen: Fülle die Flasche mit Erde. Lass etwa 2-3 cm Platz bis zum Rand.
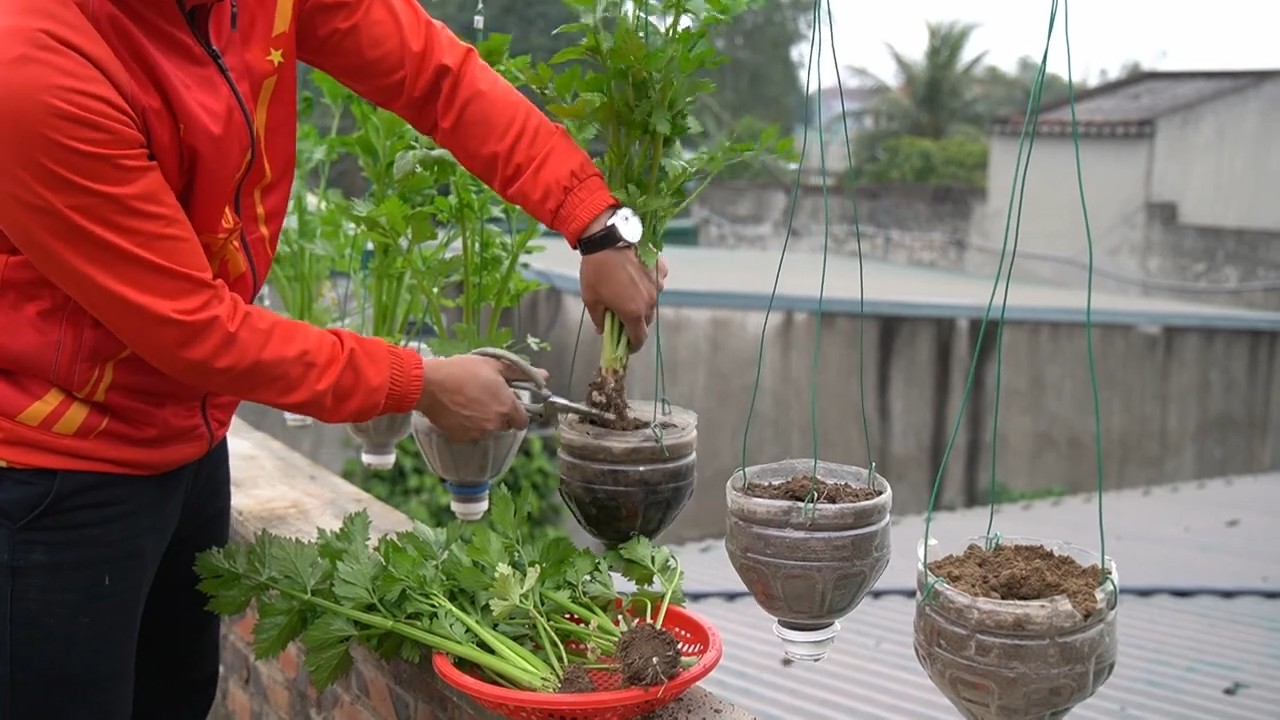
3. Sellerie vorbereiten: Nimm eine Staudensellerie-Stange und schneide sie etwa 5-7 cm oberhalb des Wurzelansatzes ab. Du brauchst nur den unteren Teil der Stange, der die Wurzeln enthält.
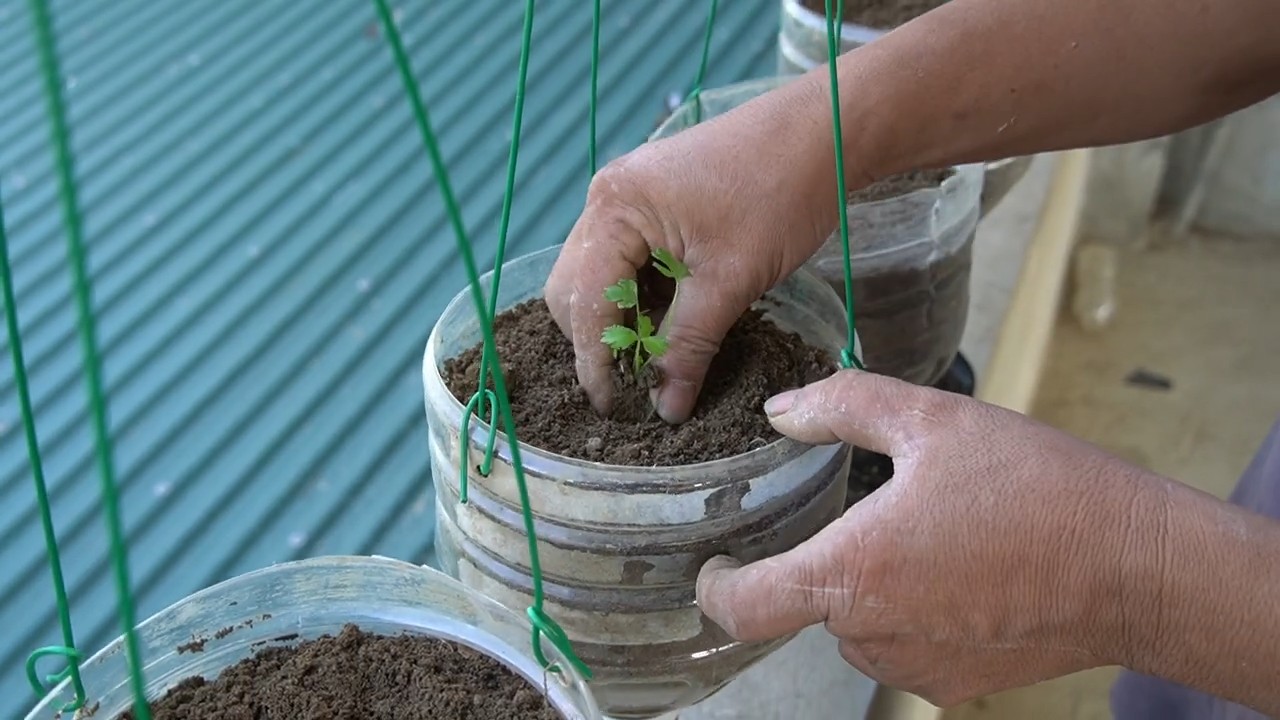
4. Einpflanzen: Stecke den Sellerie-Stumpf in die Erde. Achte darauf, dass die Wurzeln gut bedeckt sind.
5. Angießen: Gieße die Erde vorsichtig an, bis sie gut durchfeuchtet ist.
3. Den Hängegarten aufhängen
1. Seil oder Draht befestigen: Ziehe das Seil oder den Draht durch die Löcher im oberen Flaschenteil. Verknote die Enden gut, damit die Flasche sicher hängt.
2. Aufhängen: Suche dir einen geeigneten Platz für deinen Hängegarten. Achte darauf, dass der Platz hell ist, aber nicht in der prallen Sonne liegt. Hänge die Flasche auf.
3. Wiederholen: Wiederhole die Schritte 1 und 2 für alle weiteren Flaschen, die du in deinem Hängegarten haben möchtest. Du kannst die Flaschen entweder einzeln aufhängen oder sie mit einem längeren Seil oder Draht miteinander verbinden, um eine Art “Girlande” zu bilden.
Pflegehinweise: So bleibt dein Staudensellerie glücklich
Damit dein Staudensellerie im Hängegarten gut gedeiht, solltest du folgende Pflegehinweise beachten:
* Gießen: Gieße den Sellerie regelmäßig, aber vermeide Staunässe. Die Erde sollte immer leicht feucht sein.
* Düngen: Dünge den Sellerie alle paar Wochen mit einem Flüssigdünger für Gemüse.
* Sonne: Stelle sicher, dass der Sellerie genügend Licht bekommt, aber nicht in der prallen Sonne steht. Ein halbschattiger Platz ist ideal.
* Ernte: Wenn der Sellerie groß genug ist, kannst du die äußeren Stangen ernten. Schneide sie einfach mit einem Messer ab. Der Sellerie wird weiterwachsen und neue Stangen bilden.
* Schädlinge: Achte auf Schädlinge wie Blattläuse oder Schnecken. Bei Bedarf kannst du natürliche Schädlingsbekämpfungsmittel verwenden.
Zusätzliche Tipps und Tricks für deinen Hängegarten
* Upcycling: Verwende alte T-Shirts oder Stoffreste, um die Flaschen zu umwickeln und ihnen einen individuellen Look zu verleihen.
* Kräuter: Pflanze neben Staudensellerie auch andere Kräuter wie Petersilie, Schnittlauch oder Basilikum in deinen Hängegarten.
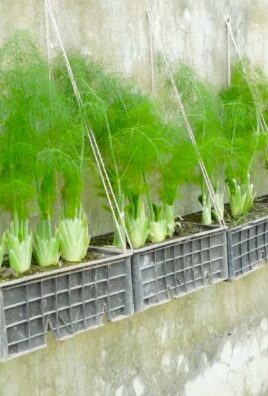
* Vertikale Gärten: Kombiniere verschiedene Hängegärten miteinander, um einen vertikalen Garten zu schaffen.
* Beschriftung: Beschrifte die Flaschen mit den Namen der Pflanzen, damit du immer weißt, was wo wächst.
* Kinder: Beziehe deine Kinder in den Bau und die Pflege des Hängegartens ein. Das ist eine tolle Möglichkeit, ihnen etwas über Pflanzen und Nachhaltigkeit beizubringen.
Warum Staudensellerie im Hängegarten anbauen?
Es gibt viele gute Gründe, Staudensellerie im Hängegarten anzubauen:
* Platzsparend: Ideal für kleine Balkone, Terrassen oder Küchen.
* Nachhaltig: Du sparst Geld und reduzierst deinen ökologischen Fußabdruck.
* Frisch: Du hast immer frischen Staudensellerie zur Hand.
* Gesund: Staudensellerie ist reich an Vitaminen und Mineralstoffen.
* Dekorativ: Ein Hängegarten ist ein echter Hingucker.
* Entspannend: Gärtnern ist eine tolle Möglichkeit, Stress abzubauen.
Fazit: Dein eigener Hängegarten für Staudensellerie ist ein Kinderspiel!
Ich hoffe, diese Anleitung hat dir geholfen, deinen eigenen Hängegarten für Staudensellerie zu bauen. Es ist wirklich einfacher, als es aussieht, und das Ergebnis ist einfach fantastisch. Also, worauf wartest du noch? Schnapp dir ein paar Plastikflaschen, etwas Erde und Staudensellerie und leg los! Viel Spaß beim Gärtnern!
Conclusion
So, there you have it! Creating your own DIY hanging garden celery is not just a fun project; it’s a sustainable, space-saving, and incredibly rewarding way to enjoy fresh, crisp celery right at your fingertips. We’ve walked you through the simple steps, highlighting the benefits of this unique gardening method. Forget those wilted, store-bought stalks – imagine the satisfaction of snipping off exactly what you need, bursting with flavor and nutrients, directly from your own vertical garden.
This isn’t just about growing celery; it’s about embracing a more conscious and creative approach to food. It’s about transforming small spaces, like balconies or patios, into thriving edible landscapes. It’s about reducing your carbon footprint by minimizing trips to the grocery store and cutting down on plastic packaging. And it’s about connecting with nature in a tangible and meaningful way.
But the beauty of this DIY project lies in its adaptability. Feel free to experiment with different containers. Instead of plastic bottles, consider using repurposed burlap sacks or even old hanging baskets lined with coconut coir. You can also explore different growing mediums. While we recommended a well-draining potting mix, you could try a soilless mix or even a hydroponic setup for a truly innovative approach.
Think about companion planting too! Tuck in some herbs like parsley or chives alongside your celery to create a fragrant and productive mini-garden. Or, consider adding some colorful flowers like marigolds to attract beneficial insects and add a touch of beauty to your hanging display.
And don’t limit yourself to just celery! Once you’ve mastered the art of vertical gardening, you can apply the same principles to grow other vegetables like lettuce, spinach, or even strawberries. The possibilities are endless!
This DIY hanging garden celery project is more than just a trend; it’s a sustainable solution for fresh produce. It’s a testament to the power of creativity and resourcefulness. It’s a way to bring the joy of gardening to even the smallest of spaces.
We wholeheartedly encourage you to give this project a try. It’s easier than you might think, and the rewards are well worth the effort. Once you’ve set up your own hanging celery garden, we’d love to hear about your experience! Share your photos, tips, and variations with us in the comments below. Let’s inspire each other to create a more sustainable and delicious world, one hanging garden at a time. Happy gardening!
Frequently Asked Questions (FAQ)
What kind of celery is best for a hanging garden?
While you can technically grow any type of celery in a hanging garden, some varieties are better suited than others. Look for compact or dwarf varieties that won’t get too large and unwieldy. ‘Golden Self-Blanching’ and ‘Utah Improved’ are popular choices that tend to perform well in containers. These varieties are known for their relatively smaller size and good flavor. Remember to check the seed packet or plant label for specific information about the variety’s growth habits.
How often should I water my hanging garden celery?
Watering frequency depends on several factors, including the weather, the type of container you’re using, and the growing medium. In general, you’ll need to water your hanging garden celery more frequently than celery planted in the ground, as containers tend to dry out faster. Check the soil moisture regularly by sticking your finger about an inch into the soil. If it feels dry to the touch, it’s time to water. Water thoroughly until water drains out of the bottom of the container. Avoid overwatering, as this can lead to root rot. During hot, dry weather, you may need to water daily or even twice a day.
What kind of sunlight does hanging garden celery need?
Celery thrives in full sun, which means at least six hours of direct sunlight per day. However, in very hot climates, it can benefit from some afternoon shade to prevent the leaves from scorching. If you’re growing your celery indoors, place it near a sunny window or supplement with grow lights. Insufficient sunlight can result in leggy growth and poor flavor. Observe your plants closely and adjust their location as needed to ensure they’re getting enough light.
How do I fertilize my hanging garden celery?
Celery is a heavy feeder, so it’s important to fertilize it regularly to ensure healthy growth. Use a balanced liquid fertilizer, such as a 10-10-10 or 20-20-20, diluted to half strength. Fertilize every two to three weeks, following the instructions on the fertilizer label. You can also amend the soil with compost or other organic matter to provide a slow-release source of nutrients. Avoid over-fertilizing, as this can lead to excessive foliage growth at the expense of flavor.
How do I prevent pests and diseases in my hanging garden celery?
Hanging gardens are generally less susceptible to pests and diseases than ground-level gardens, but it’s still important to take precautions. Regularly inspect your plants for signs of pests, such as aphids, spider mites, or whiteflies. If you find any pests, treat them with insecticidal soap or neem oil. To prevent fungal diseases, ensure good air circulation around your plants and avoid overwatering. Remove any dead or diseased leaves promptly. You can also use a copper fungicide as a preventative measure.
Can I grow celery from scraps in a hanging garden?
Yes, you can! This is a great way to recycle celery scraps and grow new plants. Simply cut off the base of a celery stalk (about 2 inches from the bottom) and place it in a shallow dish of water. Change the water every day or two. After a few days, you should see roots starting to grow. Once the roots are about an inch long, you can transplant the celery base into your hanging garden container. This method is a fun and easy way to propagate celery, but keep in mind that the resulting plants may not be as vigorous as those grown from seed.
How long does it take to grow celery in a hanging garden?
Celery typically takes about 100 to 130 days to mature from seed. However, if you’re starting with celery scraps, you can shorten the growing time by a few weeks. The exact time will depend on the variety of celery, the growing conditions, and your local climate. Be patient and provide your plants with the care they need, and you’ll be rewarded with a bountiful harvest of fresh, homegrown celery.
What are some common problems when growing celery and how do I fix them?
Some common problems include bolting (premature flowering), which can be caused by stress or temperature fluctuations; pithiness (hollow stalks), which can be caused by insufficient water or nutrients; and diseases like celery blight. To prevent bolting, choose bolt-resistant varieties and provide consistent watering and fertilization. To prevent pithiness, ensure your plants are getting enough water and nutrients. To prevent celery blight, practice good sanitation and avoid overhead watering.
How do I harvest my hanging garden celery?
You can harvest celery stalks as needed once they reach a desirable size. Simply cut the outer stalks near the base of the plant, leaving the inner stalks to continue growing. You can also harvest the entire plant at once by cutting it off at the base. Celery is best harvested in the morning when the stalks are crisp and cool. Store harvested celery in the refrigerator for up to two weeks.
Can I grow other vegetables in the same hanging garden as celery?
Yes, you can! Companion planting can be beneficial for celery and other vegetables. Good companions for celery include onions, garlic, leeks, tomatoes, and marigolds. Avoid planting celery near parsley, as they can compete for nutrients. When choosing companion plants, consider their growth habits and ensure they won’t overcrowd the celery.

Leave a Comment