
Balcony Cabbage Growing Tips: Dreaming of fresh, homegrown cabbage but short on space? You’re not alone! Many urban dwellers crave the satisfaction of harvesting their own vegetables, and thankfully, you don’t need acres of land to make it happen. I’m here to tell you that growing cabbage on your balcony is not only possible, but it can be surprisingly rewarding.
For centuries, cabbage has been a staple in diets around the world, from the hearty stews of Eastern Europe to the vibrant slaws of North America. Its resilience and nutritional value have made it a beloved crop, and now, with a little ingenuity, you can bring that tradition to your own urban oasis.
But why bother with balcony cabbage growing? Well, imagine stepping outside your door to snip fresh, crisp leaves for your dinner salad. Think of the money you’ll save at the grocery store, and the satisfaction of knowing exactly where your food comes from. Plus, gardening is a fantastic stress reliever! This article is packed with simple, effective DIY tricks and hacks that will guide you through every step of the process, from choosing the right variety to warding off pests. Get ready to transform your balcony into a thriving cabbage patch!
Balkonkohl: Dein eigener kleiner Gemüsegarten auf dem Balkon
Hey Gartenfreunde! Habt ihr auch Lust auf frisches, knackiges Gemüse direkt vom Balkon? Dann seid ihr hier genau richtig! Ich zeige euch, wie ihr kinderleicht Kohl auf eurem Balkon anbauen könnt. Keine Angst, es ist einfacher als ihr denkt und macht richtig Spaß!
Warum Kohl auf dem Balkon?
Kohl ist super vielseitig und gesund. Ob Weißkohl, Rotkohl, Grünkohl oder Rosenkohl – die Auswahl ist riesig! Und das Beste: Ihr wisst genau, was drin ist, denn ihr habt ihn selbst gezogen. Außerdem ist es einfach toll, den Pflanzen beim Wachsen zuzusehen und am Ende die Früchte eurer Arbeit zu ernten.
Was ihr für den Balkonkohl braucht
Bevor wir loslegen, hier eine kleine Einkaufsliste:
* Kohlsaat oder Jungpflanzen: Sucht euch eure Lieblingskohlsorten aus. Jungpflanzen sind besonders für Anfänger super, weil sie schon einen kleinen Wachstumsvorsprung haben.
* Große Pflanzgefäße: Kohl braucht Platz! Wählt Töpfe oder Kübel mit mindestens 20 Litern Fassungsvermögen. Je größer, desto besser.
* Gute Pflanzerde: Am besten spezielle Gemüseerde, die ist nährstoffreich und sorgt für ein gutes Wachstum.
* Kompost oder organischer Dünger: Kohl ist ein Starkzehrer, das heißt, er braucht viele Nährstoffe.
* Gießkanne oder Gartenschlauch: Zum regelmäßigen Gießen.
* Schneckenkorn oder Schneckenzaun: Kohl ist leider sehr beliebt bei Schnecken.
* Eventuell ein Rankgitter: Für Sorten wie Grünkohl, die etwas höher wachsen.
* Geduld und Freude: Das Wichtigste überhaupt!
Die richtige Vorbereitung ist alles
Bevor wir mit dem Pflanzen loslegen, müssen wir ein paar Vorbereitungen treffen:
* Die Wahl des Standorts: Kohl liebt die Sonne! Sucht euch einen sonnigen Platz auf eurem Balkon aus, der mindestens 6 Stunden Sonne am Tag bekommt.
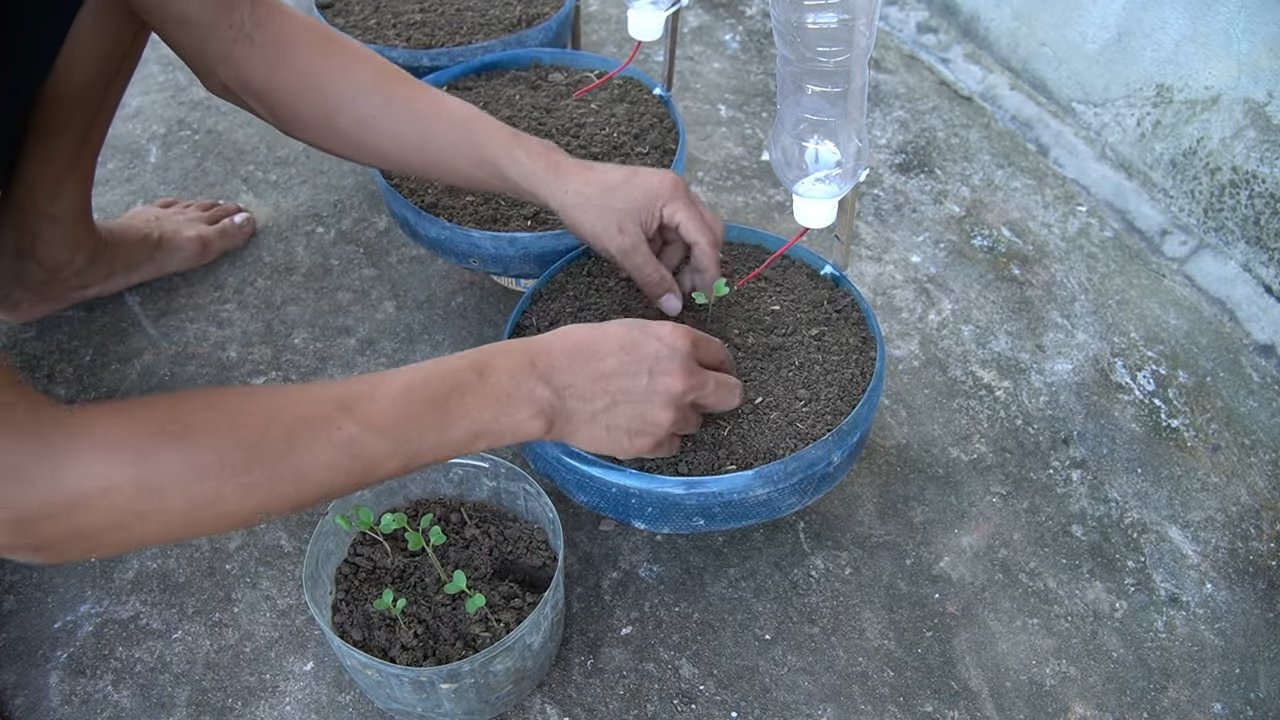
* Die Pflanzgefäße vorbereiten: Achtet darauf, dass die Töpfe oder Kübel Abzugslöcher haben, damit das Wasser gut ablaufen kann. Füllt sie mit der Pflanzerde und mischt etwas Kompost oder organischen Dünger unter.
* Die Jungpflanzen vorbereiten: Wenn ihr Jungpflanzen gekauft habt, lockert die Wurzelballen vorsichtig auf, bevor ihr sie einpflanzt.
Schritt-für-Schritt-Anleitung: Kohl pflanzen auf dem Balkon
Jetzt geht’s ans Eingemachte! Hier ist eine detaillierte Anleitung, wie ihr euren Balkonkohl pflanzt:
1. Die Pflanzgefäße befüllen: Füllt die vorbereiteten Töpfe oder Kübel mit der Pflanzerde. Lasst etwa 5 cm Platz bis zum Rand.
2. Die Pflanzlöcher vorbereiten: Grabt mit einer kleinen Schaufel oder euren Händen Pflanzlöcher in die Erde. Die Löcher sollten so tief sein, dass die Wurzelballen der Jungpflanzen oder die Kohlsaat gut hineinpassen.
3. Die Kohlsaat aussäen oder die Jungpflanzen einsetzen:
* Kohlsaat: Legt die Samen in die Pflanzlöcher und bedeckt sie leicht mit Erde. Gießt die Erde vorsichtig an.
* Jungpflanzen: Setzt die Jungpflanzen in die Pflanzlöcher und füllt die Löcher mit Erde auf. Drückt die Erde leicht an.
4. Angießen: Gießt die frisch gepflanzten Kohlpflanzen gründlich an. Das hilft ihnen, sich gut im neuen Zuhause zu verwurzeln.
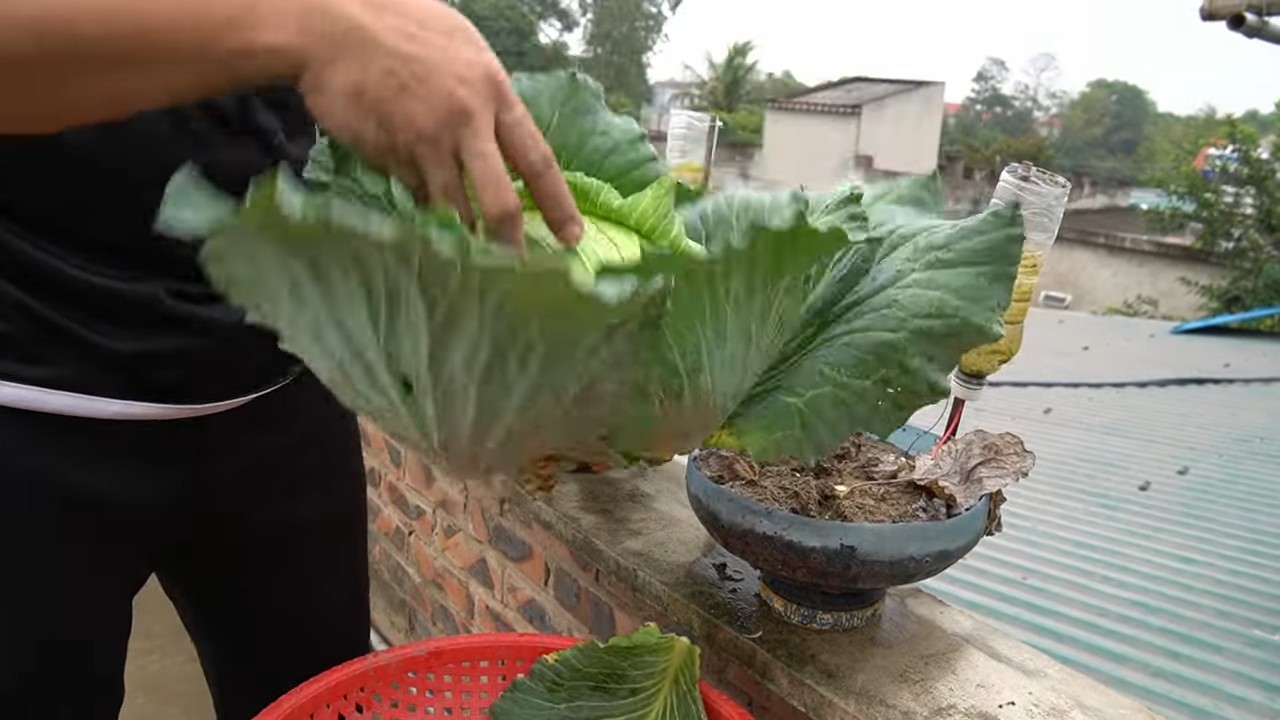
5. Schutz vor Schnecken: Bringt Schneckenkorn aus oder installiert einen Schneckenzaun um eure Pflanzen. Glaubt mir, das ist wichtig!
6. Rankgitter anbringen (optional): Wenn ihr Grünkohl oder andere hochwachsende Kohlsorten gepflanzt habt, könnt ihr jetzt ein Rankgitter anbringen, an dem die Pflanzen hochwachsen können.
Die richtige Pflege: So bleibt euer Balkonkohl fit
Damit euer Balkonkohl prächtig gedeiht, braucht er regelmäßige Pflege:
* Gießen: Kohl braucht viel Wasser, besonders an heißen Tagen. Gießt regelmäßig, aber vermeidet Staunässe. Die Erde sollte immer leicht feucht sein.
* Düngen: Kohl ist ein Starkzehrer und braucht viele Nährstoffe. Düngt eure Pflanzen regelmäßig mit Kompost oder organischem Dünger. Am besten alle zwei bis drei Wochen.
* Schneckenkontrolle: Kontrolliert eure Pflanzen regelmäßig auf Schnecken und entfernt sie gegebenenfalls.
* Krankheiten und Schädlinge: Achtet auf Anzeichen von Krankheiten oder Schädlingsbefall. Bei Bedarf könnt ihr biologische Pflanzenschutzmittel einsetzen.
* Unkraut entfernen: Entfernt regelmäßig Unkraut aus den Pflanzgefäßen.
Spezielle Tipps für verschiedene Kohlsorten
Jede Kohlsorte hat ihre eigenen kleinen Besonderheiten. Hier ein paar Tipps für die beliebtesten Sorten:
* Weißkohl: Braucht viel Platz und Sonne. Erntet ihn, wenn der Kopf fest und geschlossen ist.
* Rotkohl: Ähnlich wie Weißkohl, aber er mag es etwas kühler.
* Grünkohl: Ist sehr robust und kann auch im Winter geerntet werden. Er wird sogar noch leckerer, wenn er Frost abbekommen hat.
* Rosenkohl: Braucht viel Sonne und regelmäßige Düngung. Erntet die Röschen von unten nach oben, wenn sie fest und geschlossen sind.
* Blumenkohl: Ist etwas anspruchsvoller und braucht viel Wasser und Nährstoffe. Schützt den Kopf vor direkter Sonneneinstrahlung, damit er nicht gelb wird.
Häufige Probleme und wie ihr sie löst
Auch beim Balkonkohl kann es mal zu Problemen kommen. Hier sind ein paar häufige Probleme und wie ihr sie lösen könnt:
* Schneckenbefall: Schneckenkorn oder Schneckenzaun helfen. Ihr könnt die Schnecken auch einfach absammeln.
* Blattläuse: Besprüht die Pflanzen mit einer Mischung aus Wasser und Schmierseife.
* Kohlhernie: Eine Pilzkrankheit, die die Wurzeln befällt. Befallene Pflanzen müssen entfernt und die Erde ausgetauscht werden. Achtet auf eine gute Fruchtfolge, um die Krankheit zu vermeiden.
* Gelbe Blätter: Können ein Zeichen für Nährstoffmangel sein. Düngt die Pflanzen mit Kompost oder organischem Dünger.
* Kümmerwuchs: Kann verschiedene Ursachen haben, z.B. zu wenig Sonne, zu wenig Wasser oder Nährstoffmangel. Überprüft die Bedingungen und passt sie gegebenenfalls an.
Erntezeit: Endlich ernten!
Nach all der Arbeit kommt endlich der schönste Teil: die Ernte! Je nach Kohlsorte könnt ihr nach einigen Wochen oder Monaten euren eigenen Balkonkohl ernten. Achtet darauf, dass die Köpfe oder Röschen fest und geschlossen sind. Schneidet sie mit einem scharfen Messer ab.
Kohl verarbeiten: Leckere Rezepte für euren Balkonkohl
Was macht man nun mit dem ganzen Kohl? Hier ein paar Ideen:
* Weißkohl: Sauerkraut, Krautsalat, Kohlrouladen
* Rotkohl: Rotkohl mit Äpfeln und Gewürzen, Rotkohlsuppe
* Grünkohl: Grünkohl mit Pinkel, Grünkohlchips
* Rosenkohl: Rosenkohl mit Speck, Rosenkohlauflauf
* Blumenkohl: Blumenkohlsuppe, Blumenkohlauflauf, Blumenkohlreis
Lasst eurer Kreativität freien Lauf und probiert neue Rezepte aus!
Fazit: Balkonkohl ist ein tolles Hobby
Ich hoffe, ich konnte euch mit dieser Anleitung Mut machen, euren eigenen Balkonkohl anzubauen. Es ist wirklich nicht schwer und macht richtig Spaß. Und das Beste: Ihr habt immer frisches, gesundes Gemüse zur Hand. Also, worauf wartet ihr noch? Ran an die Töpfe und los geht’s! Viel Erfolg und eine reiche Ernte!
Conclusion
So, there you have it! Growing cabbage on your balcony isn’t just a whimsical idea; it’s a genuinely achievable and rewarding experience. We’ve walked you through the essential steps, from selecting the right varieties and containers to nurturing your leafy greens to their full potential. But why should you actually *do* this? Why dedicate precious balcony space to cabbage when you could be growing petunias or enjoying a cocktail?
The answer lies in the unparalleled freshness and flavor of homegrown produce. Store-bought cabbage simply can’t compare to the crisp, vibrant taste of a head you’ve nurtured yourself. Imagine the satisfaction of harvesting your own cabbage and using it in a delicious slaw, stir-fry, or even a hearty cabbage roll. Plus, you’ll know exactly where your food came from and what went into growing it – no mystery pesticides or long-distance transportation here!
Beyond the taste, growing cabbage on your balcony is a fantastic way to connect with nature, even in the heart of the city. It’s a therapeutic activity that can reduce stress and boost your mood. Watching your cabbage plants grow and thrive is incredibly rewarding, and it’s a great way to learn more about the natural world.
But the benefits don’t stop there. Balcony cabbage growing is also a sustainable choice. By growing your own food, you’re reducing your carbon footprint and supporting a more localized food system. You’re also minimizing food waste, as you can harvest only what you need when you need it.
Ready to take your balcony cabbage growing to the next level? Consider experimenting with different varieties. Red cabbage adds a beautiful splash of color to your balcony garden and a slightly peppery flavor to your dishes. Savoy cabbage offers a more delicate texture and a milder taste. You can also try growing different types of Asian cabbage, such as bok choy or napa cabbage, which are well-suited to container gardening.
Don’t be afraid to get creative with your containers, too. While plastic pots are a practical choice, you can also use repurposed items like old buckets, wooden crates, or even fabric grow bags. Just make sure your containers have adequate drainage to prevent waterlogging.
And finally, remember that growing cabbage on your balcony is a learning process. Don’t be discouraged if you encounter challenges along the way. Pests, diseases, and weather conditions can all impact your harvest. But with a little patience, persistence, and research, you can overcome these obstacles and enjoy a bountiful crop of homegrown cabbage.
So, what are you waiting for? Grab some seeds or seedlings, find a sunny spot on your balcony, and get growing! We’re confident that you’ll be amazed by the results. And once you’ve harvested your first head of cabbage, be sure to share your experience with us. We’d love to hear about your successes, your challenges, and your favorite ways to use your homegrown cabbage. Share your photos and stories on social media using [Your Hashtag Here] – let’s create a community of balcony cabbage growers!
Frequently Asked Questions (FAQ)
1. What is the best type of cabbage to grow on a balcony?
The best types of cabbage for balcony growing are those that are compact and early-maturing. Smaller varieties like ‘Dwarf Morden’, ‘Golden Acre’, and ‘Red Express’ are excellent choices. These varieties don’t require as much space as larger cabbages and tend to mature more quickly, making them ideal for container gardening. Consider the amount of sunlight your balcony receives and choose a variety that is well-suited to those conditions. For example, if your balcony gets less than six hours of direct sunlight per day, you might want to choose a variety that is more shade-tolerant.
2. How much sunlight does cabbage need when grown on a balcony?
Cabbage thrives in full sun, which means at least six hours of direct sunlight per day. If your balcony doesn’t receive that much sunlight, you can supplement with grow lights. Position the grow lights about 6-12 inches above the plants and keep them on for 12-14 hours per day. Rotate your cabbage plants regularly to ensure that all sides receive adequate sunlight. Insufficient sunlight can lead to leggy growth and smaller heads.
3. What size container is needed for growing cabbage on a balcony?
A container that is at least 12 inches in diameter and 12 inches deep is recommended for growing cabbage on a balcony. This will provide enough space for the roots to develop properly. Choose a container with drainage holes to prevent waterlogging, which can lead to root rot. You can use plastic pots, terracotta pots, or even repurposed containers like buckets or crates. Just make sure the container is sturdy enough to support the weight of the mature cabbage plant.
4. What type of soil is best for growing cabbage in containers?
Use a well-draining potting mix that is rich in organic matter. Avoid using garden soil, as it can be too heavy and compact for container gardening. You can amend your potting mix with compost or other organic materials to improve its fertility and drainage. A slightly acidic soil pH of 6.0 to 6.8 is ideal for cabbage. You can test your soil pH with a soil testing kit and adjust it accordingly.
5. How often should I water my balcony cabbage plants?
Water your cabbage plants regularly, especially during hot, dry weather. The soil should be kept consistently moist but not waterlogged. Check the soil moisture by sticking your finger about an inch into the soil. If it feels dry, it’s time to water. Water deeply, allowing the water to drain out of the drainage holes. Avoid watering the foliage, as this can promote fungal diseases.
6. What are some common pests and diseases that affect cabbage, and how can I control them on my balcony?
Common pests that affect cabbage include cabbage worms, aphids, and flea beetles. You can control these pests by handpicking them off the plants, using insecticidal soap, or applying Bacillus thuringiensis (Bt), a natural insecticide. Common diseases that affect cabbage include black rot, clubroot, and downy mildew. You can prevent these diseases by practicing good sanitation, providing adequate air circulation, and avoiding overwatering. If you notice signs of disease, remove the affected leaves or plants immediately.
7. How do I fertilize cabbage plants grown on a balcony?
Fertilize your cabbage plants every 2-3 weeks with a balanced fertilizer, such as 10-10-10. You can also use a liquid fertilizer or a slow-release fertilizer. Follow the instructions on the fertilizer package carefully. Avoid over-fertilizing, as this can lead to excessive foliage growth and smaller heads.
8. When is the best time to harvest cabbage grown on a balcony?
Cabbage is ready to harvest when the head is firm and compact. The exact time will depend on the variety and growing conditions. Check the seed packet or plant tag for the expected maturity date. To harvest, cut the head off the plant at the base with a sharp knife. Leave a few outer leaves on the plant, as these can continue to produce small side shoots.
9. Can I grow cabbage on my balcony in the winter?
In mild climates, you can grow cabbage on your balcony in the winter. Choose a cold-hardy variety and provide protection from frost and freezing temperatures. You can cover the plants with a blanket or move them to a sheltered location. In colder climates, you may need to grow cabbage indoors under grow lights.
10. What are some creative ways to use homegrown cabbage?
Homegrown cabbage can be used in a variety of dishes, including coleslaw, stir-fries, soups, stews, and cabbage rolls. You can also ferment cabbage to make sauerkraut or kimchi. Get creative and experiment with different recipes to find your favorite ways to use your homegrown cabbage. Don’t forget to share your culinary creations with friends and family!

Leave a Comment