
Grow carrots at home, even if you think you don’t have a green thumb! Have you ever dreamed of pulling vibrant, crunchy carrots straight from your own backyard? Imagine the satisfaction of serving a salad made with ingredients you nurtured from seed to table. It’s more achievable than you might think, and this DIY guide is your key to unlocking that dream.
For centuries, cultivating carrots has been a rewarding practice. From their humble beginnings as wild, pale roots to the vibrant orange varieties we know and love today, carrots have nourished communities worldwide. They’ve been a staple in diets and even held symbolic significance in various cultures. But you don’t need to be a seasoned farmer to enjoy the fruits (or rather, vegetables!) of your labor.
In today’s world, where fresh, healthy produce can be expensive and sometimes lacking in flavor, learning to grow carrots at home offers a fantastic solution. Not only will you save money, but you’ll also have access to the freshest, most flavorful carrots imaginable. Plus, gardening is a fantastic stress reliever and a wonderful way to connect with nature. I’m here to show you some simple, effective DIY tricks and hacks that will help you cultivate a thriving carrot patch, no matter your experience level. Let’s get started!
Karottenanbau im eigenen Garten: So geht’s!
Hallo liebe Gartenfreunde! Ich liebe es, frisches Gemüse aus dem eigenen Garten zu ernten, und Karotten gehören definitiv zu meinen Favoriten. Sie sind nicht nur super lecker, sondern auch reich an Vitaminen und relativ einfach anzubauen. In diesem Artikel zeige ich euch Schritt für Schritt, wie ihr eure eigenen Karotten zu Hause ziehen könnt – egal ob im Garten, im Hochbeet oder sogar im Topf auf dem Balkon. Los geht’s!
Die Vorbereitung: Der Schlüssel zum Erfolg
Bevor wir mit dem eigentlichen Pflanzen beginnen, ist eine gute Vorbereitung das A und O. Das betrifft die Wahl des richtigen Standorts, die Bodenvorbereitung und die Auswahl der passenden Karottensorte.
* Der Standort: Karotten lieben die Sonne! Wählt einen sonnigen Standort, der mindestens 6 Stunden direktes Sonnenlicht pro Tag bekommt. Halbschatten ist auch möglich, aber die Karotten werden dann möglicherweise nicht so groß und süß.
* Der Boden: Das ist wirklich wichtig! Karotten brauchen lockeren, gut durchlässigen Boden. Schwere, lehmige Böden sind ein No-Go, da die Karotten sich darin nur schwer entwickeln können und oft krumm und verzweigt werden. Der Boden sollte außerdem steinfrei sein, da Steine das Wachstum der Wurzeln behindern.
* Die Sortenwahl: Es gibt unzählige Karottensorten, die sich in Größe, Form, Farbe und Reifezeit unterscheiden. Für den Anbau im Topf eignen sich beispielsweise kurze Sorten wie “Pariser Markt” oder “Rondo”. Für den Garten könnt ihr aus dem Vollen schöpfen und Sorten wie “Nantaise”, “Berlikumer” oder “Flakkese” wählen. Informiert euch am besten im Fachhandel oder online, welche Sorten für eure Region und eure Bedürfnisse am besten geeignet sind.
* Die richtige Zeit: Karotten sind relativ kältetolerant und können daher schon früh im Jahr ausgesät werden. In den meisten Regionen ist die Aussaat ab März oder April möglich, sobald der Boden nicht mehr gefroren ist. Für eine späte Ernte könnt ihr auch noch im Juli oder August aussäen.
Schritt-für-Schritt-Anleitung: Karotten säen und pflegen
Jetzt geht’s ans Eingemachte! Hier ist eine detaillierte Anleitung, wie ihr eure Karotten erfolgreich aussät und pflegt:
1. Boden vorbereiten:
* Lockert den Boden gründlich auf. Entfernt Steine, Wurzeln und andere Hindernisse.
* Verbessert die Bodenstruktur, indem ihr Kompost oder Sand einarbeitet. Das sorgt für eine bessere Drainage und Belüftung.
* Achtet darauf, dass der Boden nicht zu sauer ist. Ein pH-Wert zwischen 6,0 und 7,0 ist ideal. Bei Bedarf könnt ihr Kalk einarbeiten, um den pH-Wert zu erhöhen.
2. Saatrillen ziehen:
* Zieht mit einem Rechen oder einer Hacke Saatrillen mit einem Abstand von etwa 20-30 cm zueinander.
* Die Saatrillen sollten etwa 1-2 cm tief sein.
3. Aussaat:
* Karottensamen sind sehr klein, daher ist es wichtig, sie nicht zu dicht auszusäen. Mischt die Samen am besten mit Sand, um sie besser verteilen zu können.
* Streut die Samen gleichmäßig in die Saatrillen.
* Bedeckt die Samen mit einer dünnen Schicht Erde.
4. Angießen:
* Gießt die Saatrillen vorsichtig an, damit die Samen nicht weggeschwemmt werden.
* Haltet den Boden in den nächsten Wochen feucht, aber nicht nass.
5. Vereinzeln:
* Sobald die Keimlinge etwa 2-3 cm groß sind, müsst ihr sie vereinzeln. Das bedeutet, dass ihr die schwächsten Pflanzen entfernt, damit die verbleibenden Pflanzen genügend Platz zum Wachsen haben.
* Der Abstand zwischen den Pflanzen sollte etwa 3-5 cm betragen.
6. Gießen:
* Gießt die Karotten regelmäßig, besonders in trockenen Perioden.
* Vermeidet Staunässe, da dies zu Wurzelfäule führen kann.
7. Unkraut jäten:
* Haltet das Beet unkrautfrei, da Unkraut den Karotten Nährstoffe und Licht entzieht.
* Jätet das Unkraut am besten von Hand, um die empfindlichen Karottenwurzeln nicht zu beschädigen.
8. Düngen:
* Karotten sind keine Starkzehrer und benötigen daher nicht viel Dünger.
* Eine leichte Düngung mit Kompost oder organischem Dünger ist jedoch empfehlenswert.
* Vermeidet stickstoffhaltige Dünger, da diese zu einem übermäßigen Wachstum des Laubs führen können und die Wurzeln weniger entwickeln.
9. Schutz vor Schädlingen:
* Karotten können von verschiedenen Schädlingen befallen werden, wie z.B. der Möhrenfliege.
* Um die Möhrenfliege fernzuhalten, könnt ihr ein Insektenschutznetz über das Beet spannen.
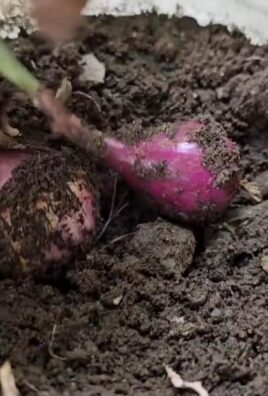
* Auch eine Mischkultur mit Zwiebeln oder Knoblauch kann helfen, Schädlinge abzuwehren.
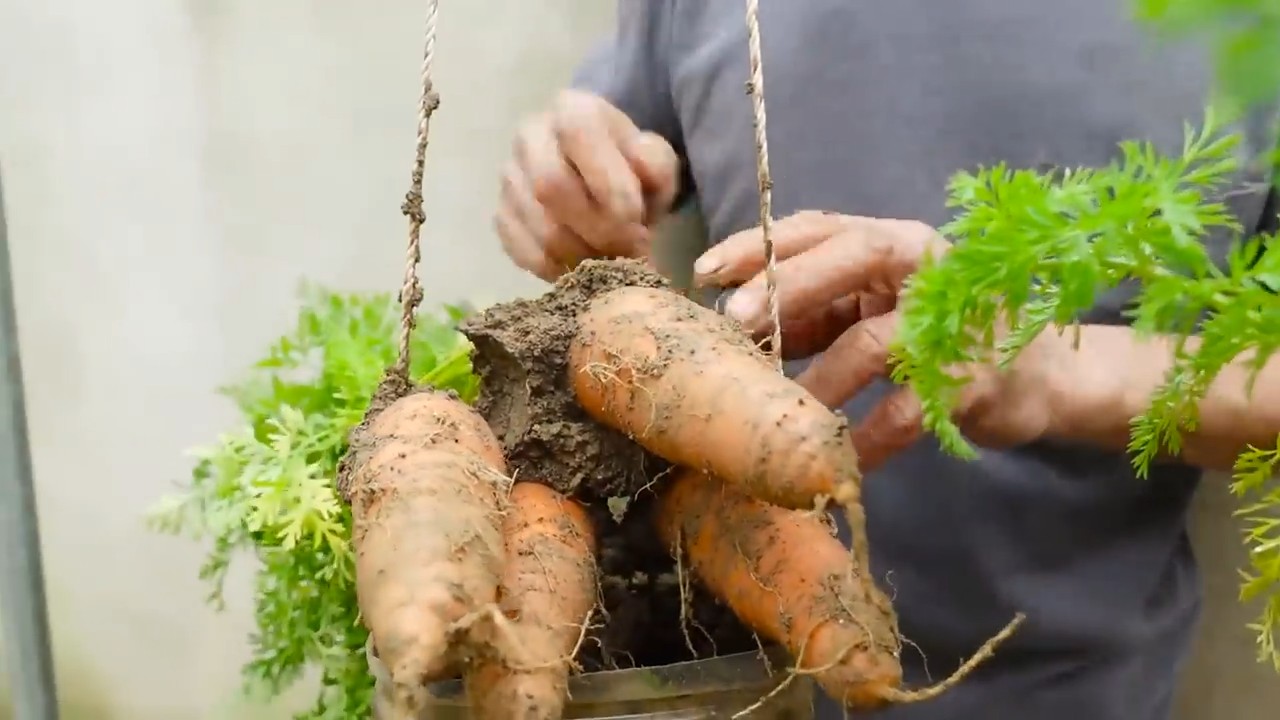
Die Ernte: Der Lohn der Mühe
Nach etwa 2-4 Monaten, je nach Sorte, sind eure Karotten erntereif.
* Erntezeitpunkt: Die Karotten sind erntereif, wenn sie die gewünschte Größe erreicht haben. Ihr könnt vorsichtig eine Karotte aus der Erde ziehen, um zu überprüfen, ob sie reif ist.
* Erntemethode: Lockert die Erde um die Karotten herum mit einer Grabegabel oder einem Spaten auf. Zieht die Karotten dann vorsichtig am Laub aus der Erde.
* Lagerung: Entfernt das Laub und die Erde von den Karotten. Lagert die Karotten an einem kühlen, dunklen und feuchten Ort, z.B. im Keller oder im Kühlschrank. In Sand eingeschlagen halten sie sich besonders lange.
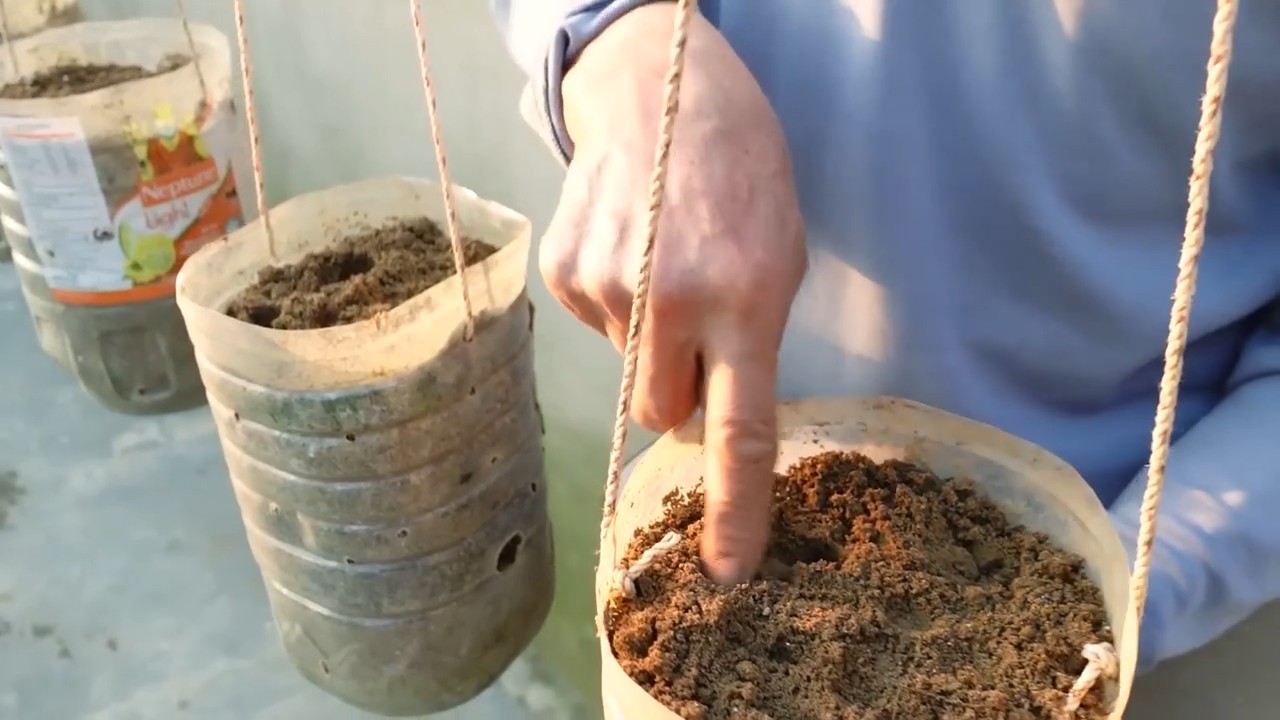
Karotten im Topf anbauen: Eine tolle Alternative für Balkon und Terrasse
Auch wenn ihr keinen Garten habt, müsst ihr nicht auf selbst angebaute Karotten verzichten. Der Anbau im Topf ist eine tolle Alternative für Balkon und Terrasse.
* Topfgröße: Wählt einen Topf mit einem Durchmesser von mindestens 20 cm und einer Tiefe von mindestens 30 cm.
* Erde: Verwendet eine hochwertige Gemüseerde, die gut durchlässig ist.
* Aussaat: Säet die Samen wie oben beschrieben aus.
* Pflege: Gießt die Karotten regelmäßig und düngt sie bei Bedarf.
* Standort: Stellt den Topf an einen sonnigen Standort.
Häufige Probleme und Lösungen
Auch beim Karottenanbau können Probleme auftreten. Hier sind einige häufige Probleme und wie ihr sie lösen könnt:
* Krumme Karotten: Krumme Karotten entstehen meist durch steinigen oder verdichteten Boden. Sorgt für einen lockeren, steinfreien Boden.
* Verzweigte Karotten: Verzweigte Karotten können durch zu dichte Aussaat oder durch Beschädigung der Wurzeln beim Vereinzeln entstehen. Vereinzeln Sie die Pflanzen rechtzeitig und vorsichtig.
* Möhrenfliege: Die Möhrenfliege legt ihre Eier an den Karotten ab, wodurch die Wurzeln beschädigt werden. Schützt eure Karotten mit einem Insektenschutznetz oder einer Mischkultur mit Zwiebeln oder Knoblauch.
* Wurzelfäule: Wurzelfäule entsteht durch Staunässe. Sorgt für eine gute Drainage und vermeidet Staunässe.
Ich hoffe, diese Anleitung hilft euch dabei, eure eigenen Karotten erfolgreich anzubauen. Viel Spaß beim Gärtnern und guten Appetit!
Conclusion
So, there you have it! Growing carrots at home, while it might seem daunting at first, is surprisingly achievable and incredibly rewarding. We’ve walked you through the essential steps, from selecting the right carrot varieties to preparing the soil and protecting your precious seedlings. But why should you bother with this DIY project when you can simply buy carrots at the store? The answer lies in the unparalleled freshness, the superior flavor, and the sheer satisfaction of harvesting something you’ve nurtured from seed to table.
Think about it: store-bought carrots often travel long distances, losing their vibrant sweetness along the way. When you grow your own, you can pick them at their peak ripeness, bursting with flavor and packed with nutrients. Plus, you have complete control over what goes into your garden, ensuring that your carrots are free from harmful pesticides and chemicals. This is especially important if you’re aiming for organic produce.
Beyond the practical benefits, growing carrots at home is also a fantastic way to connect with nature, de-stress, and learn new skills. It’s a project that the whole family can enjoy, from planting the seeds to eagerly anticipating the first sprouts. And let’s not forget the bragging rights that come with serving a carrot you grew yourself!
But don’t just take our word for it. We encourage you to give this DIY trick a try. Start small, perhaps with a container garden on your balcony or a raised bed in your backyard. Experiment with different carrot varieties to find your favorites. Consider adding companion plants like onions or marigolds to deter pests and improve soil health.
Here are a few variations to consider:
* Rainbow Carrots: Plant a mix of colorful carrot varieties like purple, yellow, and white for a visually stunning harvest.
* Baby Carrots: Opt for shorter, round varieties that are perfect for snacking and easy to grow in containers.
* Succession Planting: Sow seeds every few weeks to ensure a continuous supply of fresh carrots throughout the growing season.
* Hydroponic Carrots: For those with limited space or challenging soil conditions, hydroponic gardening can be a viable option.
Remember, gardening is a journey, not a destination. There will be successes and setbacks along the way. Don’t be discouraged if your first attempt isn’t perfect. Learn from your mistakes, adapt your approach, and keep experimenting. The more you grow, the more you’ll learn, and the more rewarding the experience will become.
We’re confident that you’ll find growing carrots at home to be a worthwhile and enjoyable endeavor. So, grab your seeds, get your hands dirty, and prepare to be amazed by the deliciousness of homegrown carrots.
We’d love to hear about your experiences! Share your photos, tips, and challenges in the comments below. Let’s create a community of carrot-growing enthusiasts and inspire others to embrace the joys of homegrown produce. Happy gardening!
Frequently Asked Questions (FAQ)
What is the best time of year to plant carrots?
The best time to plant carrots depends on your climate. In general, carrots are a cool-season crop, meaning they thrive in temperatures between 60°F and 70°F (15°C and 21°C). For most regions, this means planting in early spring or late summer/early fall. Spring plantings should occur as soon as the soil can be worked, typically a few weeks before the last expected frost. Fall plantings should be timed so that the carrots have enough time to mature before the first hard frost. Check your local planting calendar for specific dates based on your region’s climate.
What kind of soil is best for growing carrots?
Carrots need loose, well-drained soil to grow properly. Rocky or compacted soil can cause them to become stunted, forked, or misshapen. The ideal soil is sandy loam, which is a mixture of sand, silt, and clay. Before planting, amend your soil with plenty of compost or other organic matter to improve drainage and fertility. Avoid adding too much nitrogen, as this can encourage leafy growth at the expense of root development. A soil pH between 6.0 and 6.8 is ideal.
How much sunlight do carrots need?
Carrots need at least six hours of sunlight per day to thrive. Choose a planting location that receives full sun for most of the day. If you live in a hot climate, some afternoon shade can be beneficial to prevent the soil from drying out too quickly.
How often should I water my carrots?
Carrots need consistent moisture to grow properly. Water deeply and regularly, especially during dry periods. Aim to keep the soil consistently moist but not waterlogged. A good rule of thumb is to water when the top inch of soil feels dry to the touch. Mulching around your carrot plants can help to retain moisture and suppress weeds.
How far apart should I plant carrot seeds?
Carrot seeds are tiny, so it can be challenging to sow them evenly. Sow seeds about ¼ inch deep and ½ inch apart in rows that are 12-18 inches apart. Once the seedlings emerge, thin them to 2-3 inches apart to give them enough room to grow. You can use small scissors to snip off the unwanted seedlings at the soil line.
What are some common pests and diseases that affect carrots?
Some common pests that affect carrots include carrot rust flies, aphids, and nematodes. Carrot rust flies lay their eggs near the base of the plants, and the larvae burrow into the roots, causing damage. Aphids suck the sap from the leaves, weakening the plants. Nematodes are microscopic worms that live in the soil and can damage the roots. To prevent pest problems, practice crop rotation, use row covers, and introduce beneficial insects like ladybugs. Common diseases that affect carrots include leaf blight and powdery mildew. To prevent disease problems, ensure good air circulation, avoid overhead watering, and use disease-resistant varieties.
How do I know when my carrots are ready to harvest?
Carrots are typically ready to harvest 60-80 days after planting, depending on the variety. Check the seed packet for specific maturity dates. You can also gauge ripeness by the size of the carrot tops. When the tops are about 1/2 to 1 inch in diameter, the carrots are usually ready to harvest. To harvest, gently loosen the soil around the carrot and pull it straight up. If the soil is dry, water it beforehand to make harvesting easier.
Can I grow carrots in containers?
Yes, you can definitely grow carrots in containers! Choose a container that is at least 12 inches deep and wide to accommodate the root growth. Use a well-draining potting mix and follow the same planting and care instructions as for growing carrots in the ground. Container-grown carrots may need more frequent watering and fertilizing than those grown in the ground. Shorter, round carrot varieties are particularly well-suited for container gardening.
How do I store my harvested carrots?
To store your harvested carrots, remove the tops, brush off any excess soil, and store them in a cool, dark, and humid place. A refrigerator is ideal. You can store them in a plastic bag or container lined with a damp paper towel to help maintain humidity. Carrots can typically be stored for several weeks or even months if stored properly. You can also freeze carrots by blanching them in boiling water for a few minutes, then cooling them in ice water before freezing.
What are the benefits of growing organic carrots?
Growing organic carrots means avoiding the use of synthetic pesticides, herbicides, and fertilizers. This is beneficial for your health, the environment, and the flavor of your carrots. Organic carrots are often more flavorful and nutritious than conventionally grown carrots. By growing organic, you are also supporting sustainable agriculture practices that protect soil health, water quality, and biodiversity. Plus, you have the peace of mind knowing exactly what went into growing your food.

Leave a Comment