
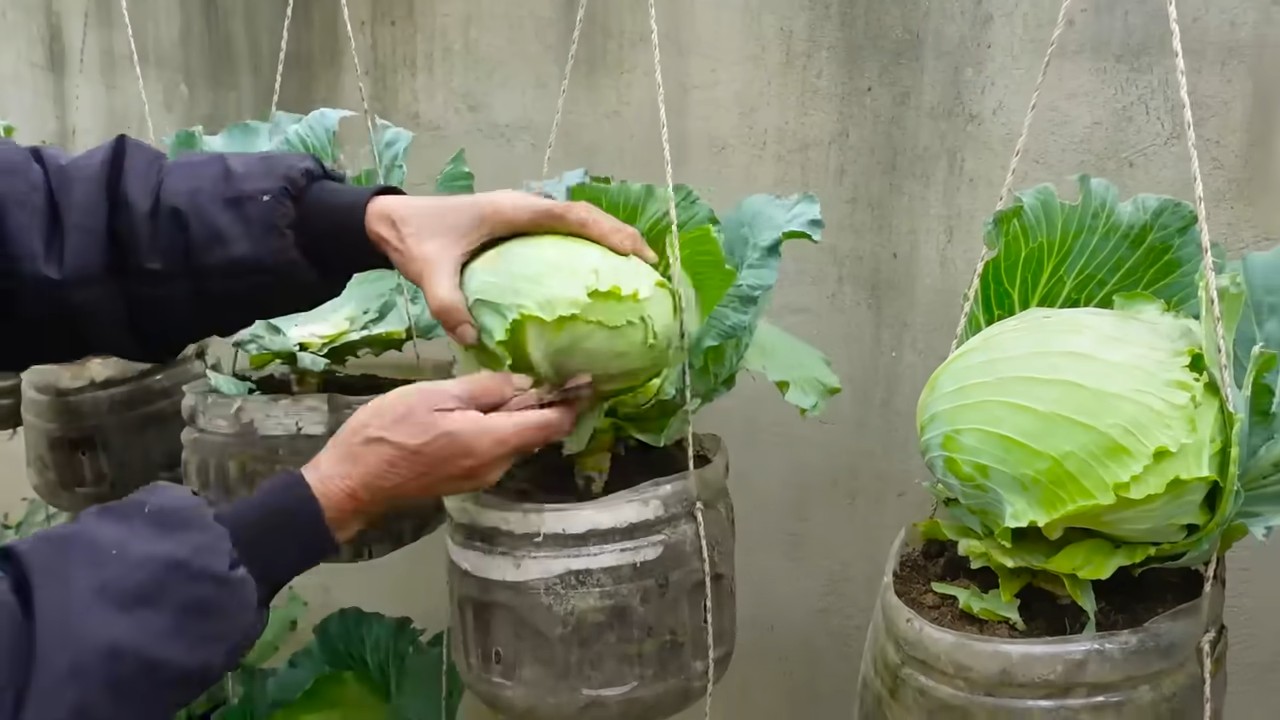
Growing Cabbage in Bottles might sound like something out of a science fiction novel, but trust me, it’s a surprisingly effective and space-saving gardening trick! Have you ever dreamt of harvesting fresh, crisp cabbage right from your balcony or even your kitchen windowsill? I know I have! This innovative method allows you to cultivate this nutritious vegetable even if you’re short on garden space.
While container gardening itself has ancient roots, with evidence suggesting its practice in ancient Egypt and Rome, the specific technique of growing cabbage in bottles is a more modern adaptation, born from the desire to maximize yields in limited urban environments. It’s a testament to human ingenuity and our constant quest to connect with nature, even in the most unlikely of places.
Why should you try this DIY trick? Well, for starters, it’s incredibly space-efficient. Apartment dwellers and those with small yards can rejoice! Plus, it offers excellent drainage and aeration for your cabbage, leading to healthier, more robust plants. And let’s be honest, there’s something incredibly satisfying about repurposing plastic bottles and turning them into mini-cabbage farms. So, if you’re looking for a fun, eco-friendly, and productive way to enjoy fresh cabbage, let’s dive into the world of growing cabbage in bottles! I’m excited to share my tips and tricks to help you succeed.
Kohl im Flaschengarten: Eine DIY-Anleitung für den urbanen Gärtner
Hallo liebe Gartenfreunde! Habt ihr wenig Platz, aber trotzdem Lust auf frischen, selbstgezogenen Kohl? Dann habe ich hier genau das Richtige für euch: Kohl im Flaschengarten! Klingt verrückt? Ist es vielleicht ein bisschen, aber es funktioniert und ist eine super Möglichkeit, auch auf dem kleinsten Balkon oder sogar in der Wohnung frisches Gemüse zu ziehen. Ich zeige euch, wie es geht!
Was ihr für euren Flaschenkohlgarten braucht:
* Leere Plastikflaschen: Am besten eignen sich 5-Liter-Wasserflaschen oder größere. Je größer die Flasche, desto mehr Platz hat der Kohl zum Wachsen.
* Kohlpflanzen: Jungpflanzen von Kopfkohl, Rosenkohl, Grünkohl oder Wirsing sind ideal. Achtet darauf, dass sie gesund und kräftig aussehen.
* Erde: Gute Blumenerde oder Gemüseerde ist wichtig. Sie sollte locker und nährstoffreich sein.
* Schere oder Messer: Zum Zuschneiden der Flaschen.
* Handschuhe: Zum Schutz eurer Hände.
* Gießkanne oder Sprühflasche: Zum Bewässern der Pflanzen.
* Optional: Drainagematerial (Kieselsteine, Blähton) für den Boden der Flasche, um Staunässe zu vermeiden.
* Optional: Pflanzschilder, um die verschiedenen Kohlsorten zu kennzeichnen.
Vorbereitung der Flaschen: Der Grundstein für euren Kohl
Bevor wir mit dem Pflanzen loslegen können, müssen wir die Flaschen vorbereiten. Das ist aber gar nicht schwer, versprochen!
1. Reinigung: Zuerst solltet ihr die Flaschen gründlich reinigen. Entfernt alle Etiketten und spült sie mit warmem Wasser und etwas Spülmittel aus. Achtet darauf, dass keine Spülmittelreste zurückbleiben.
2. Zuschneiden: Jetzt kommt der spannende Teil: das Zuschneiden der Flaschen. Es gibt verschiedene Möglichkeiten, wie ihr das machen könnt. Ich bevorzuge es, die Flasche horizontal in der Mitte durchzuschneiden. So erhaltet ihr zwei Teile: den unteren Teil, der als Pflanzgefäß dient, und den oberen Teil, den ihr später als eine Art Mini-Gewächshaus verwenden könnt.
* Variante 1: Flasche in der Mitte durchschneiden.
* Variante 2: Nur den oberen Teil der Flasche abschneiden, sodass ein großer Topf entsteht.
* Variante 3: Die Flasche längs aufschneiden und die Ränder nach außen biegen, um mehr Platz zu schaffen.
Wählt die Variante, die euch am besten gefällt und die am besten zu euren Platzverhältnissen passt.
3. Drainage (optional): Wenn ihr Staunässe vermeiden wollt, könnt ihr eine Schicht Drainagematerial (Kieselsteine oder Blähton) auf den Boden der Flasche geben. Das sorgt dafür, dass überschüssiges Wasser ablaufen kann.
Das Pflanzen: Jetzt kommt der Kohl in die Flasche!
Jetzt wird es ernst: Wir pflanzen den Kohl in die vorbereiteten Flaschen.
1. Erde einfüllen: Füllt die Flasche mit Erde. Lasst dabei etwa 2-3 cm Platz bis zum Rand. Die Erde sollte locker und nicht zu fest angedrückt sein.
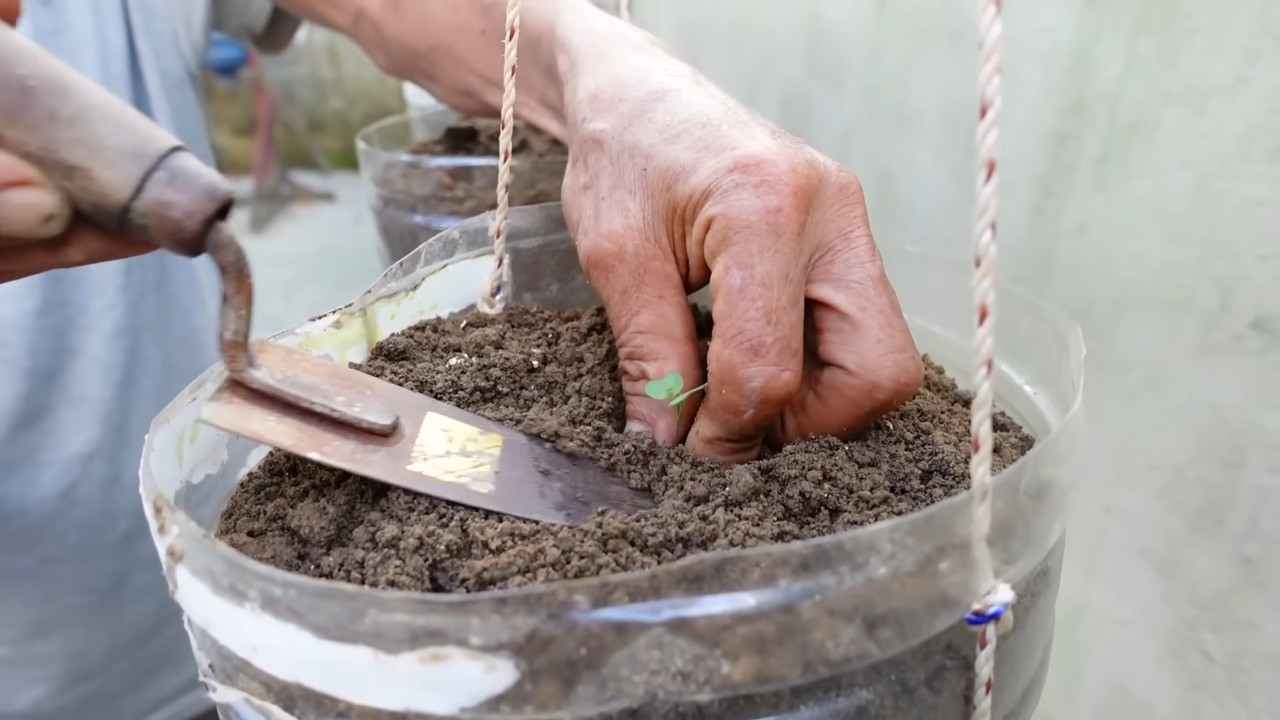
2. Pflanzloch graben: Grabt mit den Fingern oder einem kleinen Löffel ein kleines Pflanzloch in die Erde. Es sollte so groß sein, dass der Wurzelballen der Kohlpflanze hineinpasst.
3. Kohlpflanze einsetzen: Nehmt die Kohlpflanze vorsichtig aus dem Anzuchttopf und setzt sie in das Pflanzloch. Achtet darauf, dass der Wurzelballen vollständig mit Erde bedeckt ist.
4. Angießen: Gießt die Kohlpflanze vorsichtig an. Verwendet dafür am besten eine Gießkanne mit Brauseaufsatz oder eine Sprühflasche, um die Erde nicht zu stark zu befeuchten.
5. Mini-Gewächshaus (optional): Wenn ihr den oberen Teil der Flasche aufgehoben habt, könnt ihr ihn jetzt als Mini-Gewächshaus über die Kohlpflanze stülpen. Das sorgt für ein feuchtwarmes Klima und fördert das Anwachsen der Pflanze. Achtet aber darauf, dass die Pflanze genügend Luft bekommt, indem ihr den Deckel der Flasche ab und zu öffnet oder kleine Löcher in die Flasche bohrt.
Pflege: Damit euer Kohl prächtig gedeiht
Damit euer Kohl im Flaschengarten prächtig gedeiht, braucht er natürlich auch die richtige Pflege.
1. Bewässerung: Kohl braucht regelmäßig Wasser, aber er mag keine Staunässe. Gießt die Pflanzen, wenn die Erde sich trocken anfühlt. Am besten testet ihr das mit dem Finger. Im Sommer müsst ihr möglicherweise täglich gießen, im Winter seltener.
2. Düngung: Kohl ist ein Starkzehrer und braucht viele Nährstoffe. Düngt die Pflanzen regelmäßig mit einem organischen Gemüsedünger. Achtet dabei auf die Dosierungsanleitung des Herstellers.
3. Standort: Kohl braucht viel Sonne. Stellt die Flaschen an einen sonnigen Standort, am besten auf den Balkon oder die Terrasse. Wenn ihr die Pflanzen in der Wohnung zieht, solltet ihr sie an ein helles Fenster stellen.
4. Schutz vor Schädlingen: Kohl ist leider anfällig für Schädlinge wie Kohlweißlinge oder Blattläuse. Kontrolliert die Pflanzen regelmäßig und entfernt Schädlinge gegebenenfalls von Hand oder mit einem biologischen Schädlingsbekämpfungsmittel.
5. Belüftung: Wenn ihr den oberen Teil der Flasche als Mini-Gewächshaus verwendet, solltet ihr die Pflanzen regelmäßig belüften, um Schimmelbildung zu vermeiden. Öffnet den Deckel der Flasche oder bohrt kleine Löcher in die Flasche.
6. Drehen: Dreht die Flaschen regelmäßig, damit die Pflanzen gleichmäßig von allen Seiten mit Licht versorgt werden.
Ernte: Die Belohnung für eure Mühe
Nach einigen Wochen oder Monaten (je nach Kohlsorte) könnt ihr euren selbstgezogenen Kohl endlich ernten.
1. Erntezeitpunkt: Der Erntezeitpunkt hängt von der Kohlsorte ab. Kopfkohl ist erntereif, wenn der Kopf fest und geschlossen ist. Rosenkohl kann geerntet werden, wenn die Röschen fest und geschlossen sind. Grünkohl kann nach Bedarf geerntet werden, indem man die äußeren Blätter abzupft.
2. Erntemethode: Schneidet den Kopfkohl mit einem scharfen Messer ab. Rosenkohl könnt ihr einfach von der Pflanze abbrechen. Grünkohl könnt ihr, wie gesagt, nach Bedarf ernten.
3. Verwendung: Verwendet euren selbstgezogenen Kohl für leckere Gerichte wie Kohlrouladen, Eintöpfe, Salate oder Gemüsepfannen. Lasst es euch schmecken!
Zusätzliche Tipps und Tricks:
* Sortenwahl: Wählt Kohlsorten, die für den Anbau im Topf geeignet sind. Kleinwüchsige Sorten sind ideal.
* Flaschengröße: Je größer die Flasche, desto besser. Größere Flaschen bieten mehr Platz für die Wurzeln und speichern mehr Wasser.
* Erde: Verwendet hochwertige Erde, die gut drainiert und ausreichend Nährstoffe enthält.
* Dünger: Düngt die Pflanzen regelmäßig, um ein gesundes Wachstum zu fördern.
* Schädlinge: Kontrolliert die Pflanzen regelmäßig auf Schädlinge und bekämpft sie gegebenenfalls.
* Klima: Achtet auf das Klima. Kohl mag es kühl und sonnig.
* Kreativität: Seid kreativ! Ihr könnt die Flaschen bemalen oder mit anderen Materialien dekorieren, um euren Flaschenkohlgarten noch individueller zu gestalten.
Ich hoffe, diese Anleitung hat euch gefallen und inspiriert, euren eigenen Kohl im Flaschengarten anzubauen. Es ist eine tolle Möglichkeit, auch auf kleinem Raum frisches Gemüse zu ziehen und gleichzeitig etwas für die Umwelt zu tun. Viel Spaß beim Gärtnern!
Conclusion
So, there you have it! Growing cabbage in bottles might sound unconventional, but it’s a game-changer for urban gardeners, those with limited space, or anyone looking for a fun and rewarding gardening project. This method offers a surprising number of benefits, from protecting your precious cabbage seedlings from pests and harsh weather to maximizing your yield in a small area. It’s a testament to the fact that you don’t need acres of land to enjoy fresh, homegrown vegetables.
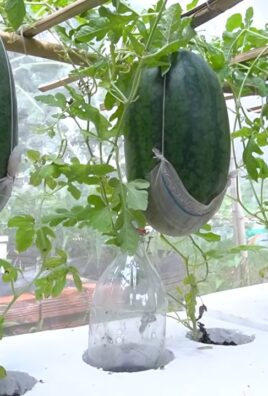
The beauty of this DIY trick lies in its adaptability. Feel free to experiment with different bottle sizes to accommodate various cabbage varieties. Consider using clear bottles for optimal sunlight exposure, or try painting the bottles white to reflect excess heat in hotter climates. You could even create a vertical garden by hanging the bottles from a sturdy structure, adding a visually stunning element to your space while increasing your growing capacity.
Beyond the practical advantages, growing cabbage in bottles is simply a fascinating and educational experience. It allows you to observe the plant’s growth process up close, fostering a deeper connection with nature and a greater appreciation for the food you eat. It’s also a fantastic way to introduce children to the wonders of gardening and teach them about sustainability.
We wholeheartedly encourage you to give this DIY trick a try. It’s a simple, cost-effective, and incredibly satisfying way to grow your own cabbage, regardless of your gardening experience. Don’t be afraid to get creative and personalize the process to suit your specific needs and preferences. The possibilities are endless!
Once you’ve harvested your first bottle-grown cabbage, we’d love to hear about your experience. Share your photos, tips, and any variations you’ve tried in the comments below. Let’s create a community of bottle-cabbage enthusiasts and inspire others to embrace this innovative gardening technique. Happy growing! Remember, successful **cabbage growing** is within your reach, even in the most unexpected containers.
Frequently Asked Questions (FAQ)
What type of cabbage is best suited for growing in bottles?
While you can technically grow any type of cabbage in a bottle, smaller varieties tend to thrive best. Consider varieties like ‘Dwarf Morden,’ ‘Golden Acre,’ or ‘Early Jersey Wakefield.’ These varieties mature relatively quickly and don’t require as much space as larger cabbage heads. However, with proper care and adequate bottle size, you can even attempt to grow slightly larger varieties. Just be mindful of the plant’s overall size and ensure the bottle provides sufficient support and room for root development.
What size bottle should I use for growing cabbage?
The ideal bottle size depends on the cabbage variety you choose. For smaller varieties, a 2-liter bottle might suffice. However, for slightly larger varieties, a 3-liter or even a gallon-sized bottle would be more appropriate. The key is to ensure the bottle is large enough to accommodate the plant’s root system and provide adequate space for the head to develop. Remember to consider the drainage needs of the plant when selecting your bottle.
How do I prepare the bottle for planting?
First, thoroughly clean the bottle to remove any residue or contaminants. Then, carefully cut off the top of the bottle, leaving enough of the neck to provide support. Drill drainage holes in the bottom of the bottle to prevent waterlogging. You can also add a layer of gravel or small stones to the bottom of the bottle to further improve drainage. Finally, fill the bottle with a high-quality potting mix that is well-draining and rich in nutrients.
How often should I water my bottle-grown cabbage?
The watering frequency will depend on factors such as the weather, the size of the bottle, and the type of potting mix you’re using. Generally, you should water your cabbage when the top inch of soil feels dry to the touch. Avoid overwatering, as this can lead to root rot. Ensure the water drains freely from the drainage holes. During hot and dry periods, you may need to water more frequently.
What kind of fertilizer should I use for my bottle-grown cabbage?
Cabbage is a heavy feeder, so it’s important to provide it with adequate nutrients. You can use a balanced liquid fertilizer, such as a 10-10-10 or 20-20-20, diluted to half strength. Apply the fertilizer every two to three weeks, following the instructions on the fertilizer label. You can also supplement with organic fertilizers, such as compost tea or fish emulsion.
How do I protect my bottle-grown cabbage from pests?
Growing cabbage in bottles can actually help to reduce pest problems, as the bottles provide a physical barrier against some pests. However, you may still encounter issues with pests like aphids, cabbage worms, or slugs. Regularly inspect your plants for signs of infestation. You can handpick pests off the plants or use organic pest control methods, such as insecticidal soap or neem oil. Consider covering the bottles with netting to prevent pests from accessing the plants.
How much sunlight does bottle-grown cabbage need?
Cabbage requires at least six hours of sunlight per day to thrive. Place your bottle-grown cabbage in a location that receives ample sunlight. If you live in a hot climate, consider providing some afternoon shade to prevent the plants from overheating. You can also use grow lights to supplement natural sunlight, especially during the winter months.
How long does it take to grow cabbage in bottles?
The time it takes to grow cabbage in bottles depends on the variety you’re growing and the growing conditions. Generally, it takes about 60 to 90 days from transplanting seedlings to harvest. Keep an eye on the head of the cabbage. It is ready to harvest when it feels firm and has reached the desired size.
Can I reuse the bottles for growing other plants?
Yes, you can definitely reuse the bottles for growing other plants. Just make sure to thoroughly clean the bottles before reusing them to remove any residual soil or pathogens. You can use the bottles to grow a variety of other vegetables, herbs, or flowers. This makes bottle gardening a sustainable and environmentally friendly practice.
What are the advantages of growing cabbage in bottles compared to traditional gardening?
Growing cabbage in bottles offers several advantages:
* **Space-saving:** Ideal for small spaces like balconies or patios.
* **Pest control:** Bottles provide a barrier against some pests.
* **Portability:** Easy to move plants to optimal sunlight or shelter.
* **Improved drainage:** Easier to control drainage compared to in-ground gardening.
* **Educational:** A fun and engaging way to learn about plant growth.
* **Upcycling:** Reuses plastic bottles, reducing waste.
What if my cabbage outgrows the bottle?
If your cabbage plant starts to outgrow its bottle, you have a couple of options. You can either transplant it into a larger container or harvest the cabbage head early. If you choose to transplant, carefully remove the plant from the bottle and transfer it to a larger pot or directly into the ground. Be gentle with the roots to avoid damaging them. If you choose to harvest early, the cabbage head may be smaller, but it will still be edible.


Leave a Comment