
Growing Tomatoes in your kitchen garden? Imagine plucking juicy, sun-ripened tomatoes right from your windowsill, ready to add a burst of flavor to your salad or pasta sauce. Forget those bland, store-bought varieties – with a little know-how, you can cultivate your own delicious, vibrant tomatoes, even without a sprawling backyard!
The history of tomato cultivation is fascinating, stretching back to the Aztecs and Incas who first domesticated these fruits. Over centuries, tomatoes journeyed across continents, evolving into the diverse range we enjoy today. But you don’t need to be an expert gardener to tap into this rich agricultural heritage.
In today’s busy world, finding time and space for a traditional garden can be a challenge. That’s where the magic of a kitchen garden comes in! Growing Tomatoes in your kitchen garden offers a convenient and rewarding way to connect with nature, reduce your carbon footprint, and enjoy fresh, healthy produce. This DIY guide will equip you with simple, effective tricks and hacks to successfully grow tomatoes indoors, regardless of your experience level. I’m excited to share these tips with you, so you can enjoy the satisfaction of harvesting your own homegrown goodness!
Tomatenanbau im eigenen Küchengarten: So geht’s!
Hallo liebe Gartenfreunde! Ich zeige euch heute, wie ihr euch den Traum von saftigen, aromatischen Tomaten direkt aus eurem eigenen Küchengarten erfüllen könnt. Egal ob Balkon, Terrasse oder ein kleines Beet – mit ein paar Tricks und Kniffen klappt das garantiert! Ich habe selbst schon viele Jahre Erfahrung und teile gerne meine besten Tipps mit euch.
Was ihr für den Tomatenanbau braucht:
* Tomatensamen oder Jungpflanzen: Wählt Sorten, die zu eurem Platzangebot und Klima passen. Es gibt unzählige Sorten, von kleinen Cherrytomaten bis hin zu riesigen Fleischtomaten.
* Anzuchterde: Für die Anzucht ist spezielle Anzuchterde ideal, da sie nährstoffarm ist und die Wurzelbildung fördert.
* Töpfe oder Anzuchtschalen: Für die Voranzucht im Haus.
* Pflanztöpfe oder ein Beet: Je nach dem, wo ihr eure Tomaten später pflanzen möchtet.
* Tomatenerde: Nährstoffreiche Erde, die speziell auf die Bedürfnisse von Tomaten abgestimmt ist.
* Dünger: Tomaten sind Starkzehrer und brauchen regelmäßige Düngergaben. Ich empfehle organischen Dünger wie Kompost oder Hornspäne.
* Stützmaterial: Tomatenpflanzen brauchen Unterstützung, um nicht umzuknicken. Tomatenstäbe, Spiralstäbe oder ein Rankgitter sind ideal.
* Gießkanne oder Gartenschlauch: Zum regelmäßigen Gießen.
* Gartenschere oder Messer: Zum Ausgeizen der Seitentriebe.
* (Optional) Regenschutz: Ein Dach oder eine Überdachung schützt die Pflanzen vor Regen und beugt Krankheiten vor.
Die Voranzucht: Der Grundstein für eine reiche Ernte
Die Voranzucht ist ein wichtiger Schritt, um den Tomaten einen Vorsprung zu verschaffen. Ich beginne damit meistens schon im März oder April.
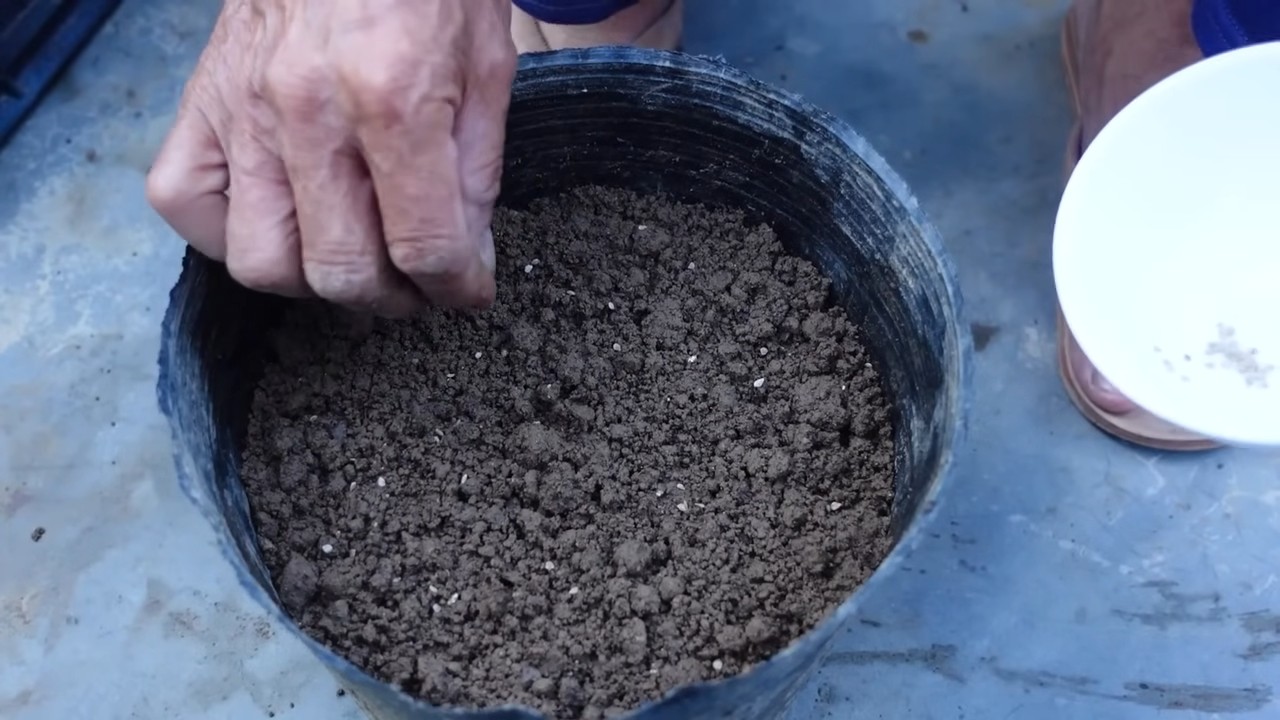
Schritt-für-Schritt-Anleitung:
1. Aussaat: Füllt eure Anzuchtschalen oder Töpfe mit Anzuchterde. Verteilt die Tomatensamen gleichmäßig auf der Erde und bedeckt sie leicht mit Erde. Drückt die Erde leicht an und befeuchtet sie mit einer Sprühflasche.
2. Standort: Stellt die Anzuchtschalen an einen hellen und warmen Ort. Eine Temperatur von 20-25°C ist ideal für die Keimung.
3. Feuchtigkeit: Haltet die Erde feucht, aber nicht nass. Vermeidet Staunässe, da dies zu Schimmelbildung führen kann.
4. Keimung: Nach etwa einer Woche sollten die ersten Keimlinge zu sehen sein.
5. Pikieren: Sobald die Keimlinge ihre ersten richtigen Blätter (nach den Keimblättern) entwickelt haben, ist es Zeit zum Pikieren. Das bedeutet, dass ihr die kleinen Pflänzchen vorsichtig aus der Anzuchtschale nehmt und in separate Töpfe mit Tomatenerde umpflanzt. Achtet darauf, die Wurzeln nicht zu beschädigen.
6. Weiterpflege: Stellt die pikierten Tomatenpflanzen wieder an einen hellen und warmen Ort. Gießt sie regelmäßig und düngt sie nach etwa zwei Wochen mit einem milden Flüssigdünger.
Die Auspflanzung: Raus in die Freiheit!
Nach den Eisheiligen (Mitte Mai), wenn keine Frostgefahr mehr besteht, können die Tomatenpflanzen ins Freie gepflanzt werden.
Schritt-für-Schritt-Anleitung:
1. Vorbereitung: Sucht einen sonnigen und windgeschützten Standort für eure Tomaten. Lockert die Erde gut auf und mischt Kompost oder Hornspäne unter.
2. Pflanzabstand: Haltet einen Pflanzabstand von etwa 50-60 cm zwischen den einzelnen Pflanzen ein.
3. Pflanzen: Grabt ein Loch, das etwas größer ist als der Wurzelballen der Tomatenpflanze. Setzt die Pflanze hinein und füllt das Loch mit Erde auf. Drückt die Erde leicht an und gießt die Pflanze gründlich.
4. Stützmaterial: Bringt sofort nach dem Pflanzen das Stützmaterial an. Bindet die Tomatenpflanze locker an den Stab oder das Rankgitter.
5. Gießen: Gießt die Tomatenpflanzen regelmäßig, besonders bei trockenem Wetter. Vermeidet es, die Blätter zu gießen, da dies Krankheiten fördern kann.
Die Pflege: Damit die Tomaten prächtig gedeihen
Die richtige Pflege ist entscheidend für eine reiche Tomatenernte.
Schritt-für-Schritt-Anleitung:
1. Gießen: Gießt die Tomatenpflanzen regelmäßig, am besten morgens oder abends. Achtet darauf, dass die Erde immer leicht feucht ist.
2. Düngen: Tomaten sind Starkzehrer und brauchen regelmäßige Düngergaben. Ich dünge meine Tomaten alle zwei Wochen mit organischem Dünger.
3. Ausgeizen: Das Ausgeizen ist ein wichtiger Schritt, um die Tomatenpflanzen gesund und produktiv zu halten. Dabei werden die Seitentriebe, die in den Blattachseln wachsen, entfernt. Dies fördert die Bildung von Früchten und verhindert, dass die Pflanze zu buschig wird. Ich breche die Seitentriebe einfach mit den Fingern ab, solange sie noch klein sind.
4. Blätter entfernen: Entfernt regelmäßig die unteren Blätter der Tomatenpflanzen, besonders wenn sie gelb werden oder Anzeichen von Krankheiten zeigen. Dies verbessert die Belüftung und beugt Pilzkrankheiten vor.
5. Kontrolle: Kontrolliert eure Tomatenpflanzen regelmäßig auf Schädlinge und Krankheiten. Bei Bedarf könnt ihr natürliche Pflanzenschutzmittel einsetzen.
Schutz vor Krankheiten und Schädlingen: Vorbeugen ist besser als Heilen
Tomatenpflanzen sind leider anfällig für verschiedene Krankheiten und Schädlinge. Mit ein paar einfachen Maßnahmen könnt ihr dem aber vorbeugen.
* Regenschutz: Ein Dach oder eine Überdachung schützt die Pflanzen vor Regen und beugt Pilzkrankheiten wie der Kraut- und Braunfäule vor.
* Gute Belüftung: Achtet auf eine gute Belüftung der Pflanzen, indem ihr regelmäßig die unteren Blätter entfernt und für ausreichend Abstand zwischen den Pflanzen sorgt.
* Bodenpflege: Eine gute Bodenpflege mit Kompost und organischem Dünger stärkt die Pflanzen und macht sie widerstandsfähiger gegen Krankheiten.
* Nützlinge fördern: Fördert Nützlinge wie Marienkäfer und Florfliegen, die Blattläuse und andere Schädlinge fressen.
* Natürliche Pflanzenschutzmittel: Bei Bedarf könnt ihr natürliche Pflanzenschutzmittel wie Brennnesseljauche oder Knoblauchsud einsetzen.
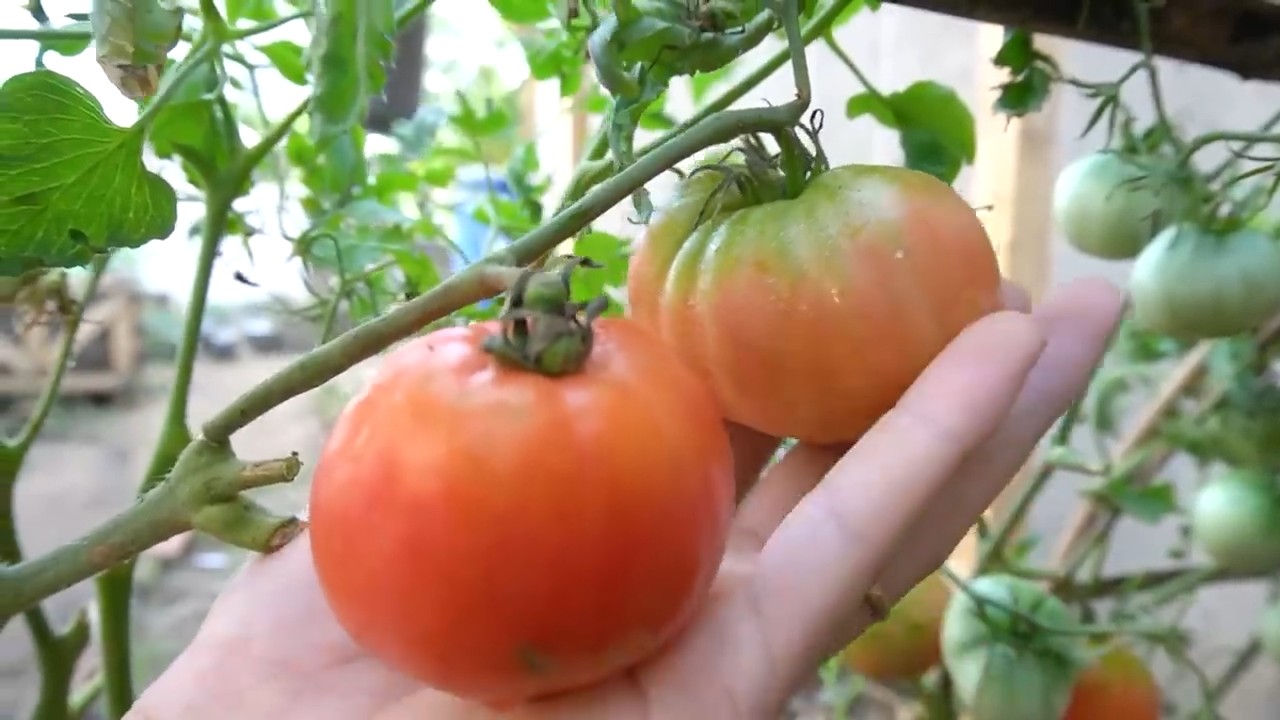
Die Ernte: Der Lohn der Mühe
Endlich ist es soweit: Die Tomaten sind reif und können geerntet werden!
Wann sind Tomaten reif?
* Die Tomaten haben ihre sortentypische Farbe erreicht.
* Sie sind leicht weich, aber nicht matschig.
* Sie lassen sich leicht vom Stiel lösen.
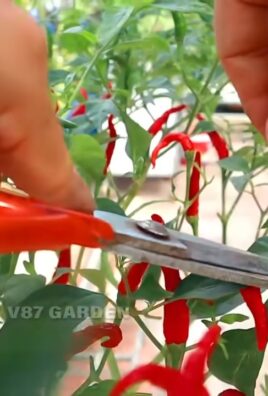
Wie erntet man Tomaten richtig?
* Schneidet die Tomaten mit einer Gartenschere oder einem Messer ab.
* Achtet darauf, die Pflanze nicht zu beschädigen.
* Erntet die Tomaten am besten morgens, wenn sie noch kühl sind.
Wie lagert man Tomaten?
* Lagert die Tomaten an einem kühlen und trockenen Ort.
* Vermeidet es, sie im Kühlschrank zu lagern, da dies ihren Geschmack beeinträchtigen kann.
* Reife Tomaten sollten innerhalb weniger Tage verzehrt werden.
Sortenempfehlungen: Für jeden Geschmack das Richtige
Es gibt unzählige Tomatensorten, da ist für jeden Geschmack etwas dabei. Hier sind ein paar meiner Favoriten:
* Cherrytomaten: ‘Sungold’ (süß und aromatisch), ‘Black Cherry’ (dunkel und würzig)
* Salattomaten: ‘Moneymaker’ (robust und ertragreich), ‘Berner Rose’ (aromatisch und saftig)
* Fleischtomaten:
Conclusion
So, there you have it! Transforming your kitchen scraps into a thriving tomato patch is not only incredibly rewarding but also a testament to the power of sustainable gardening. This DIY approach to growing tomatoes offers a multitude of benefits, from reducing waste and saving money to enjoying the unparalleled flavor of homegrown produce. Forget those bland, store-bought tomatoes; with a little effort and this simple trick, you can cultivate juicy, flavorful tomatoes right in your own backyard, balcony, or even windowsill.
This method of growing tomatoes from kitchen scraps is a must-try for several compelling reasons. First, it’s an environmentally conscious choice. By repurposing tomato seeds and scraps, you’re actively reducing food waste and minimizing your carbon footprint. Second, it’s a budget-friendly alternative to purchasing seedlings or starter plants. The initial investment is minimal, and the potential yield is substantial. Third, it’s an incredibly satisfying experience. Watching a tiny seed sprout and grow into a flourishing tomato plant is a truly remarkable process.
But the best part? The taste! Homegrown tomatoes, nurtured with your own hands, possess a depth of flavor that is simply unmatched. Imagine biting into a sun-ripened tomato, bursting with sweetness and tanginess – a taste of summer that you can enjoy throughout the growing season.
Don’t be afraid to experiment with different varieties of tomatoes. From cherry tomatoes and Roma tomatoes to beefsteak and heirloom varieties, the possibilities are endless. You can also try different growing mediums, such as compost, potting soil, or a combination of both. Consider adding companion plants like basil, marigolds, or onions to your tomato patch to deter pests and enhance growth.
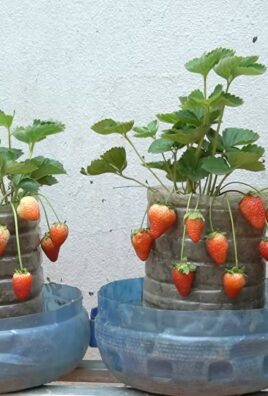
For those with limited space, container gardening is an excellent option. Choose a large pot with good drainage and provide adequate support for your tomato plants as they grow. Remember to water regularly and fertilize as needed to ensure optimal growth and fruit production.
We encourage you to embrace this DIY trick and embark on your own tomato-growing adventure. It’s a simple, sustainable, and incredibly rewarding way to enjoy the fruits (or vegetables!) of your labor. Don’t be intimidated if you’re a beginner gardener; this method is surprisingly easy and forgiving.
Once you’ve harvested your first batch of homegrown tomatoes, be sure to share your experience with us! We’d love to hear about your successes, challenges, and any variations you’ve tried. Share your photos, tips, and recipes in the comments section below. Let’s create a community of tomato enthusiasts and inspire others to embrace the joys of homegrown produce. So, get your hands dirty, plant those seeds, and get ready to savor the delicious taste of your very own homegrown tomatoes! This method of **growing tomatoes** is a game changer.
Frequently Asked Questions (FAQ)
1. What kind of tomatoes can I grow from scraps?
You can grow almost any variety of tomato from scraps, but it’s important to use tomatoes that are ripe and healthy. Heirloom varieties often produce the most flavorful results, but cherry tomatoes, Roma tomatoes, and beefsteak tomatoes are also excellent choices. Avoid using tomatoes that are diseased or have been treated with pesticides, as these may not germinate properly. The key is to use the seeds from the freshest, most flavorful tomatoes you can find.
2. How long does it take for tomato seeds to germinate?
Tomato seeds typically germinate within 5-14 days, depending on the temperature and humidity. To speed up the germination process, you can soak the seeds in water for 24 hours before planting. Keep the soil consistently moist but not waterlogged, and provide adequate warmth and sunlight. A heat mat can be particularly helpful in cooler climates.
3. What kind of soil is best for growing tomatoes?
Tomatoes thrive in well-draining soil that is rich in organic matter. A mixture of compost, potting soil, and perlite is ideal. Avoid using heavy clay soil, as it can retain too much moisture and lead to root rot. Before planting, amend the soil with compost or aged manure to provide essential nutrients. The pH level of the soil should be slightly acidic, around 6.0 to 6.8.
4. How often should I water my tomato plants?
Water your tomato plants deeply and regularly, especially during hot, dry weather. Aim to water at the base of the plant to avoid wetting the foliage, which can increase the risk of fungal diseases. Check the soil moisture regularly and water when the top inch feels dry to the touch. Avoid overwatering, as this can lead to root rot. Mulching around the base of the plant can help retain moisture and suppress weeds.
5. How much sunlight do tomato plants need?
Tomato plants require at least 6-8 hours of direct sunlight per day to thrive. Choose a sunny location for your tomato patch or container garden. If you’re growing tomatoes indoors, provide supplemental lighting with grow lights. Insufficient sunlight can result in leggy plants with poor fruit production.
6. Do I need to fertilize my tomato plants?
Yes, tomatoes are heavy feeders and benefit from regular fertilization. Use a balanced fertilizer that is specifically formulated for tomatoes. Apply fertilizer according to the package instructions, typically every 2-3 weeks during the growing season. Avoid over-fertilizing, as this can lead to excessive foliage growth and reduced fruit production.
7. How do I prevent pests and diseases from affecting my tomato plants?
There are several steps you can take to prevent pests and diseases from affecting your tomato plants. Choose disease-resistant varieties, practice crop rotation, and maintain good air circulation. Inspect your plants regularly for signs of pests or diseases and take action promptly. Use organic pest control methods, such as insecticidal soap or neem oil, to control aphids, whiteflies, and other common pests. Remove any diseased leaves or fruit immediately to prevent the spread of infection.
8. When is the best time to harvest tomatoes?
Tomatoes are typically ready to harvest when they are fully colored and slightly soft to the touch. Gently twist the tomato from the vine, leaving the stem attached. Avoid picking tomatoes that are still green, as they will not ripen properly off the vine. Store harvested tomatoes at room temperature for the best flavor.
9. Can I grow tomatoes indoors?
Yes, you can grow tomatoes indoors, but it requires careful planning and attention. Choose a sunny location near a window or provide supplemental lighting with grow lights. Use a large pot with good drainage and provide adequate support for your tomato plants. Water regularly and fertilize as needed. Pollinate the flowers manually by gently shaking the plants or using a small brush.
10. What are some common problems when growing tomatoes and how can I fix them?
Some common problems when growing tomatoes include blossom end rot, cracking, and sunscald. Blossom end rot is caused by a calcium deficiency and can be prevented by adding lime to the soil and watering regularly. Cracking is caused by inconsistent watering and can be prevented by providing consistent moisture. Sunscald is caused by excessive sun exposure and can be prevented by providing shade during the hottest part of the day.
11. Can I save seeds from my homegrown tomatoes for next year?
Yes, you can save seeds from your homegrown tomatoes for next year. Choose the healthiest, most flavorful tomatoes and scoop out the seeds. Ferment the seeds in a jar of water for 3-4 days to remove the gelatinous coating. Rinse the seeds thoroughly and dry them on a paper towel. Store the dried seeds in an airtight container in a cool, dark place.
12. What are some companion plants for tomatoes?
Companion plants can help deter pests, attract beneficial insects, and improve the overall health of your tomato plants. Some good companion plants for tomatoes include basil, marigolds, onions, garlic, carrots, and beans. Avoid planting tomatoes near brassicas, such as cabbage and broccoli, as they can compete for nutrients.
Leave a Comment