
Grow celery at home, even if you think you don’t have a green thumb! Have you ever tossed the celery base after using the stalks, feeling a pang of guilt about the waste? Well, what if I told you that seemingly useless base holds the secret to an endless supply of fresh, crunchy celery, right from your own kitchen? It’s true! This simple DIY trick is not only incredibly satisfying but also a fantastic way to reduce food waste and save money.
The practice of regrowing vegetables from scraps has roots in resourceful gardening traditions passed down through generations. Historically, especially during times of scarcity, people have always found ways to maximize their resources. This method echoes the ingenuity of our ancestors, who understood the value of every part of the plant.
In today’s fast-paced world, convenience often trumps sustainability. But what if you could have both? Learning how to grow celery at home from scraps is a small step towards a more eco-conscious lifestyle. Plus, imagine the joy of harvesting your own celery for soups, salads, or even a healthy snack! This DIY project is perfect for beginners, requires minimal space, and is a fun activity for the whole family. So, ditch the guilt of tossing that celery base and let’s embark on this exciting gardening adventure together!
Sellerie zu Hause anbauen: Ein umfassender DIY-Leitfaden
Hallo Gartenfreunde! Habt ihr euch jemals gefragt, ob man Sellerie nicht nur im Supermarkt kaufen, sondern auch ganz einfach zu Hause anbauen kann? Die Antwort ist ein klares JA! Und ich zeige euch, wie es geht. Sellerie anzubauen ist nicht nur nachhaltig, sondern auch unglaublich befriedigend. Frischer, knackiger Sellerie direkt aus dem eigenen Garten – was will man mehr? Dieser Leitfaden führt euch Schritt für Schritt durch den Prozess, vom Starten aus einem gekauften Strunk bis zur Ernte eurer eigenen Selleriestangen. Lasst uns loslegen!
Was ihr braucht: Die Vorbereitung
Bevor wir mit dem eigentlichen Anbau beginnen, ist es wichtig, dass wir alles Notwendige zur Hand haben. Hier ist eine Liste der Dinge, die ihr benötigt:
* Ein Selleriestrunk: Am besten einen frischen, festen Strunk aus dem Supermarkt oder vom Markt. Achtet darauf, dass er noch eine intakte Basis mit Wurzelansätzen hat.
* Ein Gefäß: Eine Schüssel, ein Glas oder ein anderer Behälter, der groß genug ist, um den Selleriestrunk aufzunehmen.
* Wasser: Leitungswasser ist völlig ausreichend.
* Pflanzerde: Hochwertige Pflanzerde, die gut drainiert.
* Ein Pflanzgefäß oder ein Gartenbeet: Ein Topf mit ausreichend Volumen (mindestens 20 cm Durchmesser) oder ein vorbereitetes Beet im Garten.
* Dünger: Ein organischer oder mineralischer Dünger für Gemüse.
* Geduld: Sellerie braucht etwas Zeit, um zu wachsen.
Sellerie aus einem Strunk ziehen: Die ersten Schritte
Dieser erste Schritt ist super einfach und macht Spaß! Wir verwandeln einen Küchenabfall in etwas Neues und Lebendiges.
1. Selleriestrunk vorbereiten: Schneidet den Selleriestrunk etwa 5-7 cm vom unteren Ende ab. Achtet darauf, dass die Wurzelansätze intakt bleiben. Das obere Ende könnt ihr für Suppen oder andere Gerichte verwenden – Zero Waste ist das Stichwort!
2. In Wasser stellen: Füllt euer Gefäß mit Wasser und stellt den Selleriestrunk mit der Schnittfläche nach unten hinein. Achtet darauf, dass die Wurzelansätze im Wasser sind, aber die Blätter nicht.
3. Platzierung: Stellt das Gefäß an einen hellen Ort, aber nicht in die pralle Sonne. Ein Fensterbrett ist ideal.
4. Wasser wechseln: Wechselt das Wasser alle 1-2 Tage, um Fäulnis zu vermeiden.
5. Wurzelbildung beobachten: Nach einigen Tagen (meistens 5-7) solltet ihr sehen, wie sich neue Wurzeln bilden und kleine grüne Blätter aus der Mitte des Strunks sprießen. Das ist ein Zeichen, dass euer Sellerie bereit ist, in Erde gepflanzt zu werden!
Sellerie einpflanzen: Der Umzug in die Erde
Sobald euer Sellerie ausreichend Wurzeln gebildet hat, ist es Zeit, ihn in Erde zu pflanzen. Das ist ein wichtiger Schritt, um ihm die Nährstoffe zu geben, die er zum Wachsen braucht.
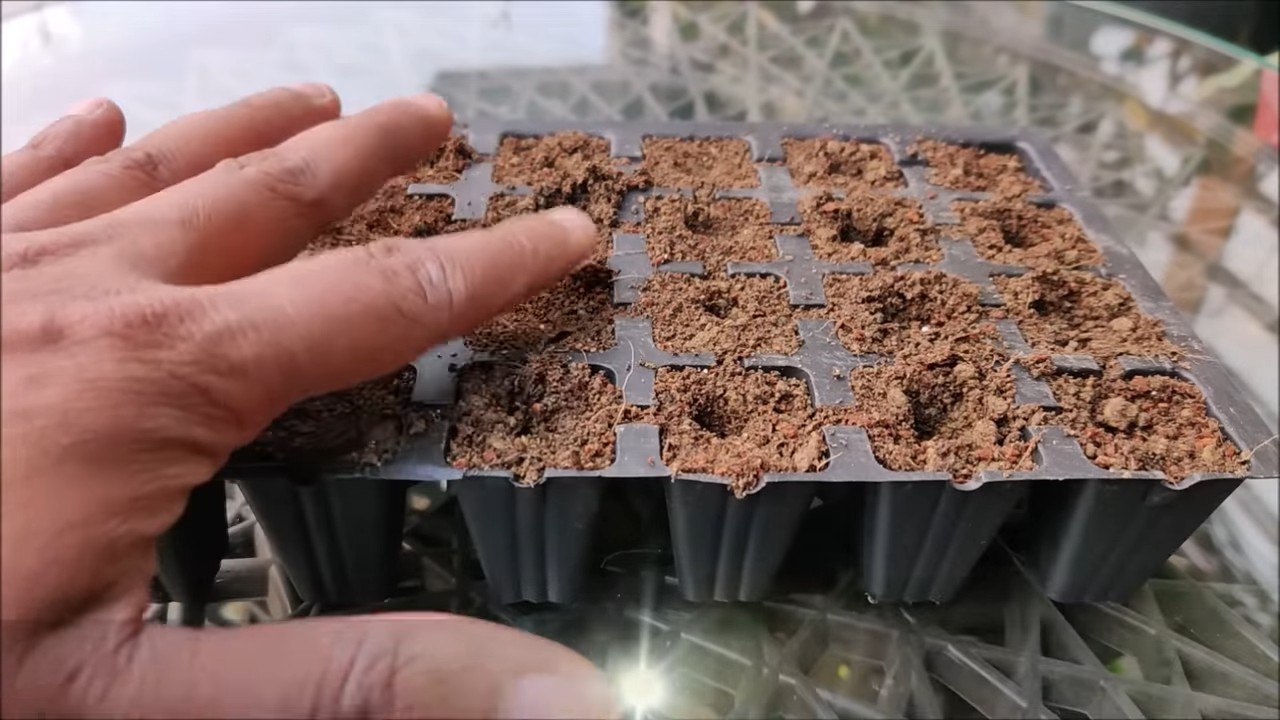
1. Pflanzgefäß vorbereiten: Füllt euer Pflanzgefäß oder das Gartenbeet mit Pflanzerde. Achtet darauf, dass die Erde locker und gut drainiert ist.
2. Pflanzloch graben: Grabt ein Loch, das groß genug ist, um den Selleriestrunk aufzunehmen.
3. Sellerie einsetzen: Setzt den Selleriestrunk vorsichtig in das Loch und bedeckt die Wurzeln mit Erde. Achtet darauf, dass der Strunk nicht zu tief in der Erde sitzt, da dies zu Fäulnis führen kann. Die Basis des Strunks sollte knapp über der Erdoberfläche liegen.
4. Angießen: Gießt den Sellerie gründlich an, damit die Erde sich setzt und die Wurzeln gut mit Wasser versorgt werden.
Sellerie pflegen: Gießen, Düngen und mehr
Die Pflege ist entscheidend, damit euer Sellerie prächtig gedeiht. Hier sind einige Tipps, die ihr beachten solltet:
* Gießen: Sellerie braucht viel Wasser, besonders während der Wachstumsphase. Gießt regelmäßig, aber vermeidet Staunässe. Die Erde sollte immer leicht feucht sein.
* Düngen: Düngt euren Sellerie alle 2-3 Wochen mit einem organischen oder mineralischen Dünger für Gemüse. Befolgt dabei die Anweisungen auf der Verpackung.
* Sonnenlicht: Sellerie bevorzugt einen sonnigen Standort, aber direkte Mittagssonne kann schädlich sein. Ein halbschattiger Platz ist ideal.
* Unkraut entfernen: Haltet das Beet oder den Topf unkrautfrei, damit der Sellerie nicht um Nährstoffe konkurrieren muss.
* Schädlinge beobachten: Achtet auf Schädlinge wie Blattläuse oder Schnecken. Bei Bedarf könnt ihr natürliche Schädlingsbekämpfungsmittel einsetzen.
Sellerie bleichen (optional): Für hellere Stangen
Das Bleichen von Sellerie ist ein optionaler Schritt, der dazu dient, die Stangen heller und milder im Geschmack zu machen. Es ist nicht unbedingt notwendig, aber viele Gärtner bevorzugen es.
1. Bleichen vorbereiten: Etwa 2-3 Wochen vor der Ernte könnt ihr den Sellerie bleichen.
2. Methoden: Es gibt verschiedene Methoden, um Sellerie zu bleichen:
* Anhügeln: Häufelt Erde um die Stangen, sodass nur noch die oberen Blätter herausschauen.
* Abdecken: Umwickelt die Stangen mit Papier, Pappe oder einem dunklen Tuch. Achtet darauf, dass die Blätter frei bleiben.
* Selbstbleichende Sorten: Es gibt auch Selleriesorten, die von Natur aus heller sind und nicht unbedingt gebleicht werden müssen.
3. Dauer: Lasst den Sellerie für 1-2 Wochen gebleicht, bevor ihr ihn erntet.
Sellerie ernten: Der Lohn der Arbeit
Nach etwa 3-4 Monaten (je nach Sorte und Wachstumsbedingungen) ist euer Sellerie bereit für die Ernte!
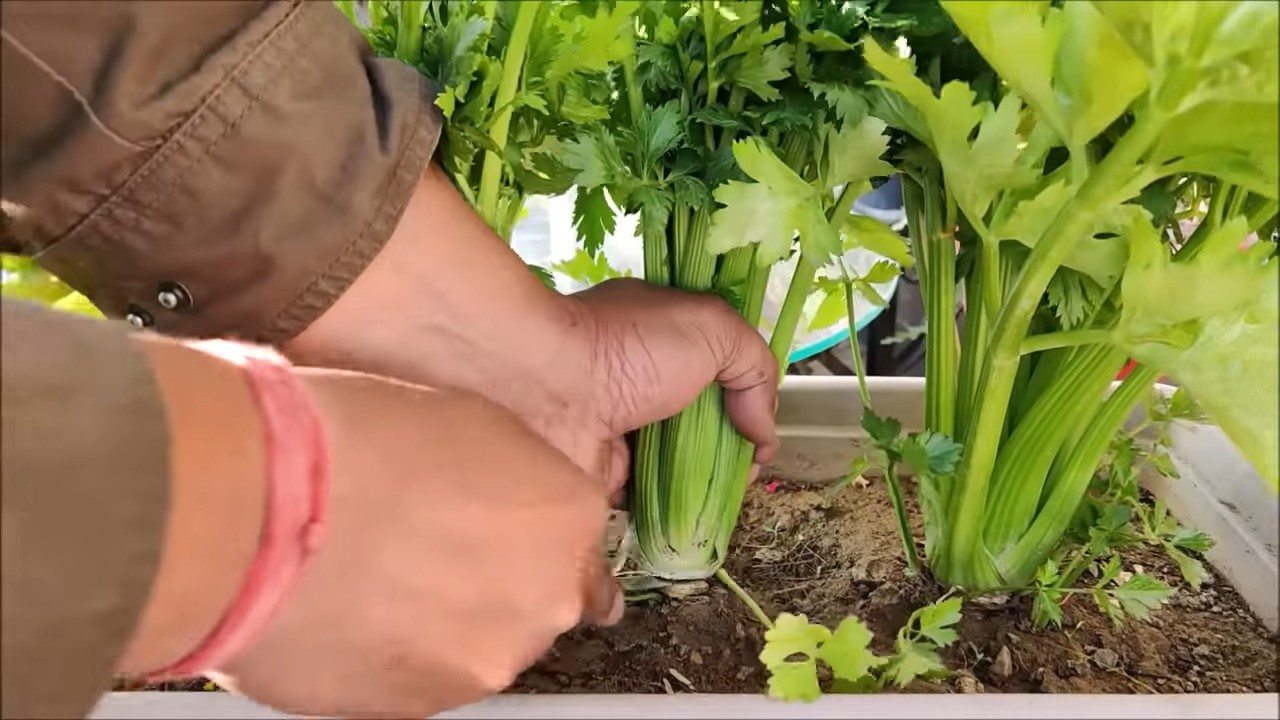
1. Erntezeitpunkt: Der Sellerie ist erntereif, wenn die Stangen eine ausreichende Größe erreicht haben und fest sind.
2. Erntemethode: Schneidet die Stangen mit einem scharfen Messer knapp über dem Boden ab. Ihr könnt entweder den ganzen Sellerie auf einmal ernten oder nur einzelne Stangen nach Bedarf.
3. Lagerung: Frischer Sellerie hält sich im Kühlschrank etwa 1-2 Wochen. Wickelt ihn am besten in ein feuchtes Tuch oder lagert ihn in einem Behälter mit Wasser.
Häufige Probleme und Lösungen
Auch beim Sellerieanbau können Probleme auftreten. Hier sind einige häufige Probleme und wie ihr sie lösen könnt:
* Gelbe Blätter: Können auf Nährstoffmangel oder zu wenig Wasser hindeuten. Düngt und gießt regelmäßig.
* Schädlinge: Blattläuse, Schnecken oder andere Schädlinge können den Sellerie befallen. Setzt natürliche Schädlingsbekämpfungsmittel ein oder sammelt die Schädlinge von Hand ab.
* Fäulnis: Kann durch Staunässe oder zu tiefe Pflanzung verursacht werden. Achtet auf eine gute Drainage und pflanzt den Sellerie nicht zu tief.
* Schlechter Wuchs: Kann auf zu wenig Sonnenlicht oder Nährstoffmangel hindeuten. Stellt den Sellerie an einen sonnigeren Standort und düngt regelmäßig.
Zusätzliche Tipps und Tricks
* Sellerie aus Samen ziehen: Ihr könnt Sellerie auch aus Samen ziehen, aber das ist etwas aufwendiger und dauert länger.
* Verschiedene Sorten: Es gibt verschiedene Selleriesorten, die sich in Geschmack, Farbe und Größe unterscheiden. Probiert verschiedene Sorten aus, um euren Favoriten zu finden.
* Sellerie als Begleitpflanze: Sellerie ist eine gute Begleitpflanze für Kohl, Tomaten und Zwiebeln.
* Sellerieblätter verwenden: Die Sellerieblätter sind essbar und können in Suppen, Salaten oder als Gewürz verwendet werden.
Ich hoffe, dieser Leitfaden hat euch geholfen, euren eigenen Sellerie zu Hause anzubauen. Es ist ein lohnendes Projekt, das euch mit frischem, knackigem Sellerie belohnt. Viel Spaß beim Gärtnern!
Conclusion
So, there you have it! Growing celery at home is not only achievable, but it’s also a remarkably rewarding experience. Forget those limp, flavorless stalks from the grocery store. Imagine biting into crisp, vibrant celery, bursting with freshness, that you nurtured from a humble celery base. This DIY trick transforms kitchen scraps into a continuous supply of this versatile vegetable, reducing food waste and saving you money.
But the benefits extend beyond just cost savings. Homegrown celery boasts a superior flavor profile compared to its store-bought counterpart. The taste is cleaner, brighter, and noticeably more intense. Plus, you have complete control over the growing process, ensuring your celery is free from harmful pesticides and chemicals. You can even experiment with different celery varieties, such as Pascal celery for its classic flavor or red celery for a touch of visual flair in your salads and snacks.
This method is incredibly simple, making it perfect for beginner gardeners and seasoned pros alike. It requires minimal space, making it ideal for apartment dwellers or those with limited garden space. All you need is a sunny windowsill, a container of water, and a little patience.
Consider these variations to personalize your celery-growing journey:
* Hydroponic Celery: For a soilless approach, try growing your celery in a hydroponic system. This method can accelerate growth and provide even more control over nutrient delivery.
* Container Gardening: Once your celery base has sprouted roots and leaves, transplant it into a larger pot filled with nutrient-rich potting soil. This will allow the plant to develop more fully and produce larger, more robust stalks.
* Companion Planting: Plant your celery alongside other vegetables like onions, tomatoes, and cabbage. These plants can help deter pests and improve the overall health of your garden.
Don’t be intimidated by the prospect of growing your own vegetables. This DIY celery trick is a fantastic starting point, offering a tangible connection to the food you eat and a sense of accomplishment that comes from nurturing something from scratch. It’s a sustainable practice that benefits both you and the environment.
We wholeheartedly encourage you to give this DIY celery growing method a try. It’s a fun, educational, and ultimately delicious way to bring a little bit of the garden into your home. Once you’ve experienced the satisfaction of harvesting your own homegrown celery, you’ll never look at a celery stalk the same way again.
So, grab a celery base, follow our simple steps, and prepare to be amazed. And most importantly, we want to hear about your experiences! Share your photos, tips, and triumphs in the comments below. Let’s build a community of home gardeners and inspire others to embrace the joy of growing their own food. Happy growing!
Frequently Asked Questions (FAQ)
How long does it take to grow celery from a base?
The initial regrowth from a celery base typically takes about 1-2 weeks. You’ll start to see new leaves emerging from the center of the base. After transplanting to soil, it can take several months (around 3-4) for the celery to fully mature and produce harvestable stalks. The exact timeframe depends on factors like sunlight, temperature, and nutrient availability.
What kind of water should I use?
Tap water is generally fine for starting your celery base. However, if your tap water is heavily chlorinated, it’s best to let it sit out for 24 hours before using it to allow the chlorine to dissipate. Filtered water is also a good option. Avoid using distilled water, as it lacks the minerals that plants need.
How much sunlight does celery need?
Celery thrives in full sun, which means at least 6-8 hours of direct sunlight per day. If you’re growing your celery indoors, place it near a sunny windowsill that receives plenty of light. If you don’t have enough natural light, you can supplement with a grow light.
What kind of soil is best for growing celery?
Celery prefers rich, well-draining soil that is high in organic matter. A good potting mix amended with compost or aged manure is ideal. The soil should also be slightly acidic, with a pH between 6.0 and 6.8.
How often should I water my celery plant?
Celery needs consistent moisture to thrive. Water your plant regularly, keeping the soil consistently moist but not waterlogged. Check the soil moisture level daily and water when the top inch of soil feels dry to the touch. During hot weather, you may need to water more frequently.
What are some common pests and diseases that affect celery?
Celery can be susceptible to pests like aphids, celery leaf tiers, and spider mites. Regularly inspect your plants for signs of infestation and take appropriate action, such as spraying with insecticidal soap or neem oil. Common diseases include celery blight and pink rot. Ensure good air circulation around your plants and avoid overhead watering to prevent these diseases.
Can I grow celery indoors year-round?
Yes, you can grow celery indoors year-round, provided you have adequate light and temperature control. Use grow lights to supplement natural sunlight during the winter months and maintain a consistent temperature between 60-70°F (15-21°C).
How do I know when my celery is ready to harvest?
Celery is ready to harvest when the stalks are at least 6-8 inches long and have reached a desirable thickness. You can harvest individual stalks as needed or harvest the entire plant at once. To harvest, simply cut the stalks at the base of the plant with a sharp knife.
Can I regrow celery from the same base multiple times?
While you can regrow celery from the same base multiple times, the subsequent harvests may be smaller and less robust than the initial regrowth. After a few cycles, the base will eventually exhaust its nutrient reserves. It’s best to start with a fresh celery base for optimal results.
Is homegrown celery more nutritious than store-bought celery?
Homegrown celery is often more nutritious than store-bought celery because it is harvested at its peak ripeness and hasn’t been subjected to long-distance transportation and storage. It also tends to be free from pesticides and other chemicals, which can further enhance its nutritional value.

Leave a Comment