
Easy Cabinet Cleaning: Your Guide to Sparkling Kitchen Cabinets
Let’s be honest, cleaning kitchen cabinets is rarely anyone’s favorite chore. Sticky fingerprints, stubborn grease splatters, and that persistent film of dust – it’s enough to make even the most enthusiastic home cook groan. But what if I told you there are easy cabinet cleaning tricks that can transform this dreaded task into a quick and satisfying accomplishment? This isn’t just about achieving a sparkling clean; it’s about reclaiming your time and energy, and enjoying a kitchen that feels fresh and inviting.
For generations, people have relied on various methods to keep their cabinets clean, from simple soap and water to more elaborate concoctions passed down through families. The desire for a clean and organized kitchen is a universal one, reflecting a deeper cultural value placed on hospitality and homemaking. But modern life often leaves us short on time and patience. That’s why mastering easy cabinet cleaning techniques is more crucial than ever.
Why You Need These Easy Cabinet Cleaning Hacks
This article isn’t just about surface-level cleaning; it’s about preventative measures and long-term solutions. We’ll explore simple DIY methods to tackle even the most stubborn grime, saving you money on expensive commercial cleaners and preventing damage to your cabinet finishes. You’ll learn how to prevent future build-up, keeping your cabinets looking their best with minimal effort. Ultimately, these easy cabinet cleaning tips will help you create a cleaner, healthier, and more enjoyable kitchen environment.
So, grab your cleaning supplies, and let’s dive into these effective and surprisingly simple solutions! Get ready to rediscover the joy of a sparkling clean kitchen, one cabinet at a time.
Deep Cleaning Your Kitchen Cabinets: A DIY Guide
I love the feeling of a sparkling clean kitchen, and nothing contributes to that feeling more than freshly cleaned cabinets. Over time, kitchen cabinets accumulate grease, grime, and sticky fingerprints. But don’t worry, you don’t need to call in a professional cleaner! With a little elbow grease and the right supplies, you can achieve professional-looking results yourself. This guide will walk you through a thorough cabinet cleaning process, leaving your kitchen looking its best.
Phase 1: Preparation is Key
- Gather your supplies: You’ll need a few essential items. This includes:
- Microfiber cloths (several, in different colors to avoid cross-contamination)
- Soft-bristled brush (an old toothbrush works great for detail work)
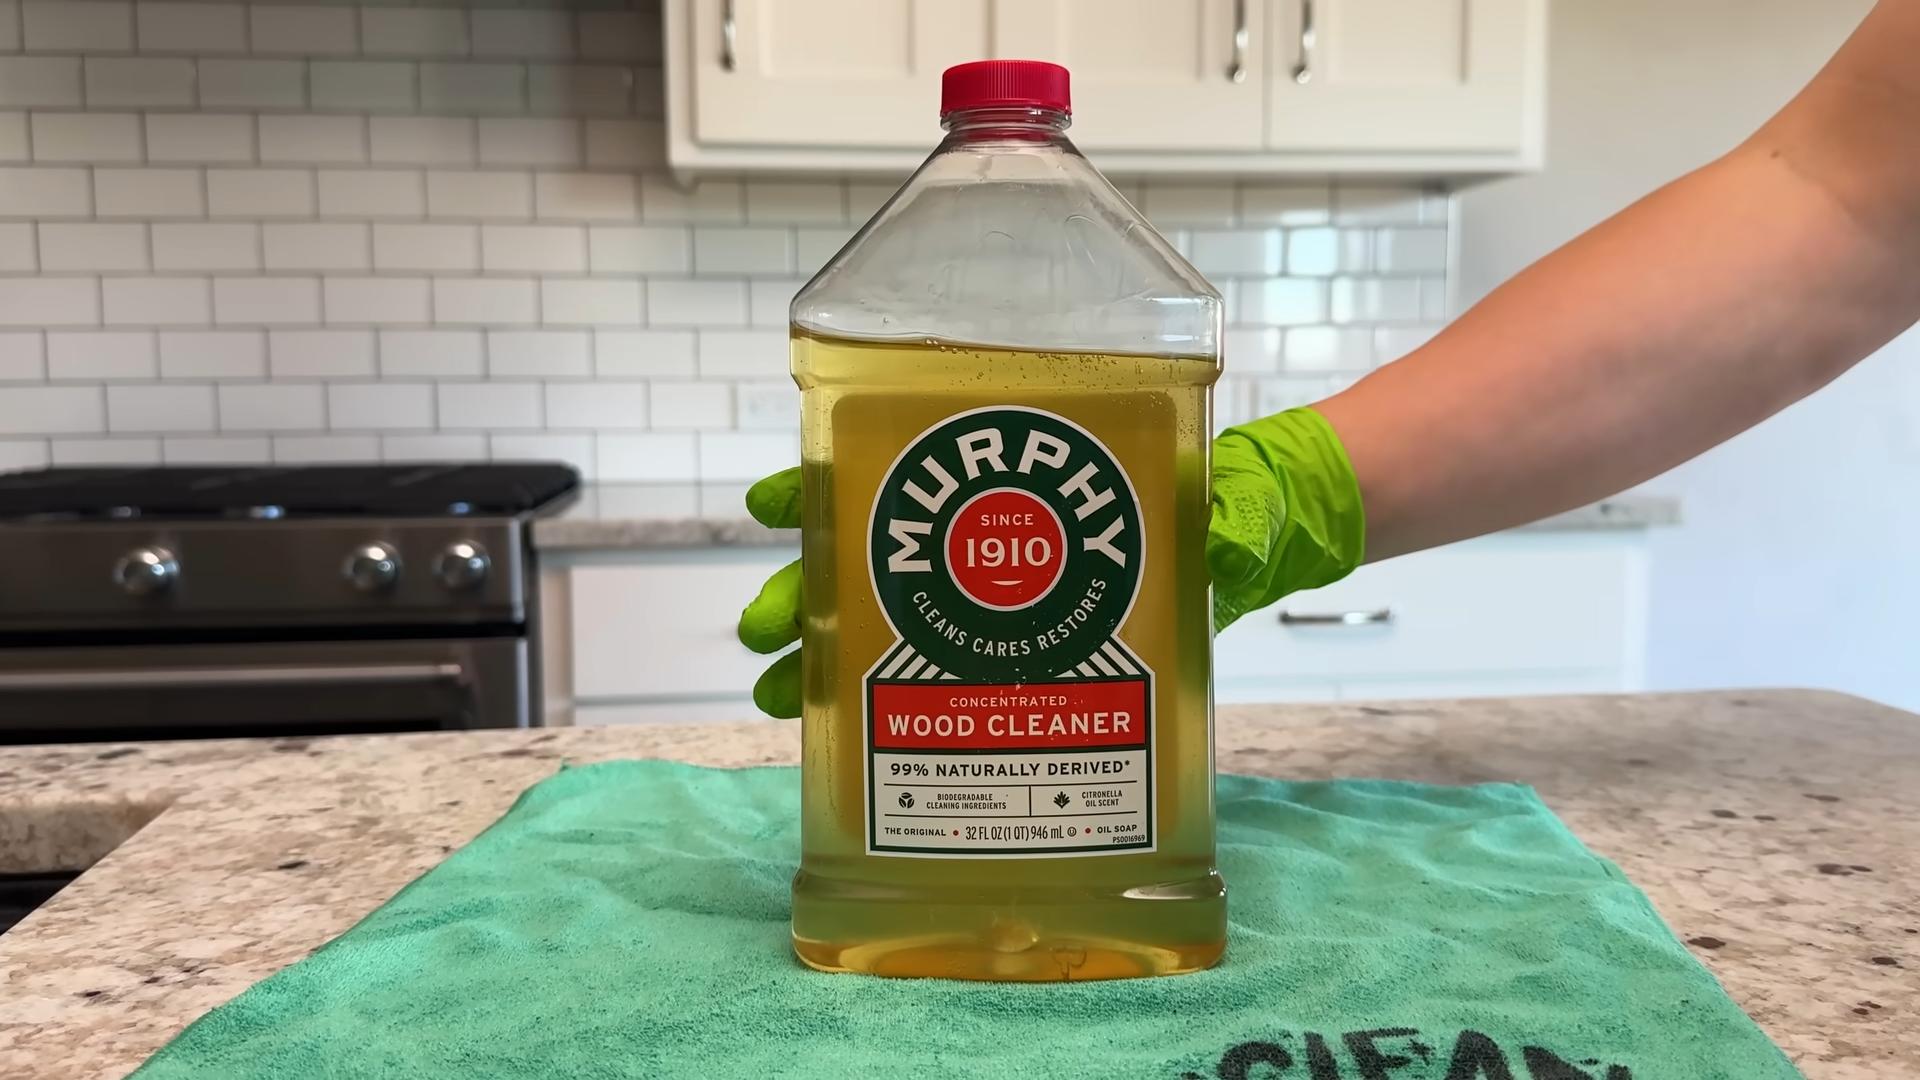
- All-purpose cleaner (I prefer a non-toxic option, but you can use what you have on hand)
- Baking soda (a natural cleaning agent)
- White vinegar (another natural cleaning powerhouse)
- Warm water
- Spray bottle
- Bucket
- Rubber gloves (to protect your hands)
- Ladder or step stool (if needed to reach high cabinets)
- Empty your cabinets: This is the most crucial step. Take everything out of your cabinets – plates, bowls, utensils, spices, everything. This allows for a thorough cleaning without accidentally missing spots.
- Remove cabinet doors (optional): For a truly deep clean, removing the cabinet doors can make the process much easier. However, this is optional and depends on your comfort level and the type of cabinets you have. If you remove them, label them clearly so you know where they go back.
- Dust thoroughly: Before you start cleaning, use a soft brush or microfiber cloth to remove loose dust and debris from the cabinet surfaces, both inside and out. Pay special attention to corners and crevices.
Phase 2: Cleaning the Cabinet Surfaces
- Mix your cleaning solution: In your spray bottle, combine equal parts warm water and white vinegar. You can add a few drops of your favorite essential oil for a pleasant scent. Alternatively, you can use a diluted all-purpose cleaner according to the product instructions.
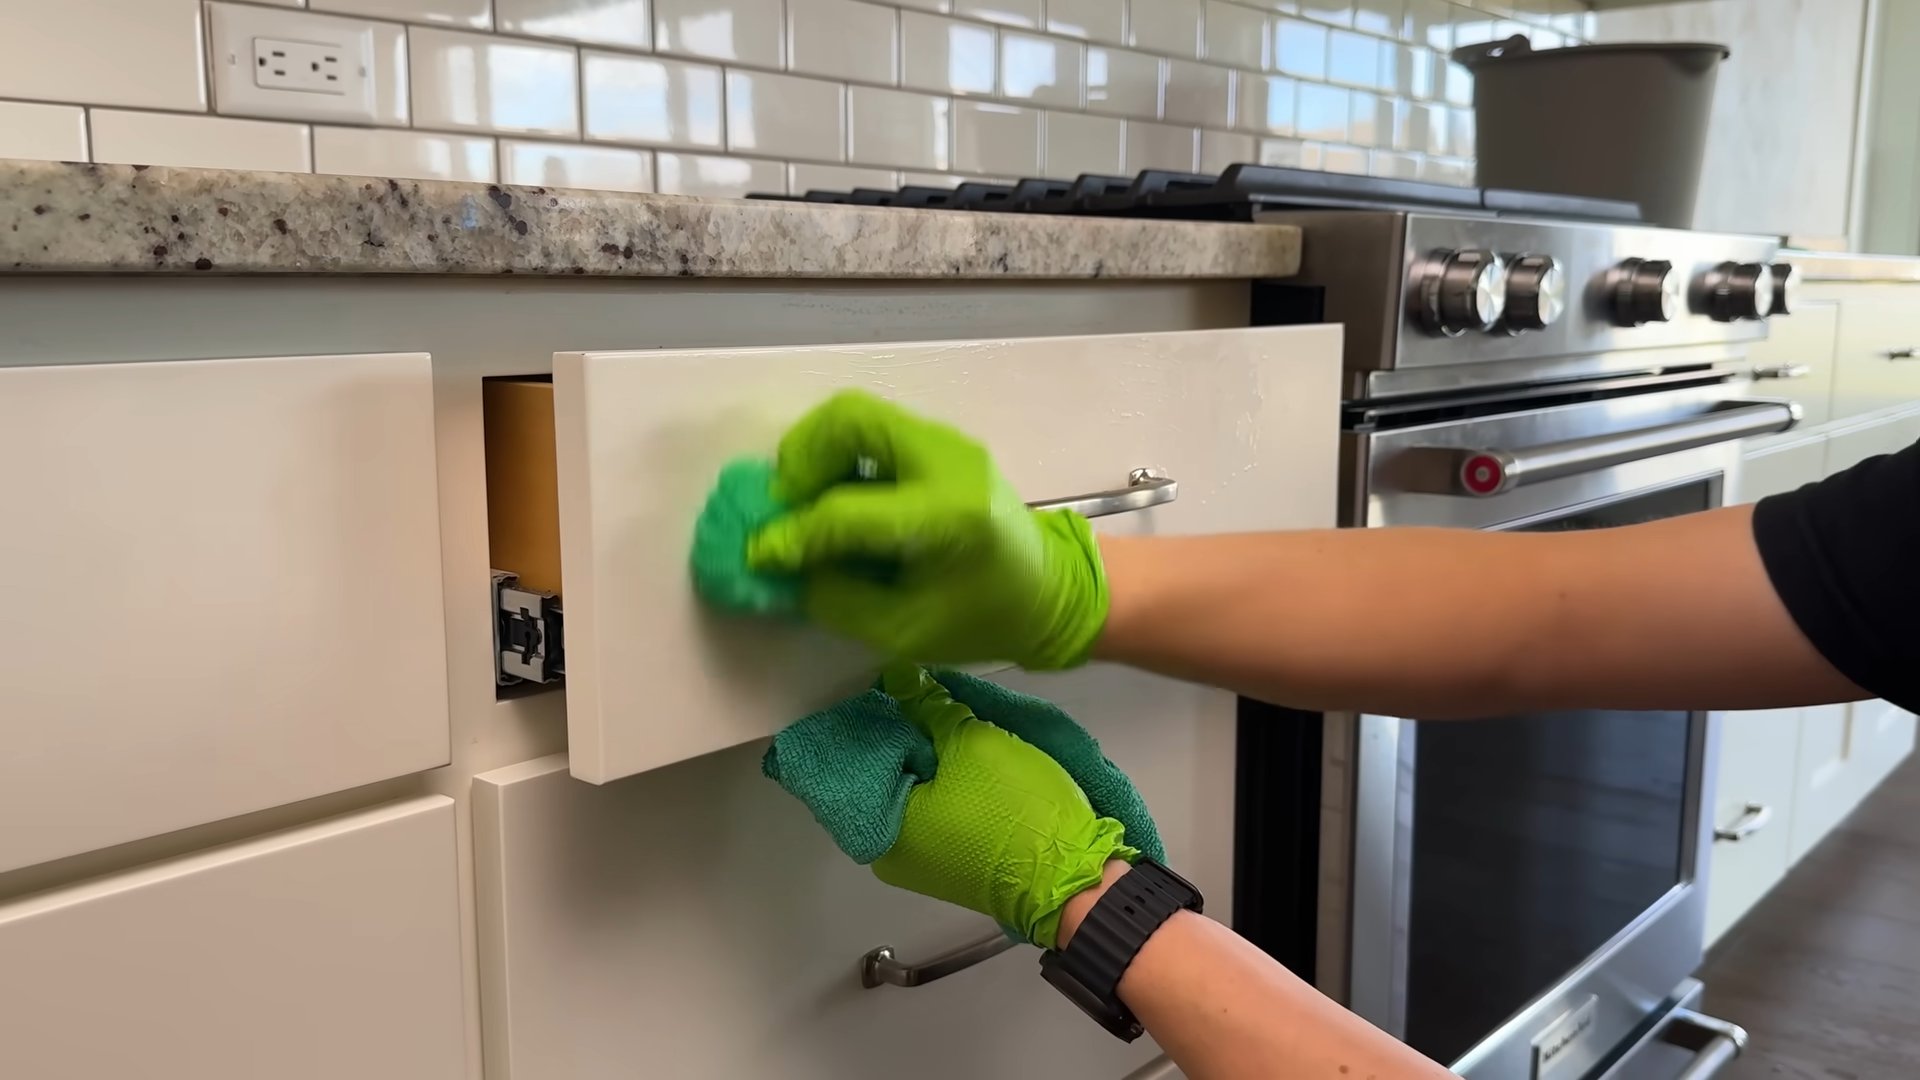
- Spray and wipe: Generously spray the cleaning solution onto the cabinet surfaces. Let it sit for a few minutes to loosen the grime. Then, use a clean microfiber cloth to wipe down the surfaces, working in small sections. For stubborn stains, let the solution sit a little longer.
- Tackle grease and sticky spots: For particularly greasy areas, make a paste of baking soda and water. Apply this paste to the affected areas, gently scrub with a soft brush, and then wipe clean with a damp cloth. This is especially effective on sticky residue.
- Clean the inside of the cabinets: Don’t forget the inside! Use the same cleaning solution and wiping method to clean the interior surfaces of your cabinets. Pay attention to shelves and any drawers.
- Dry thoroughly: After cleaning, use a clean, dry microfiber cloth to wipe down all surfaces completely. Leaving any moisture behind can lead to mildew or mold growth.
Phase 3: Detailed Cleaning and Refinements
- Clean cabinet hardware: Remove knobs and pulls and clean them separately with warm soapy water. Use an old toothbrush to get into any crevices. Dry thoroughly before reattaching.
- Address stubborn stains: For persistent stains that don’t come off with the initial cleaning, you might need a stronger solution. Try a mixture of baking soda and water, or a commercial cleaner specifically designed for kitchen surfaces. Always test any new cleaner on an inconspicuous area first.
- Clean the tracks (if applicable): If your cabinets have sliding doors or drawers, clean the tracks with a cotton swab or small brush dipped in the cleaning solution. This will help them slide smoothly.
- Focus on corners and crevices: Use a soft-bristled brush or an old toothbrush to reach those hard-to-clean corners and crevices. This will remove any accumulated dust and grime.
- Polish (optional): For a truly polished look, you can apply a wood polish or furniture polish to your cabinets after they are completely dry. This will add shine and protect the wood.
Phase 4: Putting Everything Back
- Let everything dry completely: Before putting anything back into your cabinets, make sure they are completely dry. This prevents moisture damage and ensures that everything stays clean.
- Replace cabinet doors (if removed): Carefully replace the cabinet doors, ensuring they are securely fastened.
- Return items to the cabinets: Now you can carefully return all your items to the cabinets. Consider reorganizing your items for better efficiency and accessibility.
- Admire your work: Stand back and admire your sparkling clean cabinets! You’ve successfully completed a deep clean, and your kitchen will look and feel amazing.
- Gather your supplies: You’ll need a few essential items. This includes:
- Microfiber cloths (several, in different colors to avoid cross-contamination)
- Soft-bristled brush (an old toothbrush works great for detail work)
- All-purpose cleaner (I prefer a non-toxic option, but you can use what you have on hand)
- Baking soda (a natural cleaning agent)
- White vinegar (another natural cleaning powerhouse)
- Warm water
- Spray bottle
- Bucket
- Rubber gloves (to protect your hands)
- Ladder or step stool (if needed to reach high cabinets)
- Empty your cabinets: This is the most crucial step. Take everything out of your cabinets – plates, bowls, utensils, spices, everything. This allows for a thorough cleaning without accidentally missing spots.
- Remove cabinet doors (optional): For a truly deep clean, removing the cabinet doors can make the process much easier. However, this is optional and depends on your comfort level and the type of cabinets you have. If you remove them, label them clearly so you know where they go back.
- Dust thoroughly: Before you start cleaning, use a soft brush or microfiber cloth to remove loose dust and debris from the cabinet surfaces, both inside and out. Pay special attention to corners and crevices.
- Mix your cleaning solution: In your spray bottle, combine equal parts warm water and white vinegar. You can add a few drops of your favorite essential oil for a pleasant scent. Alternatively, you can use a diluted all-purpose cleaner according to the product instructions.
- Spray and wipe: Generously spray the cleaning solution onto the cabinet surfaces. Let it sit for a few minutes to loosen the grime. Then, use a clean microfiber cloth to wipe down the surfaces, working in small sections. For stubborn stains, let the solution sit a little longer.
- Tackle grease and sticky spots: For particularly greasy areas, make a paste of baking soda and water. Apply this paste to the affected areas, gently scrub with a soft brush, and then wipe clean with a damp cloth. This is especially effective on sticky residue.
- Clean the inside of the cabinets: Don’t forget the inside! Use the same cleaning solution and wiping method to clean the interior surfaces of your cabinets. Pay attention to shelves and any drawers.
- Dry thoroughly: After cleaning, use a clean, dry microfiber cloth to wipe down all surfaces completely. Leaving any moisture behind can lead to mildew or mold growth.
- Clean cabinet hardware: Remove knobs and pulls and clean them separately with warm soapy water. Use an old toothbrush to get into any crevices. Dry thoroughly before reattaching.
- Address stubborn stains: For persistent stains that don’t come off with the initial cleaning, you might need a stronger solution. Try a mixture of baking soda and water, or a commercial cleaner specifically designed for kitchen surfaces. Always test any new cleaner on an inconspicuous area first.
- Clean the tracks (if applicable): If your cabinets have sliding doors or drawers, clean the tracks with a cotton swab or small brush dipped in the cleaning solution. This will help them slide smoothly.
- Focus on corners and crevices: Use a soft-bristled brush or an old toothbrush to reach those hard-to-clean corners and crevices. This will remove any accumulated dust and grime.
- Polish (optional): For a truly polished look, you can apply a wood polish or furniture polish to your cabinets after they are completely dry. This will add shine and protect the wood.
- Let everything dry completely: Before putting anything back into your cabinets, make sure they are completely dry. This prevents moisture damage and ensures that everything stays clean.
- Replace cabinet doors (if removed): Carefully replace the cabinet doors, ensuring they are securely fastened.
- Return items to the cabinets: Now you can carefully return all your items to the cabinets. Consider reorganizing your items for better efficiency and accessibility.
- Admire your work: Stand back and admire your sparkling clean cabinets! You’ve successfully completed a deep clean, and your kitchen will look and feel amazing.
I love the feeling of a sparkling clean kitchen, and nothing contributes to that feeling more than freshly cleaned cabinets. Over time, kitchen cabinets accumulate grease, grime, and sticky fingerprints. But don’t worry, you don’t need to call in a professional cleaner! With a little elbow grease and the right supplies, you can achieve professional-looking results yourself. This guide will walk you through a thorough cabinet cleaning process, leaving your kitchen looking its best.
Phase 1: Preparation is Key
Phase 2: Cleaning the Cabinet Surfaces
Phase 3: Detailed Cleaning and Refinements
Phase 4: Putting Everything Back
Important Note: Always test any cleaning solution on a small, inconspicuous area first to ensure it doesn’t damage the finish of your cabinets. If you have antique or delicate cabinets, consider consulting a professional cleaner or using a gentler cleaning method.
Conclusion
So there you have it – a simple, effective, and surprisingly satisfying method for achieving sparkling clean cabinets! This Easy Cabinet Cleaning DIY trick isn’t just about saving money on expensive commercial cleaners; it’s about reclaiming control over what you’re using in your home and achieving professional-looking results without the harsh chemicals. The power of this method lies in its simplicity and effectiveness. You likely already have most of the ingredients in your pantry, making it a truly accessible and budget-friendly solution for everyone. Beyond the immediate shine, you’ll also appreciate the peace of mind knowing you’ve cleaned your cabinets with natural, non-toxic ingredients, making it safe for your family and the environment. This method is perfect for tackling everyday grime, but it also holds its own against stubborn grease and sticky residue. The results speak for themselves – a renewed sense of cleanliness and a kitchen that feels fresh and inviting.
We strongly encourage you to try this Easy Cabinet Cleaning method and experience the transformation firsthand. Don’t be afraid to experiment and adapt the recipe to your specific needs and preferences. Perhaps you’d like to add a few drops of your favorite essential oil for a pleasant aroma, or substitute white vinegar with apple cider vinegar for a slightly different cleaning action. The possibilities are endless! Once you’ve tried it, we’d love to hear about your experience. Share your before-and-after photos on social media using #EasyCabinetCleaning and tag us – we can’t wait to see your sparkling cabinets! Remember, a clean kitchen is a happy kitchen, and this DIY trick is your key to unlocking that happiness. It’s time to ditch the harsh chemicals and embrace the simplicity and effectiveness of this natural cleaning solution. Your cabinets – and your family – will thank you for it. This Easy Cabinet Cleaning method is more than just a cleaning solution; it’s a commitment to a healthier, more sustainable, and more enjoyable home environment.
Frequently Asked Questions
What types of cabinets does this method work on?
This Easy Cabinet Cleaning method works effectively on most types of cabinets, including wood, laminate, and painted surfaces. However, it’s always recommended to test the solution on a small, inconspicuous area first to ensure it doesn’t damage the finish. For particularly delicate or antique cabinets, you may want to proceed with extra caution and consider using a gentler approach. Always refer to the manufacturer’s cleaning instructions for your specific cabinet type.
How often should I clean my cabinets using this method?
The frequency of cleaning will depend on your household and how often your cabinets are used. For most kitchens, a monthly cleaning should suffice to maintain a clean and fresh look. However, if you notice spills or excessive grease buildup, you may need to clean them more frequently. Regular wiping down with a damp cloth between deep cleans can help prevent the accumulation of dirt and grime.
Can I use this method on cabinet hardware?
Yes, this method is generally safe for most cabinet hardware, including knobs and pulls. However, avoid soaking the hardware in the cleaning solution for extended periods, and always dry it thoroughly afterward to prevent water spots or damage. For particularly delicate or ornate hardware, you may want to clean it separately with a soft cloth and mild soap.
What if I don’t have white vinegar?
While white vinegar is the preferred ingredient due to its acidity and cleaning power, you can substitute it with apple cider vinegar or even lemon juice. However, keep in mind that the cleaning power might be slightly less effective. Lemon juice, in particular, may leave a slight residue, so ensure you rinse thoroughly.
Are there any safety precautions I should take?
Always wear gloves when handling cleaning solutions, even natural ones, to protect your skin. Ensure the area is well-ventilated to avoid inhaling strong fumes. Keep the cleaning solution out of reach of children and pets. If you experience any skin irritation, rinse the affected area with water and discontinue use. Remember to always test the solution on a small, inconspicuous area before applying it to the entire surface.
What if I have stubborn stains or grease?
For stubborn stains or grease, you may need to let the cleaning solution sit on the surface for a few minutes before wiping it off. You can also use a soft-bristled brush to gently scrub the affected areas. For particularly stubborn stains, you may need to repeat the process or consider using a slightly stronger solution (always test first!). Remember, patience is key when dealing with stubborn grime.
Can I use this method on other surfaces in my kitchen?
While this Easy Cabinet Cleaning method is specifically designed for cabinets, it can be adapted for other kitchen surfaces, such as countertops (depending on the material) and backsplashes. Always test the solution on a small, inconspicuous area first to ensure it doesn’t damage the surface. Remember to adjust the cleaning time and pressure according to the material’s sensitivity. For delicate surfaces, always opt for a gentler approach.
Where can I find the ingredients?
The ingredients for this Easy Cabinet Cleaning method are readily available at most grocery stores and supermarkets. White vinegar, baking soda, and dish soap are common household items. Essential oils, if you choose to add them, can be found at health food stores or online retailers. The accessibility of these ingredients makes this DIY cleaning solution incredibly convenient and budget-friendly.


Leave a Comment