
Clean Tile and Grout: Your Guide to Sparkling Floors
I love the feeling of walking into a bathroom or kitchen with sparkling clean floors. There’s nothing quite like the satisfaction of seeing those gleaming tiles and perfectly pristine grout lines. But let’s be honest, keeping tile and grout clean can feel like a never-ending battle! That’s why I’m so excited to share some of my favorite Clean Tile and Grout hacks and DIY solutions with you today. This isn’t just about aesthetics; it’s about creating a healthier and more inviting home environment.
For centuries, people have sought ways to maintain the cleanliness of their homes, from ancient Roman mosaics to the modern ceramic tiles we use today. The desire for clean, beautiful floors transcends time and culture. Maintaining clean tile and grout isn’t just about appearances; it’s about hygiene. Grimy grout can harbor bacteria and mold, impacting air quality and potentially causing health problems. That’s why knowing how to effectively clean tile and grout is so crucial.
Why You Need These DIY Tricks
This article isn’t just about using expensive commercial cleaners. I’ll be sharing simple, cost-effective, and eco-friendly DIY methods that will leave your tile and grout sparkling. You’ll learn how to tackle tough stains, prevent future build-up, and save money in the process. Whether you’re a seasoned DIY enthusiast or a complete beginner, these Clean Tile and Grout techniques are easy to follow and will make a noticeable difference in your home.
So, grab your cleaning supplies, and let’s get started on transforming your floors from drab to fab! Prepare to be amazed by how easy it is to achieve professional-looking results with these simple DIY solutions.

Deep Cleaning Your Tile and Grout: A DIY Guide
I’ve always loved the look of clean tile, but let’s be honest, grout is a magnet for dirt and grime. This guide will walk you through my foolproof method for getting your tile and grout sparkling clean, even if it’s been neglected for a while!
Gathering Your Supplies
- All-purpose cleaner (I prefer a non-toxic option)
- Bleach (optional, for tough stains – use with caution and ventilation)
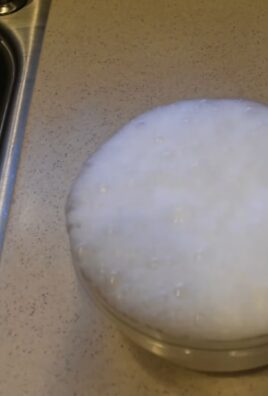
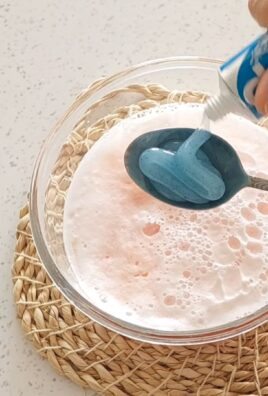
- Baking soda
- White vinegar
- Hydrogen peroxide (3%)
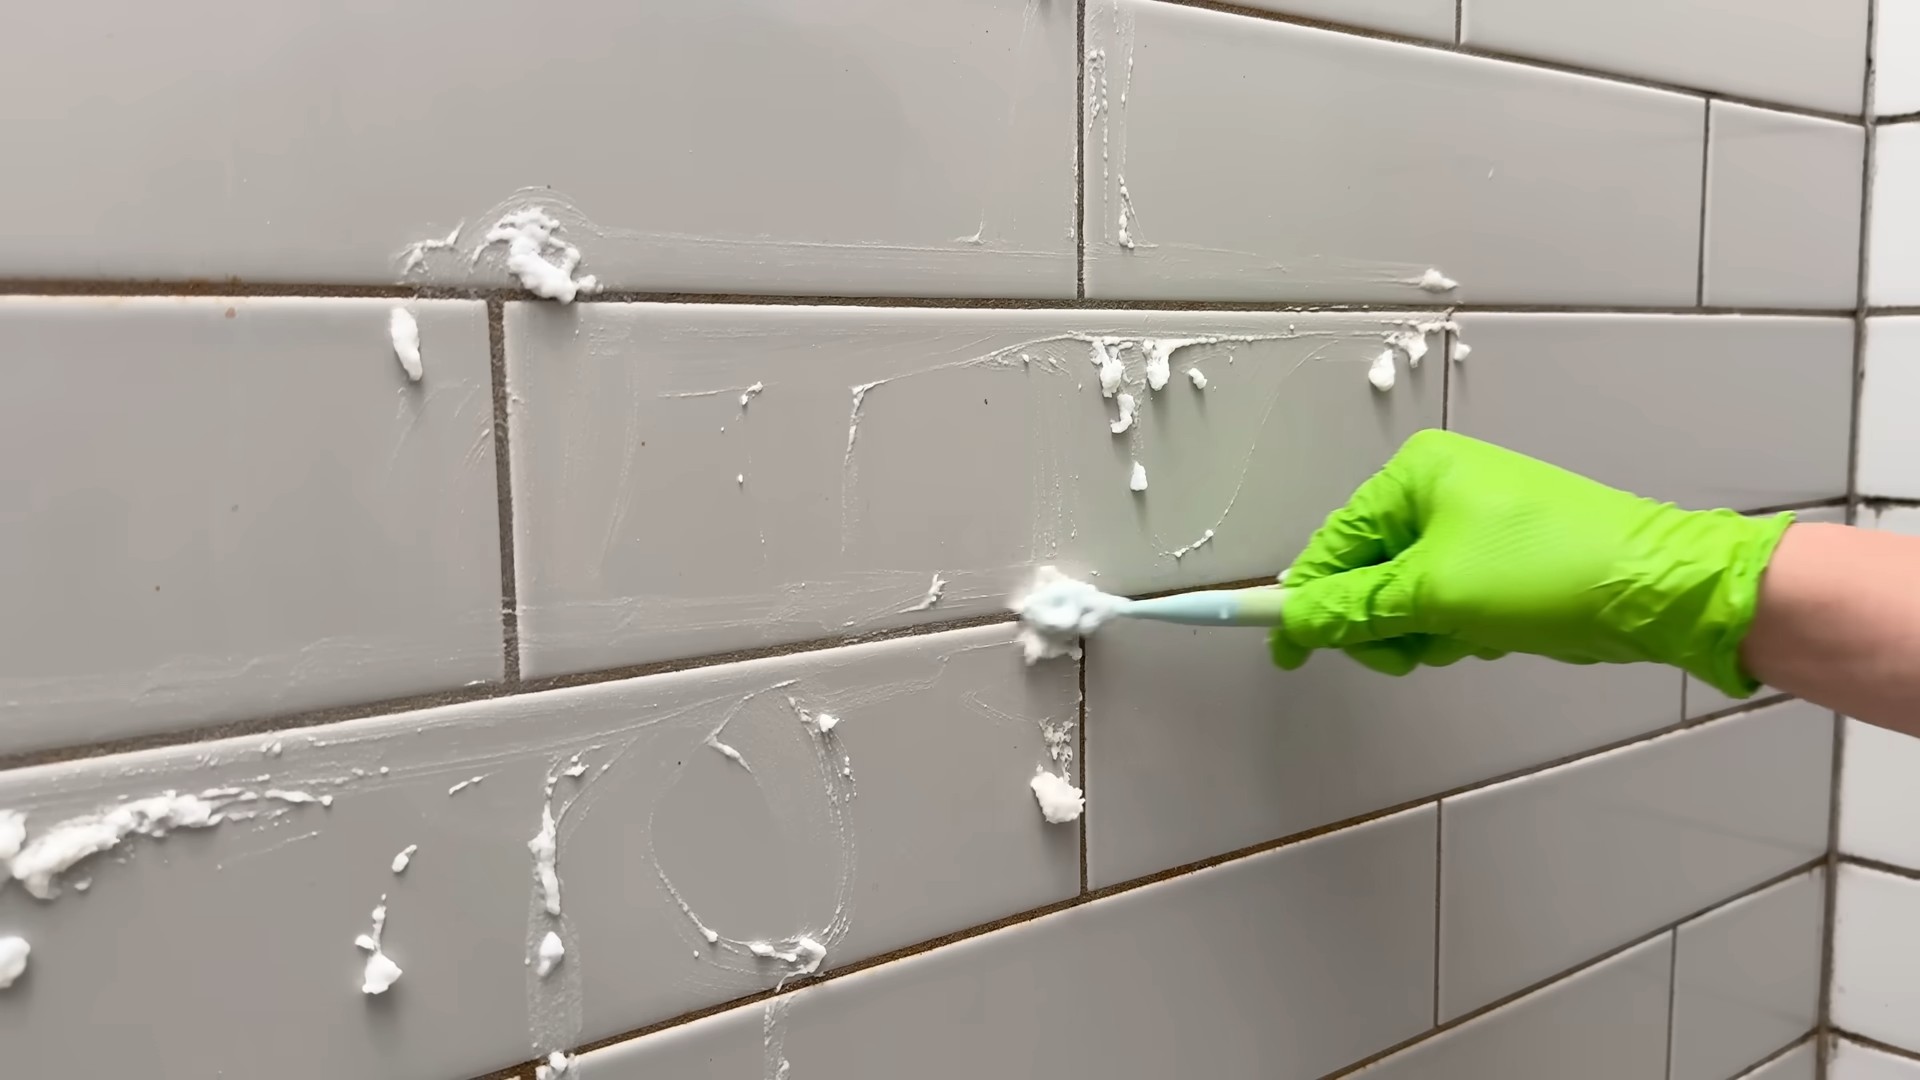
- Soft-bristled brush (old toothbrush works great for grout)
- Stiff-bristled brush (for heavier cleaning)
- Microfiber cloths
- Bucket
- Rubber gloves
- Grout brush (optional, but highly recommended for deep cleaning)
- Spray bottle
- Scrubbing pad (non-abrasive)
Phase 1: Preparation is Key
1. Clear the area: Remove any items from the floor or wall you’ll be cleaning. This includes rugs, furniture, and anything else that might get in your way. The more space you have, the easier the cleaning process will be.
2. Sweep or vacuum: Before you start scrubbing, remove loose dirt, dust, and debris. This prevents it from getting ground into the grout during cleaning. A quick sweep or vacuum will make a huge difference.
3. Pre-treat stubborn stains: If you have particularly stubborn stains, apply a paste of baking soda and water directly to the affected areas. Let it sit for about 15-20 minutes to allow it to work its magic. For really tough stains, you can try a paste of baking soda and bleach (use with caution and good ventilation!), but always test it in an inconspicuous area first.
Phase 2: The Deep Clean
1. Mix your cleaning solution: In your bucket, mix warm water with your chosen cleaner. I usually start with a simple all-purpose cleaner, but for tougher jobs, I add a splash of white vinegar or hydrogen peroxide. Remember, always test any new cleaning solution in an inconspicuous area first to ensure it doesn’t damage your tile.
2. Apply the solution: Using a spray bottle or by pouring directly onto the tile, apply the cleaning solution to a small section at a time. Don’t overdo it; you don’t want to soak the area excessively.
3. Scrub the tile: Using your soft-bristled brush or scrubbing pad, gently scrub the tile surface. Pay attention to any areas with noticeable dirt or grime. For stubborn stains, you might need to scrub a little harder, but be careful not to scratch the tile.
4. Attack the grout: This is where the grout brush comes in handy. Using your grout brush (or an old toothbrush), carefully scrub the grout lines. Work slowly and methodically to ensure you get into all the crevices. For really grimy grout, you might need to repeat steps 2-4.
5. Rinse thoroughly: Once you’ve scrubbed the entire area, rinse the tile and grout with clean water. Use a microfiber cloth to wipe away any remaining cleaning solution and dirt. You can also use a wet/dry vacuum to suck up excess water, especially if you’re cleaning a large area.
Phase 3: Finishing Touches
1. Dry the area: Use clean microfiber cloths to thoroughly dry the tile and grout. This prevents water spots and helps the area to look its best. For larger areas, a fan can help speed up the drying process.
2. Grout sealer (optional): For added protection and to make future cleaning easier, consider applying a grout sealer. This will help prevent dirt and grime from penetrating the grout, making it easier to clean in the future. Follow the manufacturer’s instructions carefully when applying the sealer.
3. Admire your work! Step back and admire your sparkling clean tile and grout. You’ve earned it!
Troubleshooting
Dealing with Mildew
If you notice mildew, don’t panic! Mix equal parts white vinegar and water in a spray bottle. Spray the affected areas, let it sit for 15-20 minutes, then scrub with a brush. For persistent mildew, you can try a solution of hydrogen peroxide and water. Always ensure proper ventilation when using bleach or hydrogen peroxide.
Removing Hard Water Stains
Hard water stains can be stubborn. Try a paste of baking soda and water, or a solution of white vinegar and water. Let it sit for a while before scrubbing. For really tough stains, you might need to use a commercial hard water stain remover.
Protecting Your Investment
Regular cleaning is key to preventing dirt and grime buildup. Try to wipe up spills immediately and sweep or vacuum regularly to prevent dirt from settling into the grout. Consider using a doormat to help keep dirt out of the area.
Important Note:
Always test any cleaning solution in an inconspicuous area before applying it to the entire surface. This will help prevent damage to your tile and grout. If you’re unsure about any aspect of this process, consult a professional cleaning service.
Conclusion
So there you have it! A sparkling clean home is within your reach, thanks to this simple and effective DIY tile and grout cleaning method. We’ve shown you how to achieve professional-looking results without the hefty price tag or harsh chemicals of commercial cleaners. This DIY tile and grout cleaning trick is a must-try because it’s not only budget-friendly and environmentally conscious, but it also delivers outstanding results. You’ll be amazed at how easily you can banish grime and restore the original beauty of your tiles and grout. The satisfying feeling of a sparkling clean bathroom or kitchen floor is unparalleled, and this method makes achieving that feeling remarkably easy. Forget scrubbing for hours with harsh chemicals; this method is efficient, effective, and leaves your home smelling fresh and clean.
Beyond the basic method, there are numerous ways to customize this cleaning approach to suit your specific needs and preferences. For particularly stubborn stains, consider pre-treating the grout with a paste of baking soda and water, allowing it to sit for 15-20 minutes before scrubbing. If you have colored grout, always test any cleaning solution in an inconspicuous area first to ensure it doesn’t affect the color. For those with sensitive skin, wearing gloves is always recommended. Experiment with different essential oils to add a pleasant scent to your cleaning solution – a few drops of tea tree oil, lemon, or lavender can leave your bathroom smelling wonderfully fresh. You can also adjust the ratio of baking soda and vinegar to suit the level of grime. For lightly soiled grout, a less concentrated solution might suffice. Remember, consistency is key; regular cleaning using this method will prevent the build-up of dirt and grime, making future cleanings even easier. Don’t be afraid to experiment and find what works best for you and your specific tile and grout type.
We strongly encourage you to try this DIY tile and grout cleaning method and share your experience with us! Show us your before-and-after photos on social media using #DIYTileClean. We’d love to see the amazing results you achieve. This simple trick can transform your home, making it a cleaner, healthier, and more inviting space. Remember, a clean home is a happy home, and this method makes achieving that happiness surprisingly easy and affordable. So, grab your supplies, roll up your sleeves, and get ready to experience the joy of a sparkling clean home, all thanks to the power of simple, natural ingredients.
Frequently Asked Questions
What types of tiles can I use this method on?
This DIY tile and grout cleaning method is suitable for most types of tile, including ceramic, porcelain, and even some natural stone tiles. However, it’s crucial to always test a small, inconspicuous area first, especially with delicate or porous stones like marble or travertine. These materials can be more sensitive to acidic cleaners, so a diluted solution or a gentler approach might be necessary. Always refer to the manufacturer’s cleaning recommendations for your specific tile type.
How often should I clean my tile and grout using this method?
The frequency of cleaning depends on the level of traffic and the amount of dirt and grime your tiles and grout are exposed to. For high-traffic areas like bathrooms and kitchens, weekly cleaning is recommended. For less frequently used areas, monthly cleaning should suffice. Regular cleaning prevents the build-up of stubborn stains and makes future cleanings much easier. Remember, consistent, light cleaning is better than infrequent, heavy scrubbing.
What if I have particularly stubborn stains or mildew?
For stubborn stains or mildew, you may need to pre-treat the affected areas. Create a paste of baking soda and water, apply it to the stained grout, and let it sit for 15-20 minutes before scrubbing. For persistent mildew, you might consider using a diluted bleach solution (always in a well-ventilated area and following safety precautions) as a pre-treatment, followed by the baking soda and vinegar cleaning method. Remember to always test any cleaning solution in an inconspicuous area first.
Can I use this method on all types of grout?
While this method works well on most grout types, it’s essential to be cautious with epoxy grout, as it’s more resistant to cleaning solutions. Epoxy grout is typically found in newer homes and is less porous than other grout types. If you have epoxy grout, you might need a specialized cleaner or a gentler approach. Always check the manufacturer’s recommendations for your specific grout type.
Are there any safety precautions I should take?
Always wear gloves when using this cleaning method, especially if you have sensitive skin. The baking soda and vinegar solution is generally safe, but prolonged contact can irritate some skin types. When using vinegar, ensure adequate ventilation to avoid inhaling strong fumes. If you’re using bleach as a pre-treatment, always work in a well-ventilated area and follow the manufacturer’s safety instructions carefully. Never mix bleach with other cleaning products, as this can create dangerous fumes.
What if my grout is discolored?
Discolored grout often indicates a build-up of dirt and grime. This DIY method should help restore some of the grout’s original color. However, if the discoloration is severe or the grout is significantly damaged, you might need to consider professional grout cleaning or even grout replacement. For minor discoloration, consistent cleaning with this method should gradually improve the appearance of your grout over time. Remember, prevention is key; regular cleaning will help prevent significant discoloration.

Leave a Comment