
Grow Bok Choy Grow Bags: Ever dreamt of harvesting fresh, crisp bok choy right from your own backyard, even if you’re short on space? I know I have! For centuries, cultivating your own food has been a cornerstone of self-sufficiency and a connection to nature. From ancient Chinese gardens where bok choy thrived to modern urban balconies, the desire to nurture our own greens remains strong.
But let’s face it, traditional gardening can be intimidating. Soil preparation, weeding, pests – it can feel like a full-time job! That’s where the magic of grow bags comes in. They offer a simple, effective, and space-saving solution for anyone wanting to grow bok choy grow bags, regardless of their gardening experience.
In this article, I’m going to share my favorite DIY tricks and hacks for creating your own bok choy haven using grow bags. We’ll explore everything from choosing the right materials to optimizing your growing conditions, ensuring a bountiful harvest of this delicious and nutritious vegetable. Get ready to ditch the gardening overwhelm and embrace the joy of homegrown goodness!

Growing Bok Choy in Grow Bags: A Beginner’s Guide
Hey there, fellow gardening enthusiasts! I’m so excited to share my experience with growing bok choy in grow bags. It’s a fantastic way to enjoy fresh, homegrown greens, even if you’re short on space. Grow bags are super versatile and perfect for balconies, patios, or small gardens. Let’s dive in!
Why Choose Grow Bags for Bok Choy?
Before we get started, let’s talk about why grow bags are a great option for bok choy:
* Excellent Drainage: Grow bags are typically made from breathable fabric, which allows excess water to drain easily. This is crucial for bok choy, as it doesn’t like soggy soil.
* Air Pruning: The fabric allows air to reach the roots, which encourages air pruning. This means the roots stop growing when they reach the edge of the bag, promoting a denser, healthier root system.
* Portability: You can easily move your bok choy plants around to follow the sun or protect them from harsh weather.
* Space-Saving: Grow bags come in various sizes, making them ideal for small spaces.
* Cost-Effective: They’re generally more affordable than traditional pots.
Materials You’ll Need
Okay, let’s gather our supplies. Here’s what you’ll need to grow bok choy in grow bags:
* Grow Bags: I recommend using 5-gallon or 7-gallon grow bags for bok choy. This gives the plants enough room to grow without being too bulky.
* Bok Choy Seeds or Seedlings: You can start from seeds or buy seedlings from your local nursery. I’ve had success with both!
* Potting Mix: Use a high-quality potting mix that’s well-draining and rich in organic matter. Avoid using garden soil, as it can compact in grow bags.
* Slow-Release Fertilizer: This will provide your bok choy with a steady supply of nutrients.
* Watering Can or Hose: For watering your plants.
* Trowel or Small Shovel: For planting.
* Optional:
* Seed Starting Tray: If you’re starting from seeds.
* Heat Mat: To speed up germination.
* Plant Labels: To keep track of your bok choy varieties.
Step-by-Step Planting Guide
Alright, let’s get our hands dirty! Here’s how to plant bok choy in grow bags:
Section 1: Starting from Seeds (Optional)
If you’re starting from seeds, this section is for you. If you’re using seedlings, skip ahead to Section 2.
1. Prepare Your Seed Starting Tray: Fill your seed starting tray with a seed starting mix. Moisten the mix thoroughly.
2. Sow the Seeds: Sow the bok choy seeds about 1/4 inch deep in the seed starting mix. I usually plant 2-3 seeds per cell to increase my chances of germination.
3. Water Gently: Water the seeds gently using a spray bottle or watering can with a fine rose.
4. Provide Warmth: Place the seed starting tray in a warm location, ideally between 65-75°F (18-24°C). A heat mat can help speed up germination.
5. Keep Moist: Keep the seed starting mix consistently moist, but not soggy.
6. Wait for Germination: Bok choy seeds typically germinate in 5-10 days.
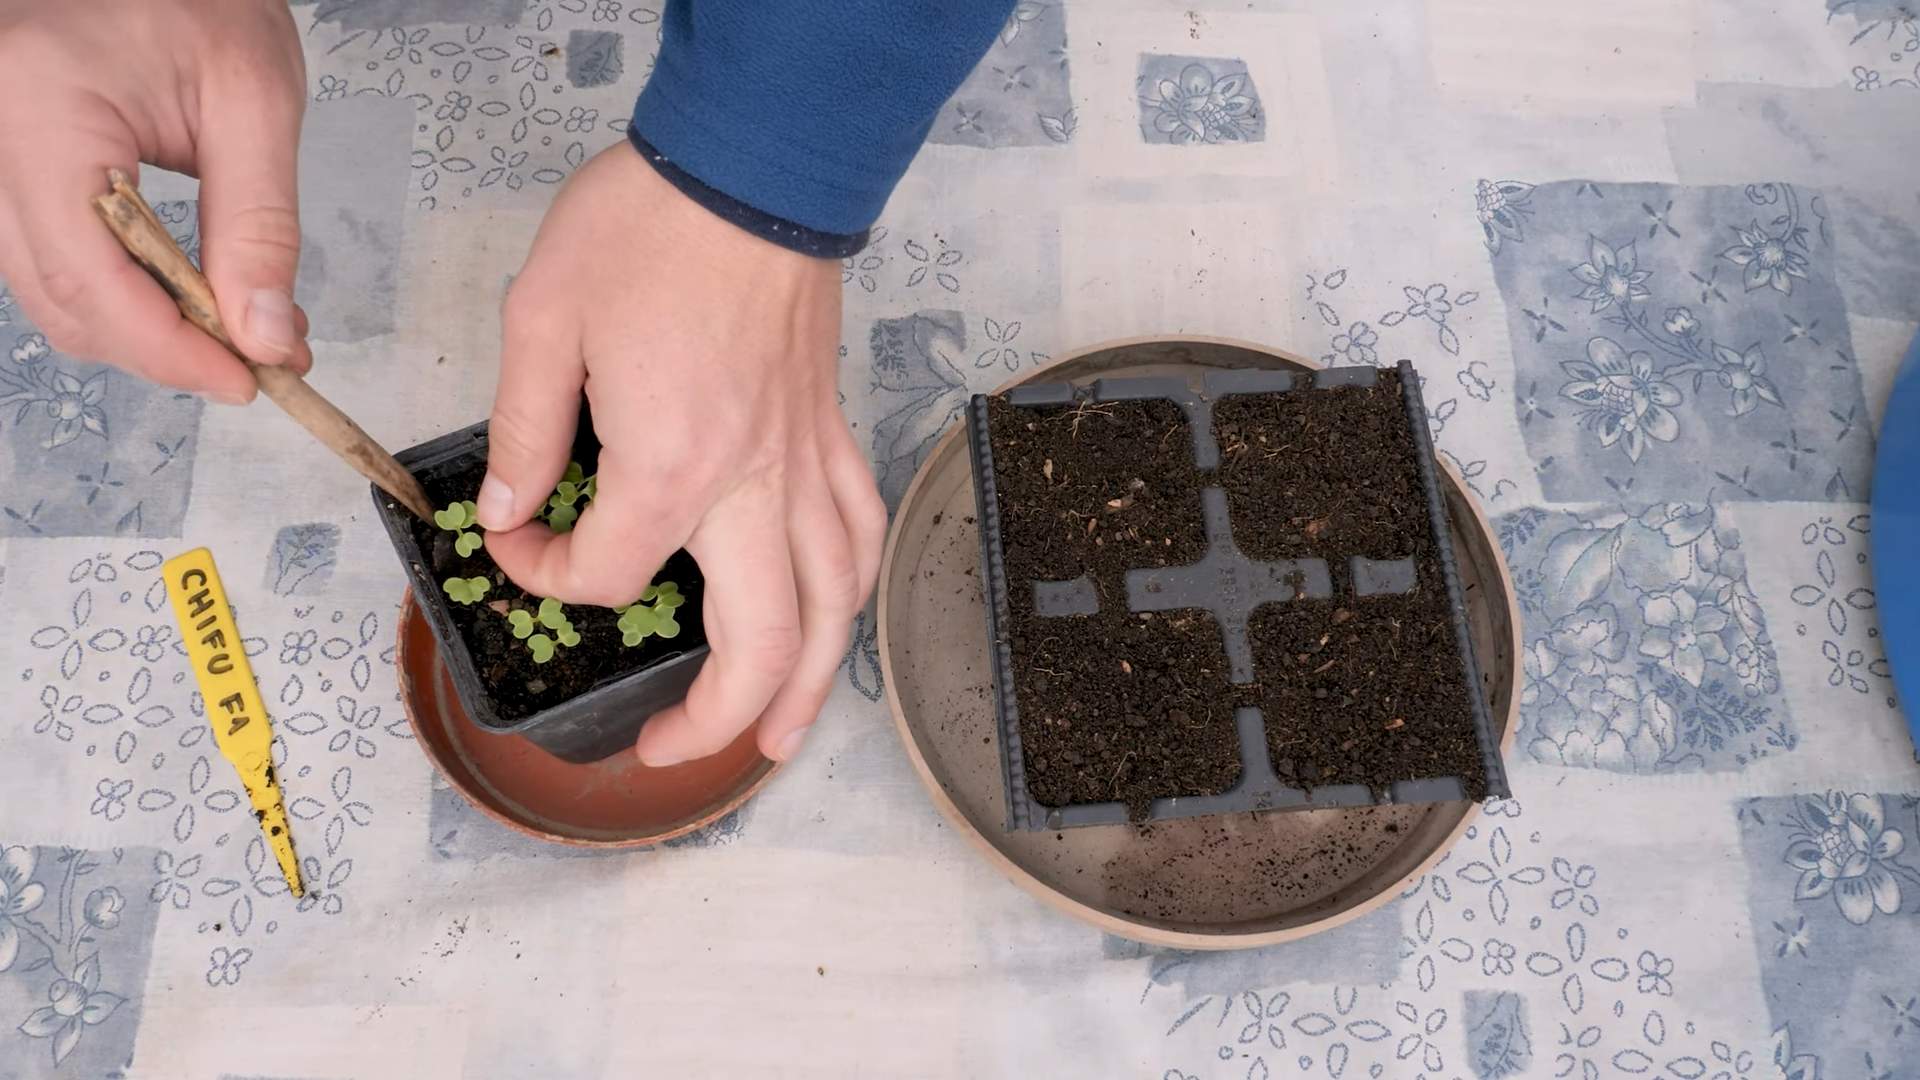
7. Thin Seedlings: Once the seedlings have their first true leaves (the second set of leaves), thin them to one seedling per cell. Choose the strongest seedling and snip off the others at the soil line.
8. Harden Off Seedlings: Before transplanting the seedlings to grow bags, you’ll need to harden them off. This process gradually acclimates the seedlings to outdoor conditions. Start by placing the seedlings outdoors in a sheltered location for an hour or two each day, gradually increasing the amount of time they spend outdoors over the course of a week.
Section 2: Planting in Grow Bags
Whether you’re using seedlings or transplanting from a seed starting tray, this section will guide you through the planting process.
1. Prepare the Grow Bag: Fill the grow bag with potting mix, leaving about 2-3 inches of space at the top.
2. Add Slow-Release Fertilizer: Mix in a slow-release fertilizer according to the package instructions. This will provide your bok choy with a steady supply of nutrients.
3. Create a Planting Hole: Dig a hole in the center of the grow bag that’s large enough to accommodate the root ball of your seedling or transplant.
4. Plant the Bok Choy: Gently remove the seedling or transplant from its container and place it in the planting hole. Make sure the top of the root ball is level with the surrounding soil.
5. Fill in with Soil: Fill in the planting hole with potting mix and gently firm the soil around the plant.
6. Water Thoroughly: Water the bok choy thoroughly after planting.
Caring for Your Bok Choy
Now that your bok choy is planted, let’s talk about how to care for it.
1. Sunlight: Bok choy needs at least 4-6 hours of sunlight per day. Place your grow bags in a sunny location.
2. Watering: Water your bok choy regularly, especially during hot, dry weather. The soil should be consistently moist, but not soggy. Check the soil moisture by sticking your finger into the soil. If the top inch feels dry, it’s time to water.
3. Fertilizing: In addition to the slow-release fertilizer you added at planting, you can also fertilize your bok choy with a liquid fertilizer every 2-3 weeks. Follow the package instructions for dilution rates.
4. Pest Control: Bok choy can be susceptible to pests like aphids, cabbage worms, and flea beetles. Inspect your plants regularly for signs of pests. If you find any, you can treat them with insecticidal soap or neem oil. I prefer organic pest control methods whenever possible.
5. Weed Control: Keep the grow bags free of weeds. Weeds can compete with your bok choy for nutrients and water.
6. Bolting: Bok choy can bolt (go to seed) in hot weather. To prevent bolting, try to provide some shade during the hottest part of the day. You can also choose bolt-resistant varieties.
Harvesting Your Bok Choy
The best part of growing your own bok choy is harvesting it!
1. Harvest Time: Bok choy is typically ready to harvest in 45-60 days from planting. You can harvest the entire plant at once or harvest individual leaves as needed.
2. Harvesting Individual Leaves: To harvest individual leaves, simply cut them off at the base of the plant. Start with the outer leaves and work your way inward.
3. Harvesting the Entire Plant: To harvest the entire plant, cut it off at the base with a sharp knife.
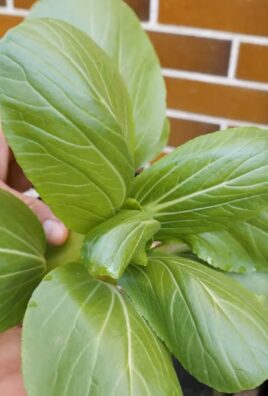
4. Enjoy Your Harvest: Bok choy is delicious in stir-fries, soups, salads, and more!
Troubleshooting
Here are a few common problems you might encounter when growing bok choy and how to fix them:
* Yellowing Leaves: This could be a sign of overwatering, underwatering, or nutrient deficiency. Check the soil moisture and adjust your watering accordingly. If the soil is consistently moist, you may be overwatering. If the soil is dry, you may be underwatering. You can also try fertilizing your bok choy with a liquid fertilizer.
* Holes in Leaves: This is likely caused by pests like cabbage worms or flea beetles. Inspect your plants for pests and treat them with insecticidal soap or neem oil.
* Bolting: As mentioned earlier, bolting can occur in hot weather. Provide some shade during the hottest part of the day or choose bolt-resistant varieties.
* Slow Growth: This could be due to insufficient sunlight, poor soil, or lack of nutrients. Make sure your bok choy is getting enough sunlight and that the soil is well-draining and rich in organic matter. You can also fertilize your bok choy with a liquid fertilizer.
Choosing the Right Bok Choy Variety
There are several varieties of bok choy to choose from, each with its own unique characteristics. Here are a few popular options:
* Shanghai Green: This variety has light green stems and leaves and a mild flavor.
* Mei Qing Choi: This variety has dark green leaves and a slightly stronger flavor. It’s also known for its bolt resistance.
* Joi Choi: This variety is
Conclusion
So, there you have it! Growing your own bok choy in grow bags isn’t just a gardening trend; it’s a game-changer for anyone who loves fresh, flavorful greens and wants to maximize their space. We’ve walked you through the simple steps, from selecting the right grow bags and soil to nurturing your bok choy plants to a bountiful harvest. The beauty of this method lies in its accessibility. Whether you have a sprawling backyard, a small balcony, or even just a sunny windowsill, you can enjoy the satisfaction of harvesting your own crisp, delicious bok choy.
But why is this DIY trick a must-try? Beyond the convenience and space-saving benefits, growing your own bok choy allows you to control the entire process, ensuring that your greens are free from harmful pesticides and herbicides. You’ll be amazed at the difference in taste and texture compared to store-bought varieties. The freshness is unparalleled, and the sense of accomplishment you’ll feel as you harvest your own vegetables is truly rewarding.
Don’t be afraid to experiment! Try different varieties of bok choy, such as baby bok choy or Shanghai bok choy, to discover your favorites. You can also companion plant your bok choy with other herbs and vegetables that thrive in similar conditions, such as radishes, carrots, or lettuce. Consider adding a layer of mulch around your plants to help retain moisture and suppress weeds. For those in hotter climates, providing some afternoon shade can prevent bolting and ensure a longer harvest period.
And speaking of harvest, remember to harvest your bok choy when the leaves are young and tender for the best flavor. You can harvest individual leaves as needed or harvest the entire head at once. Either way, you’ll be rewarded with a delicious and nutritious addition to your meals.
We are confident that you’ll find this method of growing bok choy incredibly rewarding. It’s a simple, effective, and sustainable way to enjoy fresh, healthy greens right at your fingertips. So, grab your grow bags, gather your supplies, and get ready to embark on your bok choy growing adventure!
We encourage you to try this DIY trick and share your experience with us! Let us know how your bok choy grows, what challenges you faced, and what tips you discovered along the way. Share your photos and stories in the comments below – we can’t wait to see your thriving bok choy gardens! Let’s cultivate a community of bok choy enthusiasts and inspire others to embrace the joys of homegrown vegetables. Remember, even the smallest space can yield a surprising harvest with the right techniques and a little bit of love. Happy growing!
Frequently Asked Questions (FAQ)
What size grow bag is best for growing bok choy?
The ideal size grow bag for bok choy is typically between 5 and 10 gallons. A 5-gallon bag is sufficient for a single plant, while a 10-gallon bag can accommodate two or three plants, depending on the variety. The depth of the bag is also important; ensure it’s at least 10-12 inches deep to allow for adequate root development. Using a grow bag that is too small can restrict root growth and lead to stunted plants, while a bag that is too large may retain too much moisture, potentially leading to root rot. Consider the mature size of the bok choy variety you’re growing when selecting your grow bag size.
What type of soil should I use in my grow bags for bok choy?
Bok choy thrives in well-draining, nutrient-rich soil. A good potting mix specifically formulated for vegetables is an excellent choice. You can also create your own mix by combining equal parts of compost, peat moss (or coconut coir), and perlite or vermiculite. Compost provides essential nutrients, peat moss or coconut coir helps retain moisture, and perlite or vermiculite improves drainage. Avoid using garden soil directly in your grow bags, as it can be too heavy and compact, hindering root growth. Amending your soil with slow-release fertilizer or organic amendments like bone meal or blood meal can further enhance nutrient availability.
How often should I water my bok choy in grow bags?
Watering frequency depends on several factors, including the weather, the size of your grow bag, and the type of soil you’re using. Generally, you should water your bok choy when the top inch of soil feels dry to the touch. During hot, dry weather, you may need to water daily, while during cooler, wetter periods, you may only need to water every few days. Ensure that the water drains freely from the bottom of the grow bag to prevent waterlogging. Overwatering can lead to root rot, while underwatering can cause the leaves to wilt and stunt growth. A good rule of thumb is to water deeply and less frequently, rather than shallowly and more often.
How much sunlight does bok choy need when grown in grow bags?
Bok choy prefers partial shade to full sun, requiring at least 4-6 hours of sunlight per day. In hotter climates, providing some afternoon shade can prevent the leaves from scorching and bolting (premature flowering). If you’re growing bok choy indoors, place your grow bags near a sunny window or use grow lights to supplement natural light. Insufficient sunlight can result in leggy, weak plants with poor leaf development. Monitor your plants closely and adjust their position as needed to ensure they receive adequate sunlight.
How do I fertilize bok choy grown in grow bags?
Bok choy is a heavy feeder and benefits from regular fertilization. Start by incorporating a slow-release fertilizer into your potting mix at planting time. Throughout the growing season, supplement with a liquid fertilizer every 2-3 weeks. Choose a fertilizer that is high in nitrogen, which promotes leafy growth. You can also use organic fertilizers such as fish emulsion or compost tea. Avoid over-fertilizing, as this can lead to excessive leaf growth and a bitter taste. Follow the instructions on the fertilizer packaging carefully.
What are some common pests and diseases that affect bok choy, and how can I prevent them?
Common pests that affect bok choy include aphids, cabbage worms, and flea beetles. Diseases include downy mildew and clubroot. To prevent pest and disease problems, start with healthy seedlings and well-draining soil. Inspect your plants regularly for signs of pests or diseases and take action promptly. You can use insecticidal soap or neem oil to control aphids and cabbage worms. Floating row covers can also help protect your plants from pests. To prevent downy mildew, ensure good air circulation and avoid overhead watering. If you suspect clubroot, remove and destroy infected plants and avoid planting brassicas in the same area for several years.
Can I grow bok choy in grow bags during the winter?
Yes, you can grow bok choy in grow bags during the winter, especially in milder climates. Bok choy is a cool-season crop that can tolerate light frosts. In colder climates, you may need to provide some protection from freezing temperatures, such as moving your grow bags indoors or covering them with frost blankets. Choose a variety that is known for its cold hardiness. Even with protection, growth may be slower during the winter months.
How do I harvest bok choy from grow bags?
You can harvest bok choy from grow bags in two ways: by harvesting individual leaves as needed or by harvesting the entire head at once. To harvest individual leaves, simply cut the outer leaves near the base of the plant, leaving the inner leaves to continue growing. To harvest the entire head, cut the plant at the base, just above the soil line. Harvest bok choy when the leaves are young and tender for the best flavor. Overmature leaves can become tough and bitter.
Can I reuse grow bags for growing bok choy?
Yes, you can reuse grow bags for growing bok choy, but it’s important to clean and sanitize them first. Remove any remaining soil and debris from the bag. Wash the bag thoroughly with soap and water, and then disinfect it with a solution of bleach and water (1 part bleach to 9 parts water). Rinse the bag thoroughly with clean water and allow it to dry completely before reusing it. This will help prevent the spread of diseases and pests. You may also want to amend the soil with fresh compost or fertilizer before replanting.
How does growing bok choy in grow bags compare to growing it in the ground?
Growing bok choy in grow bags offers several advantages over growing it in the ground. Grow bags provide better drainage, which is essential for preventing root rot. They also allow you to control the soil composition and nutrient levels more easily. Grow bags are portable, so you can move your plants to a location with optimal sunlight or protection from the elements. Additionally, grow bags can be used in areas with poor soil quality or limited space. However, growing bok choy in the ground may require less frequent watering, as the soil retains moisture better. Ultimately, the best method depends on your individual circumstances and preferences.


Leave a Comment