
Cape Gooseberry Growing Guide: Unlock the Secrets to Bountiful Harvests!
Have you ever stumbled upon those intriguing little golden berries, nestled in their papery husks, and wondered how to grow them yourself? Well, you’re in the right place! This Cape Gooseberry Growing Guide is your passport to cultivating these delightful fruits right in your own backyard. Forget expensive grocery store prices; imagine plucking fresh, sun-ripened cape gooseberries straight from your garden – the taste is simply unmatched!
Cape gooseberries, also known as golden berries or Inca berries, boast a rich history, with origins tracing back to the Andes Mountains of South America. For centuries, indigenous cultures have cherished them for their unique flavor and medicinal properties. Now, you can join this tradition and experience the joy of growing your own.
But why should you bother with this DIY project? Because growing cape gooseberries is surprisingly easy and incredibly rewarding! They’re relatively low-maintenance, pest-resistant, and thrive in a variety of climates. Plus, these little powerhouses are packed with vitamins and antioxidants, making them a healthy and delicious addition to your diet. This Cape Gooseberry Growing Guide will provide you with the knowledge and simple tricks you need to succeed, even if you’re a complete beginner. I’m excited to share my tips and tricks with you, so let’s get started and transform your garden into a golden berry paradise!
Growing Cape Gooseberries: A DIY Guide to Golden Goodness
Alright, fellow gardening enthusiasts! Today, we’re diving into the delightful world of Cape Gooseberries, also known as Golden Berries, Physalis peruviana, or simply, those cute little fruits wrapped in papery lanterns. I’m going to walk you through everything you need to know to grow these tangy treats right in your own backyard. Trust me, it’s easier than you think, and the reward is well worth the effort!
Understanding Cape Gooseberries
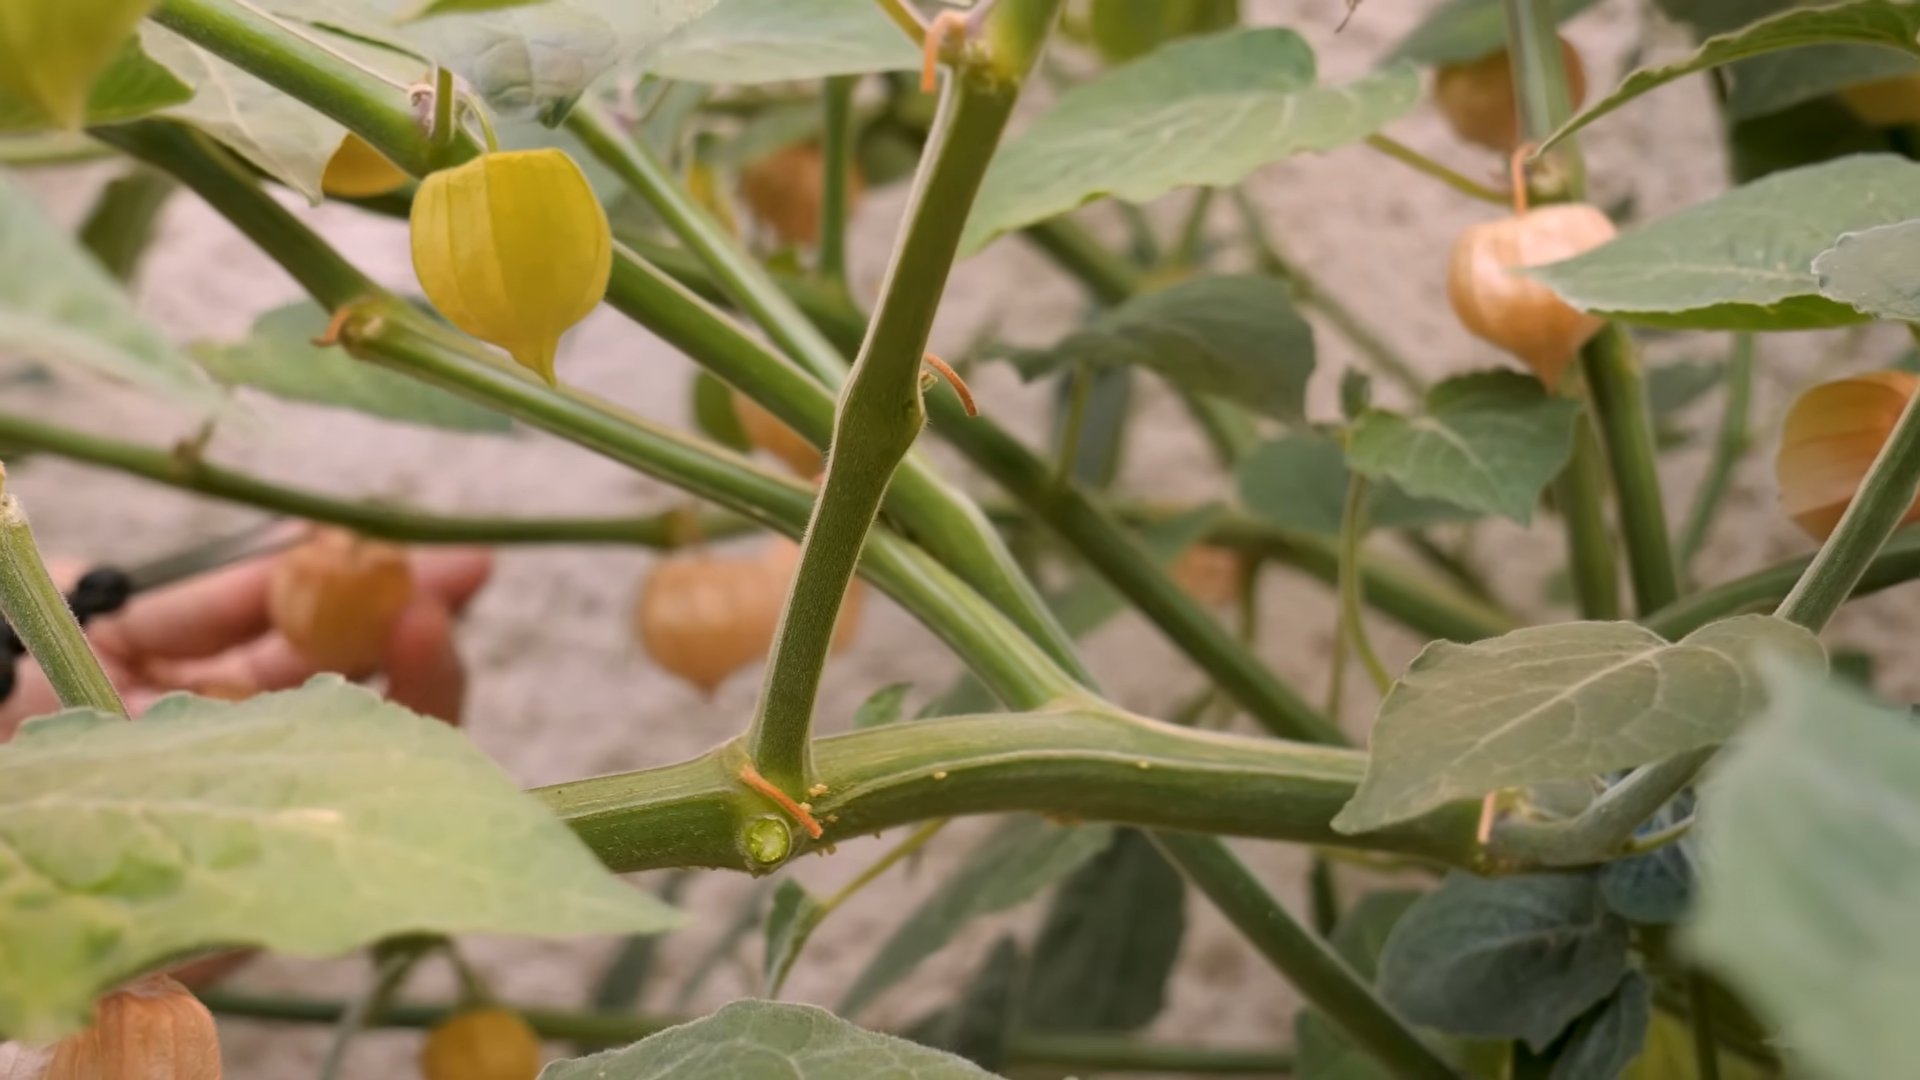
Before we get our hands dirty, let’s talk a bit about what we’re dealing with. Cape Gooseberries are not actually gooseberries! They’re related to tomatoes, peppers, and eggplants – all members of the nightshade family. They’re native to South America, but they’ve naturalized in many parts of the world. The fruit is small, round, and orange-yellow when ripe, encased in a papery husk that turns brown as it matures. They have a unique sweet-tart flavor that’s perfect for snacking, jams, desserts, or even savory dishes.
Getting Started: Seeds vs. Seedlings
You have two main options for starting your Cape Gooseberry adventure: seeds or seedlings.
* Seeds: Starting from seed is the more economical option, but it requires a bit more patience and effort.
* Seedlings: Buying seedlings from a nursery gives you a head start and is generally easier, especially for beginners.
I personally prefer starting from seed because I love watching the whole process from tiny sprout to fruiting plant. But if you’re short on time or just want a quicker harvest, seedlings are the way to go.
Starting from Seed: A Step-by-Step Guide
If you’re like me and want to start from seed, here’s how:
1. Timing is Key: Start your seeds indoors 6-8 weeks before the last expected frost in your area. This gives them plenty of time to germinate and grow into strong seedlings before you transplant them outdoors.
2. Gather Your Supplies: You’ll need:
* Cape Gooseberry seeds (purchase from a reputable source)
* Seed starting trays or small pots
* Seed starting mix (a light, well-draining mix is essential)
* Spray bottle with water
* Heat mat (optional, but helpful for germination)
* Grow light (optional, but recommended for strong seedlings)
3. Sow the Seeds:
* Moisten the seed starting mix thoroughly.
* Fill your seed starting trays or pots with the moistened mix.
* Sow the seeds about ¼ inch deep, placing 2-3 seeds per cell or pot.
* Gently cover the seeds with more seed starting mix.
* Lightly mist the surface with water.
4. Create the Ideal Germination Environment:
* Cover the seed starting trays or pots with a clear plastic dome or plastic wrap to create a humid environment.
* Place the trays or pots on a heat mat, if using. The ideal germination temperature is around 70-75°F (21-24°C).
* Place the trays or pots under a grow light, if using. This will provide consistent light and prevent leggy seedlings.
5. Monitor and Maintain:
* Check the moisture level of the seed starting mix daily. Keep it consistently moist, but not soggy. Mist with water as needed.
* Once the seeds germinate (usually within 1-3 weeks), remove the plastic dome or plastic wrap.
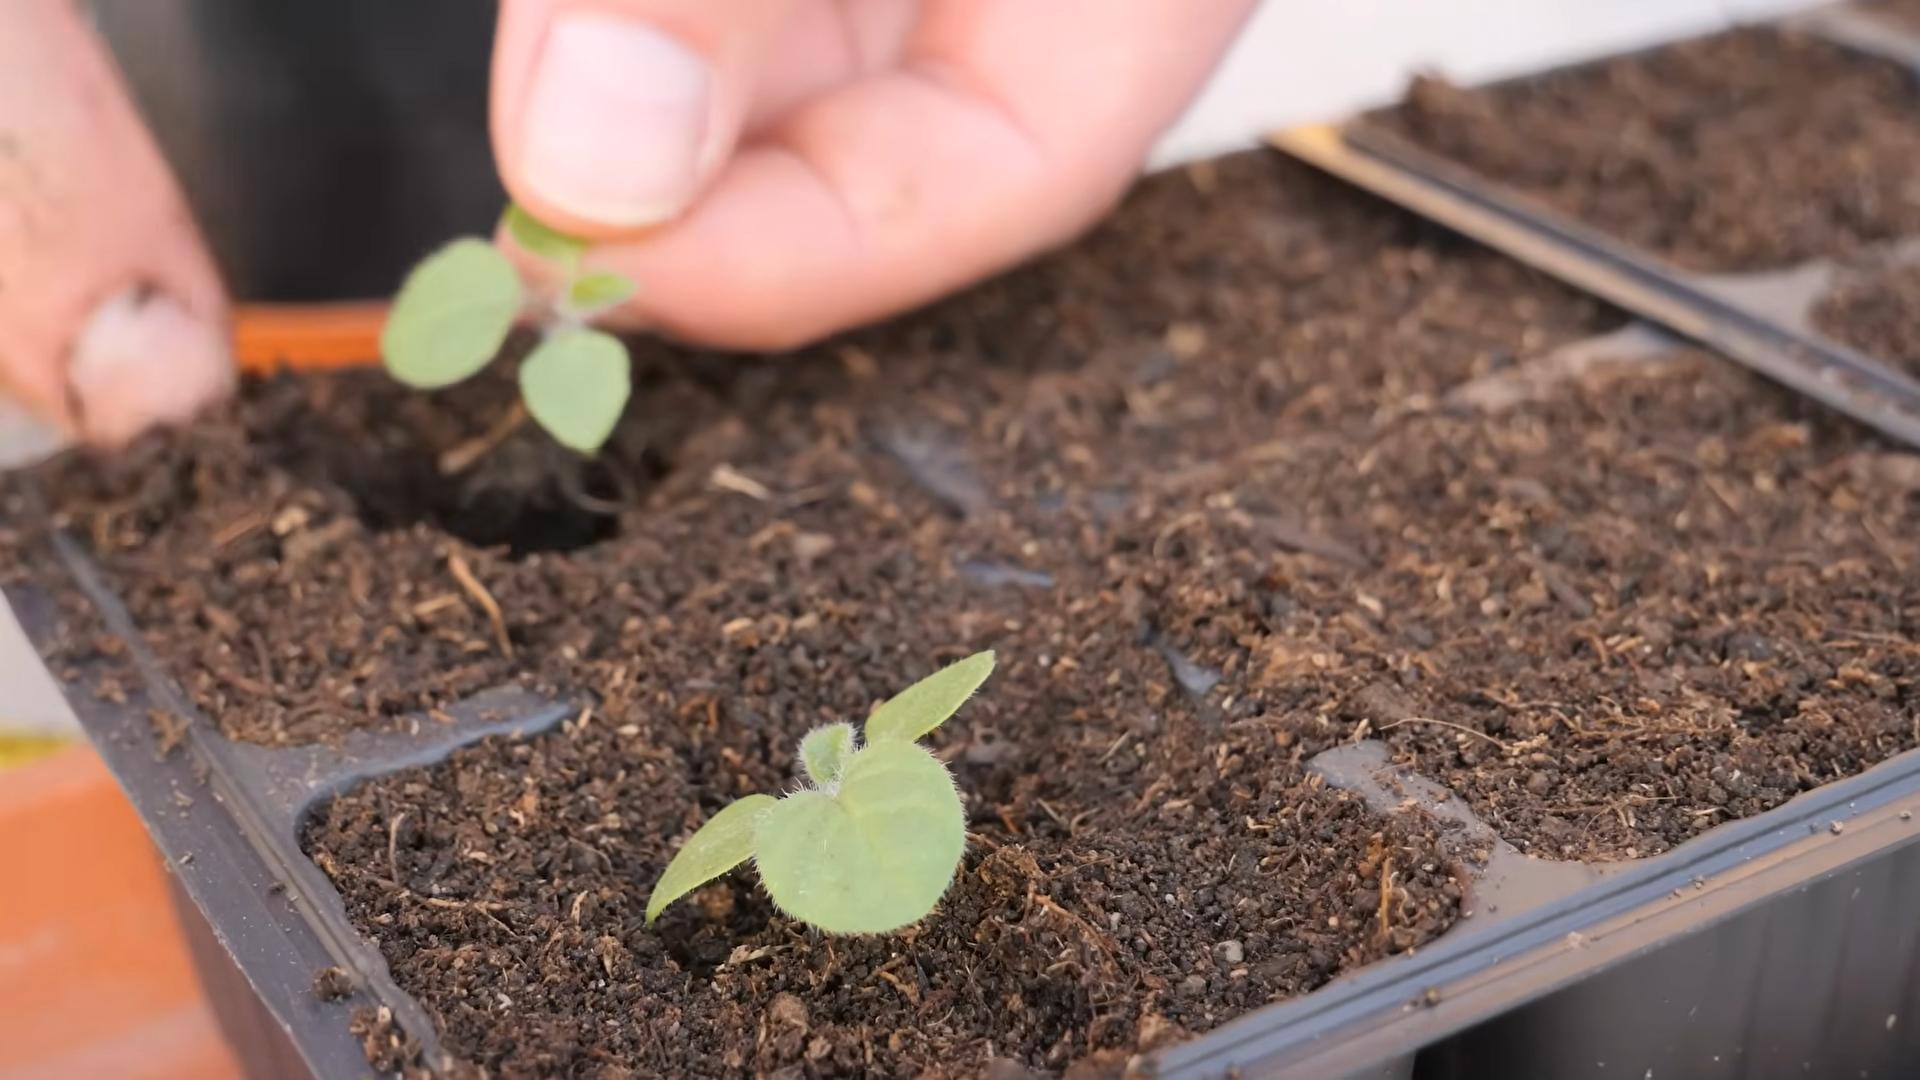
* If you sowed multiple seeds per cell or pot, thin them out to one seedling per cell or pot once they have their first true leaves (the leaves that appear after the initial seed leaves).
6. Harden Off the Seedlings:
* Before transplanting your seedlings outdoors, you need to “harden them off.” This gradually acclimates them to the outdoor environment.
* Start by placing the seedlings outdoors in a sheltered location for a few hours each day, gradually increasing the amount of time they spend outdoors over the course of a week or two.
* Protect them from direct sunlight and strong winds during this process.
Transplanting Seedlings: Giving Them a Home
Whether you started from seed or purchased seedlings, transplanting is a crucial step.
1. Choose the Right Location: Cape Gooseberries need plenty of sunlight – at least 6-8 hours per day. They also prefer well-drained soil that is rich in organic matter.
2. Prepare the Soil:
* Amend the soil with compost or other organic matter to improve drainage and fertility.
* Cape Gooseberries prefer a slightly acidic soil pH of around 6.0-6.8. You can test your soil pH with a soil testing kit and amend it accordingly.
3. Transplant the Seedlings:
* Dig holes that are slightly larger than the root balls of the seedlings.
* Gently remove the seedlings from their pots or trays.
* Place the seedlings in the holes, making sure the top of the root ball is level with the surrounding soil.
* Backfill the holes with soil and gently firm the soil around the seedlings.
* Water the seedlings thoroughly.
4. Space Them Properly: Space your Cape Gooseberry plants about 2-3 feet apart to allow them plenty of room to grow. They can get quite bushy!
Caring for Your Cape Gooseberry Plants: The Nitty-Gritty
Now that your plants are in the ground, it’s time to provide them with the care they need to thrive.
* Watering: Water your Cape Gooseberry plants regularly, especially during dry periods. They need consistent moisture, but avoid overwatering, which can lead to root rot. A good rule of thumb is to water deeply when the top inch of soil feels dry.
* Fertilizing: Feed your Cape Gooseberry plants with a balanced fertilizer every few weeks during the growing season. Look for a fertilizer that is specifically formulated for tomatoes or vegetables. Avoid over-fertilizing, as this can lead to excessive foliage growth at the expense of fruit production.
* Mulching: Apply a layer of mulch around your Cape Gooseberry plants to help retain moisture, suppress weeds, and regulate soil temperature. Organic mulches like straw, wood chips, or shredded leaves are ideal.
* Pruning: Cape Gooseberries don’t require a lot of pruning, but you can prune them lightly to remove any dead, damaged, or crossing branches. You can also pinch back the tips of the branches to encourage bushier growth.
* Support: As your Cape Gooseberry plants grow, they may need some support to prevent them from sprawling on the ground. You can use stakes, cages, or trellises to provide support.
* Pest and Disease Control: Cape Gooseberries are generally resistant to pests and diseases, but they can be susceptible to aphids, whiteflies, and fungal diseases like powdery mildew. Inspect your plants regularly for signs of pests or diseases and take action promptly if you notice any problems. Use organic pest control methods whenever possible.
Harvesting Your Golden Bounty: The Sweet Reward
The best part of growing Cape Gooseberries is, of course, harvesting the delicious fruit!
1. Knowing When to Harvest: Cape Gooseberries are ready to harvest when the papery husks turn brown and dry and the fruit inside is a vibrant orange-yellow. The husks will often drop to the ground when the fruit is fully ripe.
2. Harvesting Technique: Simply pick the ripe fruits from the plant. You can also gently shake the plant to dislodge any ripe fruits that are ready to fall.
3. Storage: Cape Gooseberries can be stored in their husks at room temperature for several weeks. For longer storage, you can refrigerate them in their husks for up to a few months. You can also freeze them for even longer storage.
Troubleshooting: Common Problems and Solutions
Even with the best care, you might encounter some problems along the way. Here are a few common issues and how to address them:
* Lack of Fruit: If your Cape Gooseberry plants are not producing fruit, it could be due to a lack of sunlight, poor soil fertility, or over-fertilizing. Make sure your plants are getting enough sunlight, amend the soil with compost, and avoid over-fertilizing.
* Yellowing Leaves: Yellowing leaves can be a sign of nutrient deficiency, overwatering, or pest infestation. Check the soil moisture level, fertilize with a balanced fertilizer, and inspect your plants for pests.
* Powdery Mildew: Powdery mildew is a fungal disease that can cause a white, powdery coating on the leaves. Improve air circulation around your plants, avoid overhead watering, and treat with a fungicide if necessary.
Enjoying Your Harvest: Culinary Delights
Now that you have a bountiful harvest of Cape Gooseberries, it’s time to enjoy them!
Conclusion
So, there you have it – a comprehensive guide to unlocking the secrets of growing your own vibrant and delicious cape gooseberries! We’ve explored everything from seed starting to harvesting, and hopefully, you’re now feeling confident and ready to embark on this rewarding gardening adventure.
Why is this DIY approach a must-try? Because nothing beats the satisfaction of nurturing a plant from a tiny seed to a bountiful producer of sweet, tangy fruit. Store-bought cape gooseberries, if you can even find them, often lack the freshness and intense flavor of homegrown ones. Plus, you have complete control over the growing process, ensuring your plants are free from harmful pesticides and herbicides. You’re not just growing fruit; you’re cultivating a connection to nature and enjoying the fruits (literally!) of your labor.
Beyond the basic techniques, there’s plenty of room for experimentation and personalization. Consider these variations to tailor your cape gooseberry growing experience:
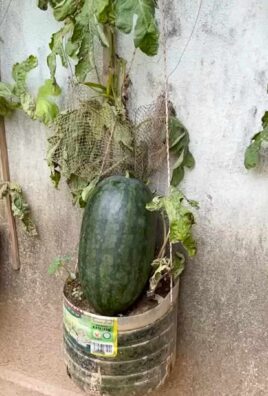
* Container Gardening: If you’re short on space, cape gooseberries thrive in containers. Choose a large pot (at least 10 gallons) with good drainage and use a high-quality potting mix. This is perfect for balconies, patios, or even indoor growing with sufficient sunlight or grow lights.
* Vertical Gardening: Train your cape gooseberry plants to grow up a trellis or support structure. This not only saves space but also improves air circulation and reduces the risk of fungal diseases.
* Companion Planting: Enhance your cape gooseberry patch by planting beneficial companions like basil, marigolds, or nasturtiums. These plants can deter pests, attract pollinators, and even improve the flavor of your fruit.
* Different Varieties: Explore different varieties of cape gooseberries. Some are sweeter, some are more tart, and some have unique flavor profiles. Experiment to find your favorite!
* Seed Saving: Once you’ve grown a successful crop, save the seeds from your best fruits to continue the cycle next year. This is a great way to preserve your favorite varieties and adapt them to your local climate.
Growing cape gooseberries is more than just a gardening project; it’s an opportunity to connect with nature, enjoy fresh, healthy food, and learn new skills. The unique flavor and versatility of these golden berries make them a delightful addition to any garden and kitchen. From snacking straight off the vine to using them in jams, pies, and savory dishes, the possibilities are endless.
We wholeheartedly encourage you to give this DIY trick a try. Don’t be intimidated if you’re a beginner gardener – cape gooseberries are relatively easy to grow, and the rewards are well worth the effort. Start small, be patient, and enjoy the process.
And most importantly, we want to hear about your experience! Share your tips, successes, and challenges in the comments below. Let’s create a community of cape gooseberry enthusiasts and learn from each other. Did you try a particular variety? Did you encounter any pests or diseases? What are your favorite ways to use your homegrown cape gooseberries? Your feedback will help other gardeners and inspire even more people to discover the joy of growing their own food. So, get your hands dirty, plant some seeds, and let the cape gooseberry adventure begin! Remember, the key to successful **cape gooseberry growing** lies in consistent care, attention to detail, and a little bit of patience. Happy gardening!
Frequently Asked Questions (FAQs)
Q: How long does it take for cape gooseberries to grow from seed to harvest?
A: Cape gooseberries typically take around 70-80 days from transplanting seedlings to harvesting ripe fruit. However, the total time from seed to harvest can be closer to 100-120 days, depending on factors like climate, variety, and growing conditions. Starting seeds indoors 6-8 weeks before the last expected frost can help shorten the overall growing season. Be patient, as the plants may take some time to establish themselves before they start producing fruit.
Q: What are the ideal growing conditions for cape gooseberries?
A: Cape gooseberries thrive in full sun (at least 6-8 hours of direct sunlight per day) and well-drained soil. They prefer slightly acidic to neutral soil pH (around 6.0-7.0). While they are relatively drought-tolerant once established, regular watering is important, especially during hot, dry periods. Protect young plants from strong winds and frost. A sheltered location can help ensure optimal growth and fruit production.
Q: How do I know when cape gooseberries are ripe?
A: Cape gooseberries are ripe when the papery husk surrounding the fruit turns from green to a light tan or brown color and the fruit inside is a golden-yellow or orange hue. The husk will also feel dry and papery. Ripe fruits will often drop from the plant, but you can also gently tug on the husk to see if the fruit is easily detached. Avoid picking fruits that are still green or have a green husk, as they will not be fully ripe and may taste sour.
Q: What are some common pests and diseases that affect cape gooseberries, and how can I prevent them?
A: Cape gooseberries are generally resistant to many pests and diseases, but they can be susceptible to aphids, whiteflies, spider mites, and fungal diseases like powdery mildew. To prevent these problems, ensure good air circulation around the plants, avoid overwatering, and inspect plants regularly for signs of infestation or disease. If you spot pests, you can try spraying them with insecticidal soap or neem oil. For fungal diseases, you can use a copper-based fungicide. Companion planting with beneficial herbs and flowers can also help deter pests and attract beneficial insects.
Q: Can I grow cape gooseberries in containers?
A: Yes, cape gooseberries are well-suited for container gardening. Choose a large pot (at least 10 gallons) with good drainage and use a high-quality potting mix. Ensure the container receives plenty of sunlight and water regularly. Container-grown plants may need more frequent fertilization than those grown in the ground. Consider using a slow-release fertilizer or liquid fertilizer every few weeks.
Q: How do I prune cape gooseberry plants?
A: Cape gooseberries generally don’t require heavy pruning, but you can prune them to improve air circulation, remove dead or diseased branches, and encourage bushier growth. Prune in late winter or early spring before new growth begins. You can also pinch back the tips of young plants to encourage branching. Avoid pruning too heavily, as this can reduce fruit production.
Q: How do I store cape gooseberries?
A: Cape gooseberries can be stored in their husks in the refrigerator for several weeks. For longer storage, you can freeze them. Simply spread the fruits out on a baking sheet and freeze them until solid, then transfer them to a freezer bag or container. You can also make jam, preserves, or chutney to preserve your harvest.
Q: Are cape gooseberries the same as ground cherries?
A: Yes, cape gooseberries are often referred to as ground cherries, although there are some subtle differences between different varieties. Both belong to the *Physalis* genus and produce small, golden-yellow fruits enclosed in a papery husk. The terms are often used interchangeably.
Q: Can I eat the husk of the cape gooseberry?
A: No, the husk of the cape gooseberry is not edible. It is papery and bitter and should be removed before eating the fruit.
Q: Are cape gooseberries safe for pets?
A: While the ripe fruit of the cape gooseberry is generally considered safe for humans, the plant itself, including the leaves and unripe fruit, contains solanine, which can be toxic to pets if ingested in large quantities. It’s best to keep your pets away from cape gooseberry plants to prevent any potential health problems. If you suspect your pet has ingested any part of the plant, contact your veterinarian immediately.

Leave a Comment