
Growing Sage Indoors can seem daunting, but trust me, it’s easier than you think! Imagine having fresh, fragrant sage readily available right in your kitchen, ready to elevate your culinary creations. No more last-minute trips to the grocery store or settling for dried herbs that lack that vibrant flavor.
Sage, with its earthy aroma and slightly peppery taste, has been cherished for centuries. Ancient Romans revered it for its medicinal properties, believing it promoted longevity and wisdom. In medieval times, it was a staple in herb gardens, used for everything from flavoring food to warding off evil spirits. Today, we appreciate sage for its culinary versatility and its ability to add depth to dishes like roasted meats, stuffings, and even teas.
But why bother growing sage indoors when you can buy it at the store? Well, for starters, the flavor of homegrown sage is simply unmatched. Plus, it’s incredibly satisfying to nurture a plant from seed (or cutting!) to harvest. And let’s be honest, who doesn’t love a little bit of greenery to brighten up their home? This DIY guide will provide you with simple, effective tricks and hacks to successfully cultivate this wonderful herb inside, regardless of your gardening experience. I’m excited to share my tips and tricks to help you enjoy the benefits of fresh sage year-round!
Growing Sage Indoors: A Comprehensive DIY Guide
Hey there, fellow plant enthusiasts! I’m so excited to share my experience with growing sage indoors. It’s easier than you might think, and having fresh sage on hand for cooking is a total game-changer. Plus, the aroma is just divine! Let’s dive into how you can cultivate your own little sage haven indoors.
Choosing the Right Sage Variety
First things first, let’s talk about sage varieties. While all sage is wonderful, some are better suited for indoor growing than others.
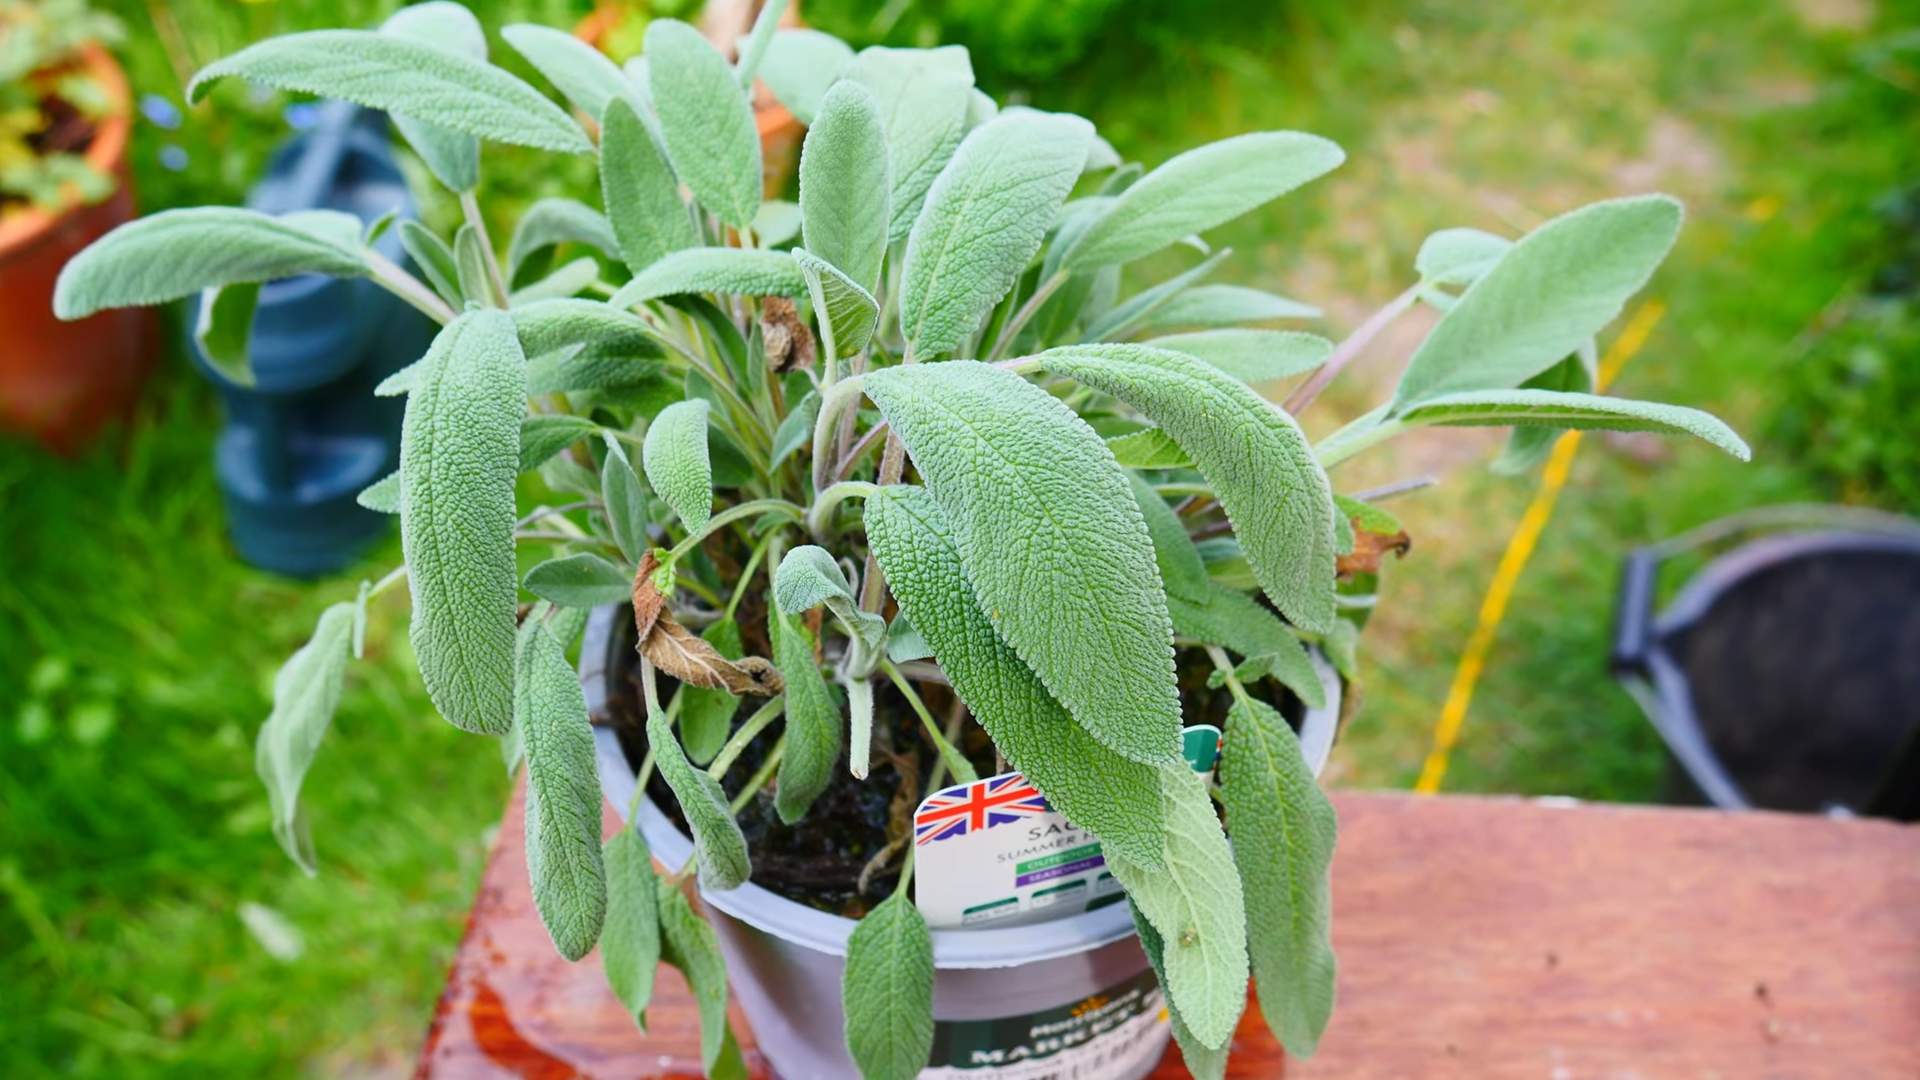
* Common Sage (Salvia officinalis): This is the classic culinary sage, and it thrives indoors. It’s relatively compact and easy to manage.
* Dwarf Sage (Salvia officinalis ‘Nana’): As the name suggests, this variety is even smaller, making it perfect for smaller spaces or windowsill gardens.
* Golden Sage (Salvia officinalis ‘Aurea’): This variety adds a splash of color with its variegated leaves. It’s just as easy to grow as common sage.
* Purple Sage (Salvia officinalis ‘Purpurascens’): Another visually appealing option, purple sage offers beautiful foliage and the same great flavor.
I personally prefer common sage because it’s readily available and provides a generous harvest. But feel free to experiment and find your favorite!
Essential Supplies You’ll Need
Before we get started, let’s gather all the necessary supplies. Trust me, having everything ready beforehand will make the process much smoother.
* Sage Seeds or a Sage Plant: You can start from seeds or purchase a small sage plant from a local nursery. Starting from seeds takes longer, but it’s more rewarding in my opinion.
* Pot with Drainage Holes: Choose a pot that’s at least 6 inches in diameter. Drainage is crucial to prevent root rot. Terracotta pots are great because they allow the soil to breathe.
* Well-Draining Potting Mix: Regular garden soil is too heavy for indoor containers. Opt for a potting mix specifically formulated for herbs or vegetables.
* Grow Lights (Optional but Recommended): Sage needs plenty of sunlight. If you don’t have a sunny windowsill, grow lights will be your best friend.
* Watering Can or Spray Bottle: For gentle watering.
* Fertilizer (Optional): A balanced liquid fertilizer can help boost growth, but it’s not essential.
* Small Shovel or Trowel: For planting.
* Pruning Shears or Scissors: For harvesting and maintaining your sage plant.
Planting Your Sage: Step-by-Step Guide
Okay, let’s get our hands dirty! Here’s how to plant your sage, whether you’re starting from seeds or a transplant.
Starting from Seeds:
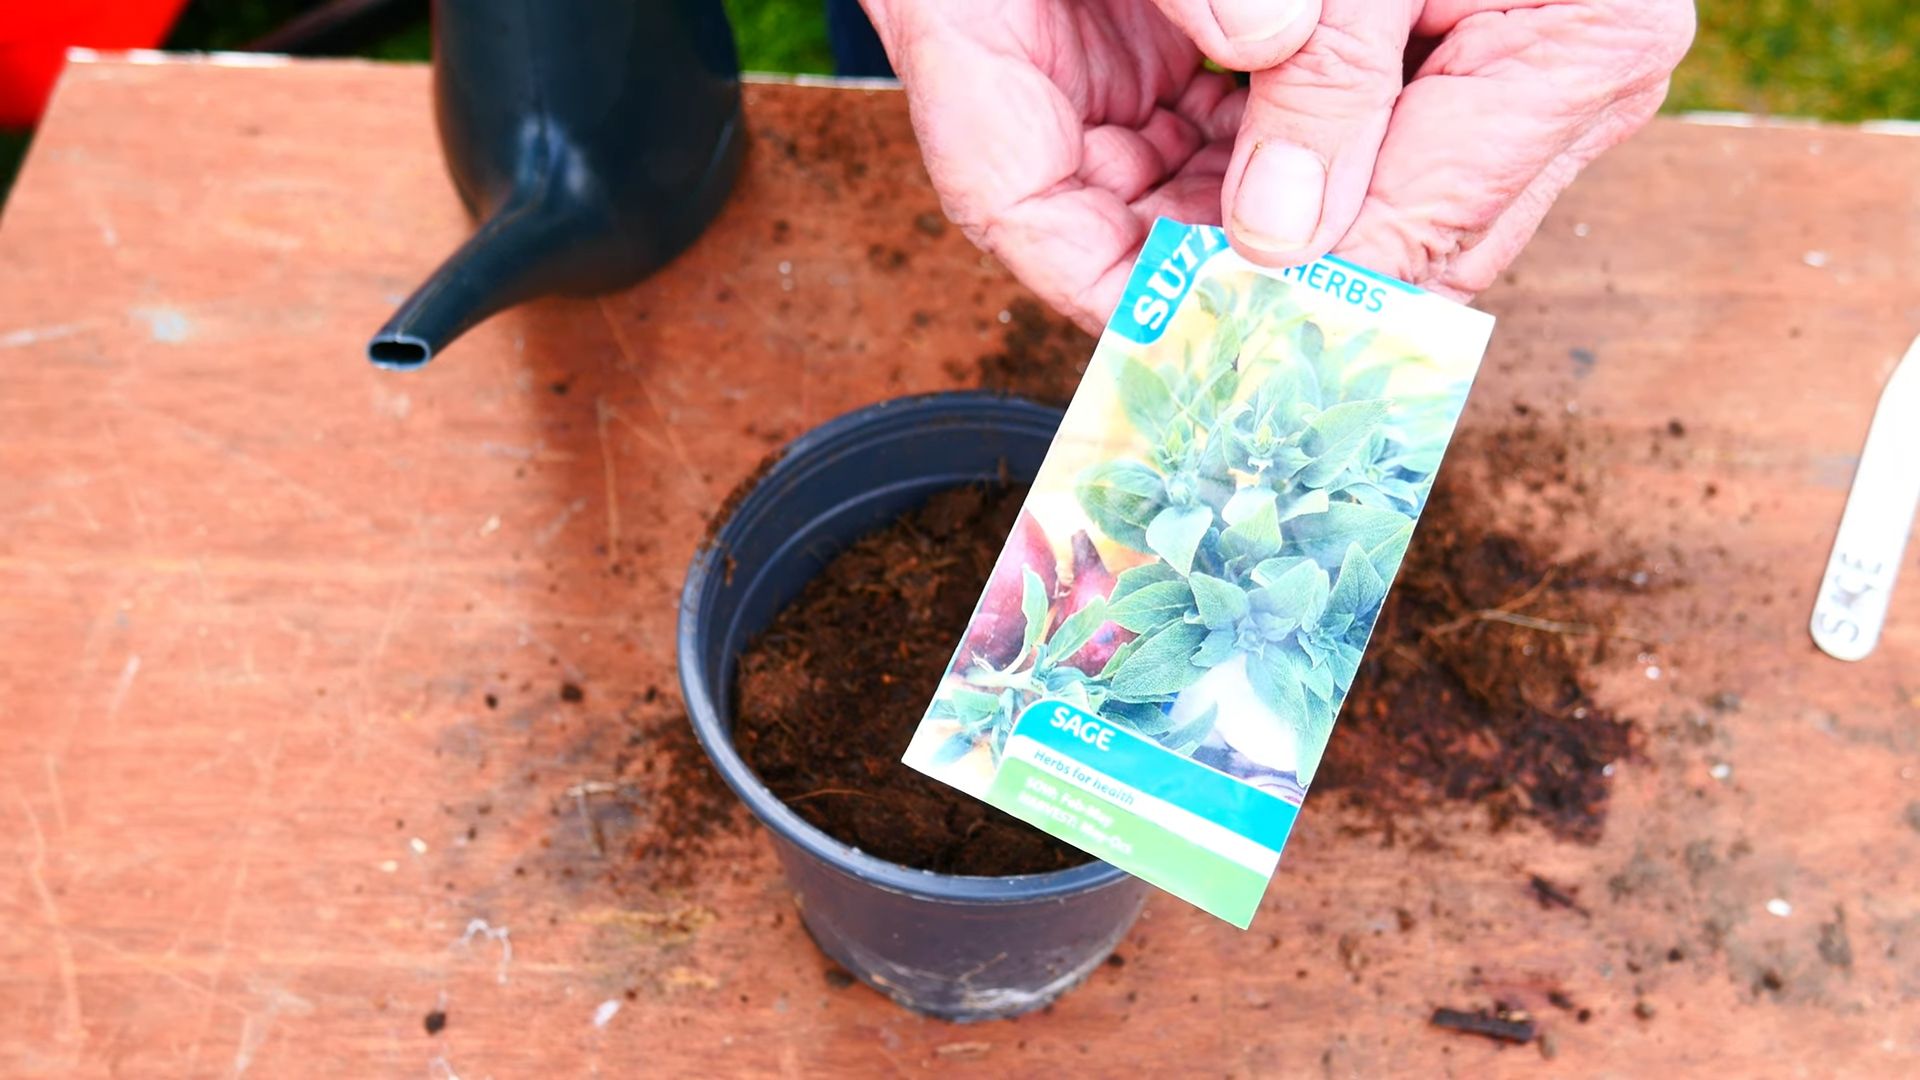
1. Prepare the Pot: Fill your pot with well-draining potting mix, leaving about an inch of space at the top.
2. Sow the Seeds: Sprinkle the sage seeds evenly over the surface of the soil. They are tiny, so don’t overdo it.
3. Cover Lightly: Gently cover the seeds with a very thin layer of potting mix. Sage seeds need light to germinate.
4. Water Gently: Use a spray bottle to mist the soil thoroughly. You want it to be moist but not soggy.
5. Provide Warmth and Light: Place the pot in a warm location with bright, indirect light. If you’re using grow lights, position them a few inches above the pot.
6. Maintain Moisture: Keep the soil consistently moist by misting it regularly. Germination usually takes 10-21 days.
7. Thin Seedlings (If Necessary): Once the seedlings emerge and have a few sets of true leaves, thin them out, leaving only the strongest plants. Space them a few inches apart.
Transplanting a Sage Plant:
1. Prepare the Pot: Fill your pot with well-draining potting mix, leaving about an inch of space at the top.
2. Remove the Sage Plant from its Container: Gently squeeze the sides of the container to loosen the plant. Carefully remove it, trying not to disturb the roots too much.
3. Loosen the Root Ball: If the roots are tightly bound, gently loosen them with your fingers.
4. Place the Plant in the Pot: Position the sage plant in the center of the pot, making sure the top of the root ball is level with the soil surface.
5. Fill with Soil: Fill in the remaining space around the plant with potting mix.
6. Water Thoroughly: Water the plant thoroughly until water drains out of the bottom of the pot.
7. Place in a Sunny Location: Put your newly transplanted sage plant in a sunny location or under grow lights.
Caring for Your Indoor Sage Plant
Now that your sage is planted, it’s time to learn how to keep it happy and healthy. Here’s what you need to know about watering, lighting, fertilizing, and pruning.
Watering:
Sage prefers to dry out slightly between waterings. Overwatering is a common mistake that can lead to root rot.
* Check the Soil: Before watering, stick your finger into the soil. If the top inch feels dry, it’s time to water.
* Water Deeply: When you water, water thoroughly until water drains out of the bottom of the pot.
* Avoid Overwatering: Don’t let the pot sit in standing water. Empty the saucer underneath the pot after watering.
* Adjust Watering Frequency: The frequency of watering will depend on the temperature, humidity, and size of your pot. In general, you’ll need to water more often during the growing season (spring and summer) and less often during the dormant season (fall and winter).
Lighting:
Sage needs at least 6-8 hours of sunlight per day to thrive.
* Sunny Windowsill: A south-facing windowsill is ideal.
* Grow Lights: If you don’t have enough natural light, use grow lights. Position them a few inches above the plant and keep them on for 12-16 hours per day.
* Rotate the Plant: Rotate the plant regularly to ensure even growth on all sides.
Fertilizing:
Sage doesn’t need a lot of fertilizer, but a light feeding can help boost growth.
* Use a Balanced Fertilizer: Choose a balanced liquid fertilizer (e.g., 10-10-10) diluted to half strength.
* Fertilize Sparingly: Fertilize every 4-6 weeks during the growing season.
* Avoid Over-Fertilizing: Over-fertilizing can lead to leggy growth and a loss of flavor.
Pruning:
Pruning is essential for keeping your sage plant compact and productive.
* Pinch Back New Growth: Pinch back the tips of new growth regularly to encourage branching.
* Remove Dead or Damaged Leaves: Remove any dead or damaged leaves to prevent disease.
* Prune After Flowering: After your sage plant flowers, prune it back by about one-third to encourage new growth.
* Don’t Prune Too Heavily: Avoid removing more than one-third of the plant at a time.
Harvesting Your Sage
The best part about growing your own sage is harvesting it for cooking!
* When to Harvest: You can start harvesting sage leaves as soon as the plant is established.
* How to Harvest: Use pruning shears or scissors to snip off individual leaves or entire stems.
* Harvest Regularly: Regular harvesting encourages new growth and keeps the plant bushy.
* Preserving Sage: You can dry sage leaves by hanging them upside down in a cool, dry place or using a dehydrator. You can also freeze sage leaves in ice cube trays with water or olive oil.
Troubleshooting Common Problems
Even with the best care, you might encounter some problems with your indoor sage plant. Here are some common issues and how to address them.
* Yellowing Leaves: This could be a sign of overwatering, underwatering, or nutrient deficiency. Check the soil moisture and adjust your watering accordingly. If the soil is dry, water thoroughly. If the soil is soggy, let it dry out before watering again. If the problem persists, try fertilizing with a balanced liquid fertilizer.
* Leggy Growth: This is usually caused by insufficient light. Move your sage plant to a sunnier location or use grow lights. Pruning can also help to encourage bushier growth.
* Powdery Mildew: This fungal disease appears as a white, powdery coating on the leaves. Improve air circulation by spacing plants further apart and pruning away affected leaves. You can also treat powdery mildew with a fungicide.
* Pests: Aphids, spider mites, and whiteflies can sometimes infest indoor sage
Conclusion
So, there you have it! Growing sage indoors isn’t just a whimsical dream for those of us without sprawling gardens; it’s a genuinely achievable and rewarding endeavor. We’ve walked through the essential steps, from selecting the right variety and providing optimal lighting to ensuring proper watering and addressing potential challenges. But why should you actually take the plunge and try this DIY trick?
Simply put, having fresh sage readily available at your fingertips elevates your culinary creations to a whole new level. Imagine the aroma of freshly harvested sage infusing your Thanksgiving stuffing, or the vibrant flavor it adds to your roasted chicken or butternut squash soup. No more relying on dried, often lackluster, herbs from the grocery store. You’ll have a constant supply of fragrant, flavorful sage, bursting with essential oils and ready to enhance your dishes.
Beyond the culinary benefits, growing sage indoors offers a therapeutic connection to nature. Tending to your little sage plant can be a calming and meditative experience, a welcome respite from the stresses of daily life. Plus, the vibrant green foliage adds a touch of natural beauty to your indoor space, creating a more inviting and relaxing atmosphere.
But the advantages don’t stop there. By growing your own sage, you’re also contributing to a more sustainable lifestyle. You’re reducing your reliance on commercially grown herbs, which often involve long-distance transportation and potentially harmful pesticides. You’re also minimizing packaging waste, as you won’t be purchasing those plastic clamshell containers from the store.
Now, let’s talk about variations and suggestions to truly personalize your indoor sage-growing experience. Consider experimenting with different varieties of sage, such as purple sage or golden sage, to add visual interest and subtle flavor nuances. You can also try propagating your sage plant from cuttings to expand your collection or share with friends and family.
Another great idea is to create a small indoor herb garden, combining your sage with other culinary herbs like rosemary, thyme, and oregano. This will provide you with a diverse range of fresh herbs to enhance your cooking and create a fragrant and inviting atmosphere in your home.
Don’t be afraid to experiment with different potting mixes and fertilizers to find what works best for your sage plant. Some gardeners prefer using organic potting mixes and fertilizers, while others opt for conventional options. The key is to monitor your plant’s growth and adjust your approach as needed.
Finally, remember that growing sage indoors is a learning process. Don’t be discouraged if you encounter challenges along the way. Just keep experimenting, learning from your mistakes, and enjoying the journey.
We wholeheartedly encourage you to give this DIY trick a try. It’s a simple, affordable, and rewarding way to enhance your cooking, connect with nature, and create a more sustainable lifestyle. Once you’ve experienced the joy of harvesting your own fresh sage, you’ll never go back to store-bought dried herbs again.
So, grab a pot, some potting mix, and a sage plant, and get started today! And most importantly, we want to hear about your experience. Share your tips, tricks, and successes in the comments below. Let’s create a community of indoor sage growers and inspire others to embrace the joys of homegrown herbs. We are confident that with a little care and attention, you’ll be enjoying the fresh, vibrant flavor of your own homegrown sage in no time.
Frequently Asked Questions (FAQs)
What is the best type of sage to grow indoors?
The best types of sage to grow indoors are generally smaller, more compact varieties. Common sage (Salvia officinalis) is a great choice, as it’s readily available and relatively easy to grow. Dwarf sage varieties are also excellent options, as they won’t outgrow their containers as quickly. Purple sage and golden sage can also be grown indoors, adding visual appeal to your herb garden. Consider the amount of space you have available and choose a variety that will thrive in that environment.
How much sunlight does indoor sage need?
Sage thrives in bright, direct sunlight. Ideally, your indoor sage plant should receive at least six to eight hours of sunlight per day. If you don’t have a south-facing window that provides sufficient sunlight, you may need to supplement with artificial grow lights. Fluorescent or LED grow lights are excellent options, as they provide the full spectrum of light that sage needs to grow. Position the grow lights a few inches above the plant and adjust the height as needed to prevent scorching.
How often should I water my indoor sage plant?
Water your indoor sage plant when the top inch of soil feels dry to the touch. Avoid overwatering, as this can lead to root rot. When you water, water thoroughly until the water drains out of the bottom of the pot. Allow the excess water to drain away completely. During the winter months, when the plant is not actively growing, you may need to water less frequently.
What kind of soil is best for growing sage indoors?
Sage prefers well-draining soil. A good potting mix for indoor sage should be light and airy, allowing for good drainage and aeration. You can use a commercially available potting mix specifically formulated for herbs, or you can create your own mix by combining equal parts potting soil, perlite, and vermiculite. Avoid using garden soil, as it can be too heavy and may contain pests or diseases.
How do I fertilize my indoor sage plant?
Fertilize your indoor sage plant every two to four weeks during the growing season (spring and summer). Use a balanced liquid fertilizer diluted to half strength. Avoid over-fertilizing, as this can lead to leggy growth and a buildup of salts in the soil. You can also use organic fertilizers, such as compost tea or fish emulsion, to provide your sage plant with essential nutrients.
How do I prune my indoor sage plant?
Pruning your indoor sage plant is essential for maintaining its shape, promoting bushier growth, and preventing it from becoming leggy. Prune your sage plant regularly by pinching back the tips of the stems. You can also remove any dead or yellowing leaves. Avoid pruning more than one-third of the plant at a time, as this can stress the plant.
What are some common problems when growing sage indoors?
Some common problems when growing sage indoors include overwatering, underwatering, pests, and diseases. Overwatering can lead to root rot, while underwatering can cause the leaves to wilt and turn brown. Pests, such as aphids and spider mites, can infest your sage plant and damage the foliage. Diseases, such as powdery mildew, can also affect sage plants. To prevent these problems, provide your sage plant with proper care, including adequate sunlight, well-draining soil, and regular watering. Inspect your plant regularly for pests and diseases and take action promptly if you notice any problems.
Can I propagate sage from cuttings indoors?
Yes, you can easily propagate sage from cuttings indoors. Take a 4-6 inch cutting from a healthy sage plant, removing the lower leaves. Dip the cut end in rooting hormone and plant it in a pot filled with moist potting mix. Cover the pot with a plastic bag or humidity dome to create a humid environment. Keep the soil moist and place the pot in a warm, bright location. The cutting should root within a few weeks. Once the roots have developed, you can transplant the new sage plant into a larger pot.
How do I harvest sage leaves from my indoor plant?
Harvest sage leaves from your indoor plant as needed. Simply snip off the leaves with scissors or pruning shears. Avoid harvesting more than one-third of the plant at a time, as this can stress the plant. The best time to harvest sage leaves is in the morning, after the dew has dried. The leaves will be most flavorful at this time.
How do I store harvested sage leaves?
You can store harvested sage leaves in several ways. You can dry them by hanging them upside down in a cool, dry place. Once the leaves are completely dry, you can store them in an airtight container. You can also freeze sage leaves by placing them in a freezer bag or container. Alternatively, you can infuse olive oil with sage leaves to create a flavorful cooking oil.


Leave a Comment